
Popular categories
Looking for a yarn?


Comments / Questions (25)
Julie Wickham wrote:
Could you please tell me how much yarn I would need to make this pattern in XXXL size? Many thanks
05.03.2014 - 14:40DROPS Design answered:
Hi Julie. You can see that at the top of the pattern: Size: S/M - M/L - L/XL - XXL/XXXL, Materials: DROPS NEPAL from Garnstudio 450-500-550-600 g colour no 2920, orange
05.03.2014 - 15:06
![]() Anja Van Den Heuvel wrote:
Anja Van Den Heuvel wrote:
Moooie poncho ,heb hem in 2 kleuren gebreid,echt mooi,word er vaak over aangesproken:)
13.11.2013 - 19:31
![]() Delphine wrote:
Delphine wrote:
Je viens de le terminer et il est très beau, chouette modèle simple à réaliser...
28.09.2013 - 08:28
![]() Ellen wrote:
Ellen wrote:
Jeg er netop blevet færdig med str. M/L. Der skal bruges 550 g og ikke 500 g som der står i opskriften. Jeg brugte en lettere måde til de forkortede pinde til "halstørklædet". Der er da ingen grund til at sætte masker på en tråd. Når man vender slår man garnet om pinden og strikker til x antal masker før forrige vending. Når man er færdig med vendingerne strikker man omslaget sammen med næste maske - så bliver der ingen huller.
22.03.2013 - 16:37DROPS Design answered:
Kaere Ellen. Jeg skal give din bemaerkning mht garnmaengden videre til Design. De skal vurdere om en rettelse er nödvendigt. Rigtig fint hvis du har en anden maade at strikke halsen paa som du er mere tilfreds med. Maaske andre ogsaa vil göre brug af det.
28.03.2013 - 14:03
![]() Sayu wrote:
Sayu wrote:
I really like this poncho!!!
12.12.2012 - 03:49
![]() Eva Rech wrote:
Eva Rech wrote:
Hallo Dropsteam und Kristina, vielen Dank für Eure Infos. Dann weiß ich Bescheid und stricke weiter... :-) Kreative Grüße, Eva
29.11.2012 - 14:40
![]() Kristina wrote:
Kristina wrote:
Hallo Eva, darüber bin ich auch "gestolpert", aber ich habe es dann so gelesen, dass die Hinreihe ja im Text noch beschrieben ist und das Diagramm dann mit der ersten Rückreihe beginnt. Und die Umschläge ganz "normal" links, damit es das das Lochmuster ergibt. So hab ich es auch gestrickt und es ist hübsch geworden. LG Kristina
29.11.2012 - 10:20
![]() Eva Rech wrote:
Eva Rech wrote:
Meine Frage: Zeigen die Diagramme nur die Hinreihen und wird die Rückreihe gestrickt, wie sie erscheint (Umschläge links)? Müsste eigentlich so sein, sonst wären die Drehungen für die Zöpfe bei der Rückreihe zu machen... Das wird mir aus der Anleitung und der Abbildung nicht ganz deutlich. Danke für Tipps, Eva
29.11.2012 - 09:03DROPS Design answered:
Liebe Eva, es sind Hin-und Rückreihen abgebildet, aber Sie haben recht – im Text klingt es, wie wenn die erste Reihe im Diagramm bereits die Hinreihe wäre, dann wäre die Verzopfung in der Rück-R. – das ist sicher nicht so gemeint. Ich habe bei der Designabteilung nachgefragt, aber Sie können gut schon stricken, indem Sie einfach die erste R im Diagramm als Rückreihe ansehen.
29.11.2012 - 09:42
![]() Elena wrote:
Elena wrote:
Oggi inizierò a lavorarlo con la lana Nepal che mi è appena arrivata, proprio nello stesso colore del modello!
26.10.2012 - 15:43Fetta wrote:
C'et un très beau modèle facile a enfiler, j’adore sa couleur, magnifique.
18.10.2012 - 17:57
|
||||||||||||||||||||||
Maple#mapleponcho |
||||||||||||||||||||||
|
|
||||||||||||||||||||||
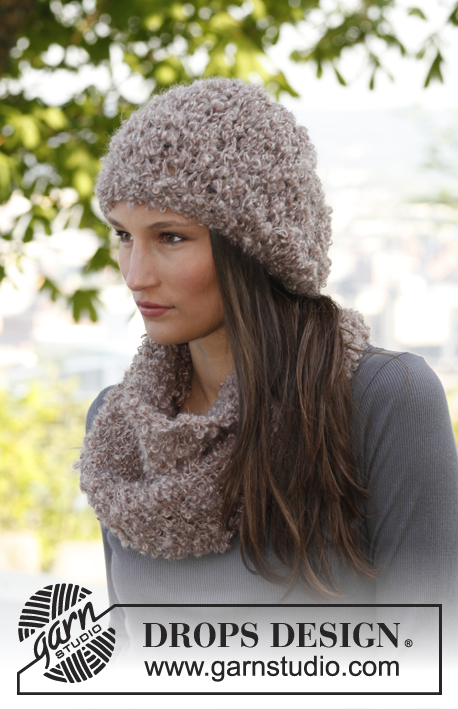
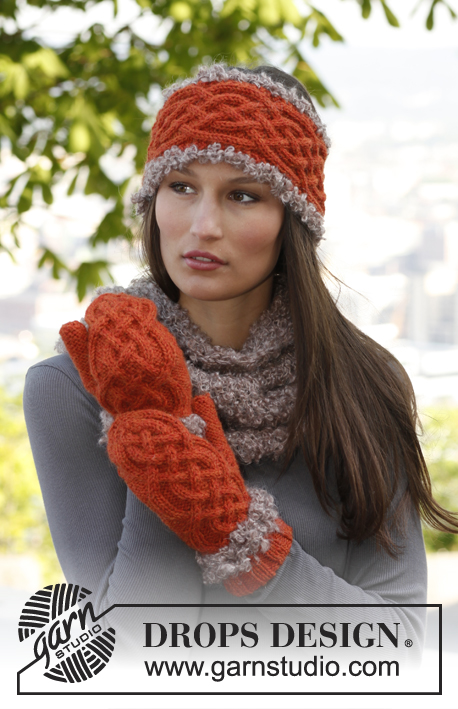
Knitted DROPS poncho with cables and lace pattern in ”Nepal”. Size: S - XXXL.
DROPS 143-19 |
||||||||||||||||||||||
|
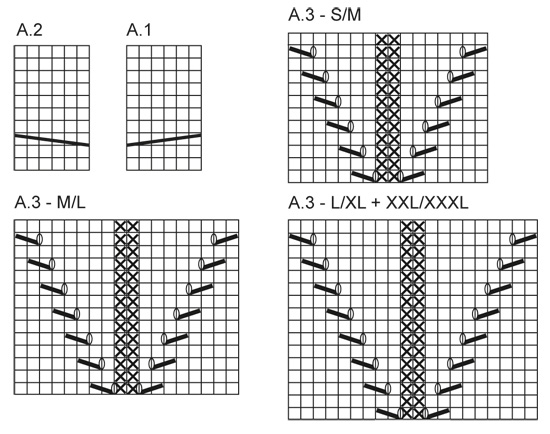
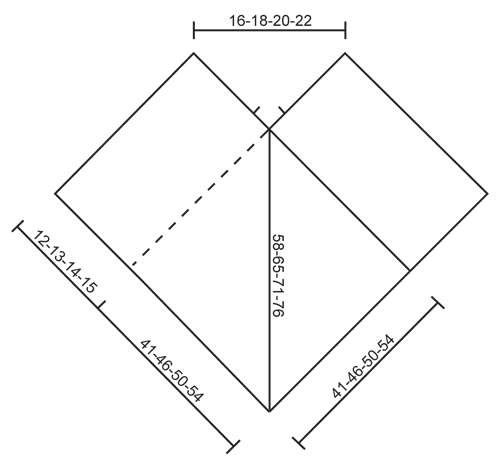
GARTER ST (back and forth on needle): K sts on all rows. PATTERN: See diagrams A.1 to A.3. Diagrams show all rows seen from RS. ---------------------------------------------------------- PONCHO: Worked in two pieces that are sewn tog when finished. Each piece is worked back and forth on circular needle. PIECE 1: Cast on 66-74-80-86 sts on circular needle size 4.5 mm / US 7 with Nepal. Work 12 rows in GARTER ST - see explanation above (1st row = WS). Switch to circular needle size 5.5 mm / US 9 and work next row as follows from WS: K 6-6-6-8, P 4, * 1 YO, P 1 *, repeat from *-* 2 more times (= 3 sts inc – NOTE: On next row K YO twisted to avoid holes), P until 13-13-13-15 sts remain, * P 1, 1 YO *, repeat from *-* 2 more times (= 3 sts inc) and finish with P 4 and K 6-6-6-8 = 72-80-86-92 sts. Then work pattern as follows beg from RS: 6-6-6-8 edge sts in garter st, K 2, P 2, diagram A.1 (= 6 sts), P 2, K 2, P 3-4-5-5, K 2-3-3-4, P 3-4-5-5, diagram A.3 (= 16-18-20-20 sts - choose diagram for your size), P 3-4-5-5, K 2-3-3-4, P 3-4-5-5, K 2, P 2, diagram A.2 (= 6 sts), P 2, K 2 and 6-6-6-8 edge sts in garter st. Continue the pattern like this. REMEMBER THE GAUGE! When piece measures approx. 61-68-74-80 cm / 24"-26¾"-29⅛"-31½" - adjust so that next row is worked from RS and that not more than 3 or 5 rows have been worked after a cable in A.1 and A.2 – K 1 row from RS while AT THE SAME TIME K sts in A.1 tog 2 by 2 and K sts in A.2 twisted tog 2 by 2 = 66-74-80-86 sts. Switch to circular needle size 4.5 mm / US 7 and work 12 rows in garter st, then loosely bind off with K from WS, piece measures approx. 65-72-78-84 cm / 25½"-28½"-30¾"-33". PIECE 2: Cast on and work as piece 1. ASSEMBLY: Place bind off edge on piece 1 towards right long side on piece 2 - bottom towards cast on edge and 41-46-50-54 cm / 16"-18"-19¾"-21¼" upwards – make sure that the piece is not stretched too much. Sew the 2 pieces tog with neat little sts. Then sew bind off edge on piece 2 to right side on piece 1 the same way. SOFT NECK: Work a neck edge with a "scarf" on each side of opening at the front as follows (scarfs are sewn tog mid back at the end): Insert 2 markers at the front of neck, approx. 5-5-6-7 cm / 2"-2"-2½"-2¾" from tip mid front and up, measure along each side of neck. LOOSELY cast on 72-78-86-92 sts on circular needle size 4.5 mm / US 7, then pick up from RS, approx. 54 to 68 sts around the neck (beg at one marker at the front and finish at the other marker), then LOOSELY cast on 72-78-86-92 new sts at end of row = approx. 198-252 sts. Work in garter st back and forth until neck edge measures 7-7-8-9 cm / 2¾"-2¾"-3"-3½". Now work short rows to make the edge higher at the back of neck as follows: K 68-74-82-88, slip these sts on a stitch holder, K the rest of row, turn, K 68-74-82-88, slip these sts on a stitch holder, K the rest of row, * turn, K 6-7-7-8, slip these sts on a stitch holder, K the rest of row, turn piece, K 6-7-7-8 sts, slip these sts on a stitch holder and K the rest of row *, repeat from *-* 2 more times. Now slip sts from stitch holder back on needle and continue in garter st back and forth over all sts until neck edge measures approx. 9-9-10-11 cm / 3½"-3½"-4"-4½" at the most narrow (i.e. at the outer edge in each side). Then very loosely bind off. Cross the two "scarfs" mid front, over the shoulders and until mid back so that the short sides meet mid back. Sew short sides tog edge to edge in outermost sts. Neck edge now lies soft around the opening of the poncho. |
||||||||||||||||||||||
Diagram explanations |
||||||||||||||||||||||
|
||||||||||||||||||||||
 |
||||||||||||||||||||||
 |
||||||||||||||||||||||
Have you finished this pattern?Tag your pictures with #dropspattern #mapleponcho or submit them to the #dropsfan gallery. Do you need help with this pattern?You'll find 9 tutorial videos, a Comments/Questions area and more by visiting the pattern on garnstudio.com. © 1982-2026 DROPS Design A/S. We reserve all rights. This document, including all its sub-sections, has copyrights. Read more about what you can do with our patterns at the bottom of each pattern on our site. |
||||||||||||||||||||||


With over 40 years in knitting and crochet design, DROPS Design offers one of the most extensive collections of free patterns on the internet - translated to 17 languages. As of today we count 324 catalogs and 12290 patterns - 12280 of which are translated into English (US/in).
We work hard to bring you the best knitting and crochet have to offer, inspiration and advice as well as great quality yarns at incredible prices! Would you like to use our patterns for other than personal use? You can read what you are allowed to do in the Copyright text at the bottom of all our patterns. Happy crafting!
Post a comment to pattern DROPS 143-19
We would love to hear what you have to say about this pattern!
If you want to leave a question, please make sure you select the correct category in the form below, to speed up the answering process. Required fields are marked *.