
Popular categories
Looking for a yarn?


Comments / Questions (87)
![]() Annalena Brage wrote:
Annalena Brage wrote:
Hej! Kan jag sticka denna kofta i Saffran? Konverteraren anger inte detta garn som ett alternativ.
12.08.2020 - 20:01DROPS Design answered:
Hej Annalena. Ja du kan sticka den i DROPS Safran, se bara till att få den stickfasthet som uppges i mönstret. Vi ska se över varför det inte kommer upp som ett alternativ, tack för info. Mvh DROPS Design
13.08.2020 - 10:38
![]() Francesca Antonelli wrote:
Francesca Antonelli wrote:
Avrei un altro quesito ..ho montato 25 maglie x il campione e ferri 3 ma invece che 10 cm mi son venuti fuori 8 cm se lavoro con i ferri più grandi mi viene slambriccioso ..come posso fare?
29.04.2020 - 14:08DROPS Design answered:
Buongiorno Francesca. Può provare a lavorare con i ferri n.3 e seguire le indicazioni per una taglia più grande. Misuri spesso il lavoro; le taglie drops vestono comode. Buon lavoro!
01.05.2020 - 15:02
![]() Francesca Antonelli wrote:
Francesca Antonelli wrote:
Buongiorno quindi se non ho capito male la fascia sotto la lavoro con due fili e il lavoro del corpo la lavoro solo con un filo?
29.04.2020 - 13:29DROPS Design answered:
Buongiorno Francesca, solo l'avvio delle maglie si fa a 2 fili, il resto a 1 filo solo. Buon lavoro!
29.04.2020 - 15:07
![]() Meeri wrote:
Meeri wrote:
Hei! Piirroksen perusteella minulle sopisi tästä mallista L-koon alaosa ja M-koon yläosa. Miten minun kannattaisi toimia, jotta saisin neuletakista sopivan?
02.01.2020 - 14:20DROPS Design answered:
Hei! Tässä tapauksessa osa neuleesta pitäisi suunnitella uudestaan, valitettavasti meillä ei ole mahdollisuutta tähän. Voit kysyä neuvoa lähimmässä DROPS jälleenmyyjäliikkeessäsi. He pystyvät paremmin auttamaan sinua paikan päällä.
13.01.2020 - 19:48
![]() Friedy wrote:
Friedy wrote:
Ik snap niet hoe het zit met de afgekapte steken van de armsgaten. Deze steken neem je niet op, hoe naai je dan de mouwen in?
13.09.2019 - 22:53DROPS Design answered:
Dag Friedy,
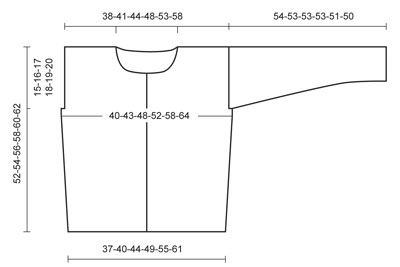
De mouw wordt als het ware een stukje in het pand gezet (zie tekening), dus het bovenste, laatste stukje van de mouw wordt aan de afgekante steken van het pand genaaid.
17.09.2019 - 08:29
![]() Susan W wrote:
Susan W wrote:
Hello I can\'t really think or see how to pick up for the sleeves .all I can see is there will be a big hole if not picking up over the hole lot
02.04.2019 - 05:37DROPS Design answered:
Dear Susan, the cast off stitches for armhole on front and back pieces will then be sewn along the first rows on sleeve - this video is showing how to sew a sleeve worked that way, and even if this pattern is worked a bit different, you can see how the seam will be done afterwards. Happy knitting!
02.04.2019 - 10:59
![]() Annie wrote:
Annie wrote:
Na 3 dagen nog geen reactie! Heb het ondertussen zelf uitgezocht door op de Engelse sit3 het patroon te lezen en kwam erachter dat niet 1x11 maar 1x14 steken afgekant moeten worden. Ergo: het verschil van 3 steken. Niet bedankt voor de hulp!
21.03.2019 - 14:51
![]() Annie Van Dal wrote:
Annie Van Dal wrote:
Betreft voorpand. Je begint met 67 steken en kant af 1x11 St. + 1x3 St. + 2x2 St. en 2x1 St. Totaal afgekant 20 steken. 67 - 20 = 47 steken over en geen 44. Klopt dit wel?
18.03.2019 - 11:58DROPS Design answered:
Dag Annie,
Bedankt voor de terugkoppeling in je andere bericht en ik heb het nu gecorrigeerd.
25.03.2019 - 09:50Oksana wrote:
The description says Knit up from RS ..... along one armhole and then - Do not knit up sts over the cast off sts for armhole... Can you please explain what the last line is to specify. thanks!
18.10.2018 - 18:21DROPS Design answered:
Dear Oksana, you will start picking up the sts for the sleeve from the marker added on back piece (right sleeve) / left front piece (left sleeve) to the marker added on right front piece (right sleeve)/ back piece (left sleeve) and work 3-4 cm (see size) then start to decrease for the sleeve. These 3-4 cm worked straight will then be sewn together to the sts bound off on body for the armholes. Happy knitting!
19.10.2018 - 08:36
![]() SABATIER Catherine wrote:
SABATIER Catherine wrote:
Merci beaucoup pour votre réponse. J'ai une autre question, pourquoi ne faut il pas relever de mailles au dessus des mailles rabattues pour l'emmanchure ? Dans ce cas on ne peut pas relever les mailles de marqueur à marqueur ? Merci d'avance pour votre aide !
16.10.2018 - 10:00DROPS Design answered:
Bonjour Mme Sabatier, on ne relève pas de mailles pour les manches le long des mailles rabattues pour les emmanchures, on va ensuite coudre les premiers rangs de la manche contre ces mailles rabattues - les mailles des manches sont relevées le long de l'emmanchure (dos + devant ou devant + dos) entre les marqueurs placés sur le dos/les devants. Bon tricot!
16.10.2018 - 15:29
|
|
Morning Sky#morningskycardigan |
|
 |
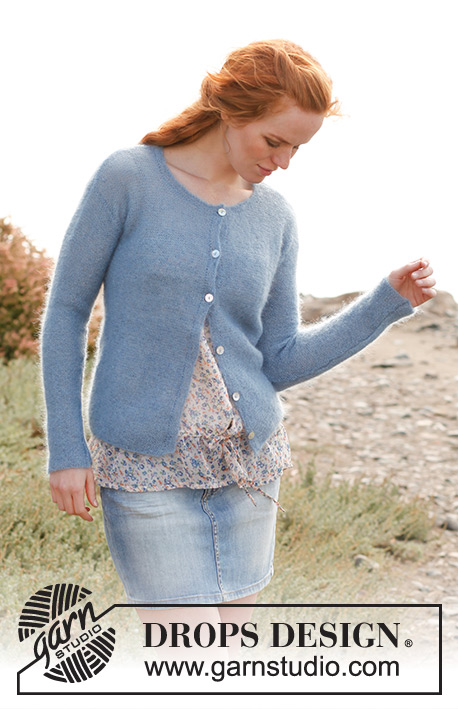 |
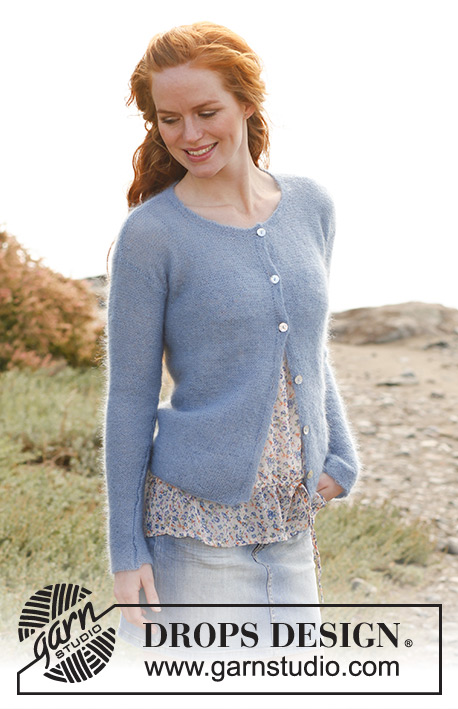
Knitted DROPS jacket in garter st in ”Kid-Silk”. Size S-XXXL.
DROPS 138-21 |
|
|
GARTER ST (back and forth on needle): K all rows. INCREASE TIP: Inc 1 st on each side of every marker as follows: Work until 1 st remains before marker, make 1 YO, K 2 (marker is between these sts), make 1 YO. On next row K YOs twisted (i.e. work in back loop of st instead of front) to avoid holes. -------------------------------------------------------- BODY: Worked in garter st - See explanation above - back and forth on circular needle from mid front. Cast on 168-184-204-224-252-280 sts on circular needle size 3 mm / US 2or3 with 2 strands Kid-Silk (to avoid a tight cast on edge). Then work back and forth with 1 strand Kid-Silk (1st row = RS). REMEMBER THE GAUGE! When piece measures 6-6-6-6-7-7 cm / 2½"-2½"-2½"-2½"-2¾"-2¾", insert 2 markers in the piece; 42-46-51-56-63-70 sts in from each side (= 84-92-102-112-126-140 sts between markers on back piece). Move the markers upwards when working. On next row, inc 1 st on each side of each marker - Read INCREASE TIP above = 4 new sts. Repeat inc every 8-8-8-9-9-9 cm / 3⅛"-3⅛"-3⅛"-3½"-3½"-3½" a total of 4 times = 184-200-220-240-268-296 sts. Continue to work until piece measures 37-38-39-40-41-42 cm / 14½"-15"-15¼"-15¾"-16⅛"-16½". On next row bind off 2-3-4-5-6-7 sts for armholes on each side of every marker = 4-6-8-10-12-14 bound off sts in each side. Now divide the piece and finish each part separately. BACK PIECE: = 88-94-102-110-122-134 sts. Remove the markers in the sides and insert new markers at beg and end of row (where to knit up sleeves later). Continue in garter st until piece measures 50-52-54-56-58-60 cm / 19¾"-20½"-21¼"-22"-22¾"-23⅝". On next row from RS, bind off the middle 32-36-38-40-42-42 sts for neck and finish each shoulder separately. Continue to bind off 2 sts on next row from neck = 26-27-30-33-38-44 sts remain on the shoulder. Loosely bind off all sts when piece measures 52-54-56-58-60-62 cm / 20½"-21¼"-22"-22¾"-23⅝"-24⅜". RIGHT FRONT PIECE: = 44-47-51-55-61-67 sts. Insert a marker at end of row (where to knit up sleeves later). Continue in garter st until piece measures 44-46-47-49-50-52 cm / 17¼"-18"-18½"-19¼"-19¾"-20½". Then bind off for neck at the beg of every row from RS (= every other row) as follows: bind off 8-10-12-12-14-14 sts 1 time, 3 sts 1 time, and 2 sts 2 times. Then bind off 1 st every other row from RS (= every 4th row) 3-3-2-3-2-2 times = 26-27-30-33-38-44 sts remain on shoulder. Loosely bind off all sts when piece measures 52-54-56-58-60-62 cm / 20½"-21¼"-22"-22¾"-23⅝"-24⅜". LEFT FRONT PIECE: Work as right front piece but reversed. ASSEMBLY: Sew the shoulder seams tog. SLEEVE: Worked back and forth on needle as follows: Knit up from RS approx. 70 to 100 sts between markers along one armhole (NOTE: Do not knit up sts over the bind off sts for armhole). On next row adjust no of sts to 68-74-78-82-86-92. Then work in garter st. When piece measures 3-3-3-3-4-4 cm / 1"-1"-1"-1"-1½"-1½", dec 1 st (by K 2 sts tog) in each side of piece. Repeat dec every 4-3½-3-3-2½-2 cm / 1½"-1¼"-1⅛"-1⅛"-⅞"-¾" a total of 12-14-15-16-17-19 times = 44-46-48-50-52-54 sts. Continue in garter st until piece measures 54-53-53-53-51-50 cm / 21¼"-21"-21"-21"-20"-19¾" (shorter measurements in the larger sizes because of wider shoulders), loosely bind off all sts. Sew sleeve seam inside 1 edge st. NOTE: The top part of the sleeve should be sewn to the bindoff edge on each side of back and front piece. Pick up and knit another sleeve in the other side of piece. RIGHT BAND: Worked back and forth on needle as follows: Pick up from RS approx. 100 to 120 sts inside 1 edge st along mid front on right front piece. K 1 row from WS while AT THE SAME TIME adjusting no of sts to 104-109-109-118-118-118. On next row from RS, bind off for 5-5-5-6-6-6 button holes as follows: K 4, * K tog the next 2 sts, make 1 YO, K 18-19-19-17-17-17 *, repeat from *-* a total of 5-5-5-6-6-6 times. On next row K the YOs. Continue in garter st until band measures 2-2-2-3-3-3 cm / ¾"-¾"-¾"-1⅛"-1⅛"-1⅛", loosely bind off all sts. LEFT BAND: Work as right band but without button holes. NECK EDGE: Worked back and forth on needle as follows: Pick up from RS approx. 90 to 110 sts around the neck (also over bands). K 1 row from WS while AT THE SAME TIME adjusting no of sts to 92-96-100-104-108-112. On next row from RS, bind off for the last button hole as follows: K 3-3-3-4-4-4, K tog the next 2 sts, make 1 YO, K the rest of row. On next row K the YO. Continue in garter st until neck edge measures 2 cm / ¾", loosely bind off all sts. Sew the buttons on to the left band. |
|
 |
|
Have you finished this pattern?Tag your pictures with #dropspattern #morningskycardigan or submit them to the #dropsfan gallery. Do you need help with this pattern?You'll find 14 tutorial videos, a Comments/Questions area and more by visiting the pattern on garnstudio.com. © 1982-2026 DROPS Design A/S. We reserve all rights. This document, including all its sub-sections, has copyrights. Read more about what you can do with our patterns at the bottom of each pattern on our site. |
|


With over 40 years in knitting and crochet design, DROPS Design offers one of the most extensive collections of free patterns on the internet - translated to 17 languages. As of today we count 325 catalogs and 12298 patterns - 12288 of which are translated into English (US/in).
We work hard to bring you the best knitting and crochet have to offer, inspiration and advice as well as great quality yarns at incredible prices! Would you like to use our patterns for other than personal use? You can read what you are allowed to do in the Copyright text at the bottom of all our patterns. Happy crafting!
Post a comment to pattern DROPS 138-21
We would love to hear what you have to say about this pattern!
If you want to leave a question, please make sure you select the correct category in the form below, to speed up the answering process. Required fields are marked *.