
Popular categories
Looking for a yarn?


Comments / Questions (44)
Ana wrote:
MUY LINDO ESTE MODELO,MODERNO Y PUEDE USARSE PARA TODA OCASION
21.11.2012 - 16:51
![]() Carolina wrote:
Carolina wrote:
Me podrian enviar el Patron para realizar este hermoso saco. Gracias. Ich möchte unbedingt die Anleitung bitte haben. Danke.
21.03.2010 - 03:05
![]() Susanna wrote:
Susanna wrote:
Jos tämä neulotaan siis ympyränä niin laitetaanko 7 aloitussilmukkaa jo rinkiin sukkapuikkojen kanssa? Ja miten?Onko aina 2 silmukkaa/puikko ja 4.llä puikolla vain yksi?Osaako joku auttaa?
14.04.2007 - 23:56Daniela wrote:
ich hätte gern die anleitung
25.09.2006 - 12:15
![]() Tina wrote:
Tina wrote:
Diese Jacke ist toll. Ich möchte unbedingt die Anleitung bitte haben
22.09.2006 - 22:13dorthe wrote:
serr spændende ud, men svær at se forfra
15.09.2006 - 11:19
![]() WENDY wrote:
WENDY wrote:
RIGTIG FLOT DEN VIL JEG GERNE EJE.
05.09.2006 - 11:43
![]() Tine Jensen wrote:
Tine Jensen wrote:
Utrolig flot model, den opskrift ville jeg gerne eje :-)
04.09.2006 - 13:54
![]() kicki wrote:
kicki wrote:
ovanlig ,det mönstret skulle jag villja ha
02.09.2006 - 21:35Regina wrote:
wunderschöne Jacke, gibt es hierzu eine deutsche Anleitung. Interessiere mich sehr für diese Jacke. Danke im voraus
26.08.2006 - 18:07
|
|
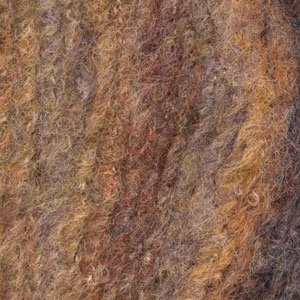
October Woodlands |
|
 |
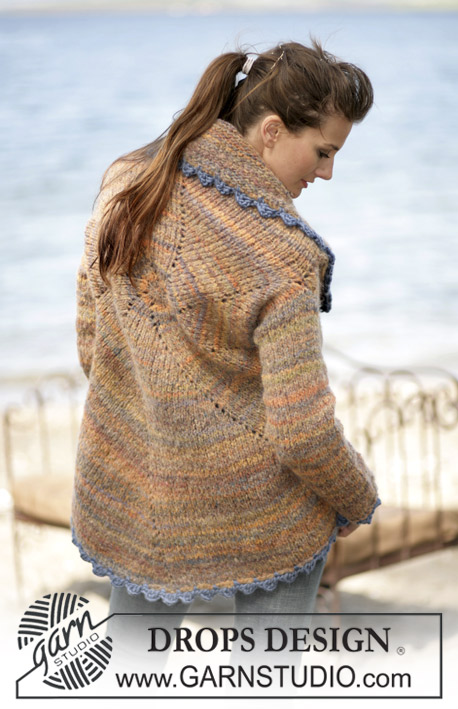 |
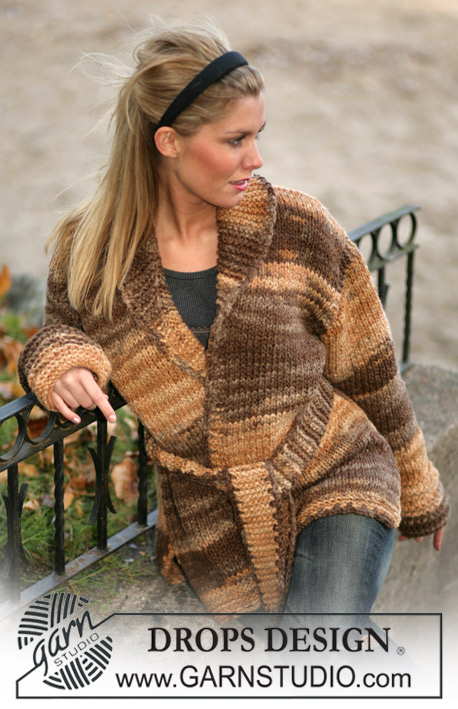
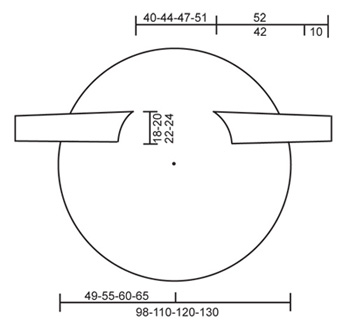
DROPS Jacket with circle pattern
DROPS 97-9 |
|
|
Knitting Gauge: 11 sts x 17 rounds on needles size 7 mm = US 10,75 in Highlander and stockinette sts = 10 x 10 cm = 4" x 4". Increasing tips: Inc. 1 st at the right side of the marking threads on every other round until finished. Inc. 1 st as follows: make a yo, on the following round twist and K the yo. Back and front piece: The cardigan is knitted in a circle from the center of the back piece. Cast on 7 sts on double pointed needles size 7 mm = US 10,75 in Highlander. K 1 round. Then K 1 round and at the same time inc 1 st in every st = 14 sts. Insert 7 marking threads in the piece with 2 sts in between. Continue in stockinette sts at the same time inc on every other round – read increasing tips – change to longer circular needle as the work proceeds. When the piece measures 25-27-30-33 cm = 9¾"-10⅝"-11¾"-13" from the center (42-46-50-56 rounds and 154-168-182-203 sts), mark the armholes as follows: Knit the first 20-22-24-26 sts on round with another color (this color is removed later and the sleeve is knitted from here and downwards). Knit another 44-48-52-56 sts and then knit the following 20-22-24-26 sts in another color (= the other armhole). Continue in Highlander and stockinette sts over all sts and inc as before. When the piece measures approx. 49-55-60-65 cm = 19¼"-21⅝"-23⅝"-25½" from the center and outwards (= 98-110-120-130 cm = 38½"-43⅜"-47¼"-51¼" in diameter) and approx 301-336-364-392 sts on round bind off loosely – NB: To make sure the binding off edge doesn’t become too tight make a yo approx. after every 8th st whilst binding off (bind off the yo’s as sts). Sleeve: The sleeves are picked up on each side of the thread which was knitted in another color and they are knitted downwards. Use 2 needles, pull the thread out as the work proceeds and put the sts from each side of the thread on separate needles = 20-22-24-26 sts each side. Put all sts on to a short circular needle = 40-44-48-52 sts. Pick up 3 extra sts at the top of the sleeve – the top is where the sleeves are closest to each other- and 1 extra st at the bottom (mid under arm) of the sleeve = 44-48-52-56 sts. Begin to knit the sleeve from mid under arm – insert a marking thread. Knit in stockinette sts. When the sleeve measures 2-2-2-3 cm = ¾"-¾"-¾"-1⅛" dec 1 st each side of the marking thread, repeat the decreases for every 5-4.5-4-3.5 cm = 2"-1¾"-1½-1¼" 8-9-10-11 times = 26-28-30-32 sts left. When the sleeve measures 51 cm = 20" P 1 row from the WS and bind off loosely, the sleeve measures approx. 52 cm = 20½"- NB: Try the cardigan on before binding off to make sure the length fits. Crochet edge: Crochet an edge around the whole cardigan and at the bottom of the sleeves on hook size 7 mm = US K or L in Snow as follows: 1 sc in the first st, *4 ch, 1 dc in the first of the 4 ch, skip approx 4 cm = 1½" 1 sc in the following st*, repeat from *-* and finish with a sl st in the 1st sc from beginning of round – NB: Make sure the crochet edge becomes even and neat, and not "wavy". |
|
 |
|
Have you finished this pattern?Tag your pictures with #dropspattern or submit them to the #dropsfan gallery. Do you need help with this pattern?You'll find 15 tutorial videos, a Comments/Questions area and more by visiting the pattern on garnstudio.com. © 1982-2026 DROPS Design A/S. We reserve all rights. This document, including all its sub-sections, has copyrights. Read more about what you can do with our patterns at the bottom of each pattern on our site. |
|


With over 40 years in knitting and crochet design, DROPS Design offers one of the most extensive collections of free patterns on the internet - translated to 17 languages. As of today we count 325 catalogs and 12298 patterns - 12288 of which are translated into English (US/in).
We work hard to bring you the best knitting and crochet have to offer, inspiration and advice as well as great quality yarns at incredible prices! Would you like to use our patterns for other than personal use? You can read what you are allowed to do in the Copyright text at the bottom of all our patterns. Happy crafting!
Post a comment to pattern DROPS 97-9
We would love to hear what you have to say about this pattern!
If you want to leave a question, please make sure you select the correct category in the form below, to speed up the answering process. Required fields are marked *.