
Popular categories
Looking for a yarn?


Comments / Questions (47)
![]() Christine wrote:
Christine wrote:
Bonjour serait il possible de m'expliquer avec des mots le diagramme A1B svp. en vous remerciant cordialement
28.04.2026 - 21:22
![]() Rosalie Stap wrote:
Rosalie Stap wrote:
Bij de rechterschouder VOOR verwijst het patroon naar telpatroon A1A, A1B en A1C. Bij de linkerschouder VOOR verwijst het patroon naar telpatroon A1D, A1B en A1E. Dit klopt volgens mij niet. De laatste 3 telpatronen bevatten meer tekens dan A1A, A1 B en A1C . De rechterschouder VOOR moet even groot toch hetzelfde zijn als de linkerschouder VOOR? Kunt u ook aangeven welke telpatronen ik moet aanhouden voor de rechterschouder ACHTER en de linkerschouder ACHTER want daar staan geen patronen.
03.03.2026 - 14:47
![]() Nina wrote:
Nina wrote:
Hej, Jeg har svært ved at forstå beskrivelsen til hvordan ærmerne skal hækles i starten. * 2 stangmasker før næste stangmasker (hækles mellem stangmaskerne), 1 luftmaske, spring over 3 stangmasker * hækl fra *-* til der er 3 stangmasker tilbage på rækken (…) Hvad betyder «før næste stangmaske»? Er det «perlen» mellem 2. og 3. maske? Og skal de to stangmasker hækles det samme sted?
19.11.2025 - 21:25
![]() Bonnie wrote:
Bonnie wrote:
Question on XXL count 1. Front left right 28, left 28 and chain 31 comes out to 87, not 78 as the pattern states. 2. Back: 26 dc on right shoulder 26 on left, then chain 35. I get 87 stitches, not 78. So for both front do I chain 22 to come up with 78 and chain 26 for the back? Or are the numbers just transposed in error? Thank you for your help with this!
16.10.2025 - 13:16
![]() Israa wrote:
Israa wrote:
On the third row of A1.B reading from the left, so 1 dc then chain 2, then sc, chain2, sc in which stitches from row2 are these sc supposed to be? Also the pattern of the shoulder says 2 sts increased midfront, where are they ? Because i see the pattern top row is still 6 sts like how it started
26.09.2025 - 04:35DROPS Design answered:
Dear Israa, work the first of the both sc in the first ch-space, then chain 2 and work the 2nd sc in the next ch-space. When working A.1C you increase at the beg of the last row from WS (on the left side of the diagram) and in A.1D at the end of the last row from WS (on the right side of the diagram). Happy crocheting!
18.11.2025 - 09:40
![]() Fabienne wrote:
Fabienne wrote:
J'ai fais la dernière ligne de l'épaule droite et donc terminer le dernier rang des dessins A1a-A1B-A1c pour la taille XXXL et moi j'arrive à 33 mailles et non pas 34 et quand je compte aussi sur le dessin il n'y en a que 33 comme cela se fait-il ? merci de votre retour
10.09.2025 - 12:15DROPS Design answered:
Bonjour Fabienne vous commencez A.1C sur 6 mailles mais vous avez 8 mailles au dernier rang: (3 ml = 1ère bride, 1 maille en l'air, 1 bride, 1 maille en l'air, 2 brides dans l'arceau suivant, 1 maille en l'air 1 bride dans l'arceau suivant: 1+1+1+1+2+1+1=8 mailles; vous avez donc augmenté 2 mailles soit 32+2= 34 mailles. Bon crochet!
17.09.2025 - 07:19
![]() Anneke wrote:
Anneke wrote:
Ik begrijp de tweede toer van de mouw niet helemaal. Begrijp ik het goed dat ik 4 losse haak, is een stokje en een losse. In de derde steek haak ik 2 stokjes dan een losse, en dit herhaal ik in elke volgende derde steek? Dus ik sla twee steken over en haak twee stokjes en een losse? Bedankt alvast😃
23.08.2025 - 17:46DROPS Design answered:
Dag Anneke,
Je haakt inderdaad 4 lossen (1 stokje + een losse), dan sla je 2 stokjes over en je haakt de volgende 2 stokjes niet in de derde steek maar tussen de tweede en de derde steek. Dus daar haak je de stokjes om. Wat tussen de sterretjes staat herhaal je steeds.
27.08.2025 - 10:38
![]() Susanne wrote:
Susanne wrote:
Hej, hvis man vil hækle blusen i en farve, hvor meget garn skal man så beregne at bruge?
14.07.2025 - 11:24DROPS Design answered:
Hei Susanne. Det har vi dessverre ikke oversikt over, men vil tippe 1-2 nøster, men det kommer an på hvilken str. du ønsker å hekle. mvh DROPS Design
31.07.2025 - 14:22
![]() Marjo wrote:
Marjo wrote:
Hallo, Wordt de eerste toer van rechts naar links van de tekening gehaakt en de tweede toer van links naar rechts en dan de derde toer van rechts naar links? Of wordt vanaf te tekening alle toeren van rechts naar links gehaakt. Groetjes Marjo
26.06.2025 - 17:40DROPS Design answered:
Dag Marjo,
De eerste toer wordt van rechts naar links gehaakt, de tweede toer van links naar rechts, en zo steeds heen en weer. Je leest de patronen van onder naar boven.
26.06.2025 - 20:07
![]() Silvia wrote:
Silvia wrote:
Sto iniziando le maniche e non mi sono chiare le seguenti istruzioni: saltare 2 maglie alte, * lavorare 2 maglie alte prima della maglia alta successiva (lavorate tra le maglie alte). Che significa ' lavorate tra le maglie alte'? Se salto 2 maglie alte come faccio a fare 2 maglie alte prima della maglia alta successiva? Grazie
07.06.2025 - 22:59DROPS Design answered:
Buonasera Silvia, deve lavorare 2 maglie alte prima della maglia alta successiva, saltando 2 maglie alte, cioè deve lavorare 2 maglie alte tra le 2 saltate e la successiva. Buon lavoro!
10.08.2025 - 22:21
|
||||||||||||||||||||||||||||
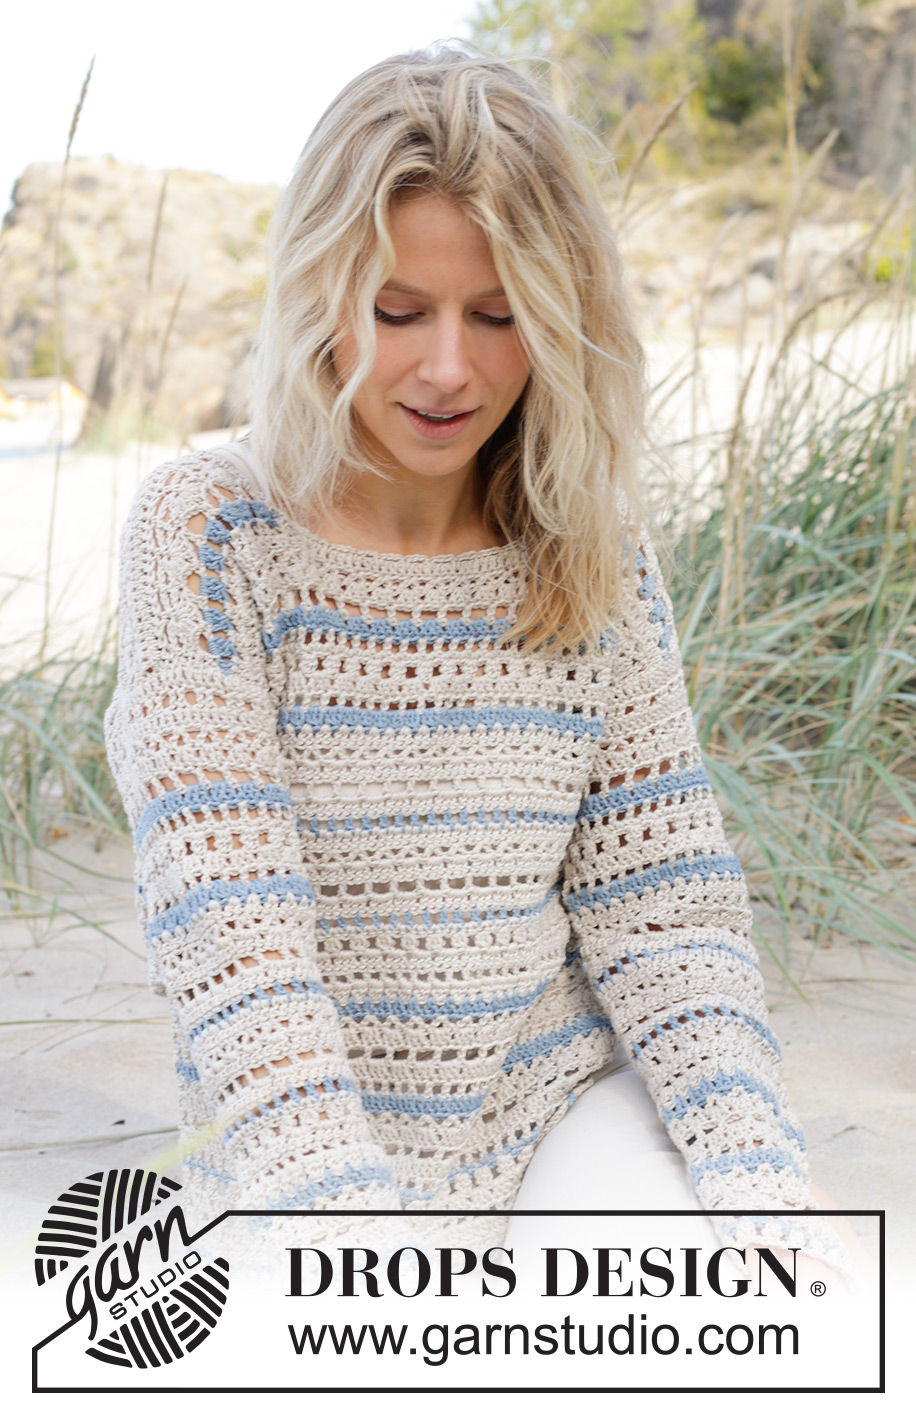
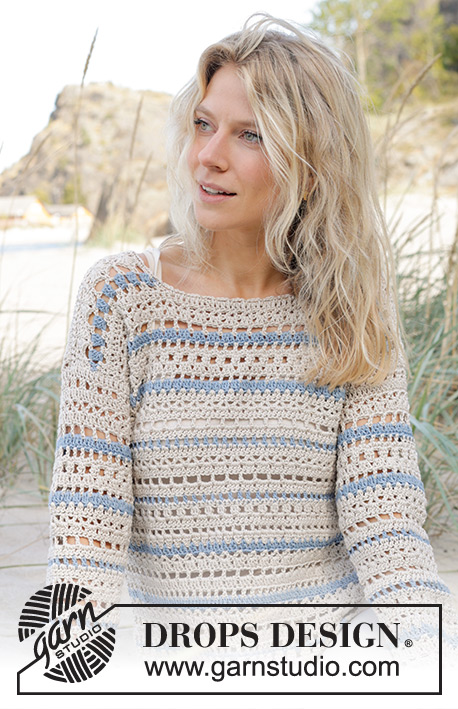
Jewels Tide Sweater#jewelstidesweater |
||||||||||||||||||||||||||||
 |
 |
|||||||||||||||||||||||||||
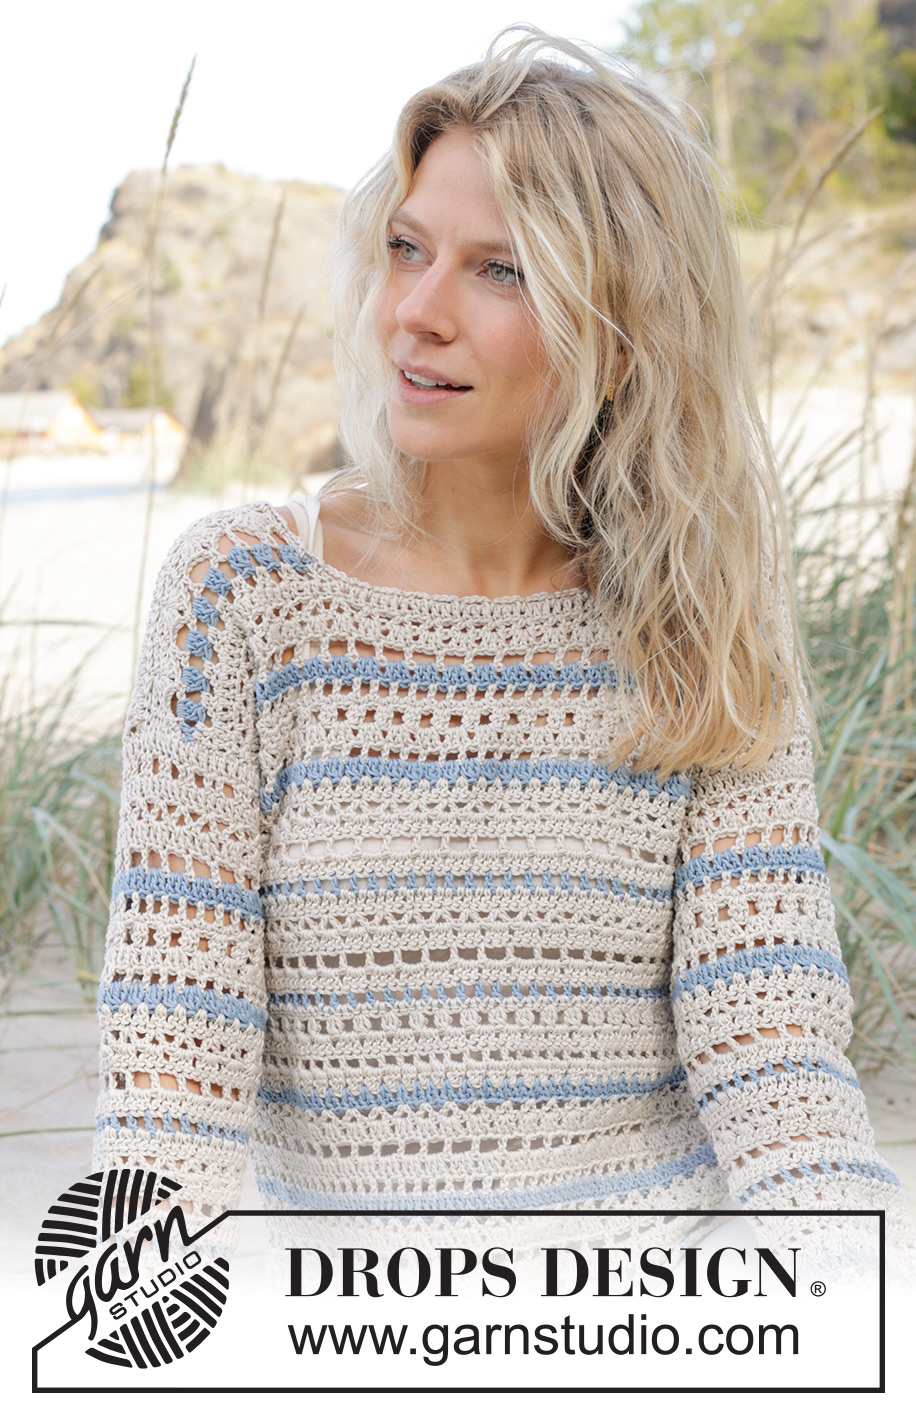
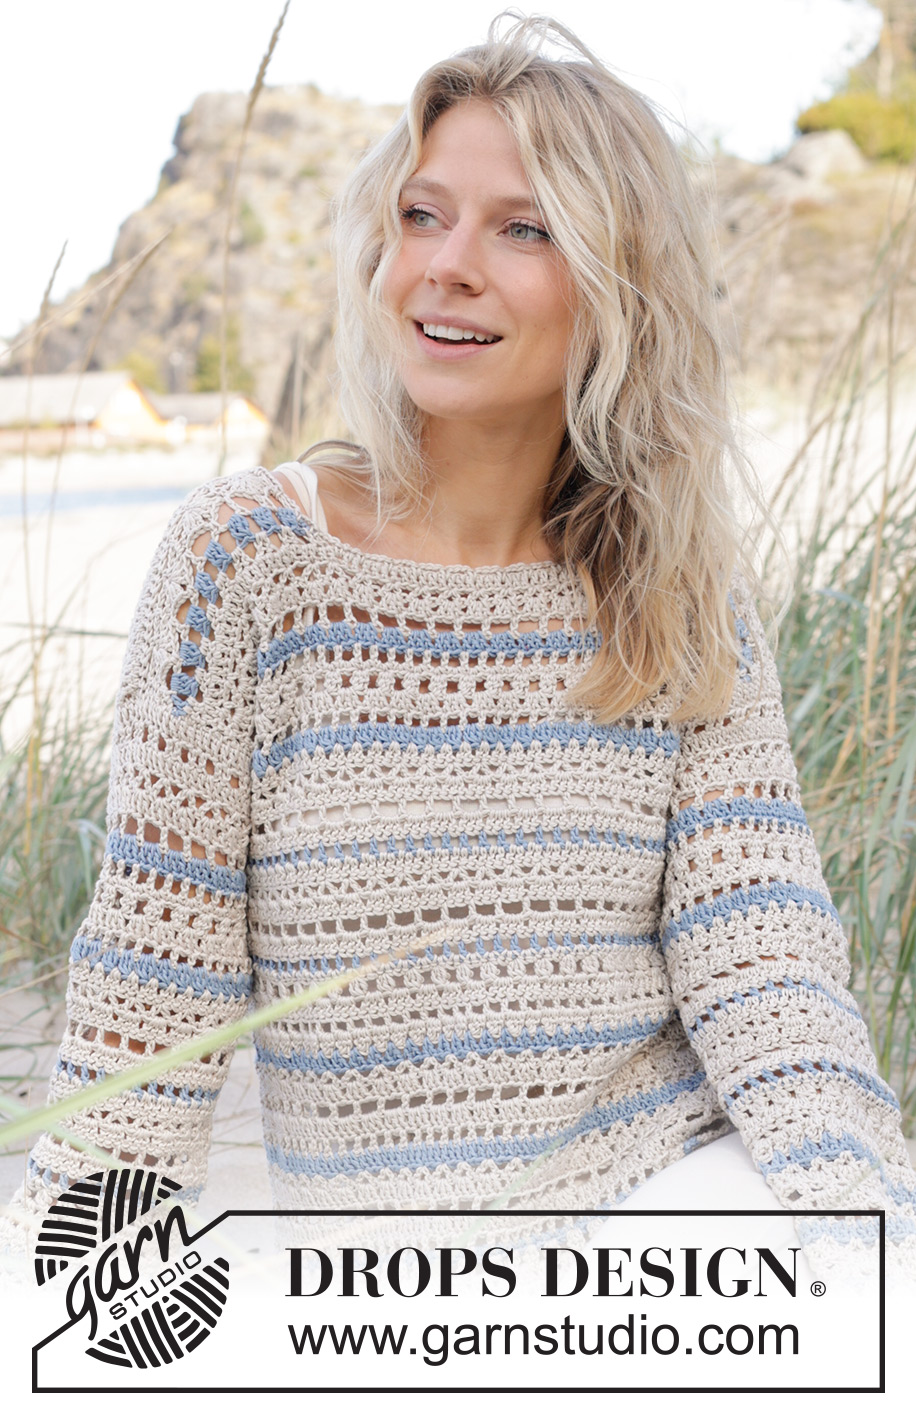
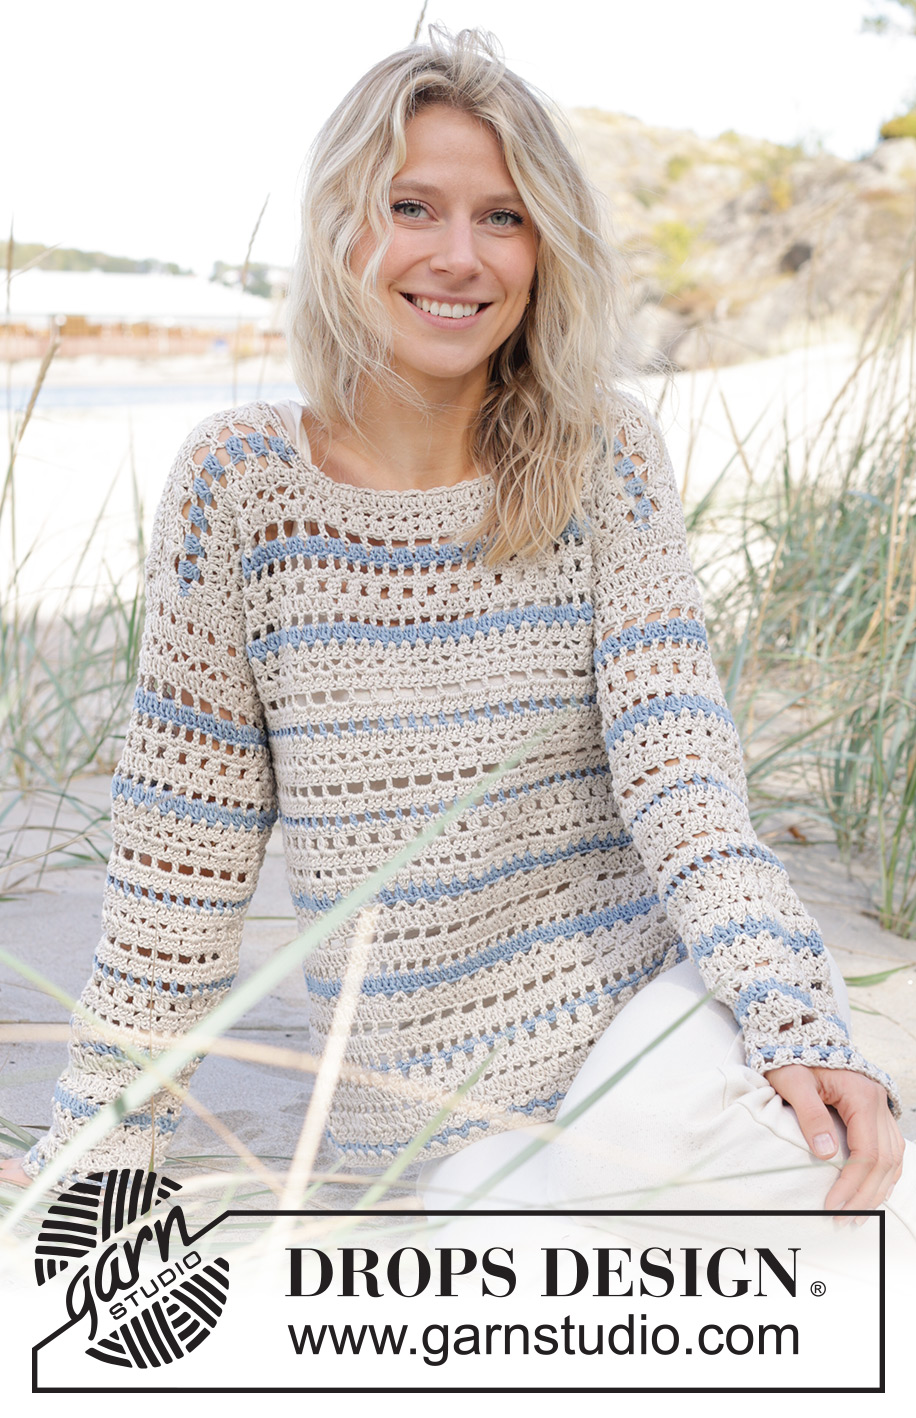
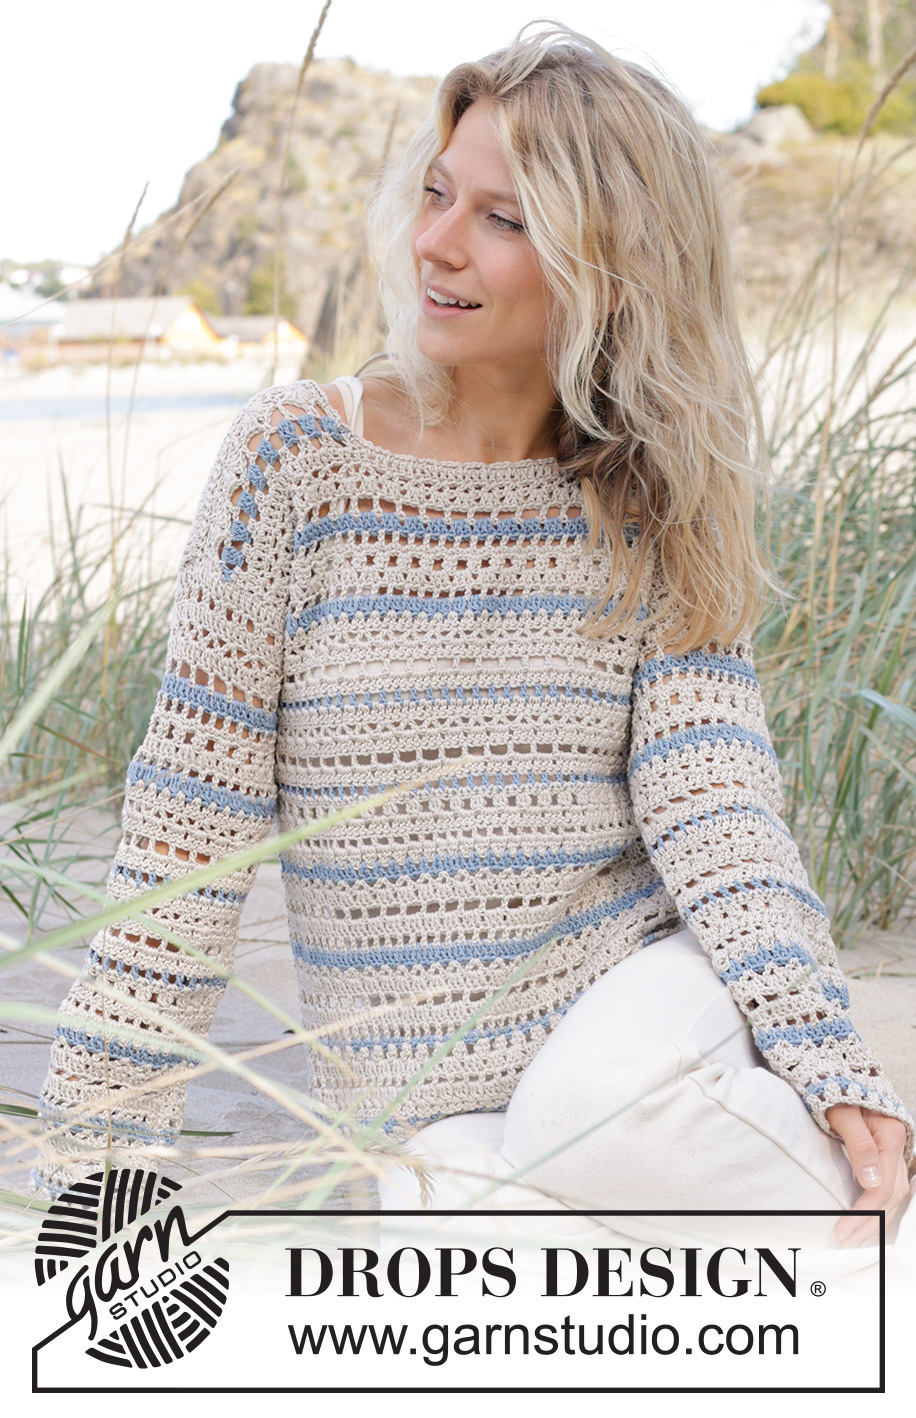
Crocheted sweater in DROPS Muskat. The piece is worked top down with lace pattern, stripes and split in sides. Sizes S – XXXL.
DROPS 239-22 |
||||||||||||||||||||||||||||
|
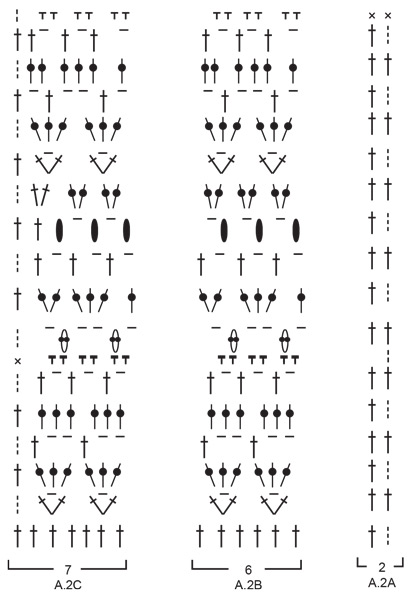
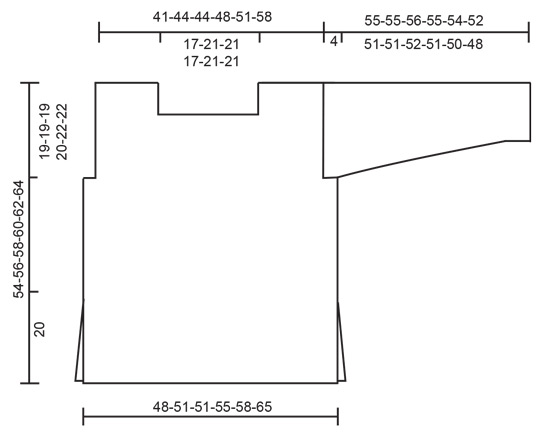
------------------------------------------------------- EXPLANATIONS FOR THE PATTERN: ------------------------------------------------------- CROCHET INFORMATION: At the beginning of each row of double crochets work 3 chain stitches, which replace the first double crochet. The round finishes with 1 double crochet in the 3rd or 2nd chain stitch from the previous row (depending on whether the row started with 2 or 3 chain stitches). At the beginning of each row of single crochets work 2 chain stitches, which replace the first single crochet. The row finishes with 1 single crochet in the 3rd or 2nd chain stitch from the previous row. PATTERN: See diagrams A.1 and A.2. DECREASE TIP (for sleeves): Decrease on a row of double crochets inside the 2 outermost stitches on each side. Decrease 1 stitch by working 2 double crochets together as follows: * Make 1 yarn over, insert the hook through the next stitch, pick up the strand and pull it through the stitch, make 1 yarn over and pull it through the first 2 loops on the hook *, work from *-* 1 more time, make 1 yarn over and pull it through all 3 loops on the hook (1 stitch decreased). STRIPES Crochet stripes as follows: work 6 rows with color pearl and the first row from the wrong side, * work 1 row with color light denim and 5 rows with color pearl*, repeat from *-* (the light denim row is always worked from the right side). To avoid cutting the pearl strand when working with light denim, lay the pearl strand over the stitches you are working, it is then hidden and carried along the row. ------------------------------------------------------- START THE PIECE HERE: ------------------------------------------------------- SWEATER - SHORT OVERVIEW OF THE PIECE: The front, back and sleeves are worked separately back and forth, top down. First work right shoulder on front piece increasing for neck, the work left soulder on front piece increasing for neck then join both pieces together to work front piece back and forth. Work back piece the same way. Sleeves are worked top down. The piece is sewn together and the neck worked to finish. RIGHT FRONT SHOULDER (when the garment is worn): Read CROCHET INFORMATION! Work 22-22-22-28-28-34 chain stitches with hook size 4 MM = US 6 and DROPS Muskat color pearl. Work STRIPES – read description above. Work the first row as follows from the right side: Work 1 double crochet in the 4th chain stitch from the hook (2 double crochets), work 1 double crochet in each of the remaining chain stitches = 20-20-20-26-26-32 double crochets. Turn and work 1 double crochet in each double crochet. Work from the right side as follows: A.1A, A.1B over the next 12-12-12-18-18-24 stitches, A.1C. Continue this pattern back and forth until A.1 is finished (2 stitches increased mid-front = 22-22-22-28-28-34 stitches). REMEMBER THE CROCHET GAUGE! Lay the piece to one side and work the left shoulder. LEFT FRONT SHOULDER (when the garment is worn): Work 22-22-22-28-28-34 chain stitches with hook size 4 MM = US 6 and color pearl. Remember STRIPES – read description above. Work the first row as follows from the right side: Work 1 double crochet in the 4th chain stitch from the hook (2 double crochets), work 1 double crochet in each of the remaining chain stitches = 20-20-20-26-26-32 double crochets. Turn and work 1 double crochet in each double crochet. Work as follows from the right side: Work A.1D, A.1B over the next 6-6-6-12-12-18 stitches, A.1E. Continue this pattern back and forth until A.1 is finished (2 stitches increased mid-front = 22-22-22-28-28-34 stitches). At the end of the last row work 25-31-31-25-31-31 slightly loose chain stitches for the neck. Fasten the chain-stitch row with 1 slip stitch in the outermost stitch by the neck on the right shoulder (from the wrong side). Cut and fasten the strand. Now the front piece has been joined together. FRONT PIECE: Start from the right side on the right shoulder, continue over the chain stitches, then work the left shoulder as follows: Work A.2A, A.2B over the next 60-66-66-72-78-90 stitches, A.2C. NOTE: When working the chain stitches, work 1 double crochet in each chain stitch = 69-75-75-81-87-99 stitches. Continue this pattern back and forth. A.2 is repeated in height. AT THE SAME TIME when the piece measures 19-19-19-20-22-22 cm = 7½"-7½"-7½"-8"-8¾"-8¾" (adjust so that next row is a row with double crochets), work 8 chain stitches at the end of the row for one armhole. Turn and work 1 double crochet in the 4th chain stitch from the hook, work 1 double crochet in each of the other 4 chain stitches, work to the end of the row as before and work 8 chain stitches at the end of the row for the second armhole. Turn and work 1 double crochet in the 4th chain stitch from the hook, work 1 double crochet in each of the other 4 chain stitches, work to the end of the row as before = 81-87-87-93-99-111 stitches. Continue the pattern but now with 2 extra repeats of A.2B. Continue working until the piece measures 53-55-57-59-61-63 cm = 21"-21⅝"-22½"-23¼"-24"-24¾". Work 1 row of double crochets. Cut and fasten the strand. The front piece measures approx. 54-56-58-60-62-64 cm = 21¼"-22"-22¾"-23⅝"-24⅜"-25¼" from the shoulder. LEFT BACK SHOULDER (when the garment is worn): Remember STRIPES! Work 22-22-22-28-28-34 chain stitches with hook size 4 MM = US 6 and color pearl. Work the first row as follows from the right side: Work 1 double crochet in the 4th chain stitch from the hook (2 double crochets), work 1 double crochet in each of the remaining chain stitches = 20-20-20-26-26-32 double crochets. Turn and work 1 double crochet in each double crochet. Lay the piece to one side and work the right shoulder. RIGHT BACK SHOULDER (when garment is worn): Work 22-22-22-28-28-34 chain stitches with hook size 4 MM = US 6 and color pearl. Remember STRIPES! Work the first row as follows from the right side: Work 1 double crochet in the 4th chain stitch from the hook (2 double crochets), work 1 double crochet in each of the remaining chain stitches = 20-20-20-26-26-32 double crochets. Turn and work 1 double crochet in each double crochets. At the end of this row work 29-35-35-29-35-35 slightly loose chain stitches for the neck. Fasten the chain-stitch row with 1 slip stitch in the outermost stitch by the neck on the left shoulder (from the wrong side). Cut and fasten the strand. Now the back piece is joined. BACK PIECE: Start from the right side on the left back shoulder, and continue as follows from the right side continue over the chain stitches, then work the right back shoulder as follows: Work A.1A, A.1B over the next 60-66-66-72-78-90 stitches, A.1E. Continue this pattern back and forth. When A.1 is finished in height, work as follows: Work A.2A, A.2B over the next 60-66-66-72-78-90 stitches, A.2C. A.2 is repeated in height. AT THE SAME TIME, when the piece measures 19-19-19-20-22-22 cm = 7½"-7½"-7½"-8"-8¾"-8¾", work 8 chain stitches at the end of the row for one armhole. Turn and work 1 double crochet in the 4th chain stitch from the hook, work 1 double crochet in each of the other 4 chain stitches, work to the end of the row as before and work 8 chain stitches at the end of the row for the second armhole. Turn and work 1 double crochet in the 4th chain stitch from the hook, work 1 double crochet in each of the other 4 chain stitches, work to the end of the row as before = 81-87-87-93-99-111 stitches. Continue the pattern but now with 2 extra repeats of A.2B. Continue working until the piece measures 53-55-57-59-61-63 cm = 21"-21⅝"-22½"-23¼"-24"-24¾". Work 1 row of double crochets. Cut and fasten the strand. The back piece measures approx. 54-56-58-60-62-64 cm = 21¼"-22"-22¾"-23⅝"-24⅜"-25¼" from the shoulder. SLEEVES: Work 65-65-65-71-77-77 chain stitches with hook size 4 MM = US 6 and color pearl. Remember STRIPES! Work the first row as follows from the right side: Work 1 double crochet in the 4th chain stitch from the hook (2 double crochets), work 1 double crochet in each of the remaining chain stitches = 63-63-63-69-75-75 double crochets. Work the next row as follows from the wrong side: 4 chain stitches (= 1 double crochet + 1 chain stitch), skip 2 double crochets, * work 2 double crochets before the next double crochet (worked between the double crochets), 1 chain stitch, skip 3 double crochets* work from *-* until there are 3 double crochets left, work 2 double crochets before the next double crochet, 1 chain stitch, skip 2 double crochets and finish with 1 double crochet in the last double crochet = 63-63-63-69-75-75 stitches. Work the next row as follows from the right side: Work A.2A, A.2B over the next 54-54-54-60-66-66 stitches, A.2C. Continue this pattern back and forth. A.2 is repeated in height. AT THE SAME TIME when the sleeve measures 6 cm = 2⅜" decrease 1 stitch on each side – read DECREASE TIP (2 stitches decreased). Decrease like this every 6-6-6-5-4½-4½ cm = 2⅜"-2⅜"-2⅜"-2"-1⅝"-1⅝" a total of 8-8-8-9-11-10 times on each side = 47-47-47-51-53-55 stitches. When the sleeve measures 55-55-56-55-54-52 cm = 21⅝"-21⅝"-22"-21⅝"-21¼"-20½", cut and fasten the strand. Work the other sleeve in the same way. ASSEMBLY: Sew the shoulder seams. Sew the sleeve seams, leaving a split of 4 cm = 1½" at the top. Sew the sleeve cap to the armhole. Sew the split at the top of the sleeve to the bottom of the armhole– see sketch. Sew the side seams, edge to edge in the outermost stitch, leaving a split of 20 cm = 8" at the bottom. NECK: Start on one shoulder, with hook size 4 MM = US 6 and color pearl: Work 1 single crochet in the first stitch, * 3 chain stitches, 1 single crochet around the next row/chain-stitch *, work from *-* around the neck, finish with 3 chain stitches and 1 slip stitch in the first single crochet at the beginning of the round. Cut and fasten the strand. |
||||||||||||||||||||||||||||
Diagram explanations |
||||||||||||||||||||||||||||
|
||||||||||||||||||||||||||||
 |
||||||||||||||||||||||||||||
 |
||||||||||||||||||||||||||||
 |
||||||||||||||||||||||||||||
 |
||||||||||||||||||||||||||||
Have you finished this pattern?Tag your pictures with #dropspattern #jewelstidesweater or submit them to the #dropsfan gallery. Do you need help with this pattern?You'll find 15 tutorial videos, a Comments/Questions area and more by visiting the pattern on garnstudio.com. © 1982-2026 DROPS Design A/S. We reserve all rights. This document, including all its sub-sections, has copyrights. Read more about what you can do with our patterns at the bottom of each pattern on our site. |
||||||||||||||||||||||||||||


With over 40 years in knitting and crochet design, DROPS Design offers one of the most extensive collections of free patterns on the internet - translated to 17 languages. As of today we count 324 catalogs and 12290 patterns - 12280 of which are translated into English (US/in).
We work hard to bring you the best knitting and crochet have to offer, inspiration and advice as well as great quality yarns at incredible prices! Would you like to use our patterns for other than personal use? You can read what you are allowed to do in the Copyright text at the bottom of all our patterns. Happy crafting!
Post a comment to pattern DROPS 239-22
We would love to hear what you have to say about this pattern!
If you want to leave a question, please make sure you select the correct category in the form below, to speed up the answering process. Required fields are marked *.