
Popular categories
Looking for a yarn?


Crochet: turning when working single crochet

Which is the first stitch to work into after you turned?
Which is the last stitch to work into?
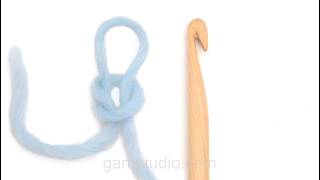
In this DROPS Video we show an example on how to work single crochet (sc) back and forth with 5 sts.
Chain the number of sts you want (in our sample 5) + 1 additional stitch.
Work a sc in 2nd ch from hook, work sc in each of rem ch across, turn.
Ch 1 to turn with, work a sc in 2nd st from hook, and sc in rem sc's on row, turn.
Repeat last row for a straight piece with a constant number of stitches.
Patterns using this technique


Video #499, listed in: Crochet tips & tricks, More tips and tricks
Our videos do not have sound. We are a worldwide company and our videos are watched by people speaking endless of different languages and many do not understand English. So since there is not a given language for us to use, we instead have written instructions to accompany the video, and then there is no sound to disturb while watching.
You can adjust the speed of this video by clicking on the icon, on the play bar.
Leave a comment or question to this video
Your email address will not be published. Required fields are marked *.


With over 40 years in knitting and crochet design, DROPS Design offers one of the most extensive collections of free patterns on the internet - translated to 17 languages. As of today we count 325 catalogs and 12298 patterns - 12288 of which are translated into English (US/in).
We work hard to bring you the best knitting and crochet have to offer, inspiration and advice as well as great quality yarns at incredible prices! Would you like to use our patterns for other than personal use? You can read what you are allowed to do in the Copyright text at the bottom of all our patterns. Happy crafting!
Dobrý den, video stále nefunguje, (vidím jen černou obrazovku)moc rada bych se na něho podívala. Zkusíte se na to, prosím, ještě jednou podívat? Dekuju
18.01.2026 - 17:13DROPS Design :
Hi Kacka, we are cheking it out. Thank you for your message. Kind regards!
02.02.2026 - 09:37Hi. I have tried this video on different devices and can't get it to play - it seems to just jump to the end. I have tried it on You Tube also and the same happens. Would you check that this is working please as I find the videos so helpful. Thank you.
23.12.2025 - 00:09DROPS Design :
Dear RJH, there seems to be an error with the video; our IT team is looking into it and will correct it soon. Happy crochetting!
28.12.2025 - 18:15Beste, hartelijk dank voor de tutorial keren bij vasten. Bestaat er ook een tutorial die aansluitend laat zien hoe je rond dit lapje een rand met vasten kan bevestigen? Ik weet nooit waar ik de haaknaald aan de zijkanten moet steken om daar een vaste in te maken. Meestal kom ik nooit aan het correcte aantal vasten op de zijkanten. De kanten waar je dus de keerlosse hebt. Alvast bedankt om me te helpen.
04.11.2023 - 10:18Ik was begonnen met de kleinste maat, maar de zool werd maar 6,5cm lang. Er staat dat 24v/stk =10 cm, hoe kan het dan dat 15v 9cm zouden moeten zijn?
26.08.2019 - 09:15Tuuuusen tack för detta!
15.03.2019 - 20:12J' ai ENFIN compris pourquoi mes bords au crochet ne sont pas droits ! J' apprécie beaucoup vos vidéos sans bla-bla inutile ! Merci DROPS !
22.03.2018 - 09:30Sofia wrote:
Hola. Que punto es recomendable para hacer el tirante de un bolso a ganchillo. Muchas gracias
13.02.2018 - 15:57DROPS Design :
Hola Sofía, es recomendable trabajar con puntos bajos porque la textura es más resistente y se estiran menos.
24.02.2018 - 20:21Claudia Cuevas Herrera wrote:
No entiendo como hacer las orejas
05.04.2017 - 21:52DROPS Design :
Hola Claudia. Las orejas se trabajan de ida y vuelta, comenzando desde la punta hacia arriba con los aumentos y después las disminuciones al inicio y final de la vuelta. Ahora hacemos un remate alrededor de la oreja sin olvidar un pequeño aumento que hacemos en la punta de la oreja para darle forma. Al final, unimos la oreja con la tapa.
09.04.2017 - 20:02Buenos días. Mi dificultad está cuando la labor se teje de forma circular, ya sea para una funda de movil o un cesto. Me cuesta identificar, si no cuento los puntos, cuál es el último y cual es el primer punto de cada vuelta. Muchas gracias.
25.05.2015 - 13:56DROPS Design :
Hola Dolores, para otra vez marca tu pregunta como "question" en lugar de "comment" y te responderemos con más rapidez. Te recomiendo usar un marcapuntos para marcar el primer y el último pt de la vta. Los marcapuntos los puedes ir cambiando de una vta a la siguiente según avanzas con la labor.
13.06.2015 - 17:53