
Popular categories
Looking for a yarn?


Comments / Questions (32)
![]() Torunn wrote:
Torunn wrote:
Når man strikker 2 masker sammen, lager en ny (=kast), og flytter en over på neste pinne (1 maske løs av) , forsvinner ingen masker. Det blir da minus en, pluss en og en= det samme som før. Hvordan får dere da til at det går fra 96 til 63 ? Mener dere at den siste masken på denne runden bare skal slippes av løst ? I såfall er det veldig rart at det legges til "som om den skulle strikkes vrang", en maske som slippes av løst spiller det jo ingen rolle om den "strikkes vrang" ?
04.12.2024 - 21:42DROPS Design answered:
Hei Torunn. Du skriver 96 til 63 masker, men om du strikker str. M/L er det 94 til 63 masker. Øverst i oppskriften står det forklaring til en patentmaske slik: PATENTMASKE: Når maskene skal telles regnes ikke kastene som egne masker. Og etter at 1. pinne er strikket, står det Les PATENTMASKE. Altså, nå skal du ikke telle kastene som en maske og da stemmer det med 63 masker. mvh DROPS Design
09.12.2024 - 11:05
![]() Marie Fredriksson wrote:
Marie Fredriksson wrote:
Hej På bilden ser det ut som framstycket är rakt. Men på mönstret ska jag som jag förstår det lägga upp 94 maskor och direkt minska till 63 maskor med 2 maskor på varje varv. Jag förstår inte!! Tacksam för svar!! Vänligen Marie Sorry för Autokorrekt! 🤣
02.12.2024 - 21:18DROPS Design answered:
🤣
03.12.2024 - 07:55
![]() Marie Fredriksson wrote:
Marie Fredriksson wrote:
Hej På bilden ser det ut som framstå ketchup är rakt. Men på mönstret ska jag som jag förstår det lägga upp 94 maskor och direkt minska till 63 maskor med 2 på varje varv. Jag förstår inte!! Tacksam för svar!! Vänligen Marie
02.12.2024 - 21:13DROPS Design answered:
Hej Marie, det er fordi at patentmaskerne fylder mere :)
03.12.2024 - 07:54
![]() MURIEL COUSIN wrote:
MURIEL COUSIN wrote:
Bonjour Merci beaucoup pour votre vidéo pour le bandeau
05.11.2024 - 10:36
![]() MURIEL COUSIN wrote:
MURIEL COUSIN wrote:
Bonjour J ai tricote le bandeau mais je n arrive pas à l assembler pourriez vous m aider svp Cordialement
29.10.2024 - 09:45DROPS Design answered:
Bonjour Mme Cousin, cette vidéo devrait vous aider, elle montre comment assembler ce type de bandeau (tricoté en jersey dans la vidéo mais le principe est le même). Bon assemblage!
29.10.2024 - 10:14
![]() Pirjo wrote:
Pirjo wrote:
Miksi en saa vinoiksi noita raitoja, kuten kuvassa? Keskeltä ei vähene silmukat.
28.11.2023 - 05:25DROPS Design answered:
Etukappaleen lisäykset ja kavennukset aloitetaan, kun työn pituus on 17-19-21 cm. Kunhan neulot ohjeen mukaisesti, työhön muodostuu vinoraitoja. Eli sinun tulee neuloa näin: Neulo ensimmäiset 6-8-10 silmukkaa kuten aiemmin, lisää seuraavaan silmukkaan 2 silmukkaa (lue LISÄYSVINKKI), neulo seuraavat 8 silmukkaa kuten aiemmin, kavenna 2 silmukkaa (lue KAVENNUSVINKKI), neulo kunnes seuraavaa merkkiä edeltää 11 silmukkaa, kavenna 2 silmukkaa (muista KAVENNUSVINKKI), neulo seuraavat 8 silmukkaa kuten aiemmin, lisää seuraavaan silmukkaan 2 silmukkaa (muista LISÄYSVINKKI), neulo loput 6-8-10 silmukkaa kuten aiemmin.
04.12.2023 - 17:29
![]() Camilla wrote:
Camilla wrote:
Hur gör man omslagsstygn, ska göras i monteringen av pannbandet?
11.01.2023 - 13:54DROPS Design answered:
Hej Camille, vi har en video som viser hvordan man monterer pandebåndet. Du finder videoen nederst i opskriften :)
12.01.2023 - 15:20
![]() Ursel wrote:
Ursel wrote:
Gibt es eine Erklärung, wie man das Stirnband verdreht, um die Optik an der Vorderseite zu bekommen? Vielen Dank!
24.11.2022 - 21:23DROPS Design answered:
Liebe Ursel, ja genau, dieses Video zeigt, wie man so ein Stirnband fertig stellt. Viel Spaß beim stricken!
25.11.2022 - 08:34
![]() Gabi wrote:
Gabi wrote:
Ein sehr schöner Pullunder. Wo kann ich denn die Maßtabelle/Maßskizze finden?
27.09.2022 - 05:49DROPS Design answered:
Liebe Gabi, Maßskizze gibt es für den Pullunder keine, aber Maßen finden Sie oben bei dem Kopfzeilen. Viel Spaß beim stricken!
27.09.2022 - 09:18
![]() Mathilde wrote:
Mathilde wrote:
Bonjour! Tout d’abord j’adore votre site qui est merveilleusement bien fait :) Je me demandais: pour la grosseur des aiguilles, quand vous indiquez par exemple no 4, est-ce que cela signifie que ce sont des aiguilles de 4mm ? Merci ! Mathilde
02.03.2022 - 15:56DROPS Design answered:
Bonjour Mathilde, tout à fait, les explications en français reprennent le système métrique - si vous voulez la conversion des aiguilles en taille US, cliquez sur le menu déroulant sous la photo et choisissez "English (US/inch)". Bon tricot!
02.03.2022 - 17:39
|
|
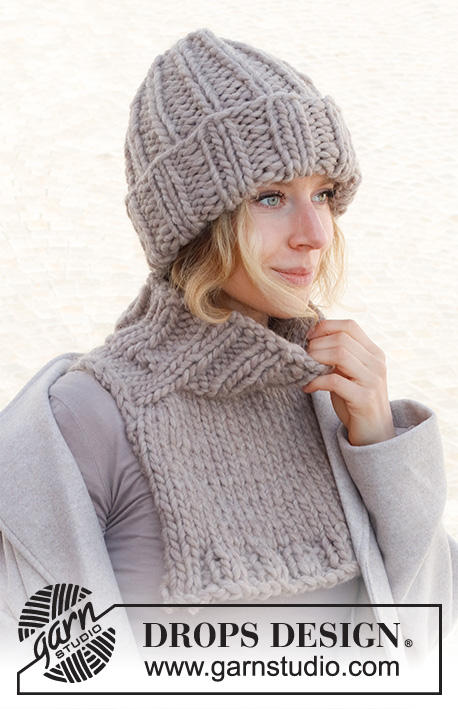
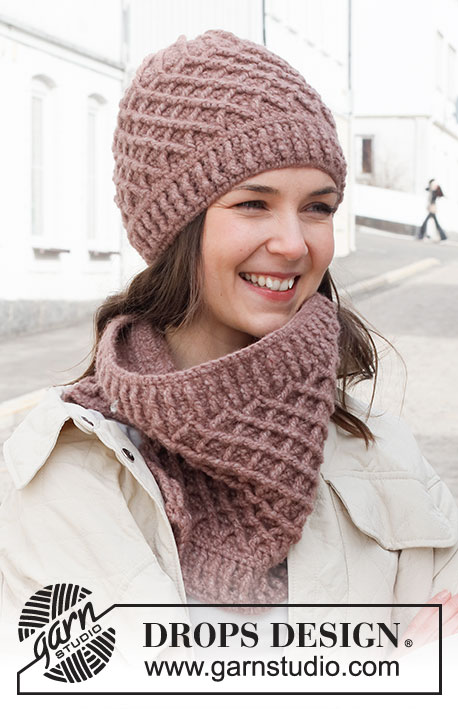
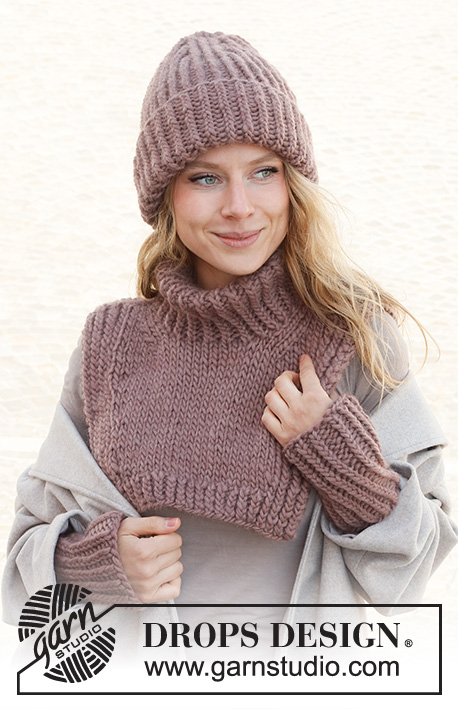
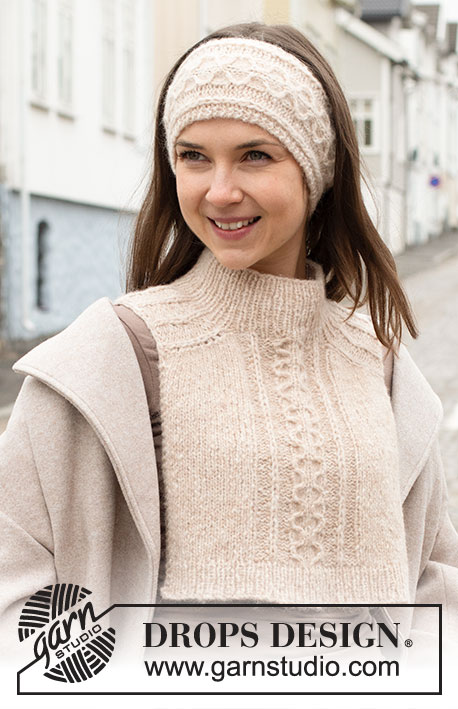
Sugar Cane Set#sugarcaneset |
|
 |
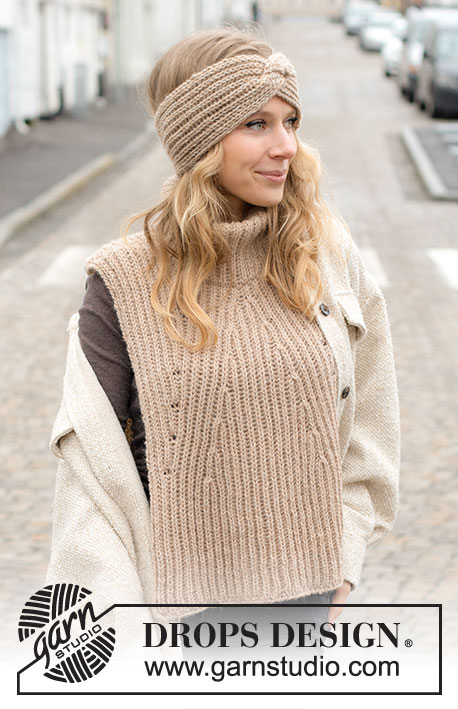 |
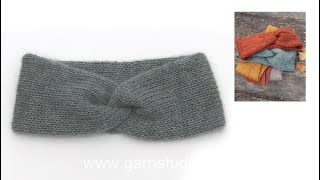
Knitted headband and vest in 2 strands DROPS Alpaca. The piece is worked with English rib, cables and displacements. Sizes S to XXXL.
DROPS 225-13 |
|
|
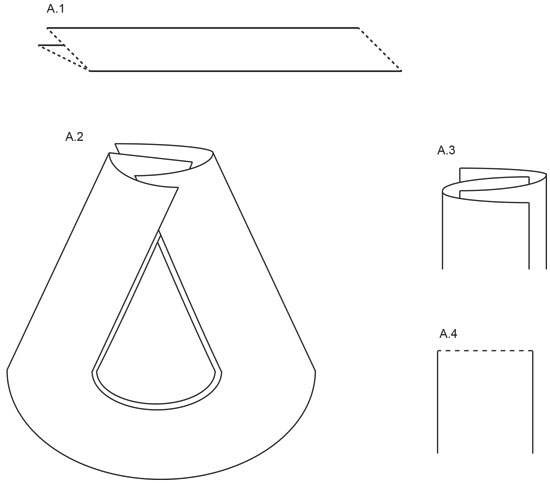
------------------------------------------------------- EXPLANATIONS FOR THE PATTERN: ------------------------------------------------------- RIDGE/GARTER STITCH (worked back and forth): Knit all rows. 1 ridge = knit 2 rows. KNITTING TIP (headband): To get a good fit, the headband should be approx. 6-7 cm = 2⅜"-2¾" shorter than head-size. ENGLISH RIB STITCH: When counting stitches the yarn overs are not counted as stitches. DIAGRAMS: See diagrams A.1 to A.4. The diagrams are used when assembling the headband. ENGLISH RIB (back and forth): ROW 1 (wrong side): Work the edge stitch as described in the text – applies to each row, * knit 1, 1 yarn over, slip 1 stitch as if to purl *, work from *-* until there are 2 stitches left, knit 1 and 1 edge stitch. ROW 2 (right side): Work the edge stitch, * 1 yarn over, slip 1 stitch as if to purl, knit together the yarn over and slipped stitch *, work from *-* until there are 2 stitches left, make 1 yarn over, slip 1 stitch as if to purl and 1 edge stitch. ROW 3 (wrong side): Work the edge stitch, * knit together the yarn over and slipped stitch, 1 yarn over, slip 1 stitch as if to purl *, work from *-* until there are 2 stitches left, knit together the yarn over and slipped stitch and 1 edge stitch. Repeat rows 2 and 3 onwards. ENGLISH RIB (in the round): ROUND 1: * Make 1 yarn over, slip 1 stitch as if to purl, knit 1 *, repeat from *-* to end of round. ROUND 2: * Purl together the yarn over and slipped stitch, make 1 yarn over, slip 1 stitch as if to purl *, repeat from *-* to end of round. ROUND 3: * Make 1 yarn over, slip 1 stitch as if to purl, knit together the yarn over and slipped stitch *, repeat from *-* to end of round. Repeat rounds 2 and 3 onwards. INCREASE TIP (for vest): All increases are worked from the right side! Increase 2 stitches by working 3 stitches in one stitch as follows: Knit the stitch, but do not slip it from the left needle, make 1 yarn over and knit the stitch 1 more time (= 2 stitches increased). Work the new stitches in English rib – note on the first row after the increases (from the wrong side), the knitted stitches are knitted without yarn overs as they have not been made. DECREASE TIP (for vest): All decreases are worked from the right side! Decrease after the first marker-stitch: Work the 8 stitches after the marker-stitch as before, slip the next stitch + yarn over (= 1 English rib stitch) as if to knit, knit together the next 2 stitches and pass the slipped stitch + yarn-over over the knitted together stitches (= 2 stitches decreased). Decrease before the second marker-stitch: Work until there are 11 stitches left before the marker-stitch, knit together the next 3 stitches + yarn overs (= 2 stitches decreased). ------------------------------------------------------- START THE PIECE HERE: ------------------------------------------------------- HEADBAND – SHORT OVERVIEW OF THE PIECE: The piece is worked back and forth. The ends are sewn together in such a way that gives a cable mid-front. HEADBAND: Cast on 19-21-23 stitches a little loosely with needle size 4 MM = US 6 and 1 strand of each color DROPS Alpaca (= 2 strands). Work 1 RIDGE back and forth – read description above. You now continue with 1 edge stitch on each side, which are slipped as if to knit at the beginning of each row and knitted at the end of each row – this applies to EVERY row. Work ENGLISH RIB (back and forth) – read description above, with 1 edge stitch on each side. Read ENGLISH RIB STITCH. REMEMBER THE KNITTING GAUGE! When the headband measures 49-51-53 cm = 19¼"-20"-21" from the cast-on edge – read KNITTING TIP, work 1 ridge. Loosely bind off with knit from the right side. ASSEMBLY: The piece is a rectangle. Fold it double lengthwise – see diagram A.1. Now put the long sides together in layers, without twisting the piece – see diagram A.2. The ends are alternately inside and outside of each other and edge to edge, - see diagram A.3. Sew through all layers along the broken line in diagram A.4 (across the ends); sew with tight casting stitches, 1 stitch in each stitch – it is important to sew through all the layers so the seam is invisible when the band is turned inside-out. Cut and fasten the strand. Turn the piece inside-out, so the seam is on the inside. ------------------------------------------------------- VEST – SHORT OVERVIEW OF THE PIECE: The front and back pieces are worked back and forth with circular needle, then sewn together at the shoulders. The double neck is worked in the round to finish. BACK PIECE: Cast on 88-94-100 stitches with circular needle size 5 MM = US 8 and 1 strand of each color DROPS Alpaca (= 2 strands). You now continue with 1 edge stitch on each side of the piece which are slipped as if to knit at the beginning of each row and knitted at the end of each row – this applies to EVERY row: Work the edge stitch, * knit 2 together (= 1 stitch decreased), make 1 yarn over, slip 1 stitch as if to purl *, work from *-* until there are 3 stitches left, knit 2 together (= 1 stitch decreased) and 1 edge stitch. There are 59-63-67 stitches. Read ENGLISH RIB STITCH. Continue rows 2 and 3 of ENGLISH RIB back and forth – read description above. REMEMBER THE KNITTING GAUGE! When the piece measures 46-48-50 cm = 18"-19"-19¾", bind off the middle 19 stitches for the neck and each shoulder is finished separately. Bind off 2 stitches on the next row from the neck = 18-20-22 stitches on the shoulder. Continue with English rib and 1 edge stitch on each side. When the piece measures 48-50-52 cm = 19"-19¾"-20½" bind off with knit; to avoid the bind-off edge being tight, the yarn-overs are bind off as separate stitches. Work the other shoulder in the same way. FRONT PIECE: Cast on 88-94-100 stitches with circular needle size 5 MM = US 8 and 1 strand of each color DROPS Alpaca (= 2 strands). You now continue with 1 edge stitch on each side of the piece which are slipped as if to knit at the beginning of each row and knitted at the end of the row – this applies to every row: Work the edge stitch, * knit 2 together (= 1 stitch decreased), make 1 yarn over, slip 1 stitch as if to purl *, work from *-* until there are 3 stitches left, knit 2 together (= 1 stitch decreased) and 1 edge stitch. There are 59-63-67 stitches. Continue rows 2 and 3 of English rib back and forth When the piece measures 17-19-21 cm = 6¾"-7½"-8¼" – adjust so the next row is from the right side, insert 2 markers as follows: 1 marker in the 6th-8th-10th stitch from each side (= purled stitch in the pattern). On the next row from the right side, start to displace stitches, decreasing and increasing as follows: Work the first 6-8-10 stitches as before, increase 2 stitches in the next stitch – read INCREASE TIP, work the next 8 stitches, decrease 2 stitches – read DECREASE TIP, work until there are 11 stitches left before the next marker, decrease 2 stitches – remember DECREASE TIP, work the next 8 stitches, increase 2 stitches in the next stitch – remember INCREASE TIP, work the last 6-8-10 stitches. You have both increased and decreased 4 stitches. Decrease and increase like this every 14th row (every 7th knitted stitch in height) a total of 7 times. Continue working until the piece measures 42-44-46 cm = 16½"-17¼"-18". Now place the middle 11 stitches on a thread for the neck and finish each shoulder separately. Bind off on each row from the neck as follows: 2 stitches 3 times = 18-20-22 stitches on the shoulder. Continue with English rib and 1 edge stitch on each side. When the piece measures 48-50-52 cm = 19"-19¾"-20½" bind off with knit; to avoid the bind-off edge being tight, the yarn-overs are bind off as separate stitches. Work the other shoulder in the same way. ASSEMBLY: Sew the shoulder seams, inside the bind-off edge. HIGH NECK: Start approx. mid-back and knit up 26 stitches as far as the thread in front, work the stitches from the thread as before, knit up 27 stitches to mid-back = 64 stitches. Work ENGLISH RIB in the round – read description above, making sure the English rib is continued as before above the thread. When the neck measures 24 cm = 9½", bind off with knit over the English rib and purl over purl – to avoid the bind-off edge being tight, the yarn-overs are bind off as separate stitches. Fold the neck to the outside or inside as in the picture. If the neck is folded to the inside it can be sewn so that it becomes a double neck. To avoid the neck being tight and rolling outwards, it is important that the seam is elastic. |
|
 |
|
Have you finished this pattern?Tag your pictures with #dropspattern #sugarcaneset or submit them to the #dropsfan gallery. Do you need help with this pattern?You'll find 29 tutorial videos, a Comments/Questions area and more by visiting the pattern on garnstudio.com. © 1982-2026 DROPS Design A/S. We reserve all rights. This document, including all its sub-sections, has copyrights. Read more about what you can do with our patterns at the bottom of each pattern on our site. |
|


With over 40 years in knitting and crochet design, DROPS Design offers one of the most extensive collections of free patterns on the internet - translated to 17 languages. As of today we count 324 catalogs and 12278 patterns - 12268 of which are translated into English (US/in).
We work hard to bring you the best knitting and crochet have to offer, inspiration and advice as well as great quality yarns at incredible prices! Would you like to use our patterns for other than personal use? You can read what you are allowed to do in the Copyright text at the bottom of all our patterns. Happy crafting!
Post a comment to pattern DROPS 225-13
We would love to hear what you have to say about this pattern!
If you want to leave a question, please make sure you select the correct category in the form below, to speed up the answering process. Required fields are marked *.