
Popular categories
Looking for a yarn?


Comments / Questions (87)
![]() Amanda B wrote:
Amanda B wrote:
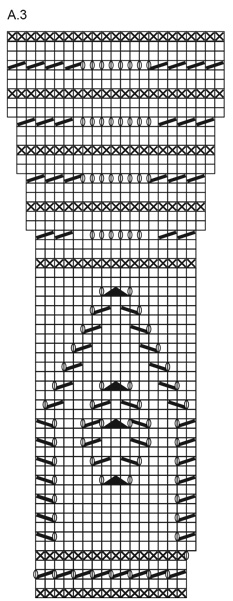
Using the markers for the wave pattern of A.3 definitely helped - thank you.
12.01.2023 - 05:55
![]() Amanda B wrote:
Amanda B wrote:
Thank you for your answer, however, after row 38, the stitch count appears to be wrong. I have 196 sts but if I follow A.3 from row 39, I don't have enough stitches at the start for the 3 decreases (I only have 4 sts) & yarn overs are not in the correct place for the wave pattern.
07.01.2023 - 21:36DROPS Design answered:
Dear Amanda B, this is correct, A.3 will the be worked over 19 sts, then you will increase 2 sts on next wave pattern row (= 21 sts in each A.3 and 216 sts in total), then 2 sts again (= 23 sts in each A.3 and 236 sts in total). Adding markers between each repeat might help you keeping tracking on the wave pattern. Happy knitting!
09.01.2023 - 09:35
![]() Amanda B wrote:
Amanda B wrote:
I have completed row 38 on A.3 and my stitches are correct but I am unable to figure out row 39. The pattern shows 2 stitches on row 39 for each k2tog on row 38, so row 44 k2tog don't fall correctly. What am I doing wrong?
04.01.2023 - 21:57DROPS Design answered:
Dear Amanda, on row 39 you will work the wave pattern with 4 sts decreased and 6 yarn overs in each repeat so that you will increase 2 sts in each repeat in width. This increase will be repeated on row 45 (6 sts decreased but 8 yarn overs) and on row 51 (6 sts decreased but 8 yarn overs). Happy knitting!
05.01.2023 - 11:05
![]() Vanina LUCIANI wrote:
Vanina LUCIANI wrote:
Bonjour, J'en suis au diagramme A3, et j'ai beau compter et recompter, le motif a 17 mailles et non 16. Qu'est-ce que je rate? Merci
30.10.2022 - 10:07DROPS Design answered:
Bonjour Mme Luciani, A.3 commence effectivement sur 16 mailles, mais au début du 5ème rang, on fait 1 jeté au début de chaque A.3 = 17 mailles. Bon tricot!
31.10.2022 - 09:02
![]() Marie wrote:
Marie wrote:
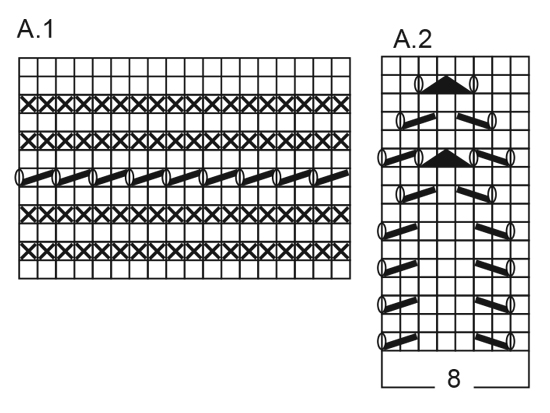
How many stitches should be on the needle at the end of row 6 in the A1 pattern? Thank you
22.09.2022 - 17:54DROPS Design answered:
Dear Marie, the number of stitches will not change in A.1, on the 6th row, every decrease is compensated by a yarn over, so that the number of sts is still the same as before. Happy knitting!
23.09.2022 - 08:05
![]() Elke Moss wrote:
Elke Moss wrote:
Anleitung A1 ist in Bezug auf die Ausführung zur Rückseite unkorrekt, Es muss heißen: Alle Maschen einschließlichder Umschläge links stricken. Zwei Maschen links zusammenstricken ist nicht möglich.
03.09.2022 - 12:02
![]() Maria Anthonia wrote:
Maria Anthonia wrote:
Klopt het dat je patroon A1 op breinaalden nr. 6 moet breien ? De rest van het dekentje moet op breinaalden nr. 3.5 gebreid en dat is wel een groot verschil vandaar mijn vraag.
21.06.2022 - 20:34DROPS Design answered:
Dag Maria,
Nee, je breit het hele dekentje op naald 3,5 mm. Maak wel altijd even een proeflapje om te controleren of de stekenverhouding klopt en pas eventueel de naalddikte aan. Bij tip voor het breien staat hoe je op de zesde in het telpatroon breit, misschien dat je hiermee in de war was.
26.06.2022 - 10:08
![]() Faye wrote:
Faye wrote:
Is it possible to get this with written instructions rather than just the diagrams to follow?
18.05.2022 - 06:32DROPS Design answered:
Hi Faye, The diagrams have written instructions for each symbol above them. It is possible to write each symbol out for yourself for the first couple of rows, until you get used to reading symbols. Unfortunately we do not have another version of this pattern available. Happy crafting!
18.05.2022 - 06:55
![]() Hanne Lise Nielsen wrote:
Hanne Lise Nielsen wrote:
Hvis jeg gerne vil strikke tæppet lidt større, f.eks. 6 ekstra rapport af A2 i bredden og 4 A2 ekstra i højden, hvor mange masker skal jeg så starte med at slå op, når jeg starter på tæppet. Og hvor meget garn skal jeg have ekstra, udover de 8 nøgler, der er beregnet til opskriften ? Mange hilsner Hanne Lise Nielsen
21.03.2022 - 17:16DROPS Design answered:
Hei Hanne Lise. Om du ønsker å strikke flere rapporter av A.2 må du legge opp 8 masker (A.2) x hvor mange flere rapporter du ønsker (f.eks 6 flere rapporter = 8 masker x 6 = 48 ekstra masker som du må legge opp). Siden vi ikke har strikket teppet i en større størrelse har vi heller ikke den nøyaktige garnmenden. mvh DROPS Design
28.03.2022 - 08:46
![]() Laila Jørgensen wrote:
Laila Jørgensen wrote:
Hej. Jeg er kommet til mønster A3, at hvor der skal være 10 rapporter a 16 masker. Men når jeg følger opskriften, er der 17 masker i en rapport?? Hilsen Laila
15.02.2022 - 13:15DROPS Design answered:
Hej Laila, A.3 starter med 16 masker nederst i diagrammet. På pind 5 tager du 1 maske ud for hver gang du starter diagrammet, så du på pind 6 har 17 masker. Sæt gerne et mærke imellem hver rapport. God fornøjelse!
15.02.2022 - 14:44
|
|||||||||||||||||||
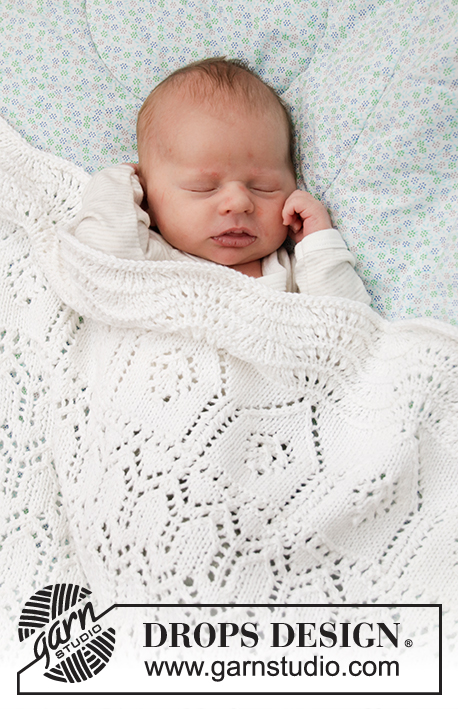
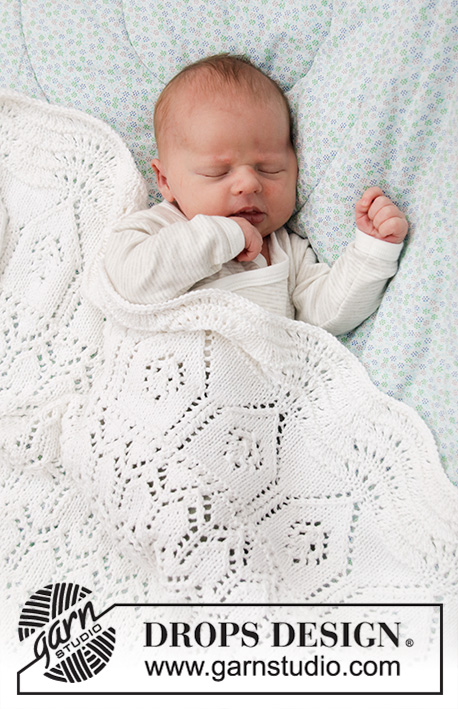
Memory Maker#memorymakerblanket |
|||||||||||||||||||
 |
 |
||||||||||||||||||
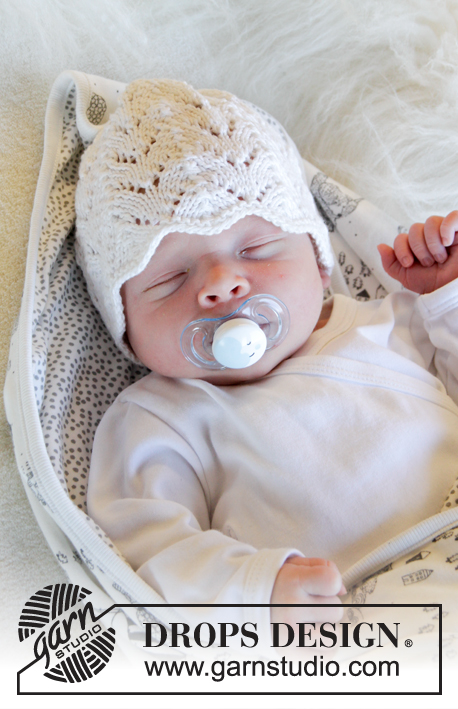
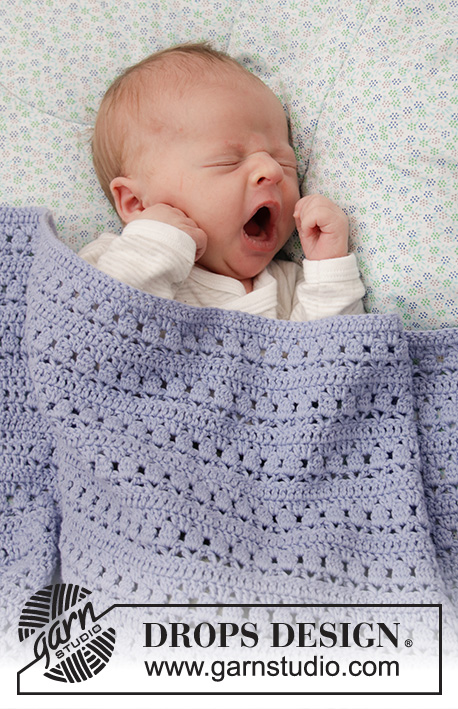
Knitted blanket for baby in DROPS Cotton Merino. Theme: Baby blanket
DROPS Baby 33-35 |
|||||||||||||||||||
|
---------------------------------------------------------- EXPLANATION FOR THE PATTERN: ---------------------------------------------------------- PATTERN: See diagrams A.1, A.2 and A.3. GARTER STITCH (back and forth): Knit all rows. 1 ridge vertically = knit 2 rows. INCREASE TIP: Increase 1 stitch by making 1 yarn over, on next row work yarn over twisted to avoid holes at the increase. Increase as follows: *Work 20 stitches, 1 yarn over*, repeat from *-* 7 times, work the rest of row. KNITTING TIP A.1: On row 6 in diagram A.1 (row with yarn overs) work as follows: 3 stitches in garter stitch, A.1 over the next 152 stitches, work 1 stitch in stockinette stitch and finish with 3 stitches in garter stitch. ---------------------------------------------------------- START THE PIECE HERE: ---------------------------------------------------------- BABY BLANKET - SHORT OVERVIEW OF THE PIECE: Worked back and forth on circular needle, bottom up. Work lace edge A.3 at the top of baby blanket. BABY BLANKET: Cast on 159 stitches on circular needle size 3.5 mm = US 4 with Cotton Merino. Work first row as follows from right side: 3 stitches in GARTER STITCH - see explanation above - A.1 over the next 153 stitches, finish with 3 stitches in garter stitch – see KNITTING TIP A.1. Continue until A.1 has been worked 1 time vertically. REMEMBER THE KNITTING GAUGE! Then work as follows from right side: 3 stitches in garter stitch, A.2 over the next 152 stitches (= 19 repetitions of 8 stitches), work 1 stitch in stockinette stitch and finish with 3 stitches in garter stitch. Continue pattern like this. Work until piece measures approx. 63 cm = 24¾", adjust so that last row is last row in a repetition of A.2. On next row (= from wrong side and last row in A.2) increase 7 stitches evenly - read INCREASE TIP = 166 stitches. Then work as follows from right side: 3 stitches in garter stitch, A.3 over the next 160 stitches (= 10 repetitions of 16 stitches), finish with 3 stitches in garter stitch. Work A.3 1 time vertically (there are now 236 stitches on needle), then loosely bind off by knitting, cut and fasten the yarn. |
|||||||||||||||||||
Diagram explanations |
|||||||||||||||||||
|
|||||||||||||||||||
 |
|||||||||||||||||||
 |
|||||||||||||||||||
Have you finished this pattern?Tag your pictures with #dropspattern #memorymakerblanket or submit them to the #dropsfan gallery. Do you need help with this pattern?You'll find 17 tutorial videos, a Comments/Questions area and more by visiting the pattern on garnstudio.com. © 1982-2026 DROPS Design A/S. We reserve all rights. This document, including all its sub-sections, has copyrights. Read more about what you can do with our patterns at the bottom of each pattern on our site. |
|||||||||||||||||||


With over 40 years in knitting and crochet design, DROPS Design offers one of the most extensive collections of free patterns on the internet - translated to 17 languages. As of today we count 324 catalogs and 12290 patterns - 12280 of which are translated into English (US/in).
We work hard to bring you the best knitting and crochet have to offer, inspiration and advice as well as great quality yarns at incredible prices! Would you like to use our patterns for other than personal use? You can read what you are allowed to do in the Copyright text at the bottom of all our patterns. Happy crafting!
Post a comment to pattern DROPS Baby 33-35
We would love to hear what you have to say about this pattern!
If you want to leave a question, please make sure you select the correct category in the form below, to speed up the answering process. Required fields are marked *.