
Popular categories
Looking for a yarn?


Comments / Questions (35)
![]() Mandy wrote:
Mandy wrote:
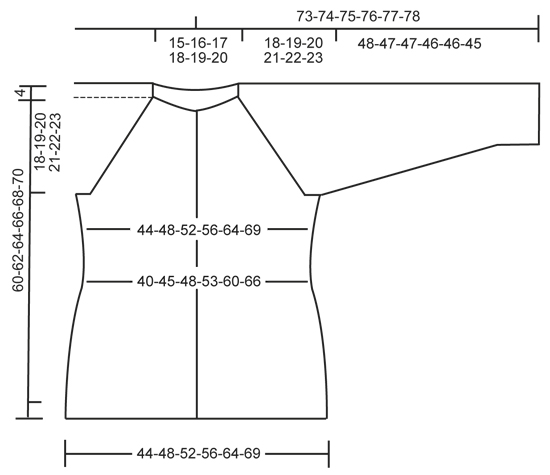
Is there an error in the pattern, under yoke instructions after completing the increases should the garment not measure 18-19-20-21-22-23 as per diagram instead of what the instructions say 22-23-24-25-26-27?
04.06.2019 - 23:58DROPS Design answered:
Dear Mandy, when all increases for raglan are done, piece measures 18-19-20-21-22-23 from cast on row and 22-23-24-25-26-27 cm from the shoulder - as shown in diagram (the 4 cm on the top are for shoulder). Happy knitting!
05.06.2019 - 10:17
![]() Helena Maine wrote:
Helena Maine wrote:
When working on the body, after 3 decreases it says "when piece measures (18,19,20cm...) start decreasing. 20cm from where. My piece already measures for large size 36cm from the neck. Does it mean 20cm from the last decrease? I am confused when I should start to increase again. If I follow the increases after the given measurements, the garment will be much longer than 44cm for large size, before the cast off.
19.03.2019 - 22:31DROPS Design answered:
Dear Mrs Maine, measurements under body (and under sleeves) are taken from where you divided sleeves and body at the end of yoke. Happy knitting!
20.03.2019 - 08:58
![]() Anna wrote:
Anna wrote:
Also, ich habe mal den Umschlag auf die linke Nadel gelegt und rechts (verschränkt=vorderer Faden) abgestrickt und dann abgekettet. Da entseht so ein Mini-Pikot und die Abkettkante wird damit erweitert. Ist das so gemeint?
23.01.2019 - 16:11DROPS Design answered:
Liebe Anna, die Abkettkante muss locker sein, deshalb strickt man Umschläge nach jeder 4. Masche, es soll kein echten Pikot entstehen, nur wie im Video (siehe vorrigen Antwort) aussehen, beachten Sie daß Ihre Umschläge nicht zu locker sind. Viel Spaß beim stricken!
24.01.2019 - 09:01
![]() Anna wrote:
Anna wrote:
Hallo, mir ist das Abketten des Rumpfteils nicht verständlich (* 4 M abketten (2 M re + 2 M li), 1 Umschlag, den Umschlag re abketten *). Wenn ich einen Umschlag auf der rechten Nadel gemacht habe, wie soll ich den dann re abketten? Oder soll das so eine Art Pikot werden?
22.01.2019 - 18:00DROPS Design answered:
Liebe Anna, dieses Video zeigt, wie man mit Umschläge abkettet - die Umschläge können Sie links oder rechts abketten, das sieht man nicht. Viel Spaß beim stricken!
23.01.2019 - 08:47
![]() Sophie DC wrote:
Sophie DC wrote:
Bonsoir, Je ne suis pas sûre de bien comprendre l\'augmentation pour le raglan. Avant le marqueur, je laisse 4 mailles; donc j\'augmente les 2 premières mailles et je ensuite tricote les 2 mailles normalement juste avant le marqueur? Et après l\'augmentation, est-ce que j\'augmente directement après le marqueur ou est-ce que je tricote deux mailles et je fais ensuite les augmentations? Merci. Sophie
22.11.2018 - 22:41DROPS Design answered:
Bonjour Sophie DC, vous devez avoir 4 m jersey entre les augmentations: tricotez jusqu'à ce qu'il reste 4 m avant le marqueur, tricotez 2 fois les 2 m suivantes (il reste 2 m avant le marqueur), tricotez 2 m end, glissez votre marqueur, tricotez les 2 m suivantes à l'end, et tricotez 2 fois chacune des 2 m suivantes, continuez jusqu'au marqueur suivant et répétez ces augmentations.
23.11.2018 - 10:17
![]() Annette wrote:
Annette wrote:
Hallo liebes Drops Team, wird in der Anleitung Air oder Air mix verwendet ??? Liebe Grüße Annette
18.11.2018 - 15:05DROPS Design answered:
Liebe Annette, diese Jacke wird mit Farbe Nr 07 gestrickt, dh mit einer Farbe "mix" gennant - Sie können aber irgendeine andere Farbe - mix oder uni colour - benutzen - siehe Farbekarte,. Viel Spaß beim stricken!
19.11.2018 - 09:04
![]() Ruth Grant wrote:
Ruth Grant wrote:
Can this be knitted flat on ordinary straight needles and I’m too much of a beginner to knit in thr!
15.09.2018 - 13:40DROPS Design answered:
Dear Mrs Grant, you will find relevant informations to adjust a pattern to straight needles here. Happy knitting!
17.09.2018 - 10:15
![]() Karin wrote:
Karin wrote:
Snygg modell! Det är bättre att sticka ett VRIDET omslag från rätan, då går det lättare att sticka avigt som vanligt.
30.12.2017 - 16:21
![]() Berit wrote:
Berit wrote:
Hej! Storlek M: 23 cm från axeln. Innebär detta inklusive 4 cm resår längst upp?
21.12.2017 - 16:40DROPS Design answered:
Hej Berit, Ja det är inklusive 4 cm resår. Se även måttskissen under mönstret. Lycka till!
02.01.2018 - 10:59
![]() Sissi wrote:
Sissi wrote:
Hallo erst mal es ist eine tolle Anleitung. Nun zu meiner Frage , wird der krause Rand an den Taschen eingeschlagen oder dient er als Zierrand und ist sichtbar? Im vorraus vielen dank.
31.10.2017 - 12:15DROPS Design answered:
Liebe Sissi, diese Krausmaschen dienen als Zierrand und sind sichtbar. Viel Spaß beim stricken!
31.10.2017 - 15:36
|
|
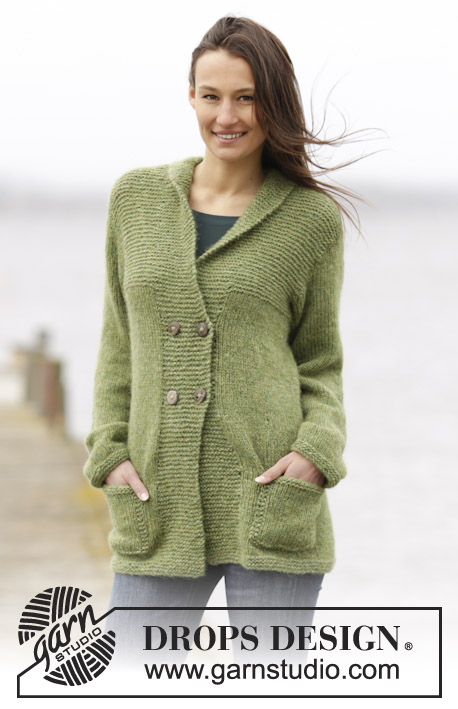
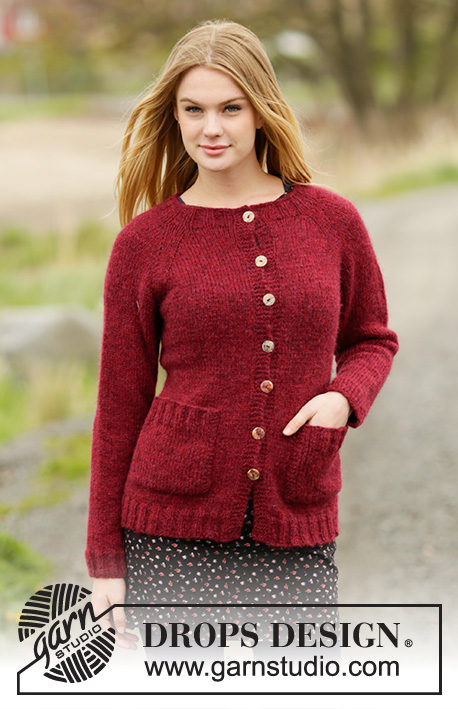
Winter Wine Cardigan#winterwinecardigan |
|
 |
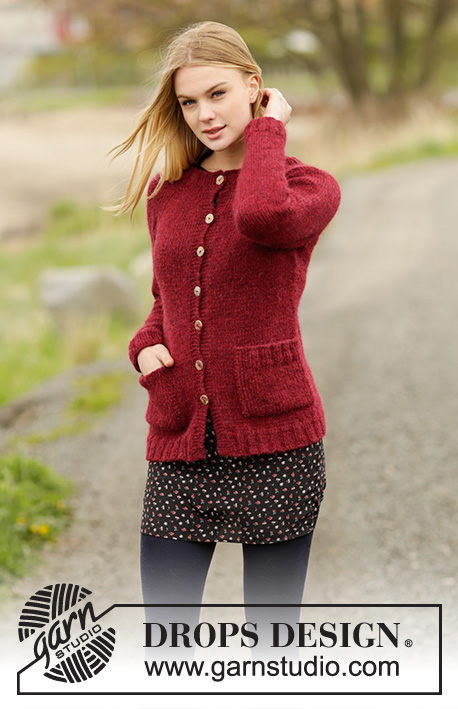 |
Knitted DROPS jacket with raglan and pockets in ”Air”. Worked top down. Size: S - XXXL.
DROPS 164-21 |
|
|
BUTTONHOLES: Dec for buttonholes on right band. Dec for buttonholes at the end of a row from RS as follows: 1 buttonhole = work until 5 sts remain on needle (= band), K 1, K the next 2 tog, 1 YO, K last 2 sts. Dec for buttonholes when piece measures: SIZE S: 2, 10, 18, 26, 34, 42 and 50 cm / ¾",4",7",10¼",13½",16½",19¾" SIZE M: 2, 10, 18, 26, 35, 43 and 52 cm / ¾",4",7",10¼",13¾",17",20½" SIZE L: 2, 10, 18, 27, 36, 45 and 54 cm / ¾",4",7",10½",14¼",17¾",21¼" SIZE XL: 2, 11, 20, 29, 39, 47 and 56 cm / ¾",4½",8",11½",15¼",18½",22" SIZE XXL: 2, 10, 18, 26, 34, 42, 50 and 58 cm / ¾",4",7",10¼",13½",16½",19¾",22¾". SIZE XXXL: 2, 10, 18, 26, 35, 43, 51 and 60 cm / ¾",4",7",10¼",13¾",17",20",23½". RAGLAN: All inc are done from RS. Inc 2 st on each side of every raglan as follows (= 16 sts inc): Inc as follows before 4 sts in stockinette st and marker: K 2 in the next 2 sts (i.e. work in front and back loop of st), 2 sts in stockinette st = 2 sts inc. Inc as follows after marker and 2 sts in stockinette st: K 2 in the next 2 sts (i.e. work in front and back loop of st) = 2 sts inc. Inc 1 st on each side of every raglan as follows (= 8 sts inc): Inc as follows before 2 sts in stockinette st and marker: 1 YO, 2 sts in stockinette st. Inc after marker as follows: 2 sts in stockinette st, 1 YO. P YOs twisted on next row to avoid holes. INCREASE TIP: Inc as follows before 2 sts in stockinette st and marker: 1 YO, 2 sts in stockinette st. Inc after marker as follows: 2 sts in stockinette st, 1 YO. P YOs twisted on next row to avoid holes. DECREASE TIP: Dec as follows before marker: Work until 3 sts remain before marker, K 2 tog, K 1. Dec as follows after marker: K 1, slip 1 st as if to K, K 1, psso ---------------------------------------------------------- JACKET: Work jacket back and forth, top down on circular needle. Work sleeves in the round on circular needle/double pointed needles. YOKE: Cast on 76-84-88-96-100-104 sts on circular needle size 4.5 mm / US 7 with Air. P 1 row from WS, then work as follows - from RS: 5 sts in GARTER ST (= band) - see explanation above, rib (K 2/ P 2) until 7 sts remain, K 2 and 5 sts in garter st (= band). Dec for BUTTONHOLES on right band - see explanation above. When rib measures 4 cm / 1½", K 1 row from RS while inc 6-6-6-10-22-30 sts evenly = 82-90-94-106-122-134 sts. Switch to circular needle size 5 mm / US 8. Now work as follows (from WS): 5 sts in garter st, P 11-13-14-17-21-24 (= right front piece), insert a marker, P 14 (= sleeve), insert a marker, P 22-26-28-34-42-48 (= back piece), insert a marker, P 14 (= sleeve), insert a marker, P 11-13-14-17-21-24 (= left front piece), 5 sts in garter st. REMEMBER THE KNITTING GAUGE Continue with stockinette st, AT THE SAME TIME on next row from RS beg inc for RAGLAN – see explanation above! Inc 2 sts on each side of every marker on every row from RS 2-3-4-4-5-6 times in total. Then inc 1 st on each side of every marker on every row from RS 18-18-18-19-19-19 times in total = 258-282-302-322-354-382 sts. Piece measures 22-23-24-25-26-27 cm / 8¾"-9"-9½"-9¾"-10¼"-10⅝" from shoulder. Now work as follows (from WS): Work the first 38-42-45-49-55-60 sts (= front piece), slip the next 58-62-66-68-72-76 sts on a stitch holder (= sleeve), cast on 8 new sts under sleeve (insert a marker in the middle of these new sts), work the next 66-74-80-88-100-110 sts (= back piece), slip the next 58-62-66-68-72-76 sts on a stitch holder (= sleeve), cast on 8 new sts under sleeve (insert a marker in the middle of these new sts), work the remaining 38-42-45-49-55-60 sts (= front piece). NOW MEASURE THE PIECE FROM HERE. BODY: There are now 74-82-88-96-108-118 sts for back piece and 42-46-49-53-59-64 sts for each front piece (= 158-174-186-202-226-246 sts in total). Continue with stockinette st and garter st on band as before. When piece measures 4 cm / 1½", dec 1 st on each side of each marker - READ DECREASE TIP! Repeat dec every 4-4½-5-5½-6-6½ cm / 1½"-1¾"-2"-2¼"-2⅜"-2⅝" 2 more times = 146-162-174-190-214-234 sts. When piece measures 18-19-20-21-22-23 cm / 7"-7½"-8"-8¼"-8 ¾"-9", inc 1 st on each side of every marker – see INCREASE TIP. Repeat inc every 8 cm / 3⅛" 2 more times = 158-174-186-202-226-246 sts. When piece measures 37-38-39-40-41-42 cm / 14½"-15"-15¼"-15¾"-16⅛"-16½", dec 2-2-2-2-2-2 sts evenly on a row from WS, on next row from RS work as follows (switch to circular needle size 4.5 mm / US 7): 5 sts in garter st, rib (K 2/ P 2) until 7 sts remain, K 2 and 5 sts in garter st. When piece measures 42-43-44-45-46-47 cm / 16½"-17"-17¼"-17¾"-18"-18½", loosely bind off as follows: bind off 5 band sts, * bind off 4 sts ( 2 K + 2 P), 1 YO, bind off YO *, repeat from *-* until 7 sts remain, bind off these sts. SLEEVE: Work sleeve in stockinette st in the round on double pointed needles. There are 58-62-66-68-72-76 sts for each sleeve. Slip sts from stitch holder back on double pointed needles size 5 mm / US 8 and cast on 8 new sts under sleeve = 66-70-74-76-80-84 sts. Work in stockinette st in the round, AT THE SAME TIME insert a marker in the middle of the new sts under sleeve (i.e. 4 sts on each side of marker). NOW MEASURE THE PIECE FROM HERE. When piece measures 4 cm / 1½", dec 1 st on each side of marker - READ DECREASE TIP. Repeat dec approx. every 3-2½-2½-2½-2-2 cm / 1⅛"-⅞"-⅞"-⅞"-¾"-¾" 12-14-14-15-15-17 more times = 40-40-44-44-48-48 sts. When sleeve measures 44-43-43-42-42-41 cm / 17¼"-17"-17"-16½"-16½"-16", switch to double pointed needles size 4.5 mm / US 7 and work rib (K 2/P 2) over all sts. When sleeve measures 48-47-47-46-46-45 cm / 19"-18½"-18½"-18"-18"-17¾", bind off with K over K and P over P. Work the other sleeve the same way. ASSEMBLY: Sew the openings under the sleeves. POCKET: Worked back and forth on circular needle. Cast on 28-28-28-32-32-32 sts on circular needle size 5 mm / US 8 with Air and work in stockinette st with 3 edge sts in garter st in each side. When pocket measures 13-13-13-15-15-15 cm / 5"-5"-5"-6"-6"-6" (adjust so that next row is worked from RS), switch to circular needle size 4.5 mm / US 7. Then work as follows: 3 sts in garter st, (K 2, P 2) until 5 sts remain, K 2, 3 sts in garter st. Work in rib for 4 cm / 1½", bind off. Knit another pocket. Sew pockets on to jacket, approx. 7 cm / 2¾" from bottom edge and approx. in the middle on front piece. |
|
 |
|
Have you finished this pattern?Tag your pictures with #dropspattern #winterwinecardigan or submit them to the #dropsfan gallery. Do you need help with this pattern?You'll find 23 tutorial videos, a Comments/Questions area and more by visiting the pattern on garnstudio.com. © 1982-2026 DROPS Design A/S. We reserve all rights. This document, including all its sub-sections, has copyrights. Read more about what you can do with our patterns at the bottom of each pattern on our site. |
|


With over 40 years in knitting and crochet design, DROPS Design offers one of the most extensive collections of free patterns on the internet - translated to 17 languages. As of today we count 324 catalogs and 12290 patterns - 12280 of which are translated into English (US/in).
We work hard to bring you the best knitting and crochet have to offer, inspiration and advice as well as great quality yarns at incredible prices! Would you like to use our patterns for other than personal use? You can read what you are allowed to do in the Copyright text at the bottom of all our patterns. Happy crafting!
Post a comment to pattern DROPS 164-21
We would love to hear what you have to say about this pattern!
If you want to leave a question, please make sure you select the correct category in the form below, to speed up the answering process. Required fields are marked *.