
Popular categories
Looking for a yarn?


Comments / Questions (46)
![]() Syberthe Langedijk wrote:
Syberthe Langedijk wrote:
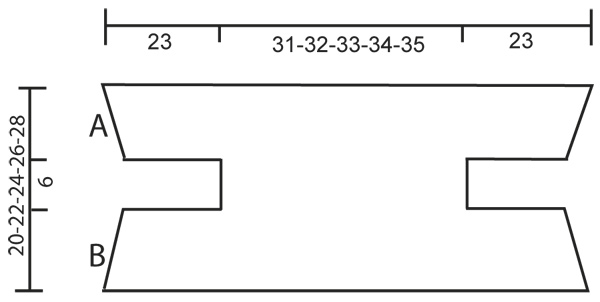
Ik begrijp iets niet aan het patroon: maas a en b aan beide zijkanten. A en B vormen toch de respectievelijke linker- en rechtervooronder-en bovenpanden? En de 6 cm uitsparingen moeten de armsgaten zijn. Dan is er toch geen sprake van mazen , maar eerder van gewoon met een steekje vastzetten?
15.01.2015 - 14:08DROPS Design answered:
Hoi Syberthe. A en B zijn de naden midden op de voorpanden. Je naait/maast deze stukken aan elkaar.
12.02.2015 - 17:23
![]() Claudia wrote:
Claudia wrote:
Thank you! Seems I got confused because I used a slightly different yarn and therefore needed to decrease in ALL rows. So I will begin to increase right away...
11.12.2014 - 13:31Claudia wrote:
I have knitted the first part of the body and the middle part of the body with less stitches. I thought I would now have to increase the stitches in the same way as I have decreased them before. BUT the pattern says that I have to knit 3 more cm (for size M) BEFORE I begin the increase again. Does that make sense? Doesn't the second part (where we increase stitches) become BIGGER than the first part when I knit THOSE THREE CENITIMETERS before increasing?? This is puzzling for me...
10.12.2014 - 19:57DROPS Design answered:
Dear Claudia, both parts will be the same just reversed, you started with dec every other row a total of 4 times then continue until work measures 8 cm - for 2nd part, work first until 17 cm (= 3 more cm) and start inc. Happy knitting!
11.12.2014 - 09:49
![]() LAURENCE wrote:
LAURENCE wrote:
Bonjour je ne comprends pas au niveau de la bordure ce qu'il fait faire à 12 cm: a quoi correspnd "la moitie des mailles de la partie du dessus" ce n'est pas clair sur combien de cote doit on faire des augmentations? merci
29.10.2014 - 16:50DROPS Design answered:
Bonjour Laurence, on augmente dans la partie supérieure de la bordure,c'est-à-dire toute la partie qui va former le col (et non celle qui sera en bas du dos) - on augmente 1 m env dans chacune des sections 4 m env dans cette partie. Bon tricot!
29.10.2014 - 17:33
![]() Mette Risbjerg wrote:
Mette Risbjerg wrote:
Jeg har ledt længe på hjemmesiden. Hvor finder jeg et målskema for kvinder, så jeg kan se brystvidden og taljevidden for S og M? Vh Mette
29.12.2013 - 20:10DROPS Design answered:
Hej Mette. Se nederst på mønstret. Her på skitsen ser du målene i alle str i cm. Du kan da f.eks se at den totale bredde af boleroen her er 23+31+23 = 77 cm (str S) osv.
30.12.2013 - 17:19
![]() Anton wrote:
Anton wrote:
Erst die Arbeit fertig haben DANN Fragen stellen???
06.11.2013 - 20:06
![]() Nicole wrote:
Nicole wrote:
Aber an welcher Stelle der Anleitung kommt das denn vor? Man soll doch an den Seiten (LG.Anleitung) abketten, nicht zusammenstricken. Oder ist das damit gemeint? Wenn ja, weiß ich nicht, wann ich 2 Re bzw. 2 li zus.stricken soll.
06.11.2013 - 17:49DROPS Design answered:
Liebe Nicole, Sie können die M sehr gut einfach abketten, dann brauchen Sie das Video nicht. Wenn man zusammenstricken will, kann man diese Technik benutzen.
07.11.2013 - 09:20
![]() Nicole wrote:
Nicole wrote:
Ich habe noch eine Frage: Ihr habt u.a. das Video "zwei li. zusammenstricken" angegeben. An welcher Stelle verwende ich dies?
04.11.2013 - 15:37DROPS Design answered:
Liebe Nicole, diese Technik braucht man an den Stellen, an denen im Perlmuster 2 Maschen links zusammengestrickt werden.
06.11.2013 - 07:54
![]() Nicole wrote:
Nicole wrote:
Ich habe das Strickstück fertig. Allerdings rollt sich bei mir die Abkettkante ziemlich nach aussen. Was habe ich falsch gemacht?
03.11.2013 - 18:53DROPS Design answered:
Liebe Nicole, feuchten Sie den Bolero am besten an und bringen ihn durch Spannen in Form.Gutes Gelingen!
05.11.2013 - 08:13
![]() Pambacon wrote:
Pambacon wrote:
What is bust measurement for drops 132-16 xxl
30.05.2013 - 13:51DROPS Design answered:
Dear Mrs Pambacon, back piece is 35 cm wide for this bolero. To figure out which size to work, you can have a look on another pattern (jacket) in the same catalog to check out the final measurements and choose the most fitting size. Happy knitting!
30.05.2013 - 15:31
|
|
Highland Beauty#highlandbeautybolero |
|
 |
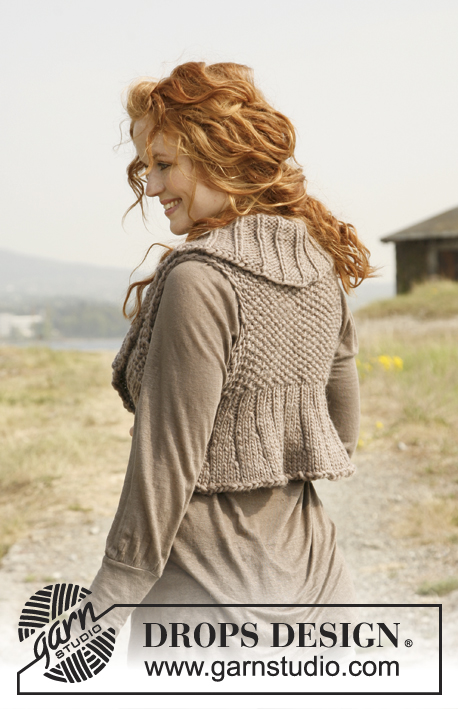 |
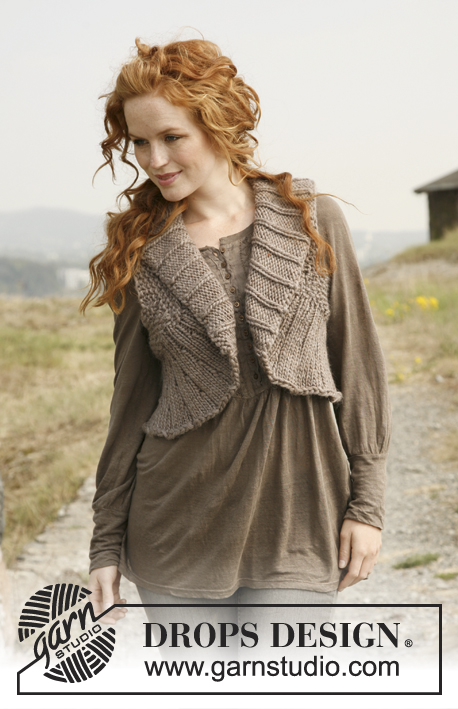
Knitted DROPS bolero in ”Snow”. Size S-XXL
DROPS 132-16 |
|
|
SEED ST: 1st row: * K 1, P 1 *, repeat from *-*. 2nd row: K over P and P over K. Repeat 2nd row. -------------------------------------------------------- BOLERO: Worked back and forth on the needle and then sewn together at the sides. Then sts are knitted up around the whole bolero and the edge is worked in the round. BODY: Cast on 70-71-72-73-74 sts on needle size 10 mm / US 15 with Snow. Work in Seed st – see explanation above - while at the same time dec 1 st in each side on every other row a total of 4 times = 62-63-64-65-66 sts. When piece measures 7-8-9-10-11 cm / 2¾"-3⅛"-3½"-4"-4⅜" loosely bind off 17 sts in each side, i.e. Bind off in beg of next 2 rows = 28-29-30-31-32 sts. Work until piece measures 13-14-15-16-17 cm / 5⅛"-5½"-6"-6¼"-6¾" and now loosely cast on 17 new sts in each side, i.e. cast on at the end of next 2 rows. Work in seed st until piece measures 15-17-19-21-23 cm / 6"-6¾"-7½"-8¼"-9". Then inc 1 st in each side on every other row a total of 4 times = 70-71-72-73-74 sts. Slip sts on a stitch holder when piece measures 20-22-24-26-28 cm / 8"-8¾"-9½"-10¼"-11". ASSEMBLY: Sew A and B tog in both sides with neat stitches - see diagram. EDGE: Worked in the round on circular needle size 10 mm / US 15. Slip sts on stitch holder back on needle and pick up 1 st in every cast on st = 140-142-144-146-148 sts - pick up sts right at the edge to avoid a bulky edge and so that the garment can be used on both on the RS and WS. P 1 round while at the same time adjusting no of sts to 141-144-147-150-153 sts around the entire body (no of sts can be divided by 3). Work rib: * K 1, P 2 *, repeat from *-*. When rib measures 4 cm / 1½", inc all P sections from 2 P sts to 3 P sts as follows: Inc by making 1 YO in the transitions from K to P and on next round P the YO's twisted (to avoid holes). After 8 cm / 3⅛", inc all P sections from 3 P sts to 4 P sts. When rib measures 12 cm / 4¾", inc over upper half of sts (i.e. in half of the rib edge) - all P sections from 4 P sts to 5 P sts, inc as before. Loosely bind off with K and P sts when edge measures 17 cm / 6¾" (all sizes). Lightly steam iron the edge. |
|
 |
|
Have you finished this pattern?Tag your pictures with #dropspattern #highlandbeautybolero or submit them to the #dropsfan gallery. Do you need help with this pattern?You'll find 5 tutorial videos, a Comments/Questions area and more by visiting the pattern on garnstudio.com. © 1982-2026 DROPS Design A/S. We reserve all rights. This document, including all its sub-sections, has copyrights. Read more about what you can do with our patterns at the bottom of each pattern on our site. |
|


With over 40 years in knitting and crochet design, DROPS Design offers one of the most extensive collections of free patterns on the internet - translated to 17 languages. As of today we count 324 catalogs and 12290 patterns - 12280 of which are translated into English (US/in).
We work hard to bring you the best knitting and crochet have to offer, inspiration and advice as well as great quality yarns at incredible prices! Would you like to use our patterns for other than personal use? You can read what you are allowed to do in the Copyright text at the bottom of all our patterns. Happy crafting!
Post a comment to pattern DROPS 132-16
We would love to hear what you have to say about this pattern!
If you want to leave a question, please make sure you select the correct category in the form below, to speed up the answering process. Required fields are marked *.