
Popular categories
Looking for a yarn?


Comments / Questions (64)
![]() Monique wrote:
Monique wrote:
Ik heb de bolero gebreid en de delen a-a en b-b 7 cm aan elkaar genaaid. Is het de bedoeling dat ie naad onder de armen loopt? Zoals ik het nu zie loopt hij over de voorkant. Ik krijg er geen zicht op, dus graag uw hulp. Mv Monique
25.03.2026 - 14:00DROPS Design answered:
Dag Monique,
De Bolero wordt overdwars gebreid van de ene zijkant via het achterpand naar de andere zijkant. De pijl in de tekening onderaan geeft de breirichting aan. In figuur 1 is de bolero gevouwen. De rechte staande lijnen zijn de naden die je aan elkaar naait. De rondingen zijn de armsgaten. De aan elkaar genaaide delen lopen vanaf de oksel/het armsgat naar de voorrand. Als je foto 1 of 3 goed bekijkt (even uitvergroten), zie een beetje een onderbreking in de ribbelsteek. Dat is waar het aan elkaar genaaid is.
06.04.2026 - 09:31
![]() Monique wrote:
Monique wrote:
Ik heb de bolero gebreid en aan elkaar genaaid. Klopt het dat de genaaide 7 cm aan de voorkant over het lijfje loopt?
25.03.2026 - 13:55
![]() Claudia wrote:
Claudia wrote:
Hola! Como estan? Estoy teniendo dificultades para entender las explicaciones del patron. Una vez que llego al Giro, no veo la explicación de las disminuciones, si sigo las instrucciones me queda un hueco. Gracias!
24.08.2024 - 14:20DROPS Design answered:
Hola Claudia, recuerda el Tip para elaboración del trabajo: "Al dar la vuelta en mitad del trabajo - desl el 1er pt, tensar el hilo y tejer la vuelta. Esto se hace para evitar hacer un agujero en la transición.". También puedes ver este método en este video: https://www.garnstudio.com/video.php?id=438&lang=es.
25.08.2024 - 22:37
![]() Judith wrote:
Judith wrote:
Ich habe nun diese beiden Teile gestrickt und ich komme mit dem zusammennähen nicht klar! Kann man mir das erklären, damit dieses schöne Bolero fertigstellen kann?????? Herzlichen Dank
02.08.2024 - 10:32DROPS Design answered:
Liebe Judith, das ganze Bolero wird in nur einem Teil wie bei Fig. 2 gestrickt (siehe Strickrichtung), dann falten Sie die Arbeit wie beim Fig. 1 und nächen Sie b und B + a und A zusammen (=beide Armasuschnitt) zusammen und so bekommen Sie Fig. 3. Viel Spaß beim Stricken!
02.08.2024 - 14:35
![]() Németh Mihályné wrote:
Németh Mihályné wrote:
Bolero elejét hogyan kell kötni?-hiányzik a leírásból ! Az ábra és a modell fényképen látható kötés igy hogyan egyezhet? Kérem a kötés minta kiegészítését! Köszönöm
11.02.2024 - 23:12DROPS Design answered:
Kedves Németh Mihályné! Nem hiányzik a leírásból, mert a bolerót egy darabban kötjük, nincs külön eleje és háta. A megkötött darabot félbehajtva össze kell varrni (kérem figyelje meg az ábrát a mintaleírás alatt!).
14.02.2024 - 02:43
![]() Németh Mihályné wrote:
Németh Mihályné wrote:
Bolero elejét hogyan kell kötni?-hiányzik a leírásból ! Az ábra és a modell fényképen látható kötés igy hogyan egyezhet? Kérem a kötés minta kiegészítését! Köszönöm
11.02.2024 - 23:09DROPS Design answered:
Kedves Németh Mihályné! A bolerónak NEM kötünk KÜLÖN elejét és hátát, hanem egy darabban kötjük, majd félbehajtjuk, és összevarrjuk, a varrás helyét a fotón a kislány karja előtt láthatja. Így alakul ki a boleró végleges formája. Sikeres kézimunkázást.
14.02.2024 - 02:41
![]() Stephanie Gauf wrote:
Stephanie Gauf wrote:
Bonjour , je débute dans le tricot c'est ma 2ème création. Est ce que je pourrais avoir des photos de votre travail pour me faire comprendre ce que je suis entrain de faire car la j'avoue que je suis perdu. J'ai pris la taille 7 8 ans et je suis déjà a 20 cm de hauteur depuis le milieu. Jai peur d'avoir fait une erreur.
01.04.2020 - 15:04DROPS Design answered:
Bonjour Mme Gauf, votre ouvrage doit se présenter approximativement comme dans la fig. 2 avec la flèche dans le sens du tricot: les côtés A/B et a/b sont plus long et le milieu (zig-zag) est plus court en hauteur à cause des rangs raccourcis. Vous pouvez montrer la photo de votre ouvrage à votre magasin (en l'envoyant par mail) pour qu'ils vérifient avec vous - vous pouvez également essayer de demander de l'aide à d'autres tricoteuses expérimentées sur le groupe DROPS Workshop. Bon tricot!
01.04.2020 - 15:38
![]() Ria wrote:
Ria wrote:
I have made this bolero & looks the same as fig 2. sewn a to A & b to B by the correct cm but it does not look like fig. 3 does not have curved front. What am I doing wrong please.
11.05.2018 - 17:47DROPS Design answered:
Dear Ria, after you have sew A to a B to b tog, rotate piece so that the ridges are vertically on back piece to get the same as fig. 3. (= holes are for armholes). Happy knitting!
22.05.2018 - 10:33
![]() Monique Vercammen wrote:
Monique Vercammen wrote:
Gezien kleindochter gevoelig is voor wol, zou ik deze in acryl willen breien, welke zou u mij aanraden aub
15.06.2016 - 20:08DROPS Design answered:
Hoi Monique. Wij verkopen geen acrylgarens. Je kan vervangen door 1 draad 100% katoen: DROPS Paris. Wil je toch acryl moet je contact opnemen met je winkel voor een ander alternatief. Veel plezier.
16.06.2016 - 14:17
![]() Wendy wrote:
Wendy wrote:
I have completed the knitting and can't figure out where the armholes come from and how to sew the seams? I am very frustrated with this pattern .
02.10.2015 - 01:57DROPS Design answered:
Dear Wendy, see fig. 2: armholes are a+A and b+B - sew 6-7-8 cm (see size) starting from outside towards inside - when piece is sewn tog, you will have fig.3. Happy knitting!
02.10.2015 - 09:07
|
||||||||||||||||||||||
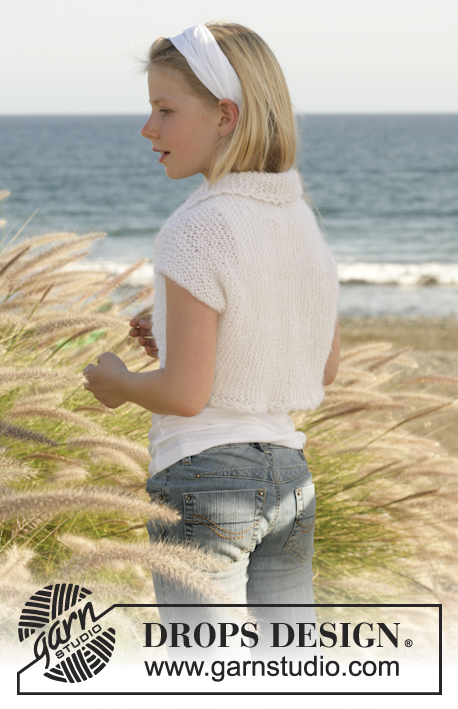
Spring Shrug#springshrug |
||||||||||||||||||||||
 |
 |
|||||||||||||||||||||
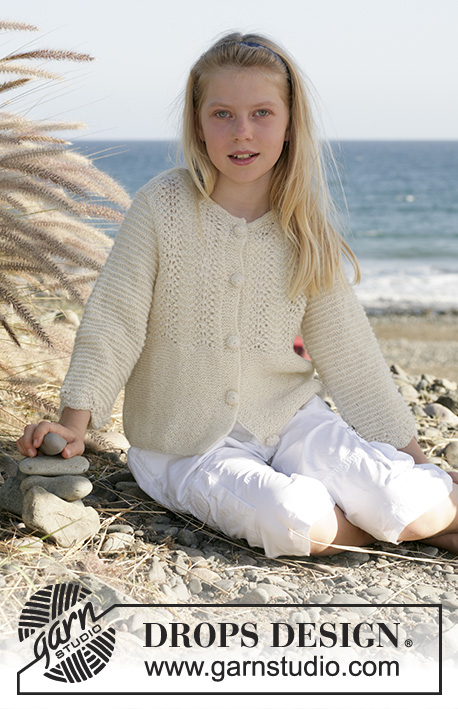
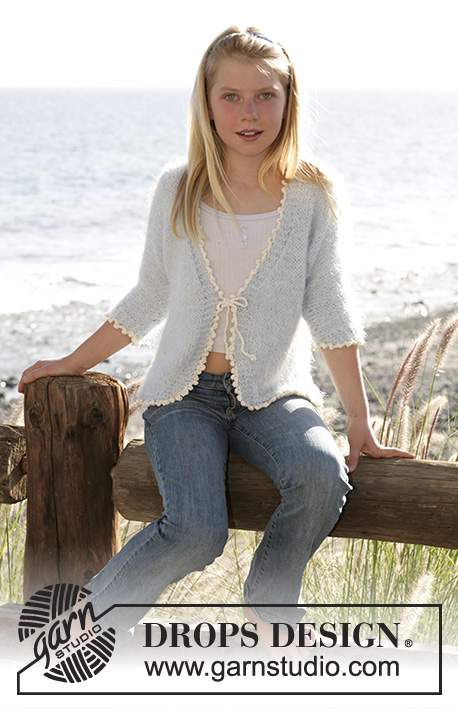
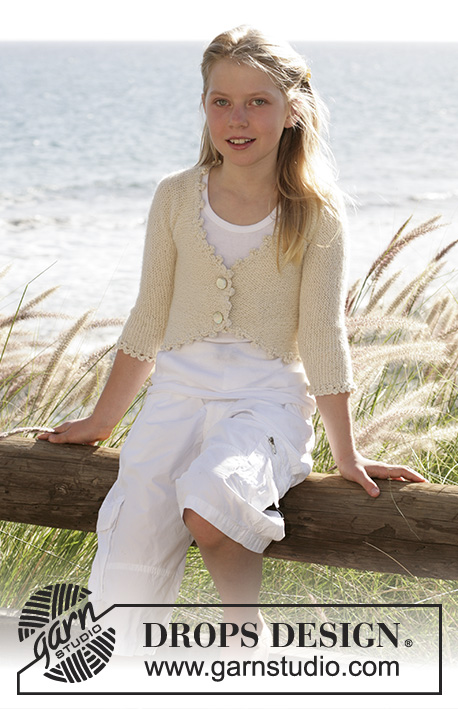
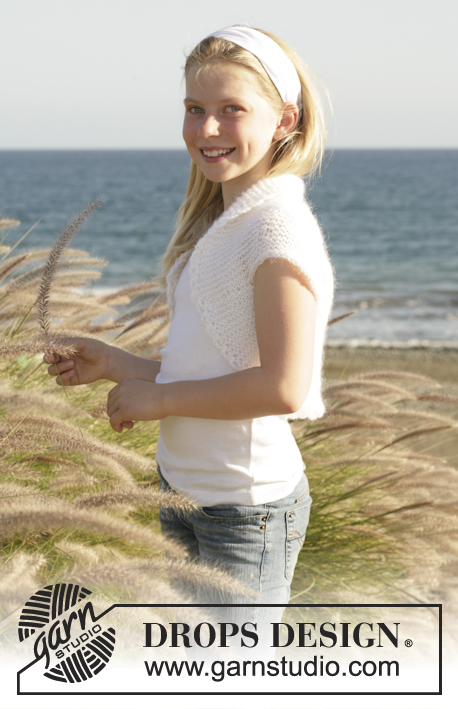
Knitted shrug in garter st, with crochet edge in DROPS Alpaca and DROPS Vivaldi. Size children 5 to 14 years.
DROPS Children 15-5 |
||||||||||||||||||||||
|
Knitting tips: When turning in the middle of the work, - slip the first st , tighten the yarn and work back. This is done to avoid a hole in the transition. Short rows: - Read knitting tips. *K 2 rows back and forth over all sts. K 18-19-20-21-22 sts, turn, K back over these sts. K over all sts, turn, K 18-19-20-21-22 sts, turn, K back over these sts. Turn, K5 rows back and forth over all sts*. Repeat from *-* SHRUG Work the shrug sideways, i.e. beg. at the side, work the back and bind off at the other side. Knit the piece in garter sts (i.e. K on all rows until finished). Cast on 54-57-60-63-66 sts on needle size 6 mm / US 10 with 1 strand of each yarn. Work with short rows – see explanation above. When the piece measures 37-41-47-52-57 cm / 14½"-16⅛"-18½"-20½"-22½" (measured from the middle of the row) and approx. 46-52-59-65-72 cm / 18"-23¼"-23¼"-25½"-28⅜" (measured from the side), bind off loosely. ASSEMBLY Fold A towards a and B towards b – see fig. 2. Sew 6-6-7-7-8 cm / 2½"-2½"-2¾"-2¾"-3" tog. at the edge each side (=12-13-13-14-14 cm /4¾"-5"-5"-5½"-5½" for arm holes). CROCHET EDGE Crochet an edge around the shrug with 1 strand of each yarn on hook size 5 mm / H as follows: 1 sc in the first garter st, ch 4, skip 4 rows of garter sts, 1 sc in the next garter st, repeat from *-* and finish with 1 sl st at the beg. of round. |
||||||||||||||||||||||
Diagram explanations |
||||||||||||||||||||||
|
||||||||||||||||||||||
 |
||||||||||||||||||||||
Have you finished this pattern?Tag your pictures with #dropspattern #springshrug or submit them to the #dropsfan gallery. Do you need help with this pattern?You'll find 7 tutorial videos, a Comments/Questions area and more by visiting the pattern on garnstudio.com. © 1982-2026 DROPS Design A/S. We reserve all rights. This document, including all its sub-sections, has copyrights. Read more about what you can do with our patterns at the bottom of each pattern on our site. |
||||||||||||||||||||||


With over 40 years in knitting and crochet design, DROPS Design offers one of the most extensive collections of free patterns on the internet - translated to 17 languages. As of today we count 325 catalogs and 12298 patterns - 12288 of which are translated into English (US/in).
We work hard to bring you the best knitting and crochet have to offer, inspiration and advice as well as great quality yarns at incredible prices! Would you like to use our patterns for other than personal use? You can read what you are allowed to do in the Copyright text at the bottom of all our patterns. Happy crafting!
Post a comment to pattern DROPS Children 15-5
We would love to hear what you have to say about this pattern!
If you want to leave a question, please make sure you select the correct category in the form below, to speed up the answering process. Required fields are marked *.