
Looking for a yarn?


Comments / Questions (25)
![]() Britta wrote:
Britta wrote:
Ich habe eine Frage zu den Abnahmen bei der Mützenspitze. Wenn ich eine linke und eine rechte Masche zusammenstricke, komme ich in der nächsten Runde mit dem Muster A3 nicht mehr zurecht.
15.12.2023 - 08:15DROPS Design answered:
Liebe Britta, nach jeden Abnahmen stricken Sie die Maschen im Muster wie zuvor so lange wie möglich ist, dh das Muster soll in der Höhe fortsetzen aber natürlich bei jeder Markierung passt es nicht immer in der Runde (nur in jeder 2. Abnahmen). Viel Spaß beim stricken!
15.12.2023 - 08:36
![]() Britta wrote:
Britta wrote:
Ich habe eine Frage zu den Abnahmen. Wenn ich eine linke und eine rechte Masche zusammenstricke, komme ich in der nächsten Runde mit dem Muster A3 nicht mehr zurecht.
13.12.2023 - 09:35DROPS Design answered:
Liebe Britta, die Abnahme wird bei der 1. Reihe in A.2 gestrickt, dann stricken Sie nur die 9 ersten Maschen vom Diagram bis die Arbeit 11 cm nach der Verteilung misst. Dann stricken Sie die andere Hälfte. In diesem Video zeigen wir, wie die beiden Hälfte dann zusammen genäht/gestrickt werden. Viel Spaß beim stricken!
13.12.2023 - 16:16
![]() Luisa wrote:
Luisa wrote:
Buongiorno, grazie per la risposta ma forse non mi sono spiegata bene. Ë ovvio, infatti che il secondo ferro sia il rovescio. Infatti il dubbio era se, essendo il secondo ferro sempre rovescio, le istruzioni vanno prese solo nell’ parte del rovescio o se, invece devo intendere: lavora il rovescio sul punto dritto e vice versa?
22.01.2023 - 12:43DROPS Design answered:
Buonasera Luisa, deve lavorare come indicato: per quanto riguarda il quadratino bianco, se sta lavorando sul diritto del lavoro lavorerà 1 maglia a diritto, se sta lavorando sul rovescio del lavoro lavorerà 1 maglia rovescio. Stessa cosa per il quadratino con la X: se sta lavorando sul diritto del lavoro lavorerà 1 maglia a rovescio, se sta lavorando sul rovescio del lavoro lavorerà 1 maglia diritto. Buon lavoro!
23.01.2023 - 22:00
![]() Luisa wrote:
Luisa wrote:
Buongiorno non mi é chiaro A1: se sono 2 Ferri il primo sarà sempre RS, mentre il secondo ferro sarà sempre WR. Quindi com’é possibile nel secondo ferro “ purl from the right side, knit from the wrong side”?
20.01.2023 - 13:52DROPS Design answered:
Buonasera Luisa, i diagrammi mostrano tutti i ferri del lavoro, quindi il 2° ferro di A.1 va lavorato dal rovescio del lavoro. Buon lavoro!
21.01.2023 - 22:19
![]() Paola wrote:
Paola wrote:
Non sono riuscita a spiegarmi... difficile fare prosegui un motivo con 1diritto ed un rovescio e contestualmente fare diminuzioni di una maglia...fa lo stesso... farò due prove con motivo o maglia rasata. grazie lo stesso
10.01.2023 - 09:05
![]() Paola wrote:
Paola wrote:
Mi riferisco alla cima del cappello...Quando il lavoro misura 5-6 cm da quando sono state riprese le maglie, inserire 6 segnapunti nel lavoro come segue: Inserire il 1° segnapunti dopo 13-15 maglie (cioè prima di una maglia a diritto), poi inserire i 4 segnapunti successivi dopo 14 maglie, ora rimangono 13-15 maglie sul giro dopo l’ultimo segnapunti e ci sono 6 segnapunti nel lavoro, prima di 1 maglia diritto. Sul giro successivo, diminuire 1 maglia all’altezza di ogni segnapunti
09.01.2023 - 21:41DROPS Design answered:
Buonasera Paola, se preferisce può lavorare le diminuzioni sul 1° ferro di A.3. Buon lavoro!
09.01.2023 - 22:58
![]() Paola wrote:
Paola wrote:
Forse secondo voi conviene per caso finire con maglia rasata piuttosto che vedere motivo sfalsato?
09.01.2023 - 18:46DROPS Design answered:
Buonasera Paola, a quale parte sta facendo riferimento? Buon lavoro!
09.01.2023 - 20:21
![]() Paola wrote:
Paola wrote:
Scusate volevo dire che ho capito che le diminuzioni si fanno sul ferro 1 del diagramma A3...
09.01.2023 - 18:34DROPS Design answered:
Buonasera Paola, a quale diminuzioni fa riferimento? Buon lavoro!
09.01.2023 - 20:22
![]() Paola wrote:
Paola wrote:
Salve, sono al punto delle diminuzioni x la cima del cappello. le diminuzioni si fanno sul 2 ferro di A3 se ho capito bene...chiedo come può continuare il motivo con un dritto e un rovescio facendo le diminuzioni...il motivo non salta? grazie
09.01.2023 - 18:29DROPS Design answered:
Buonasera Paola, a quale diminuzioni fa riferimento? Buon lavoro!
09.01.2023 - 20:22
![]() Barbara Bailey wrote:
Barbara Bailey wrote:
I need to use straight needles. Would that work out for this design? Thanks!
01.10.2022 - 18:48DROPS Design answered:
Dear Barbara, you can substitute the circular needles for straight needles, but you need to also use double-pointed needles for the part worked in the round. Happy knitting!
03.10.2022 - 00:59
|
||||||||||||||||
Garbo#garbohat |
||||||||||||||||
 |
 |
|||||||||||||||
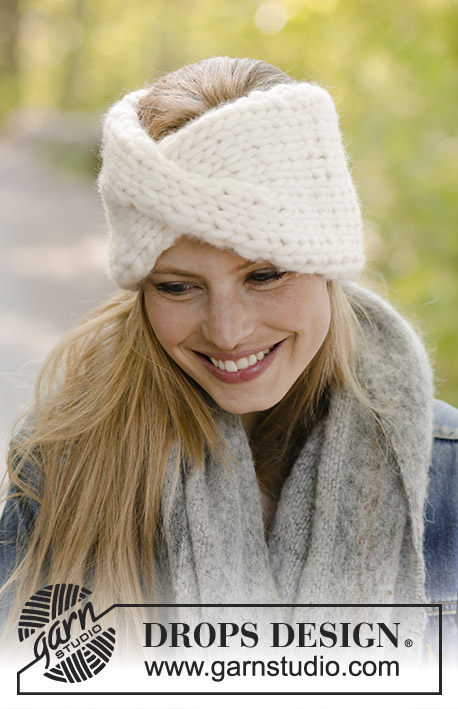
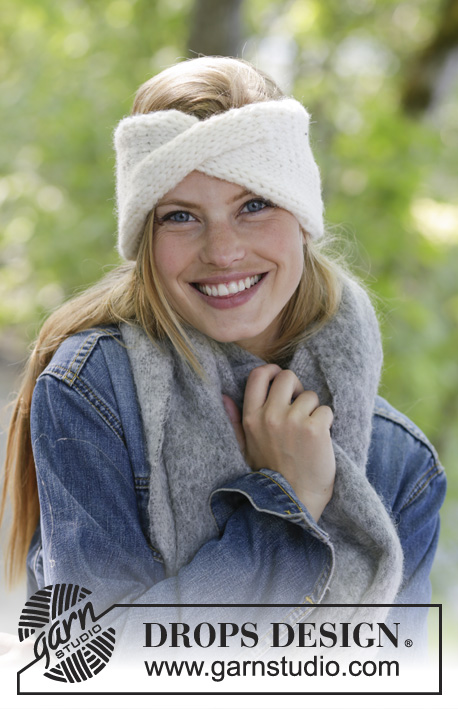
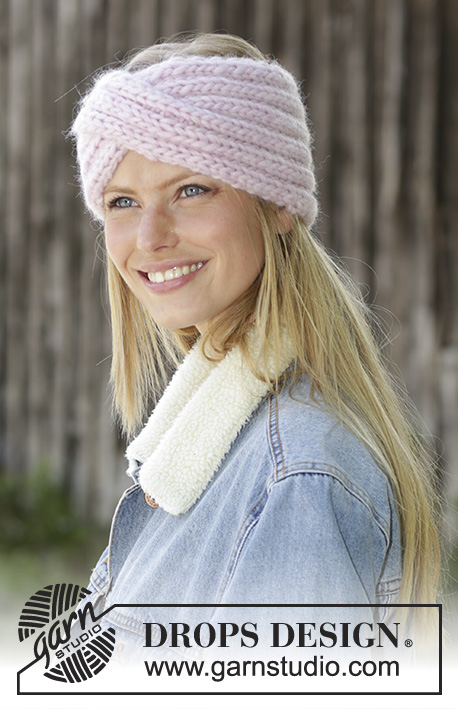
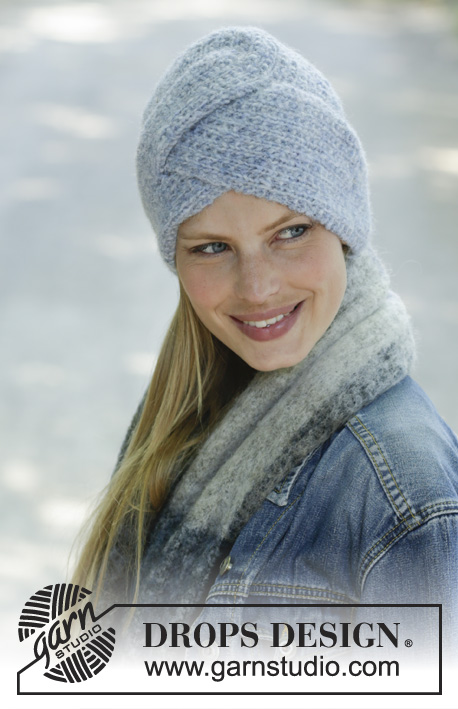
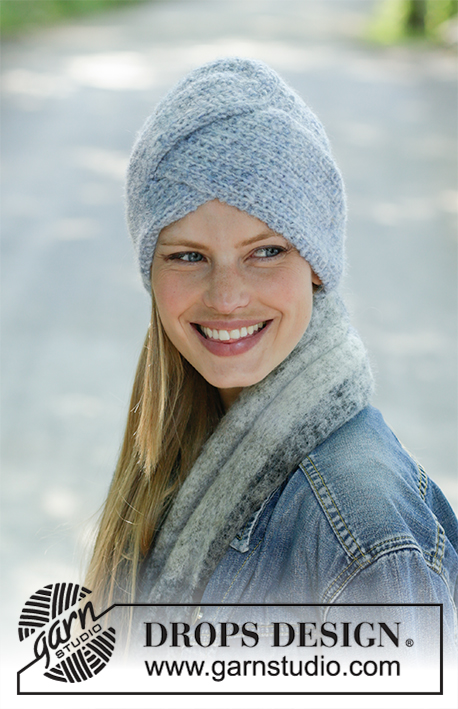
Knitted hat in DROPS Air. Piece is knitted with texture and cables at the front.
DROPS 192-12 |
||||||||||||||||
|
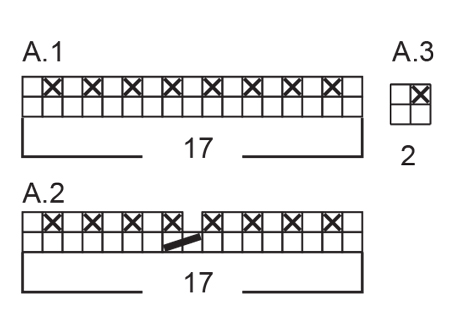
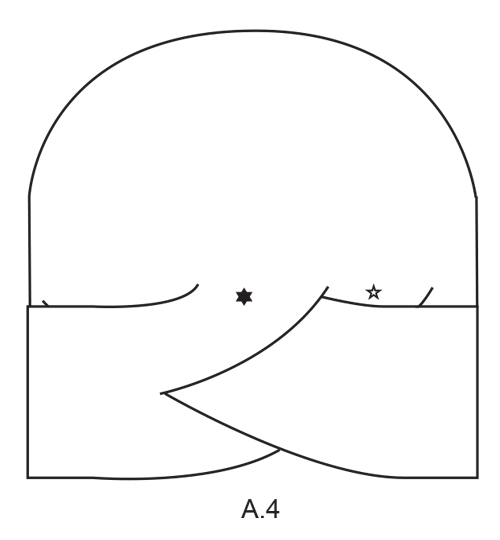
---------------------------------------------------------- EXPLANATION FOR THE PATTERN: ---------------------------------------------------------- GARTER STITCH (back and forth): 1 ridge = knit 2 rows. PATTERN: See diagrams A.1 to A.3 and illustration A.4. Diagrams show all rows in pattern seen from the right side! DECREASE TIP: Work until 1 stitch remain before marker thread, knit the next 2 stitches together (= 1 stitch decreased). Repeat at each of the remaining marker threads = 6 stitches decreased on round. ---------------------------------------------------------- START THE PIECE HERE: ---------------------------------------------------------- HAT - SHORT OVERVIEW OF THE PIECE: First work piece back and forth on circular needle in 2 parts from mid back, then sew the 2 parts together mid back and plait parts together mid front, then pick up stitches around the edge and then work in the round and decrease for hat. Switch to double pointed needles when needed. HAT: Work first part as follows: Cast on 19 stitches on circular needle size 5 mm = US 8 with Air. Work pattern back and forth as follows: 1 edge stitch in garter stitch, A.1 (= 17 stitches), 1 edge stitch in garter stitch. Continue back and forth like this until piece measures 21-22 cm = 8¼"-8¾", adjust so that next row is worked from right side. Turn and work 1 edge stitch in garter stitch, work the first 8 stitches in A.2 from right side before slipping these 9 stitches on a stitch holder. Work the remaining 9 stitches in A.2 (= 1 stitch decreased), 1 edge stitch in garter stitch = 9 stitches. Work last row in A.2 over the 9 stitches on needle. Continue back and forth with pattern as before over the 9 stitches on needle until piece measures 11 cm = 4⅜" from division (approx. 33-34 cm = 13"-13⅜" from cast-on edge) - adjust so that next row is worked from right side. Slip stitches on a stitch holder. This part is marked with a black star in illustration A.4. Slip stitches from the other stitch holder back on needle = 9 stitches. Begin from wrong side and work last row in A.2, 1 edge stitch in garter stitch. Continue pattern back and forth until piece measures 11 cm = 4⅜" (approx. 33-34 cm = 13"-13⅜" from cast-on edge) - adjust so that next row is worked from right side. Slip stitches on a stitch holder. This part is marked with a white star in illustration A.4. Work second part as follows: Cast on 19 stitches on circular needle size 5 mm = US 8 with Air. Work pattern back and forth as follows: 1 edge stitch in garter stitch, A.1 (= 17 stitches), 1 edge stitch in garter stitch. Continue back and forth like this until piece measures 33-34 cm = 13"-13⅜", adjust so that next row is worked from right side. Cut the yarn. ASSEMBLY AND PLAITING: Sew together the 2 cast-on edges mid back. Slip stitches from the different parts worked on circular needle as follows: Slip the first 9 stitches from first part (= white star) on needle, then slip the next 9 stitches from first part (= black star) on needle, place the 19 stitches on the second part over the first 9 stitches (white star) and under the next 9 stitches (= black star) and slip stitches on to needle. Parts cross mid front as shown in A.4. TOP OF HAT: Now work in the round from right side on part with white star as follows: Knit the first 8 stitches, knit the next 2 stitches together (= 1 stitch decreased in transition between part with white and black star), knit the next 7 stitches, knit the next 2 stitches together (= 1 stitch decreased in transition between part with black star and next part), knit the next 3 stitches together (= 2 stitches decreased), knit the next 15 stitches. There are now 33 stitches on needle and pattern fits every other knit stitch and every other stitch in garter stitch. Now pick up 24-26 stitches inside 1 edge stitch in garter stitch along the first part until seam mid back, then pick up 25-27 stitches the same way from seam mid back and until beginning of round = 82-86 stitches. Continue in the round with pattern A.3, and adjust so that pattern fits the entire round and over stitches on parts plaited mid front. When piece measures 5-6 cm = 2"-2⅜" from where stitches were picked up, insert 6 marker threads in piece as follows: Insert first marker thread after 13-15 stitches (i.e. before a knit stitch), then insert the next 4 marker threads after 14 stitches, 13-15 stitches now remain on round after last marker thread and there are 6 marker threads in piece, before 1 knit stitch. On next round, decrease 1 stitch at every marker thread – read DECREASE TIP! Decrease like this every other round 10 times in total = 22-26 stitches. Knit stitches together 2 by 2 = 11-13 stitches. Cut the yarn and pull it through the remaining stitches, tighten tog and fasten. Hat measures approx. 24-25 cm = 9½"-9¾". |
||||||||||||||||
Diagram explanations |
||||||||||||||||
|
||||||||||||||||
|
||||||||||||||||
|
||||||||||||||||
Have you finished this pattern?Tag your pictures with #dropspattern #garbohat or submit them to the #dropsfan gallery. Do you need help with this pattern?You'll find 19 tutorial videos, a Comments/Questions area and more by visiting the pattern on garnstudio.com. © 1982-2025 DROPS Design A/S. We reserve all rights. This document, including all its sub-sections, has copyrights. Read more about what you can do with our patterns at the bottom of each pattern on our site. |
||||||||||||||||


With over 40 years in knitting and crochet design, DROPS Design offers one of the most extensive collections of free patterns on the internet - translated to 17 languages. As of today we count 314 catalogs and 11822 patterns - 11812 of which are translated into English (US/in).
We work hard to bring you the best knitting and crochet have to offer, inspiration and advice as well as great quality yarns at incredible prices! Would you like to use our patterns for other than personal use? You can read what you are allowed to do in the Copyright text at the bottom of all our patterns. Happy crafting!
Post a comment to pattern DROPS 192-12
We would love to hear what you have to say about this pattern!
If you want to leave a question, please make sure you select the correct category in the form below, to speed up the answering process. Required fields are marked *.