Comments / Questions (10)
![]() Gaby Schuijlenburg wrote:
Gaby Schuijlenburg wrote:
Na A.2b & A1b en toevoegen A3 tussen-in, moet verder met patroon en tricot gebreid worden tot totaal 23 cm. maar hoe gebruik je patroon? Geheel A.2b/A.1b &A3 of alleen laatste 4 nld-n van A.2b/A.1b & A3.
26.05.2025 - 15:56DROPS Design answered:
Dag Gaby,
Je breit de telpatronen in zijn geheel en niet alleen de laatste 4 naalden.
27.05.2025 - 20:16
![]() Genevieve Cabrol wrote:
Genevieve Cabrol wrote:
Dans le demi devant gauche "Tricoter 2 rangs comme avant sans augmenter " Ces deux rangs ne sont pas mentionnés sur l'autre demi devant => Décalage
25.11.2024 - 11:18
![]() Genevieve Cabrol wrote:
Genevieve Cabrol wrote:
Dans le demi devant gauche "Tricoter 2 rangs comme avant sans augmenter " Ces deux rangs ne sont pas mentionnés sur l'autre demi devant => Décalage
25.11.2024 - 11:16DROPS Design answered:
Bonjour Mme Cabrol, lorsque vous tricotez le devant gauche, vous tricotez 2 fois les rangs 1 et 2 au total, puis vous tricotez encore 2 rangs de la même façon mais sans augmenter sur l'endroit = vous n'avez pas de décalage mais vous avez tricoté 6 rangs au total. Bon tricot!
25.11.2024 - 14:58
![]() Genevieve Cabrol wrote:
Genevieve Cabrol wrote:
Dans la partie AUGMENTATIONS POUR LES EMMANCHURES: RANG 1 (= sur l'endroit): Voir AUGMENTATIONS, tricoter 1 maille endroit et augmenter 1 maille inclinée à gauche, il me semble qu'il y a une erreur . C'est 3 mailles qu'il faut tricoter avant l'augmentation
25.11.2024 - 11:14DROPS Design answered:
Bonjour Mme Cabrol, merci pour votre retour, correction faite. Bonne continuation!
25.11.2024 - 14:57
![]() Andrea wrote:
Andrea wrote:
Hallo, in der Anleitung steht für Größe S beim Rückenteil 12 cm bis zu den Zunahmen für die Armausschnitte, beim Vorderteil aber 22 cm. Ist die Differenz von 10 cm richtig? Wenn nein, welches Maß stimmt? LG Andrea
18.11.2024 - 13:36DROPS Design answered:
Liebe Andrea, so stimmt es, die Schulterlinie wird etwas im Rücken sein - so haben Sie auch (10+22= 32/2 = 16 cm Armloch, wie in der Skizze). Siehe auch unter Tab Videos/Letkion wie man so einen Pullover mit europäsichen Schultern strickt. Viel Spaß beim Stricken!
18.11.2024 - 16:18
![]() Mona Robinson Webjørnsen wrote:
Mona Robinson Webjørnsen wrote:
Genser Cable Heart: Har et spørsmål når jeg skal begynne på mønster A1. De 12 første m fra retten,strikkes mønster,resten av pinnen strikkes rett. Hvordan strikker jeg fra vrangsiden?
01.11.2024 - 17:22DROPS Design answered:
Hei Mona. Oppskriften er oversendt til design avd. slik at de kan dobbeltsjekke og evnt komme med en rettelse. Flettene bør / skal stikkes fra retten. mvh DROPS Design
04.11.2024 - 14:14
![]() Elisabeth Levin wrote:
Elisabeth Levin wrote:
Hej!\r\nStämmer flätmönstret? Om jag börjar på A1a från rätsidan så blir fjärde varvet från avigsidan. Då borde inte man sticka maskorna med flätstickan räta. För då blir det avigt i flätans första varv. Eller tänker jag fel?\r\n/Elisabeth
31.10.2024 - 21:01
![]() Ela wrote:
Ela wrote:
Dzień dobry Dlaczego w tym wzorze przy tym połączeniu włóczek użyte są druty nr 5,5? A w zakładce połączenia włóczek przy tych włóczkach zalecacie nr 7. Pozdrawiam
25.10.2024 - 22:32DROPS Design answered:
Witaj Elu, projektant mógł zaprojektować ten sweter na cieńszych drutach, ponieważ mogło mu zależeć na innym efekcie, sweter będzie bardziej zbity. Pamiętaj, że podany rozmiar drutów jest orientacyjny. Ważne, abyś otrzymała próbkę jaka jest we wzorze. Pozdrawiamy!
28.10.2024 - 09:06
![]() Soile wrote:
Soile wrote:
Hei, onko virhe olkapään neuleohjeessa? Langankierrot/lisäykset siirtävät erikohtaan palmikon? Kiitos vastauksesta.
24.10.2024 - 22:01DROPS Design answered:
Hei, palmikoiden kohdalla ei tehdä lisäyksiä. Mallineule jatkuu kuten aiemmin vaikka työhön luodaan uusia silmukoita pääntietä varten. Lisätyt silmukat neulotaan sileänä neuleena.
25.10.2024 - 17:53
![]() Andrews wrote:
Andrews wrote:
Est il possible de tricoter ce modèle avec 2 Aiguilles et non avec une aiguille circulaire ? Et comment avoir le modèle ?
15.10.2024 - 07:43DROPS Design answered:
Bonjour Mme Andrews, vous trouverez sous les onglets Vidéos et Leçons comment ce pull se commence, pour les parties tricotées en rond, cette leçon pourra vous aider à faire les ajustements nécessaires (pensez par ex à ne pas faire la couture des côtés avant de relever les mailles des manches pour pouvoir les tricoter plus facilement. Bon tricot!
15.10.2024 - 10:30
Cable Heart#cableheartsweater |
|||||||||||||||||||||||||
 |
 |
||||||||||||||||||||||||
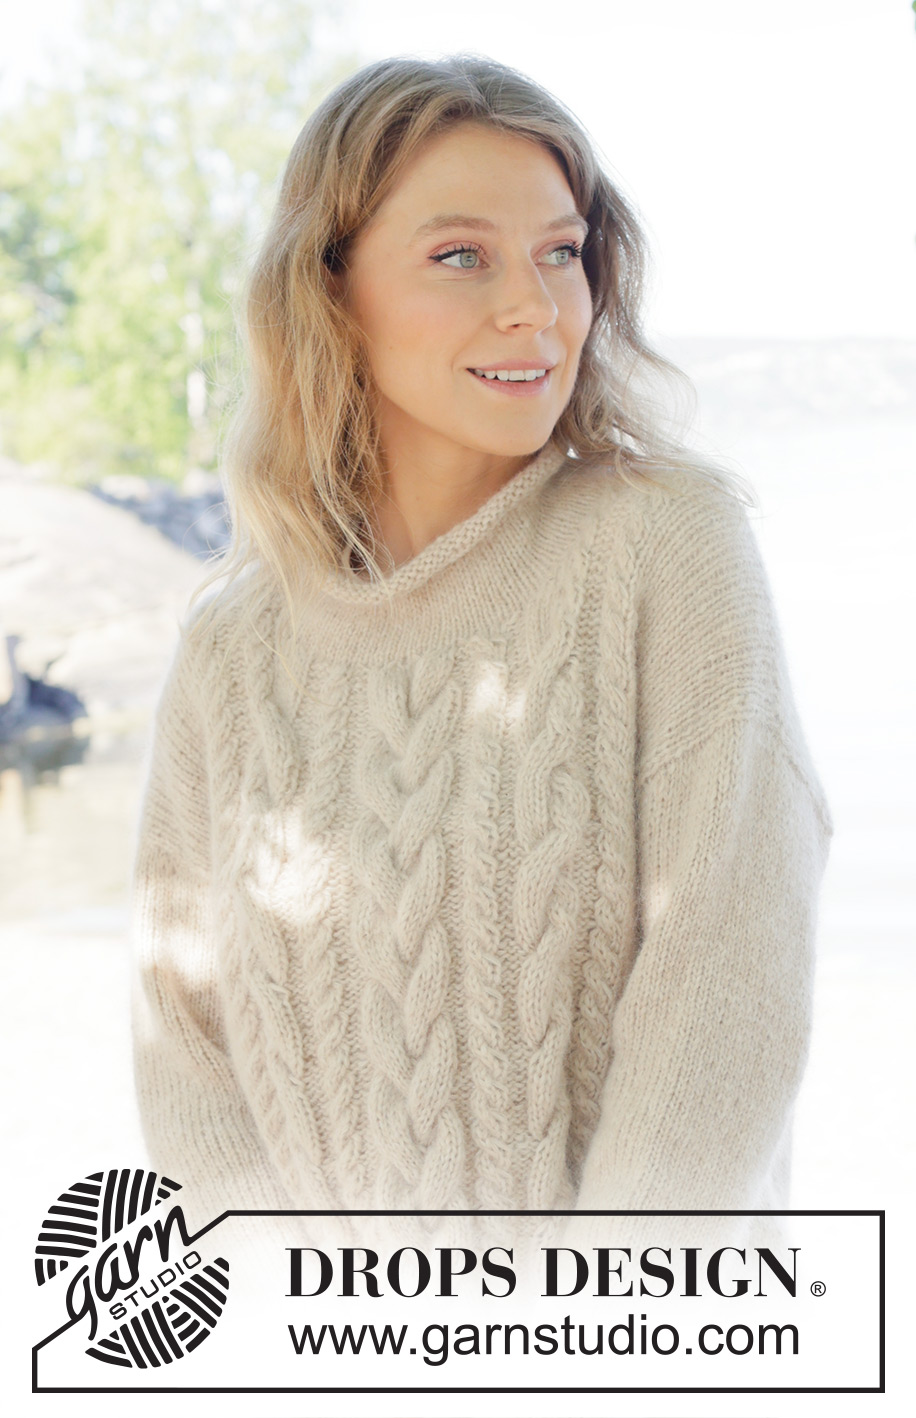
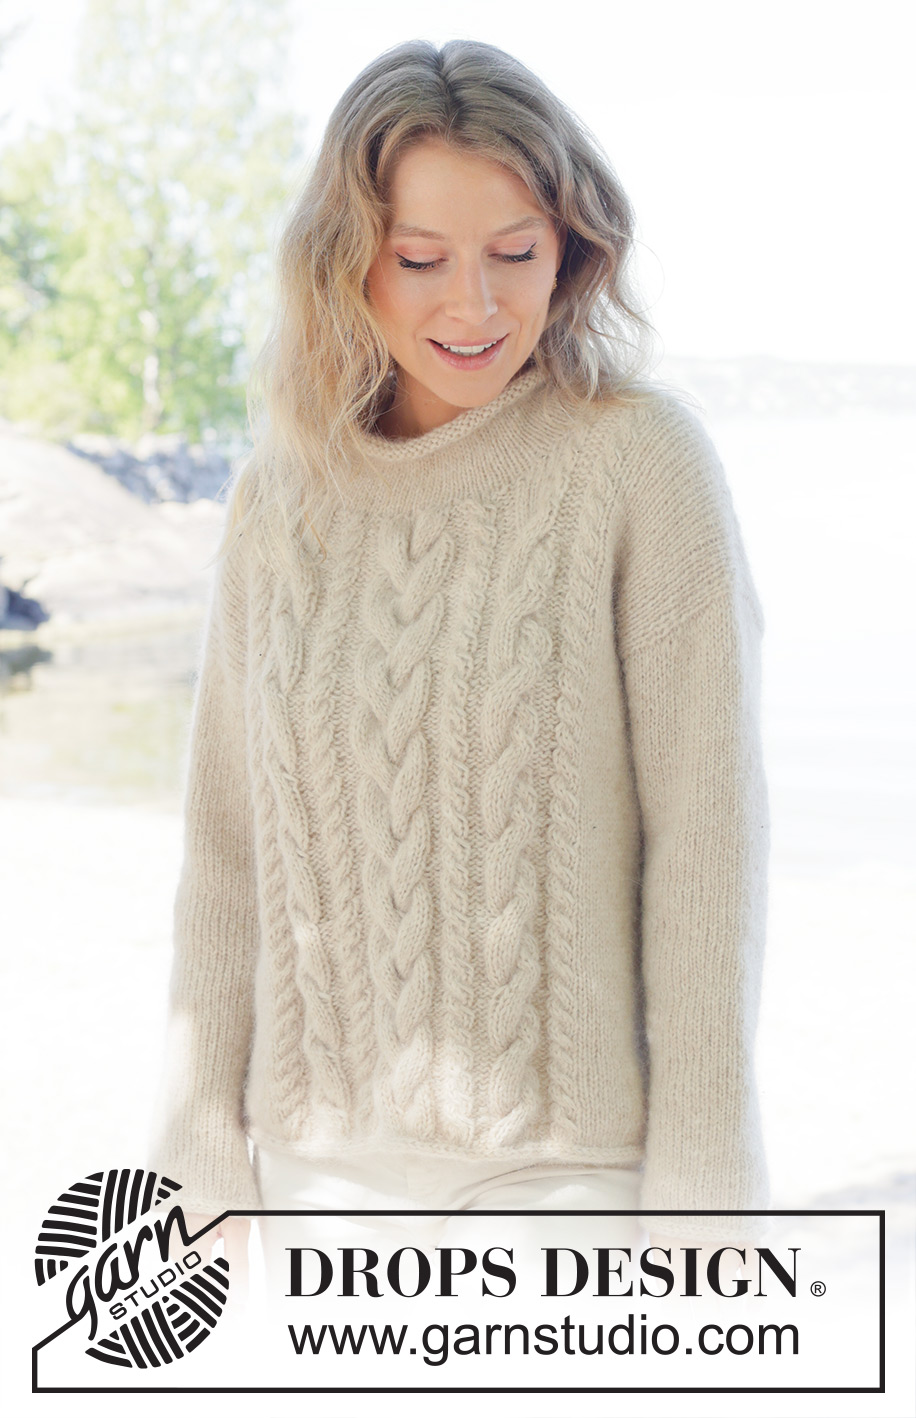
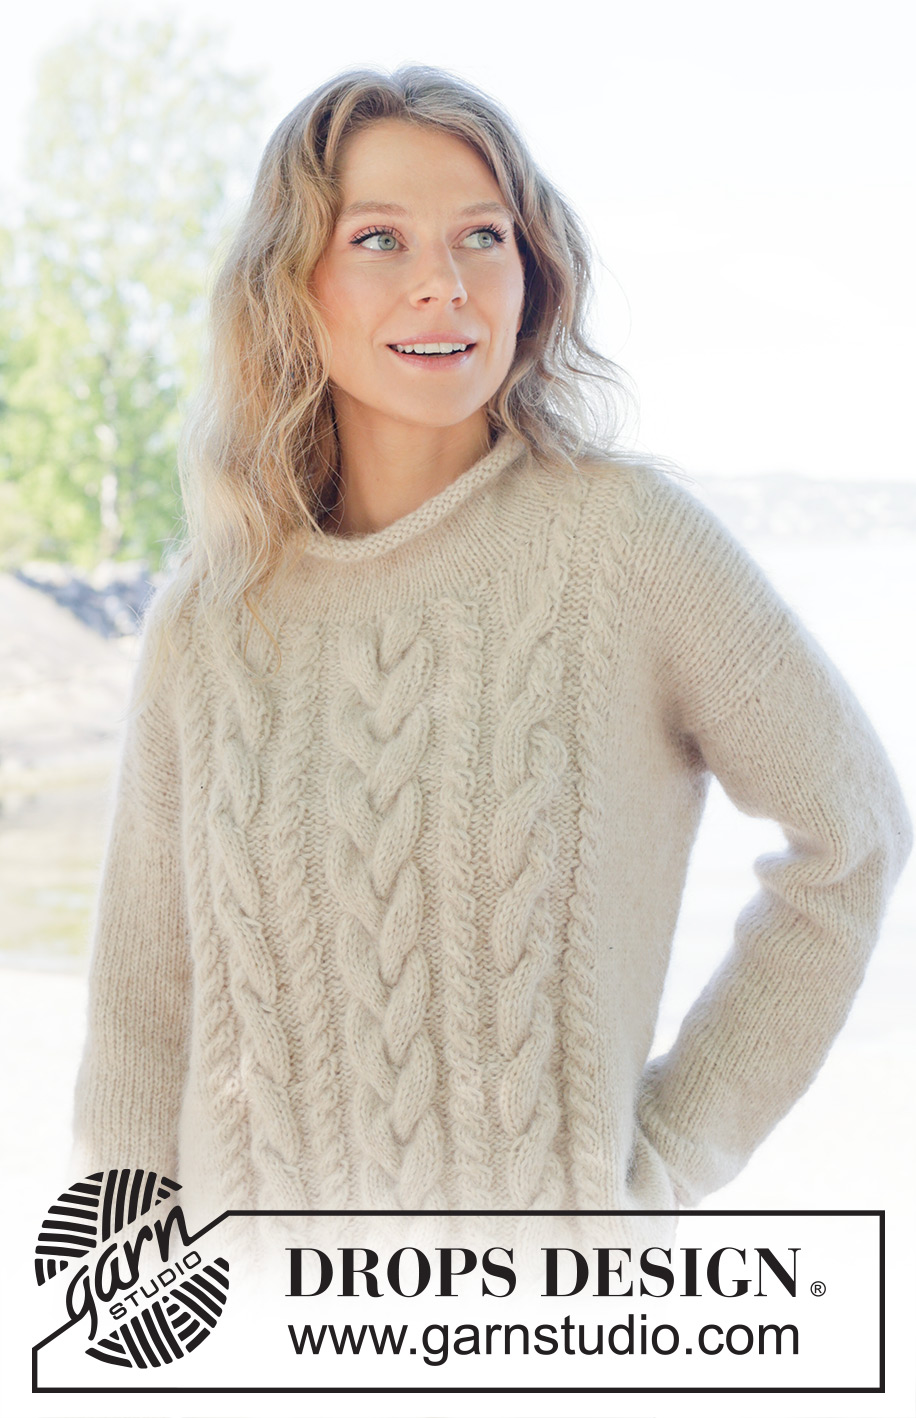
Knitted sweater in DROPS Air and DROPS Kid-Silk. The piece is worked top down with European/diagonal shoulders and cables. Sizes S-XXXL.
DROPS 255-15 |
|||||||||||||||||||||||||
|
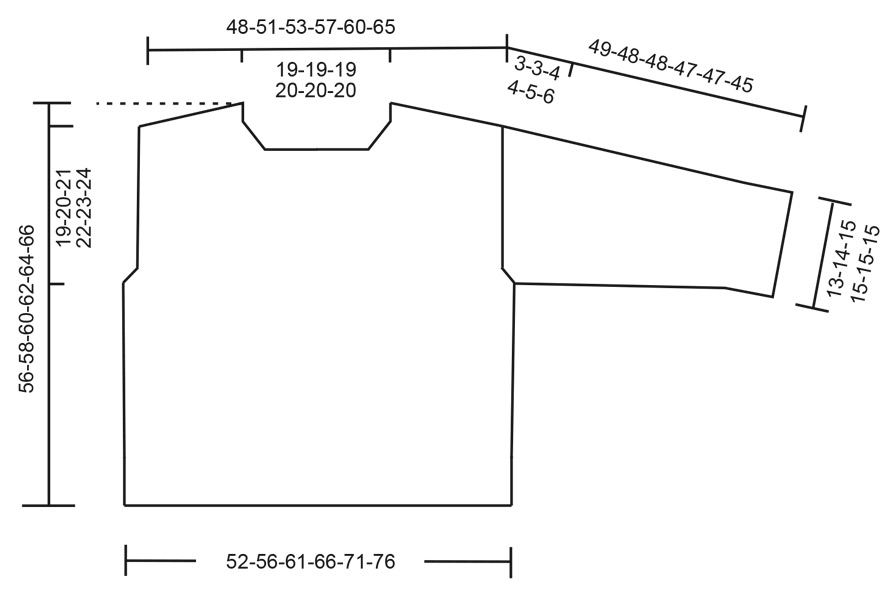
------------------------------------------------------- EXPLANATIONS FOR THE PATTERN: ------------------------------------------------------- PATTERN: See diagrams A.1 to A.3. The diagrams show the pattern from the right side. Choose diagram for your size (applies to A.3). INCREASE TIP: INCREASE 1 STITCH TOWARDS THE LEFT – from the right side: Use the left needle to pick up the front strand between 2 stitches from the previous row, knit the back loop. INCREASE 1 STITCH TOWARDS THE RIGHT – from the right side: Use the left needle to pick up the back strand between 2 stitches from the previous row, knit the front loop. I-CORD BIND OFF: At the end of the round, after the last stitch is worked: Cast on 3 stitches on the right needle from the right side. Slip the 3 stitches onto the left needle, so the strand is inside these 3 stitches (the working strand then tightens the piece to form a small tube). ROW 1 (right side): Knit 2, knit 2 twisted together. ROW 2 (right side): Slip the 3 stitches from the right needle back onto the left needle, knit 2, knit 2 twisted together. Repeat ROW 2 until there are 3 stitches left on the right needle. Slip these 3 stitches onto the left needle. Bind off. Sew a small stitch, joining the beginning and end of the I-cord together. KNITTING TIP: When working short rows, there will be a small hole after each turn – this hole can be closed by tightening the strand or using the technique German Short Rows as follows: Slip the first stitch purl-wise, lay the strand over the right needle and tighten well from the back. There are now 2 loops on the needle, which are worked together on the next row. DECREASE TIP: Decrease 1 stitch on each side of the marker-thread as follows: Work until there are 3 stitches left before the marker-thread, knit 2 together, knit 2 (marker-thread sits between these 2 stitches), slip 1 stitch knit-wise, knit 1 and pass the slipped stitch over the knitted stitch (2 stitches decreased). ------------------------------------------------------- START THE PIECE HERE: ------------------------------------------------------- SWEATER – SHORT OVERVIEW OF THE PIECE. The pattern uses both long and short needles; start with the length which fits the number of stitches and change when necessary. The piece is first worked back and forth on circular needle. Start by casting on stitches at the back of the neck and working the back piece back and forth, top down, while increasing stitches on each side for the shoulders, which become slightly diagonal. The back piece is worked as far as the armholes. The front piece is started in 2 sections, knitting up stitches along one back shoulders and working downwards with pattern while increasing for the neckline, then repeating this on the other shoulder. The 2 sections are joined when the increases for the neckline are finished, and the front piece is continued back and forth until the armholes are finished. The front and back pieces are joined on the same circular needle and the body finished, in the round. Stitches are knitted up around the armholes for the sleeves, which are started back and forth for the sleeve cap, then finished in the round. Stitches are knitted up around the neckline and the neck worked in the round. If there is a «0» in your chosen size, skip the information and go straight to the next instruction. BACK PIECE: The piece is worked back and forth. Cast on 28-28-28-30-30-30 stitches with circular needle size 5.5 MM = US 9, 1 strand DROPS Air and 1 strand DROPS Kid-Silk (= 2 strands). ROW 1 (= wrong side): Purl. ROW 2 (= right side): Knit, cast on 2 stitches at the end of the row. ROW 3 (= wrong side): Purl, cast on 2 stitches at the end of the row. Work ROWS 2 and 3 a total of 11-12-13-14-15-17 times (= 22-24-26-28-30-34 rows), after the last increase there are 72-76-80-86-90-98 stitches. Insert 1 marker outermost on one side. The piece is now measured from here! Continue with stockinette stitch until the piece measures 12-13-13-13-13-14 cm = 4¾"-5⅛"-5⅛"-5⅛"-5⅛"-5½" from the marker, measured along the outside of the armhole. Remember to maintain the knitting gauge. Now increase for the armholes on each side. INCREASE FOR ARMHOLES: ROW 1 (= right side): Read INCREASE TIP, knit 3 and increase 1 stitch towards the left, knit until there are 3 stitches left, increase 1 stitch towards the right, knit 3. ROW 2 (= wrong side): Purl. Work ROWS 1 and 2 a total of 2-2-3-4-4-4 times = 76-80-86-94-98-106 stitches. Continue working until the piece measures 14-15-16-17-17-18 cm = 5½"-6"-6¼"-6¾"-6¾"-7" from the marker, measured along the armhole and finishing with a row from the wrong side. Cut the strand, place the stitches on a stitch holder. Work the left shoulder and front piece as follows: LEFT FRONT PIECE: Find the left shoulder on the back piece as follows: Lay the piece flat, right side up, with the stitch holder towards you; left side of piece = left shoulder. Starting from the right side, knit up stitches along the left back shoulder, from the neck to the armhole as follows: Knit up 1 stitch in each stitch, inside the outermost stitch = 22-24-26-28-30-34 stitches. All measurements for the piece are taken from this knitted-up row. Work as follows from the wrong side: Purl 14-16-18-20-22-26, *make 1 yarn over, purl 1 *, work from *-* 1 more time, knit 3, work from *-* 2 more times, knit 1 = 26-28-30-32-34-38 stitches. On the next row work the yarn overs twisted to avoid holes. Work the next row from the right side as follows: Work A.1a over the first 12 stitches, work stockinette stitch to end of row. Continue back and forth with stockinette stitch and A.1a. When the piece measures 8-8-9-10-11-12 cm = 3⅛"-3⅛"-3½"-4"-4⅜"-4¾", increase towards the neck as follows: ROW 1 (= right side): Work as before. ROW 2 (= wrong side): Work as before and cast on 2 stitches at the end of the row – these new stitches are continued in stockinette stitch. Work ROWS 1 and 2 a total of 2 times (= 4 rows) = 30-32-34-36-38-42 stitches. Work 2 rows as before without increasing (with the next row from the right side). Cut the strand, place the stitches on a stitch holding, noting which row in A.1 you finished on. Now work the right front piece. RIGHT FRONT PIECE: Starting from the right side, knit up stitches along the right back shoulder from the armhole to the neck as follows: Knit up 1 stitch in each stitch, inside the outermost stitch = 22-24-26-28-30-34 stitches. All measurements for the piece are taken from this knitted-up row. Work as follows from the wrong side: Knit 1, * make 1 yarn over, purl 1 *, work from *-* 1 more time, knit 3, work from *-* 2 more times, purl 14-16-18-20-22-26 = 26-28-30-32-34-38 stitches. On the next row work the yarn overs twisted to avoid holes. Work as follows from the right side: Stockinette stitch over the first 14-16-18-20-22-26 stitches, work A.2a to end of row. Work back and forth with stockinette stitch and A.2a. When the piece measures 8-8-9-10-11-12 cm = 3⅛"-3⅛"-3½"-4"-4⅜"-4¾", and there are 4 rows left in the pattern until the right front piece matches the left front piece, increase towards the neck as follows: ROW 1 (= right side): Work the row as before, cast on 2 stitches at the end of the row – these new stitches are continued in stockinette stitch. ROW 2 (= wrong side): Work the row as before. Work ROWS 1 and 2 a total of 2 times (= 4 rows) = 30-32-34-36-38-42 stitches (with the next row from the right side). Now the 2 front pieces are joined – it is important that the pattern is of equal length on both front pieces, so the cables are symmetrical on the body. FRONT PIECE (right and left front pieces joined): Work as follows from the right side: Work the 30-32-34-36-38-42 stitches on the right front piece, cast on 24-24-24-26-26-26 stitches for the neckline, work the 30-32-34-36-38-42 stitches from the left front piece = 84-88-92-98-102-110 stitches. The patterns on each front piece, i.e., A.1a and A.2a, are continued with A.1b and A.2b - you are cabling every 4th row. Work as follows from the wrong side: Work 14-16-18-20-22-26 stockinette stitches, A.1b over the next 17 stitches, knit 2, * make 1 yarn over, purl 1 *, work from *-* 1 more time, knit 3-3-3-4-4-4, purl 1, work from *-* 7 times, knit 3-3-3-4-4-4, work from *-* 2 times, knit 2, work A.2b over the next 17 stitches and stockinette stitch to end of row = 95-99-103-109-113-121 stitches. On the next row work the yarn overs twisted to avoid holes. Continue with stockinette stitch and pattern. All the diagrams are aligned so the small cables are worked on the same row (every 4th row). To avoid the neck curling, do not cable the first 3 rows when working A.3. Work as follows from the right side: Work 14-16-18-20-22-26 stockinette stitches, A.2b, A.3, A.1b and stockinette stitch to end of row. Continue this pattern and stockinette stitch until the piece measures 22-23-23-23-25-26 cm = 8¾"-9"-9"-9"-9¾"-10¼" from the knitted-up row. Now increase for the armholes. INCREASE FOR ARMHOLES: ROW 1 (= right side): Remember INCREASE TIP. Knit 3, increase 1 stitch towards the left, work as before until there are 3 stitches left, increase 1 stitch towards the right, knit 3. ROW 2 (= wrong side): Work back as before. Work ROWS 1 and 2 a total of 2-2-3-4-4-4 times = 99-103-109-117-121-129 stitches. Continue working until the piece measures 24-25-26-27-29-30 cm = 9½"-9¾"-10¼"-10⅝"-11⅜"-11¾", finishing after a row from the wrong side. The front and back pieces are joined for the body. The piece is now measured from here! BODY: Work the 99-103-109-117-121-129 stitches from the front piece as before, cast on 2-4-6-4-8-8 stitches (in side mid-under sleeve), work the 76-80-86-94-98-106 stitches from the back piece, cast on 2-4-6-4-8-8 stitches (in side mid-under sleeve) = 179-191-207-221-235-251 stitches. Continue in the round with stockinette stitch and pattern as before until the piece measures approx. 33-34-35-35-36-37 cm = 13"-13⅜"-13¾"-13¾"-14¼"-14½" from the armhole – adjust so the last round is either row 3 or 11 in A.3. Work 1 round with knit over knit and purl over purl, AT THE SAME TIME, across the cabled sections, knit 2 together over all knitted stitches (= 23 decreased stitches) = 156-168-184-198-212-228 stitches. Read I-CORD BIND OFF and bind off with I-cord. The front piece measures approx. 58-60-62-64-66-68 cm = 22¾"-23⅝"-24⅜"-25¼"-26"-26¾" measured from the knitted-up row. The front piece is 2 cm = ¾" longer than the length given in the measurement chart, because the knitted-up row is not on top of the shoulder but slightly down the back piece. The sweater measures approx. 56-58-60-62-64-66 cm = 22"-22¾"-23⅝"-24⅜"-25¼"-26". SLEEVES: The sleeves are worked from the armhole down with circular needle size 5.5 MM = US 9. Lay the piece flat and insert 1 marker at the top of the armhole = mid-top of shoulder (NOTE! Mid-top of shoulder is not the same place as the knitted up row for the front piece but approx. 5 to 6 cm = 2" to 2⅜" down the front piece). Using circular needle size 5.5 MM = US 9 and starting in the middle of the cast-on stitches under the sleeve, knit up 60-64-68-70-76-80 stitches around the armhole, making sure you knit up equal numbers of stitches on each side of the marker. Work stockinette stitch back and forth, with short rows across the sleeve cap to give the sleeve a better fit, starting mid-under the sleeve – read KNITTING TIP: ROW 1 (= right side): Knit to 6-7-6-7-6-5 stitches past the marker on top of the shoulder, turn – read KNITTING TIP. ROW 2 (= wrong side): Purl to 6-7-6-7-6-5 stitches past the marker, turn. ROW 3 (= right side): Knit to 6-7-6-7-6-5 stitches past the previous turn, turn. ROW 4 (= wrong side): Purl to 6-7-6-7-6-5 stitches past the previous turn, turn. Repeat ROWS 3 and 4 until you have turned 6-6-8-8-10-12 times (= 3-3-4-4-5-6 times on each side and the last row is from the wrong side). AFTER THE FINAL TURN: After the last repeat of row 4, turn and work back from the right side to the beginning of the round (mid-under the sleeve). Insert 1 marker-thread mid-under the sleeve, which is used when decreasing. Allow the thread to follow your work onwards. Work stockinette stitch in the round, AT THE SAME TIME as you decrease as follows - read DECREASE TIP: When the sleeve measures 1 cm = ⅜" measured under the sleeve, decrease 2 stitches 1-2-3-2-4-4 times, every 2nd round, then decrease 2 stitches every 4-3½-3½-3-2½-2 cm = 1½"-1¼"-1¼"-1⅛"-1"-¾" 9-9-9-11-11-13 times = 40-42-44-44-46-46 stitches. Continue working until the sleeve measures 48-47-47-46-46-44 cm = 19"-18½"-18½"-18"-18"-17¼" from mid-top of shoulder. Bind off with I-cord. The sleeve measures approx. 49-48-48-47-47-45 cm = 19¼"-19"-19"-18½"-18½"-17¾" from mid-top of shoulder. NECK: With circular needle size 5 MM = US 8 and 1 strand of each quality (= 2 strands), start from the right side by one knitted-up edge and knit up approx. 74-74-76-80-82-84 stitches inside 1 stitch around the neckline. Knit 1 round and adjust the stitch count if necessary - which must be divisible by 2. Work stockinette stitch in the round for 6 cm = 2⅜". Work 2 rounds of rib (knit 1, purl 1). Knit 4 rounds. Bind off with knit, making 1 yarn over after every 4th stitch - which are bind off as normal stitches. |
|||||||||||||||||||||||||
Diagram explanations |
|||||||||||||||||||||||||
|
|||||||||||||||||||||||||

|
|||||||||||||||||||||||||

|
|||||||||||||||||||||||||
|
|||||||||||||||||||||||||
Have you finished this pattern?Tag your pictures with #dropspattern #cableheartsweater or submit them to the #dropsfan gallery. Do you need help with this pattern?You'll find 32 tutorial videos, a Comments/Questions area and more by visiting the pattern on garnstudio.com. © 1982-2025 DROPS Design A/S. We reserve all rights. This document, including all its sub-sections, has copyrights. Read more about what you can do with our patterns at the bottom of each pattern on our site. |
|||||||||||||||||||||||||





Post a comment to pattern DROPS 255-15
We would love to hear what you have to say about this pattern!
If you want to leave a question, please make sure you select the correct category in the form below, to speed up the answering process. Required fields are marked *.