
Looking for a yarn?


Comments / Questions (149)
![]() Janine Jaedicke wrote:
Janine Jaedicke wrote:
Dann glatt rechts weiterstricken - GLEICHZEITIG bei einer Länge von 12 cm je 1 Masche beidseitig des Markierungsfadens zunehmen – ZUNAHMETIPP lesen. In dieser Weise alle 5½-5½-5-4-3½-3½ cm insgesamt 7-7-7-8-9-9 x zunehmen = 41-43-43-47-49-51 Maschen. Bei einer Länge von 43-42-42-40-39-37 cm im Muster A.1 weiterstricken. Muss ich erst 12 cm rechts stricken oder direkt erste Maschen Abnahme. Weil ich beim Messen mit dem rechts Linksmuster 17cm.
05.03.2025 - 00:10DROPS Design answered:
Liebe Frau Jaedicke, die 12 cm messen Sie ab der Anschlagskante, sowie die Länge für A.1 wird von der Anschlagskante gemessen. So nach Bündchen stricken Sie noch 2 cm dann beginnnen die Zunahmen. Viel Spaß beim Stricken!
05.03.2025 - 09:15
![]() Winnie Heidi Andersen wrote:
Winnie Heidi Andersen wrote:
Forstår ikke hvordan den kan være 8 cm længe på ryggen når rib er 10 cm på bagstykke og forstykke, skulle rib så ikke have været 18 cm på bagstykke og 10 cm på forstykke?
01.03.2025 - 11:39DROPS Design answered:
Hej Winnie, vi beskriver nøjagtig hvordan du skal gøre, det er bare at følge opskriften, så får du den som du kan se på billedet :)
06.03.2025 - 14:09
![]() Tara Rogers wrote:
Tara Rogers wrote:
Hi There, I'm fairly new to knitting. I'd like to knit this sweater, and see that I can use the drop air, 48. Love the colour. How do I know how many balls to order? It doesn't say, I'm wanting to knit the XL size. Do I need to do one strand or two? Very confused.
16.02.2025 - 21:55DROPS Design answered:
Hi Tara, Drops Air comes in 50 g balls (see drop-down menu at top of page "Yarn & Needles" to find details of each yarn). So for size S, for example, you will need 9 balls. Happy knitting!
17.02.2025 - 07:00
![]() Marie Simonová wrote:
Marie Simonová wrote:
A o těch 8 cm je delší patent?
15.02.2025 - 12:48
![]() Marie Simonová wrote:
Marie Simonová wrote:
Podle foto i nákresu má být zřejmě zadní díl delší než přední o 8 cm, ale v návodu se s tím nepočítá. Děkuji za odpověď.
14.02.2025 - 19:35DROPS Design answered:
Dobrý den, Marie, zadní díl se uzavírá ve výšce 62-64-66-68-70-72 cm a přední díl ve výši 54-56-58-60-62-64 cm. To znamená, že zadní díl je opravdu o 8 cm delší. Ať se vám hezky plete!
14.02.2025 - 21:02
![]() Lily wrote:
Lily wrote:
Ne ne c’est pas comment voir le patron de ce magnifique pull en entier, je vois seulement des exemples??? Expliquer moi comment faire pour tout voir je trouve ça compliqué, ou envoyé moi le patron 🙂 Merci infiniment, bonne journée
13.02.2025 - 22:30DROPS Design answered:
Bonjour Lily, retrouvez ici les explications de ce modèle en français. Vous verrez d'abord les photos et les onglets "Explications / Vidéos / Leçons / FAQ", puis faites dérouler la page un peu pour trouver les explications un peu plus bas. Bon tricot!
14.02.2025 - 09:29
![]() Jane Fry wrote:
Jane Fry wrote:
What is meant in your pattern, yarn over and knitted stich knitted together. A2. What knitted stitch ?
13.02.2025 - 15:39DROPS Design answered:
Dear Jane, the English rib is worked over 2 stitches. In the first row: knit 1, 1 yarn over, slip 1 stitch purlwise. So you have 1 knit stitch, 1 yarn over and a slipped stitch. In the next row, you work in the opposite way and you work the yarn over of the previous row and the knit stitch of the previous row together. In this video you can see how this rib is worked. Happy knitting!
17.02.2025 - 00:02
![]() BETTY Stefens wrote:
BETTY Stefens wrote:
Excelente explicación gracias
07.02.2025 - 19:00
![]() Beata wrote:
Beata wrote:
Jaką włóczką zastąpić tę z modelu ?
01.02.2025 - 14:38
![]() Beata wrote:
Beata wrote:
Jaką włóczką zastąpić tę z modelu ?
01.02.2025 - 14:37DROPS Design answered:
Witaj Beato, możesz wykorzystać włóczki z grupy E (Andes i Snow), ale wtedy sweter będzie cięższy. Możesz również połączyć inne włóczki, które w efekcie dadzą wymaganą próbkę, czyli 10 oczek na szerokość i 14 rzędów. Zobacz również nasze połączenia włóczek TUTAJ. Pozdrawiamy!
03.02.2025 - 10:44
|
||||||||||||||||
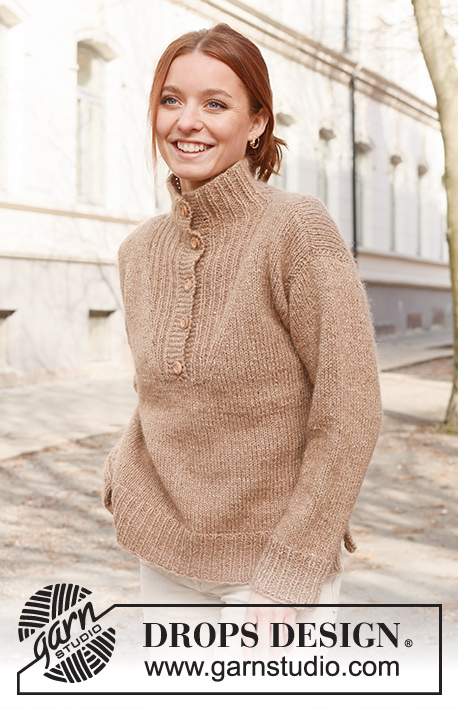
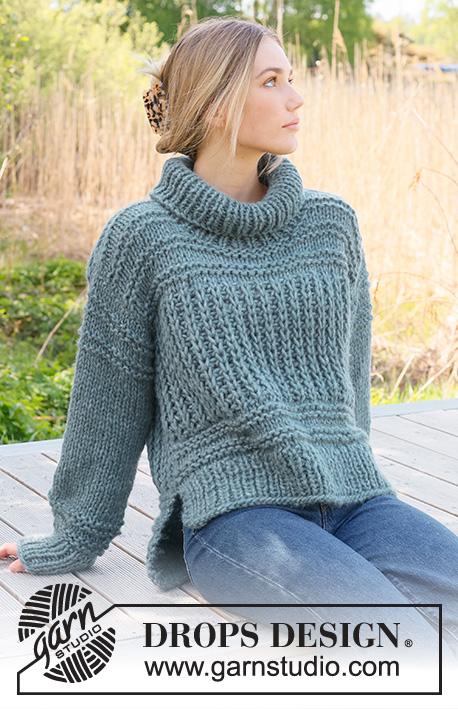
Rain Chain#rainchainsweater |
||||||||||||||||
 |
 |
|||||||||||||||
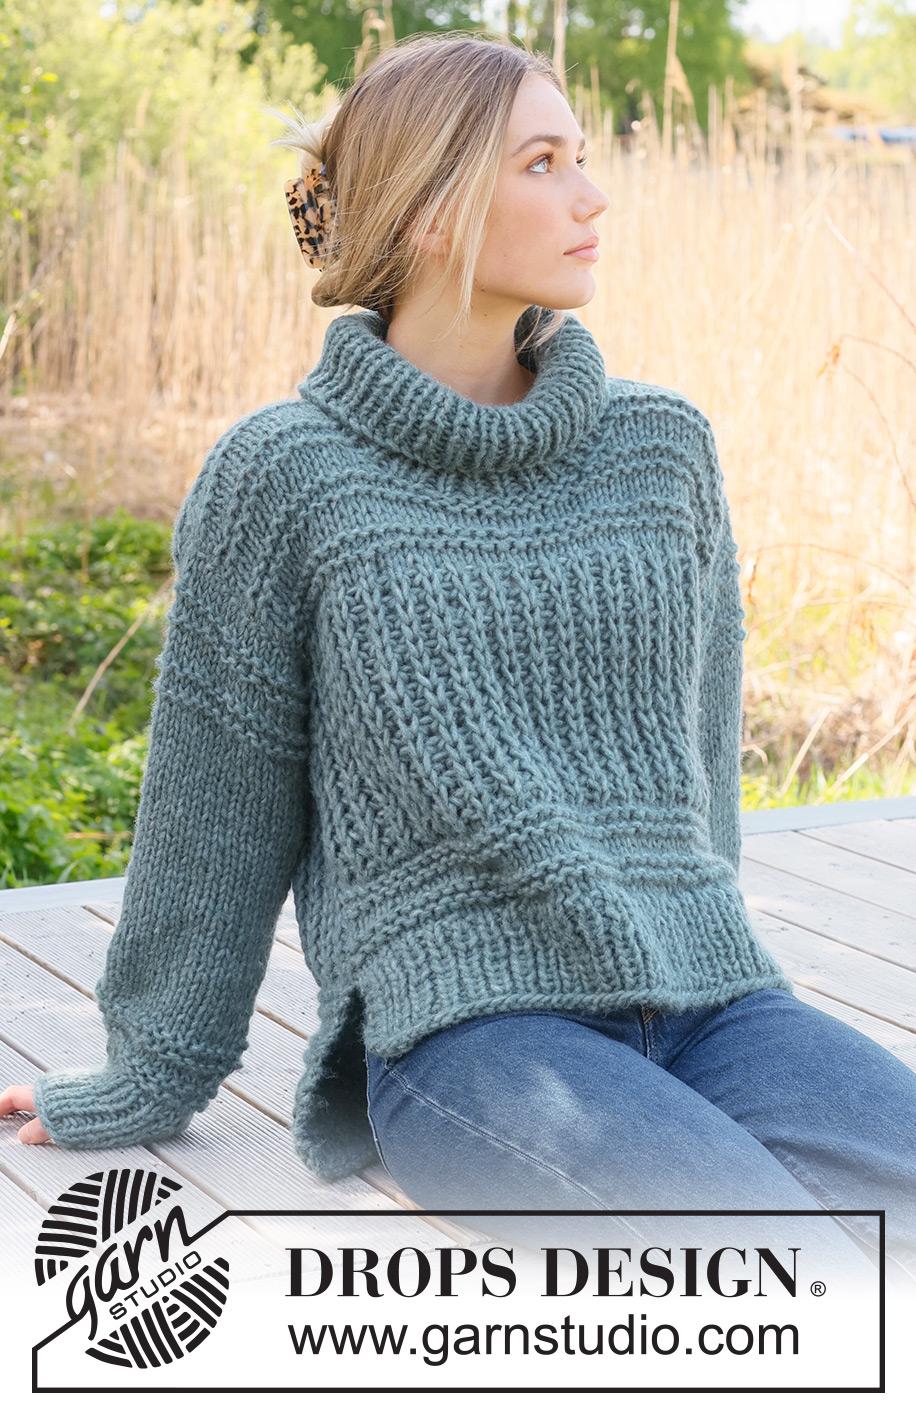
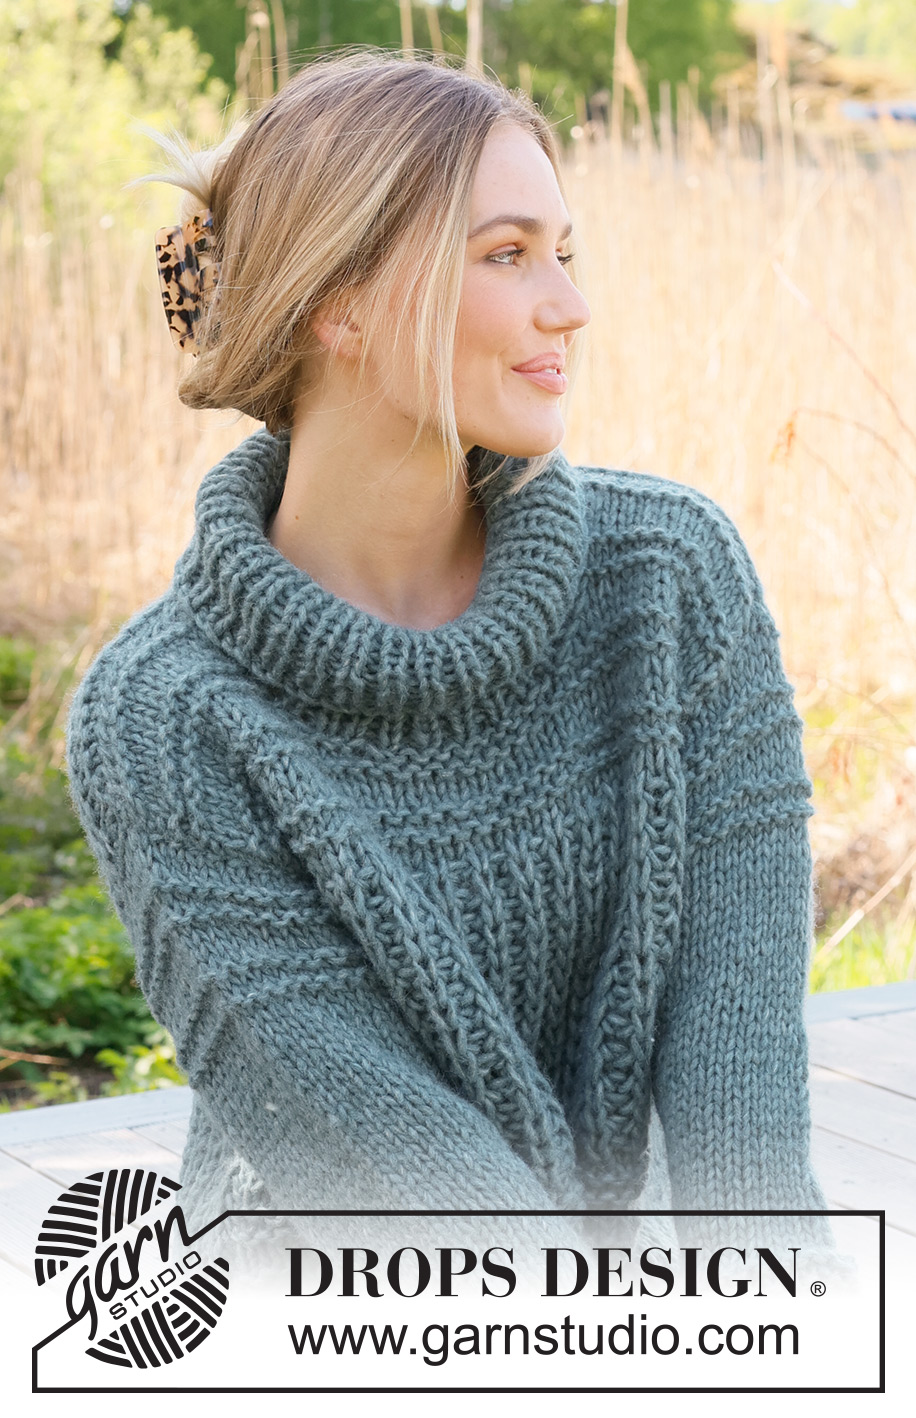
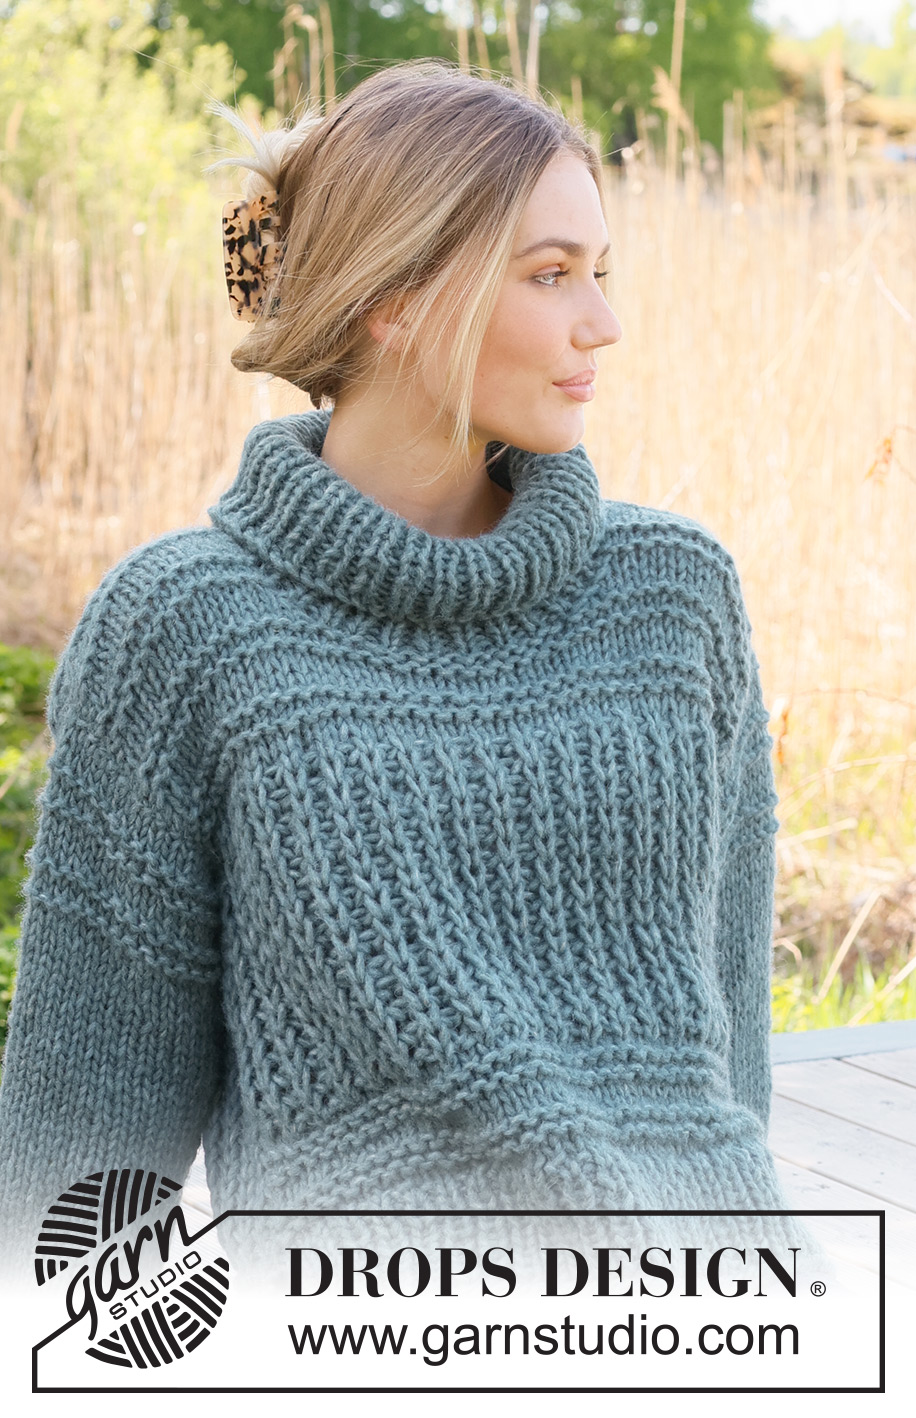
Knitted sweater in 1 strand DROPS Wish or 2 strands DROPS Air. The piece is worked bottom up with English rib, open garter stitch and split in the sides. Sizes S - XXXL.
DROPS 236-9 |
||||||||||||||||
|
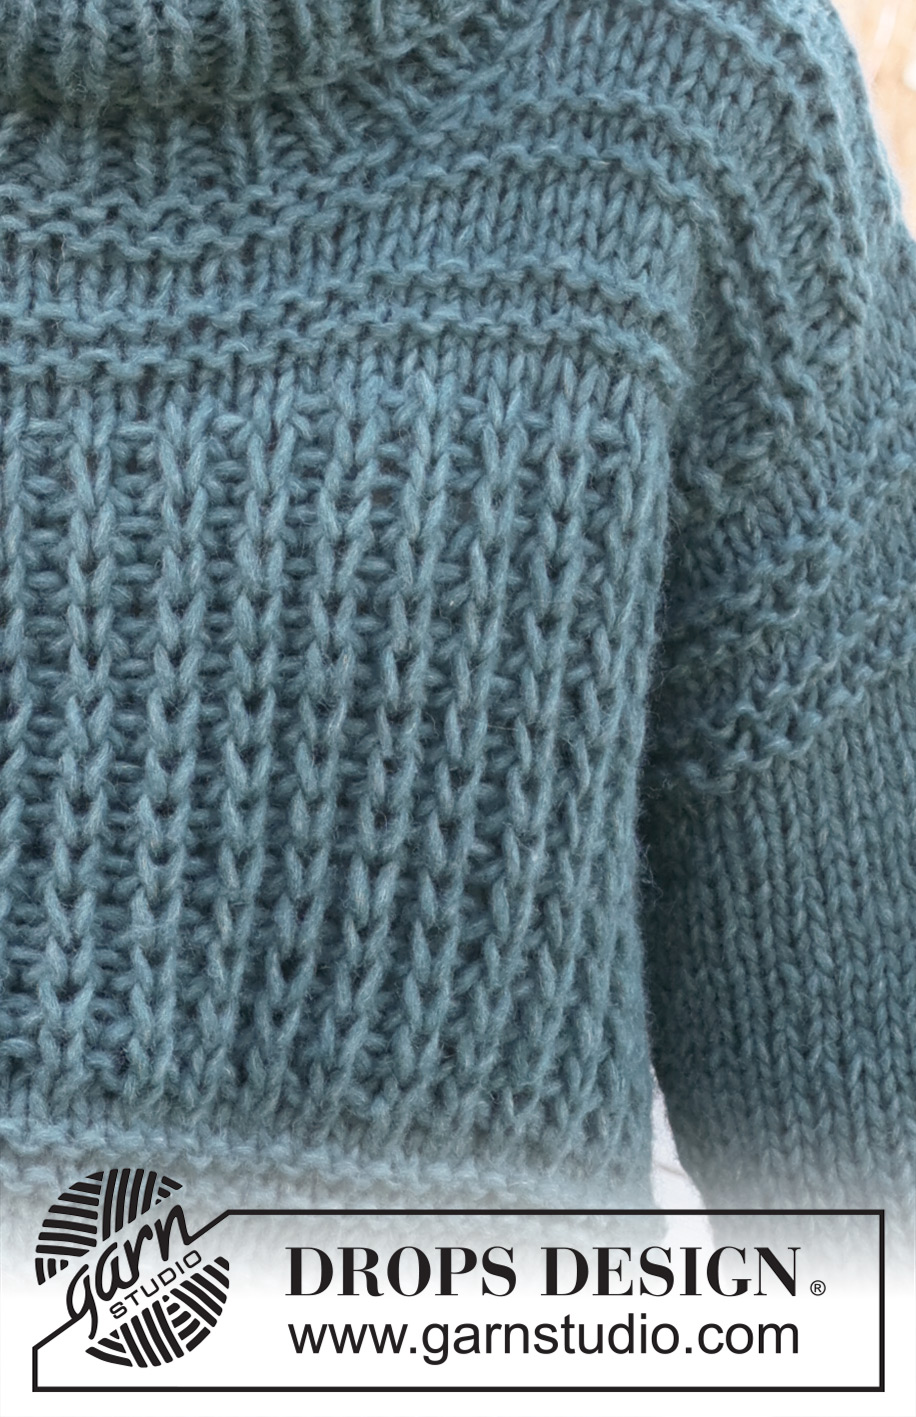
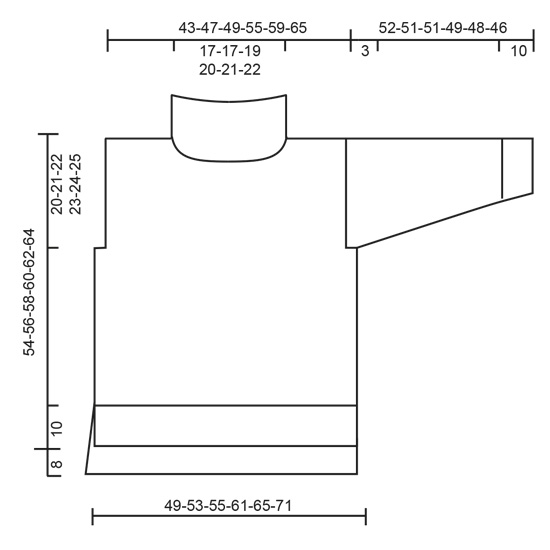
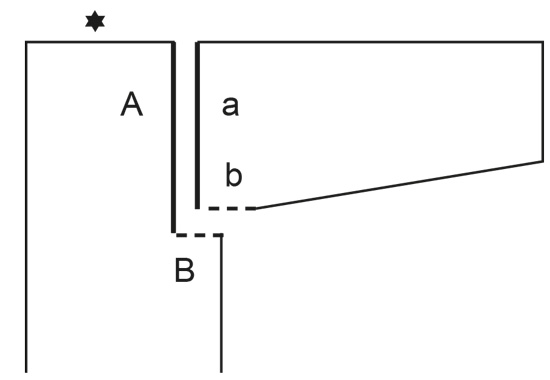
------------------------------------------------------- EXPLANATIONS FOR THE PATTERN: ------------------------------------------------------- PATTERN: See diagrams A.1 and A.2. The diagrams show all rows in the pattern from the right side. RIDGE/GARTER STITCH (worked back and forth): Knit all rows. 1 ridge = knit 2 rows. INCREASE TIP (for sleeves): Work until there is 1 stitch left before the marker thread, 1 yarn over, knit 2 (marker thread sits between these stitches), 1 yarn over. On the next round knit the yarn overs twisted to avoid holes. Then work the new stitches in stockinette stitch. ------------------------------------------------------- SWEATER – SHORT OVERVIEW OF THE PIECE: The piece is worked in sections, back and forth and bottom up, then sewn together. The sleeves are worked in the round with double pointed needles/short circular needle bottom up. The back piece is 8 cm = 3⅛" longer than the front. BACK PIECE: Cast on 59-63-67-73-79-85 stitches with circular needle size 8 MM = US 11 1 strand DROPS Wish or 2 strands DROPS Air. Purl 1 row from the wrong side then work rib as follows from the right side: 2 edge stitches in GARTER STITCH – read description above, * knit 1, purl 1 *, work from *-* until there are 3 stitches left, knit 1 and 2 edge stitches in garter stitch. Continue this rib for 10 cm = 4". Purl 1 row from the wrong side and decrease 10-10-12-12-14-14 stitches evenly spaced = 49-53-55-61-65-71 stitches. Change to circular needle size 9 MM = US 13. REMEMBER THE KNITTING GAUGE! Work A.1, 2-2-2-3-3-3 times in height. Now work 1 row as follows from the right side: 1 edge stitch in garter stitch, * knit 1, purl 1 *, work from *-* until there are 2 stitches left, knit 1 and 1 edge stitch in garter stitch. Work A.2 (first row from the wrong side, reading the diagram from left to right and the pattern beginning and ending with 1 knitted stitch in English rib inside 1 edge stitch in garter stitch, seen from the right side). Continue A.2 onwards. When the piece measures 42-43-44-45-46-47 cm = 16½"-17"-17¼"-17¾"-18"-18½", bind off 3 stitches at the beginning of the next 2 rows for the armholes = 43-47-49-55-59-65 stitches. Continue A.2. When the piece measures 44-46-48-50-52-54 cm = 17¼"-18"-19"-19¾"-20½"-21¼", purl the next row from the wrong side. Then work according to A.1. When the piece measures 60-62-64-66-68-70 cm = 23⅝"-24⅜"-25¼"-26"-26¾"-27½", bind off the middle 13-13-15-15-17-17 stitches for the neck and finish each shoulder separately. Bind off 1 stitch on the next row from the neck = 14-16-16-19-20-23 stitches on the shoulder. Bind off when the piece measures 62-64-66-68-70-72 cm = 24⅜"-25¼"-26"-26¾"-27½"-28⅜". Work the other shoulder in the same way. FRONT PIECE: Cast on and work in the same way as the back piece until the front measures 34-35-36-37-38-39 cm = 13⅜"-13¾"-14¼"-14½"-15"-15¼". Bind off 3 stitches at the beginning of the next 2 rows for the armholes = 43-47-49-55-59-65 stitches. Continue A.2. When the piece measures 36-38-40-42-44-46 cm = 14¼"-15"-15¾"-16½"-17¼"-18", purl the next row from the wrong side. Then work according to A.1. When the piece measures 47-49-51-53-55-57 cm = 18½"-19¼"-20"-21"-21⅝"-22½", work the neck as follows: Place the middle 9-9-11-11-13-13 stitches on a thread and finish each shoulder separately. Bind off for the neck every 2nd row as follows: 2 stitches 1 time, 1 stitch 1 time = 14-16-16-19-20-23 stitches on the shoulder. Bind off when the piece measures 54-56-58-60-62-64 cm = 21¼"-22"-22¾"-23⅝"-24⅜"-25¼". Work the other shoulder in the same way. SLEEVES: Cast on 30-32-32-34-34-36 stitches with double pointed needles size 8 MM = US 11 and 1 strand DROPS Wish or 2 strands DROPS Air. Insert 1 marker-thread at the beginning of the round (mid-under sleeve). Knit 1 round, then work rib in the round (knit 1, purl 1) for 10 cm = 4". Knit 1 round and decrease 3-3-3-3-3-3 stitches evenly spaced = 27-29-29-31-31-33 stitches.Change to double pointed needles size 9 mm = US 13. Work A.1, 2 times in height then continue with stockinette stitch. AT THE SAME TIME when the sleeve measures 12 cm = 4¾", increase 1 stitch on each side of the marker-thread – read INCREASE TIP. Increase like this every 5½-5½-5-4-3½-3½ cm = 2⅛"-2⅛"-2"-1½"-1¼"-1¼" a total of 7-7-7-8-9-9 times = 41-43-43-47-49-51 stitches. When the sleeve measures 43-42-42-40-39-37 cm = 17"-16½"-16½"-15¾"-15¼"-14½", continue with A.1. When the sleeve measures 49-48-48-46-45-43 cm = 19¼"-19"-19"-18"-17¾"-17", work the sleeve cap back and forth (from mid-under sleeve) to finished length. Bind off when the sleeve measures 52-51-51-49-48-46 cm = 20½"-20"-20"-19¼"-19"-18". Work the other sleeve in the same way. ASSEMBLY: Sew the shoulder seams. Sew in the sleeves, inside the 1 edge stitch and sew the bottom of the armholes – see sketch. Sew the side seams as far as the rib (= 10 cm = 4" split on the front piece, 18 cm = 7" on the back), sew in the outermost loop of the outermost stitch so the seam is flat. NECK: Start at the top of the right shoulder and knit up (including the stitches on the thread) 60 to 72 stitches with short circular needle size 8 MM = US 11 and 1 strand DROPS Wish or 2 strands DROPS Air. The number of stitches should be divisible by 2. Work rib in the round (knit 1, purl 1) for 20-20-20-22-22-22 cm = 8"-8"-8"-8¾"-8¾"-8¾". Bind off. |
||||||||||||||||
Diagram explanations |
||||||||||||||||
|
||||||||||||||||

|
||||||||||||||||
|
||||||||||||||||
|
||||||||||||||||
Have you finished this pattern?Tag your pictures with #dropspattern #rainchainsweater or submit them to the #dropsfan gallery. Do you need help with this pattern?You'll find 34 tutorial videos, a Comments/Questions area and more by visiting the pattern on garnstudio.com. © 1982-2025 DROPS Design A/S. We reserve all rights. This document, including all its sub-sections, has copyrights. Read more about what you can do with our patterns at the bottom of each pattern on our site. |
||||||||||||||||


With over 40 years in knitting and crochet design, DROPS Design offers one of the most extensive collections of free patterns on the internet - translated to 17 languages. As of today we count 314 catalogs and 11822 patterns - 11812 of which are translated into English (US/in).
We work hard to bring you the best knitting and crochet have to offer, inspiration and advice as well as great quality yarns at incredible prices! Would you like to use our patterns for other than personal use? You can read what you are allowed to do in the Copyright text at the bottom of all our patterns. Happy crafting!
Post a comment to pattern DROPS 236-9
We would love to hear what you have to say about this pattern!
If you want to leave a question, please make sure you select the correct category in the form below, to speed up the answering process. Required fields are marked *.