
Popular categories
Looking for a yarn?


Comments / Questions (132)
![]() Liz wrote:
Liz wrote:
Still not clear. Do you mean instead of purling on a purl row (WS) , you knit instead, for those rows designated as "knit from wrong side"? The same symbol in the "Agnes set" diagram IS purl. I am working size 3-4, so not an issue til row 6.
24.09.2020 - 22:44DROPS Design answered:
Dear Liz, correct, in the Agnes Set, diagram is worked in the round, so that the stitch will be purled from RS - for the jacket you work back and forth and in order to get this stitch look like "purl from RS" you need to knit it from WS. Happy knitting!
25.09.2020 - 09:12
![]() Liz wrote:
Liz wrote:
In the diagram explanations, what does "knit from wrong side" mean?
24.09.2020 - 16:31DROPS Design answered:
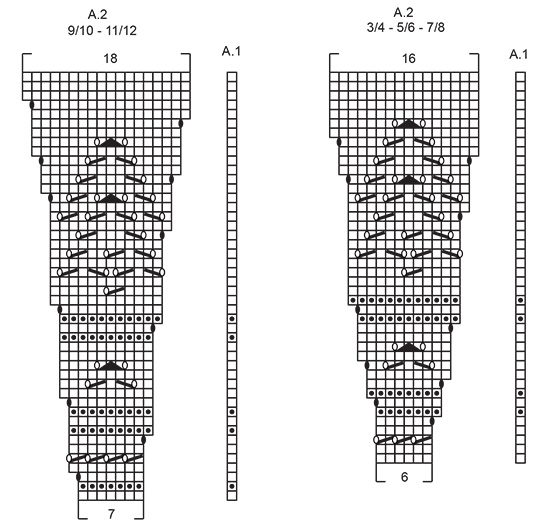
Dear Liz, this stitch will be worked only from WS and has to be knitted, this means for example on row 2 in A.2 size 9/10 and 11/12 you will knit all stitches from WS. Happy knitting!
24.09.2020 - 16:46
![]() Cindy wrote:
Cindy wrote:
I’m making size 3/4 and at the end of A2 I have 345 stitches! I never did A1, is this salvageable or should I just quit?
19.09.2020 - 12:04DROPS Design answered:
Dear Cindy, in size 3/4 you start with 89 sts and work diagrams A.1 x 1 and A.2 x 13 (A.1 makes both ends being the same), ie: 5 front band sts, 1 st (A.1), repeat 13 times the 6 sts in A.2 and end with 5 front band sts. When diagrams are done, there are: 5 + 1 + 16 x 13 + 5 = 219 sts. Happy knitting!
21.09.2020 - 08:42
![]() Jean wrote:
Jean wrote:
A2=18 stitches. 109 stitches on needle. subtract 10 stitches for band stitches.99 stitches left. "A2 a total of 14 times" A2 is 18 stitches. 14 x 18 = 252 stitches. I don't have that many stitches?????? Please explain.
25.08.2020 - 00:31DROPS Design answered:
Hi Jean, You start at the bottom of the diagram and work upwards (even if you are working top down), so A.2 has 7 stitches to begin with. The bands are 10 stitches, A.1 is 1 stitch and 7 x 14 = 98, which all adds up to 109 stitches. Happy knitting!
25.08.2020 - 08:44
![]() Janet Cartmell wrote:
Janet Cartmell wrote:
I think what is happening. And I did it too. Whennyiu read the pattern. People are adding in A1 in the repeats across the row. Maybe an adjustment in the written pattern to explain A1 is only done 'once' then continue on A2 across the row. Thanks
24.08.2020 - 01:38
![]() Patricia PONT wrote:
Patricia PONT wrote:
Bonjour, je ne comprends pas en que veut dire ... « les diagrammes A.1 et A.2 : 5 mailles de bordure devant au POINT MOUSSE, A.1 au-dessus de la maille suivante, répéter x fois A.2 et terminer 5 mailles de bordure »... : A1 au dessus de la maille suivante ? de plus ce diagramme A 1 ne doit il pas se retrouver sur la fin du rang avant les 5 mailles boutonnière ? La version en anglais ne m'éclaire pas non plus. Merci d’avance. Cordialement. Patricia
02.08.2020 - 10:44DROPS Design answered:
Bonjour Mme Pont, vous tricotez 1 fois A.1 (= 1 m end ou 1 m env) et vous répétez le diagramme A.2 qui correspond au motif ajouré - en même temps, vous tricotez les 5 m de bordure devant de chaque côté au point mousse. Ainsi, le motif sera symétrique de chaque côté. Bon tricot!
03.08.2020 - 08:18
![]() Lotta wrote:
Lotta wrote:
Dessa instruktioner har bytt plats... RÄTSTICKNING (stickas fram och tillbaka): Alla varv stickas räta. RÄTSTICKNING (stickas runt): Sticka *1 varv rätt och 1 varv avigt*, upprepa *-*
31.07.2020 - 17:11
![]() Christine wrote:
Christine wrote:
Hi there. I’m making ‘Agnes’ in size 7/8 I have completed sections A.1 and A.2 and have 272 stitches on my needle (not including the 2 x 5 garter stitch band stitches) and the pattern has repeated 17 times not 15 ... I have no idea why as I was following the instructions. Of course I don’t want to undo it so would it be ok to decrease to the 253 stitches specified and how to I do that evenly? Every 13th and 15th stitch? Thank you
30.07.2020 - 13:11DROPS Design answered:
Dear Christine, you should have worked the diagram over 101 sts, maybe you forgot to increase evenly after neck edge (from 80 to 101)? It looks like you have 20 sts too much, which is ca 10 cm too much in widht, you can decrease evenly but this might be visible on the jacket. Good luck and happy knitting!
30.07.2020 - 15:38
![]() Elke wrote:
Elke wrote:
Passe: Um einen sauberen Anschluss zu den Randmaschen am Ende jeder Hinreihe zu erhalten (wie am Anfang jeder Hinreihe), wollte ich A1 am Ende jeder Hinreihe noch einmal stricken. (5 Randmaschen/ A1/A2/A1/5 Randmaschen). Wäre das möglich? Größe: Könnte ich A2 um 1 oder 2 Muster verringern (für 2jährige). Muss A2 immer eine ungerade Zahl ergeben? Danke!
09.07.2020 - 07:52DROPS Design answered:
Liebe Elke, damit das Muster symetrisch wird, fängt man zuerst mit A.1, dann wiederholt man A.2 ( so gibt es 1 Masche glatt rechts beidseitig innerhalb den Blendemaschen) - leider können wir jede Anleitung nach jedem Wunsch umrechnen, gerne kann Ihnen aber Ihr DROPS Laden weiter helfen - auch telefonisch oder per E-Mail. Viel Spaß beim stricken!
09.07.2020 - 09:51
![]() Elke wrote:
Elke wrote:
Passe: Um einen sauberen Anschluss zu den Randmaschen am Ende jeder Hinreihe zu erhalten (wie am Anfang jeder Hinreihe), wollte ich A1 am Ende jeder Hinreihe noch einmal stricken. (5 Randmaschen/ A1/A2/A1/5 Randmaschen). Wäre das möglich? Größe: Könnte ich A2 um 1 oder 2 Muster verringern, um eine Größenänderung zu erreichen?Muss A2 immer eine ungerade Zahl ergeben? Ich möchte die Jacke für meine 2jährige Enkelin stricken.
09.07.2020 - 07:49
|
||||||||||||||||||||||
Agnes#agnescardigan |
||||||||||||||||||||||
 |
 |
|||||||||||||||||||||
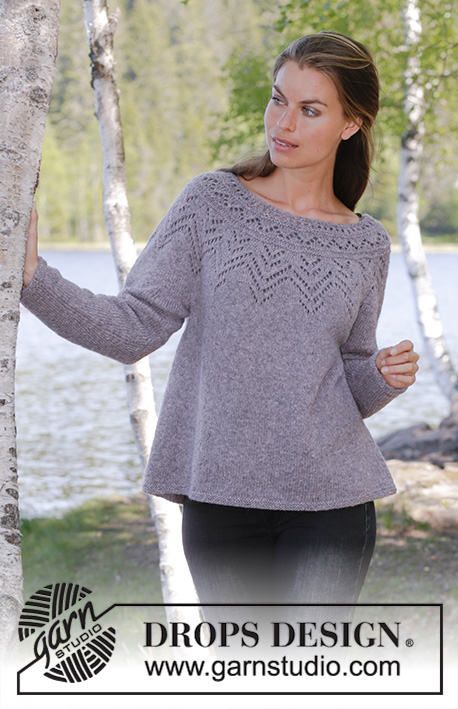
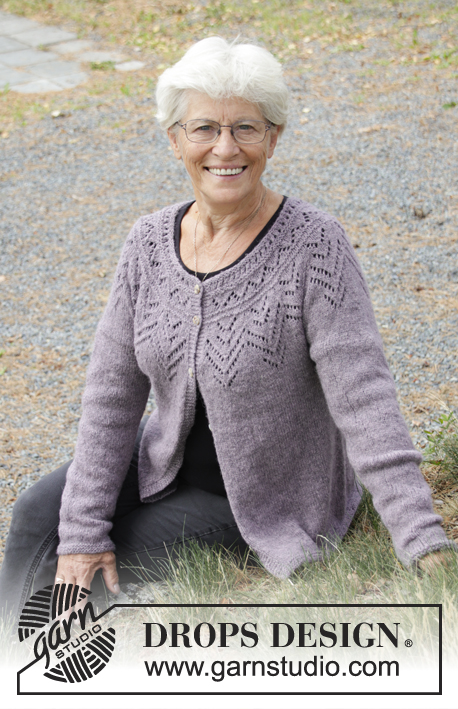
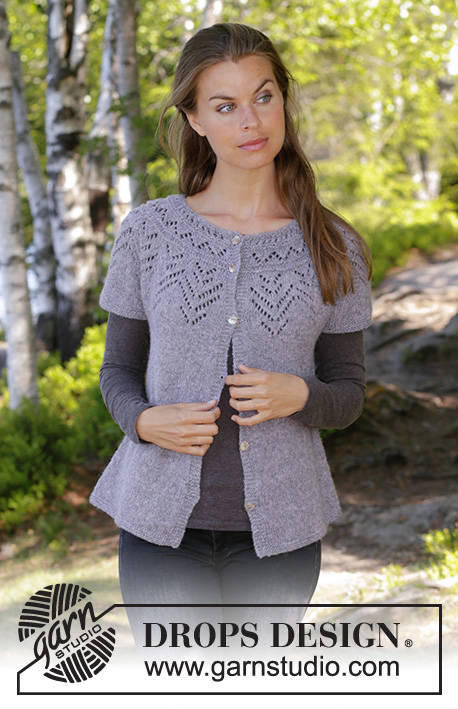
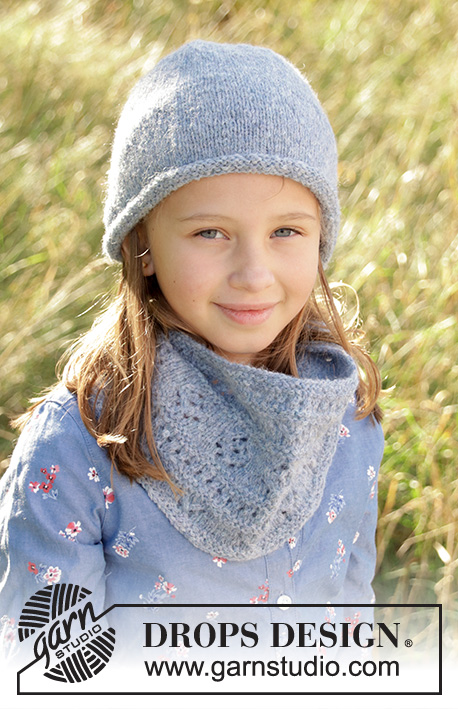
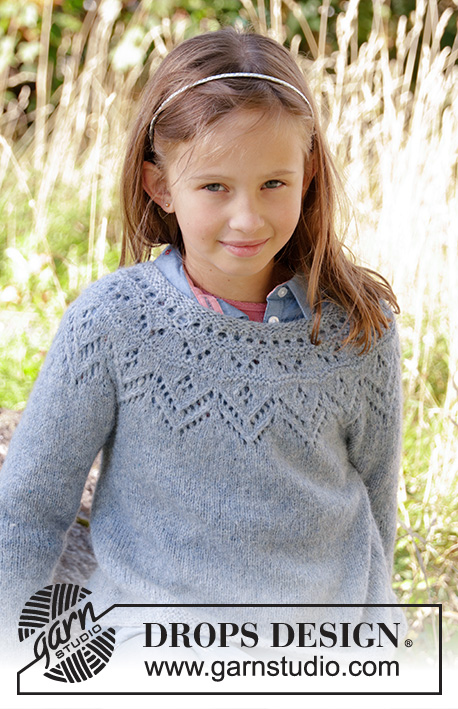
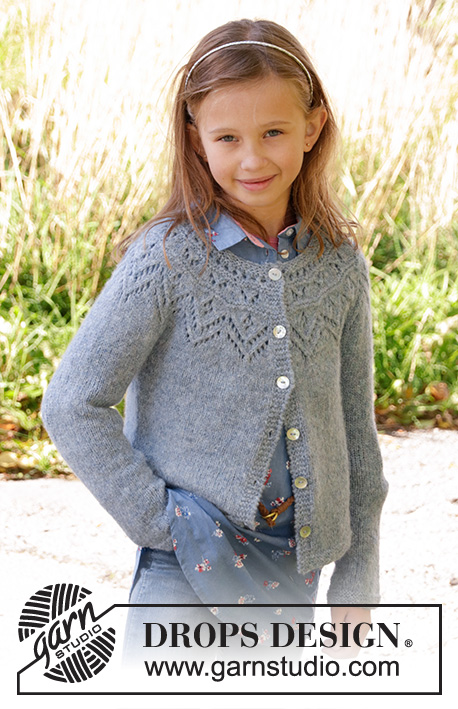
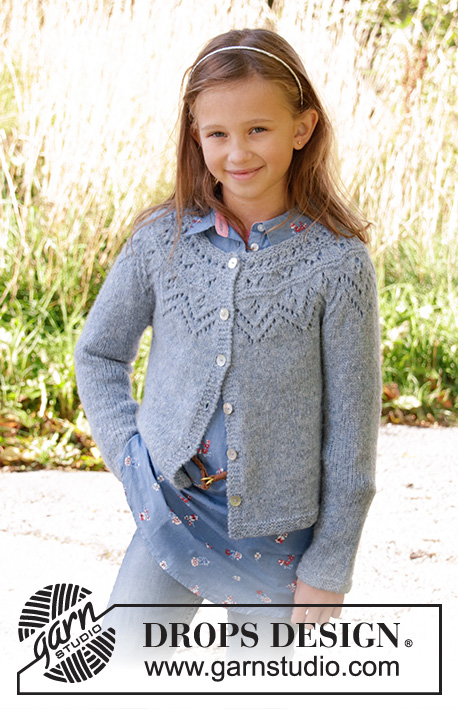
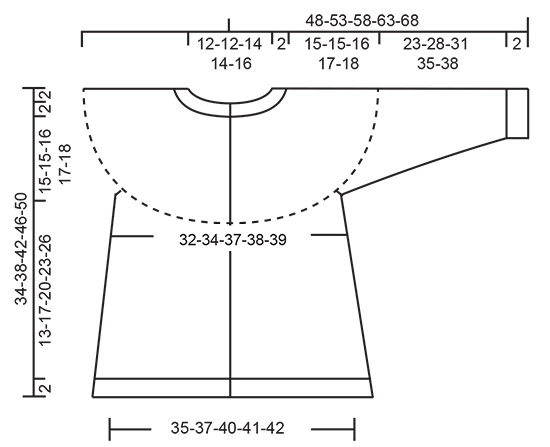
Knitted jacket for children in DROPS Sky. The piece is worked top down with round yoke, lace pattern, stocking stitch and garter stitch. Sizes 3-12 years.
DROPS Children 34-9 |
||||||||||||||||||||||
|
------------------------------------------------------- EXPLANATIONS FOR THE PATTERN: ------------------------------------------------------- RIDGE/GARTER STITCH (worked back and forth): 1 ridge = Knit 2 rows. RIDGE/GARTER STITCH (worked in the round): 1 ridge = 2 rounds. Knit 1 round and purl 1 round PATTERN: See diagrams A.1 and A.2. Choose diagram for your size. The diagrams show all the rows in the pattern seen from the right side. INCREASE TIP-1 (evenly spaced): To work out how to increase evenly, count the total number of stitches on the needle (e.g. 72 stitches) and divide by the number of increases to be made (e.g. 17) = 4.2. In this example, increase by making 1 yarn over after approx. each 4th stitch. On the next row work the yarn overs twisted to avoid holes. INCREASE TIP-2 (for sides of body): Work until there is 1 stitch left before the marker thread, 1 yarn over, knit 2 (the marker thread sits between these 2 stitches), 1 yarn over = 2 stitches increased. On the next row work the yarn overs twisted to avoid holes. Then work the new stitches in stocking stitch. DECREASE TIP (for sleeves): Decrease 1 stitch on each side of the marker thread as follows: Work until there are 3 stitches left before the marker thread, knit 2 together, knit 2 (the marker thread sits between these 2 stitches), slip 1 stitch as if to knit, knit 1 and pass the slipped stitch over the knitted stitch = 2 stitches decreased. BUTTONHOLE: Work the buttonholes on right band (when the garment is worn). 1 buttonhole = start from the wrong side and knit together the 2nd and 3rd stitch from the edge, make 1 yarn over. On the next row knit the yarn over to leave a hole. The first buttonhole is worked after approx. 1 cm from the neck edge, then the next 5-5-5-6-6 buttonholes every 5-6-6-6-7 cm. ------------------------------------------------------- START THE PIECE HERE: ------------------------------------------------------- JACKET - SHORT OVERVIEW OF THE PIECE: The piece is worked back and forth with circular needle, top down. It is divided for body and sleeves. The body is continued back and forth with circular needle. The sleeves are worked in the round with double pointed needles/short circular needle. YOKE: Cast on 72-76-80-86-92 stitches with circular needle size 4 mm and Sky. Work 2 RIDGES – see description above – remember BUTTONHOLES on right band – see description above. Knit 1 row where you increase 17-19-21-23-24 stitches evenly on row - READ INCREASE TIP-1! = 89-95-101-109-116 stitches on needle. Knit 1 row from the wrong side. Insert a marker thread on this round and measure from here. Work according to diagrams A.1 and A.2 as follows from the right side: Work 5 band stitches in GARTER STITCH, work A.1 over 1 stitch, A.2 a total of 13-14-15-14-15 times on the row and then 5 band stitches in garter stitch. REMEMBER THE KNITTING TENSION! When diagrams A.1 and A.2 have been completed in height there are 219-235-251-263-281 stitches on the row. On the next row from the right side adjust stitch count to 219-235-253-261-283 stitches. Continue working stocking stitch until the piece measures 15-15-16-17-18 cm from marker thread. The next row from the right side is worked as follows: Work 5 band stitches in garter stitch, 30-32-35-36-37 stitches in stocking stitch (= front piece), place the next 44-48-51-53-62 stitches on a thread (= sleeve), cast on 6 new stitches under the sleeve, work 61-65-71-73-75 stitches in stocking stitch (= back piece), place the next 44-48-51-53-62 stitches on a new thread (= sleeve), cast on 6 new stitches, work 30-32-35-36-37 stitches (= front piece) and 5 band stitches in garter stitch. BODY: There are 143-151-163-167-171 stitches on the needle. THE PIECE IS NOW MEASURED FROM HERE! Insert 1 marker thread in the middle of the 6 new stitches which were cast on in each side. Work stocking stitch back and forth with 5 band stitches in garter stitch on each side. When the piece measures 3 cm increase 1 stitch on each side of each marker (= 4 stitches increased) READ INCREASE TIP-2! Repeat this increase every 3-4½-5½-6½-7½ cm a total of 3 times = 155-163-175-179-183 stitches on needle. Continue working until the piece measures approx. 15-17-20-23-26 cm (or to desired length, there is approx. 2 cm until finished measurements). Work garter stitch for 2 cm. Loosely cast off with knit. Cut and fasten the thread. SLEEVE: Place the stitches from the one thread on short circular needle/double pointed needles size 4 mm (= 44-48-51-53-62 stitches) and knit up 1 new stitch in each of the 6 new stitches on the body (= 50-54-57-59-68 stitches). Insert 1 marker thread in the middle of these 6 stitches. Work stocking stitch in the round until the sleeve measures 3 cm. Now decrease 1 stitch on each side of the marker thread - READ DECREASE TIP. Continue with stocking stitch and repeat the decrease every 4-4-4-4-3½ cm until you have decreased a total of 5-6-7-8-10 times = 40-42-43-43-48 stitches on needle. Work stocking stitch until the sleeve measures 23-28-31-35-38 cm. Work garter stitch for 2 cm. Cast off with knit. Cut and fasten the strand. Work the other sleeve in the same way. ASSEMBLY: Sew buttons onto left band. |
||||||||||||||||||||||
Diagram explanations |
||||||||||||||||||||||
|
||||||||||||||||||||||
 |
||||||||||||||||||||||
 |
||||||||||||||||||||||
Have you finished this pattern?Tag your pictures with #dropspattern #agnescardigan or submit them to the #dropsfan gallery. Do you need help with this pattern?You'll find 28 tutorial videos, a Comments/Questions area and more by visiting the pattern on garnstudio.com. © 1982-2026 DROPS Design A/S. We reserve all rights. This document, including all its sub-sections, has copyrights. Read more about what you can do with our patterns at the bottom of each pattern on our site. |
||||||||||||||||||||||


With over 40 years in knitting and crochet design, DROPS Design offers one of the most extensive collections of free patterns on the internet - translated to 17 languages. As of today we count 325 catalogues and 12298 patterns translated into English (UK/cm). 12298
We work hard to bring you the best knitting and crochet have to offer, inspiration and advice as well as great quality yarns at incredible prices! Would you like to use our patterns for other than personal use? You can read what you are allowed to do in the Copyright text at the bottom of all our patterns. Happy crafting!
Post a comment to pattern DROPS Children 34-9
We would love to hear what you have to say about this pattern!
If you want to leave a question, please make sure you select the correct category in the form below, to speed up the answering process. Required fields are marked *.