
Popular categories
Looking for a yarn?






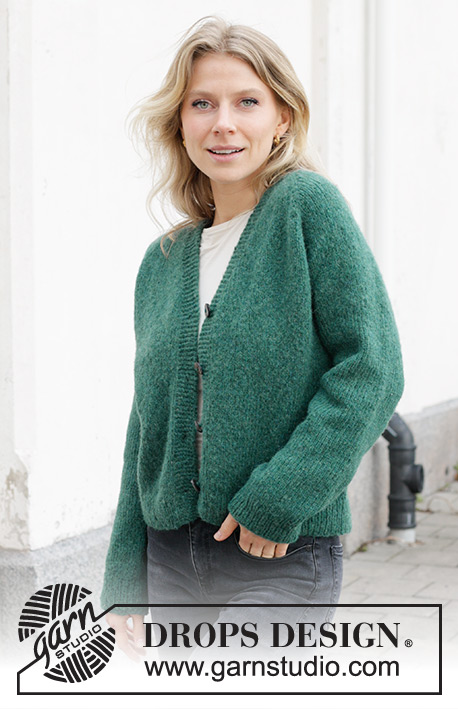
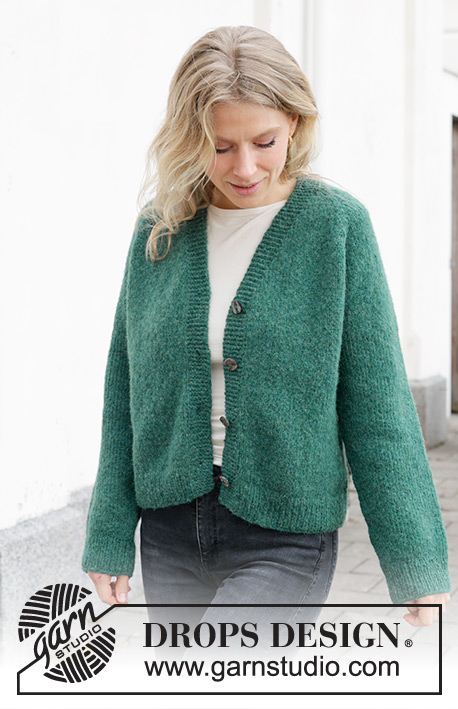
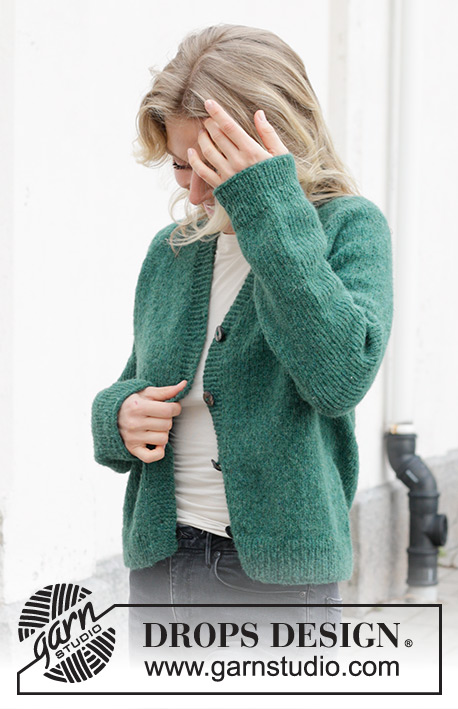
































Comments / Questions (136)
 Fabienne wrote:
Qu’est-ce exactement ce qu’on appelle l’empiètement ? Comment le mesurer si on ne sait pas quoi mesurer !
14.10.2026 - 15:11DROPS Design answered:
Bonjour Fabienne, l'empiècement correspond à la partie où vous avez réuni vos bordures devants et monté les mailles entre elles = vous avez maintenant entre 82 et 88 m sur votre aiguille. Vous mesurerez la longueur totale de l'empiècement à partir du milieu dos (= au milieu des 68-74 m que vous avez monté entre les bordures au début de l'empiècement. Si vous avez d'autres questions, n'hésitez pas à revenir. Bon tricot!
15.10.2026 - 16:35
 Petra wrote:
Hallo ich verstehe es nicht mit den seperat gestrickten Blenden. Das Strickstück sieht komisch aus.Wie soll ich die denn an den hinteren Halsbereich nähen die sind doch mit auf der Nadel oder nicht? Die Anleitung ist finde ich verwirrend.
11.10.2026 - 13:30DROPS Design answered:
Liebe Petra, in diesem Video (für ein anderes Modell, dh mit verkürzten Reihen die Sie hier nicht stricken), zeigen wir, wie man die Blende zuerst strickt, dann die Maschen dazwischen anschlägt, wie man weiter strickt und wie es am Ende zusammengenäht wird. Viel Spaß beim Stricken!
12.10.2026 - 09:30
Fabienne wrote:
Assez simple à réaliser. J’ai fait un petit changement parce que je trouve l’encolure trop longue. Au lieu d’augmenter toutes les 4 lignes, j’augmente toutes les 3 lignes. J’aurai donc 5 boutons au lieu des 4 prévus.
06.10.2026 - 09:13
Lucie wrote:
Bonjour ! J’ai déjà fait plusieurs pulls en cercle, mais là je bloque comme c’est en aller retour : je ne trouve pas comment tricoter les mailles envers torses pour le jersey, je ne trouve que des vidéos où vous montrez le raglan dans le cercle ! Avez vous un pas à pas pour le raglan mais en aller retour ? Merci par avance pour tout votre travail ! Lucie
08.09.2026 - 20:39DROPS Design answered:
Bonjour Lucie, découvrez ici, en vidéo comment augmenter pour un raglan avec des jetés tricotés torse à l'envers au rang suivant - notez que dans la vidéo, on augmente de chaque côté d'1 seule maille, pour ce modèle, on va augmenter de chaque côté de 2 mailles jersey. Bon tricot!
09.09.2026 - 07:46
Jutta wrote:
Es werden 4 markierer gesetzt zwischen 2 m. Wird dann direkt vor u d nach dem markierer zugenommen oder vor und hinter dem markierer erst eine rechte gestrickt und davor und dahinter zugenommen? So dass die raglanlinie zwischen den Vorder/Rückrnteilen u d Ärmeln aus 2 rechten m besteht? Dann würde es doch einfacher sein, 8 markierer zu setzen.
23.08.2026 - 10:18DROPS Design answered:
Liebe Jutta, es sind jeweils 2 Maschen für jede Raglan, so werden die Zunamhen 1 Masche vor dem Markierungsfaden und/oder 1 Masche nach dem Markierungsfaden, so sind es immer 2 Maschen zwischen die Raglanzunahmen. Viel Spaß beim Stricken!
24.08.2026 - 08:59
 Camilla wrote:
Hei, jeg har nå strikket ganske langt ned på jakken, men lurer på om de 17 cm stolpene også skal syes på ermene (de 20 maskene på toppen samt halve bakstykket) Forstår ikke hvordan 17 cm x 2 holder ? Har jeg misforstått noe? Hilsen Camilla
18.08.2026 - 11:34DROPS Design answered:
Hej Camilla, du strikker de 2 stolper og legger masker op imellem stolperne, så når du fortsætter med at strikke nedad fortsætter du også over stolperne i hver side :)
20.08.2026 - 11:24
Irmgard wrote:
Hallo diese Anleitung ist sehr verwirrend, kann es sein das diese von einer anderen Sprache übersetzt wurde ? Welche Bedeutung " Beim Tragen der Jacke " Bei Anleitung der Knopflöcher. Ferner bei Beschreibung der Blende und Einarbeitung der Knopflöcher . Die Blenden werden doch separat gestrickt Länge der Blende 17 cm . Ich zitiere : Knopflöcher im Abstand von 8 cm die Blende hat 17 cm ??? Ich habe schon Pullover von oben nach unten gestrickt. Komme leider hier nicht zurecht.
03.08.2026 - 20:52DROPS Design answered:
Liebe Irmgard, "beim Tragen der Jacke" bezieht sich auf die Angabe "rechts", d.h. es ist die vordere Blende gemeint, die sich beim Tragen der Jacke (also angezogen) an der rechten Seite befindet (also nicht rechts, wenn die Jacke vor Ihnen liegt). Die 17 cm der Blenden sind die Blendenstücke, die hinterher an den rückwärtigen Halsausschnitt genäht werden. Die Maße, die bei den Knopflöchern genannt sind, beziehen sich auf die Abstände zwischen den Knopflöchern beim weiteren Stricken, denn wenn Sie die Maschen für den rückwärtigen Halsausschnitt angeschlagen haben, stricken Sie ja die Blenden zusammen mit der Jacke weiter. Gutes Gelingen!
03.08.2026 - 22:06
Katja wrote:
Sorry im so mehr Kommentare ich lese um so durcheinander. das mit 6 Reihen 8 M zunehmen ist klar. Dann jede 2. R Vorder+Rücken, jede 4.R Ärmel, also zb R 2 nur Vorder+Rücken, R 4 dann Ärmel, Vorder+Rück,richtig? Und ich mach immer 1 Umschlag vor der Vorletzten oder nach der 1. M? Heisst R 2 4M zunehmen, Rückreihe links. R 3 Hin und Rückreihe nur stricken, R 4 8 M zunehmen. oder zähl ich die R falsch? Beim Kommentar vom 16.08. ist das iwie anders beschrieben
03.06.2026 - 17:18DROPS Design answered:
Liebe Katja, in M werden Sie so zunehmen: 8 Maschen (= Vorder-, Rücken + Ärmel) 6 Mal in jeder 2. Reihe (= in jeder Hinreihe), dann nehmen Sie abwechslungsweise in jeder 2. Reihe 4 Maschen (nur Vorder + Rückenteil) und 8 Maschen (Vorder-, Rückenteile und Ärmel) insgesamt 22 Mal zu. Dann in M nehmen Sie noch 1 Mal in der nächsten Hinreihe aber nur 4 Maschen (Vorder und Rückenteile) = es wurde insgesamt 6+22+1=29 Mal für Vorder/Rücktenteil und 6+11=17 Mal für die Ärmel zugenommen. Viel Spaß beim Stricken!
04.06.2026 - 09:34
Katja wrote:
Ich strick in Gr, M und der Fehlerteufel ist drin, da meine Jacke bei Raglanende über 40cm ist. Bei Zunahme V Auschnitt und Vorderseite werden 3 M insgesamt zugenommen? 1 M direkt nach Blende (VAuschnitt), dann 1 M re, 1 Zunahme (Vorderteil)und dann 1 Zunahme noch nach der 8. M in der 1. Zunahmereihe? ich hab nur 1 Zunhame gemacht nach der 8. M
03.06.2026 - 10:58DROPS Design answered:
Liebe Katja, die V-Ausschnitt-Zunahmen werden gleichzeitig als die Raglanzunahmen gestrickt, nur mit einem anderen Rythmus, beim V-Ausschnitt nimmt man in jeder 4. Reihe (= in jeder 2. Hinreihe) für beide Vorderteile zu; Für Raglan wird man zuerst in jeder 2. Reihe (jeder Hinreihe) 8 Maschen zunehmen, dann abwechslungs in jeder 2. Reihe 8 M (wie zuvor: Vorder-/Rückenteile + Ärmel) und 4 Maschen (nur Vorder-/Rückenteile) zunehmen. Es wird insgesamt 29 M in jeder 2. Reihe für Rumpf zugenommen = 58 Reihen so mit 22 Reihen =10cm sind diese 58 Reihen ca 26 cm. Viel Spaß beim Stricken!
04.06.2026 - 08:55
 Anastasya wrote:
When I increase inside the band, does that mean I need to knit the increased stitches in garter stitch or in stocking stitch after the increase? Does that mean that the band will be increased over the work?
28.04.2026 - 18:36DROPS Design answered:
Hi Anastasya, The increased stitches are worked in stocking stitch, so the bands remain the same width throughout. Regards, Drops Team.
29.04.2026 - 06:07
|
|
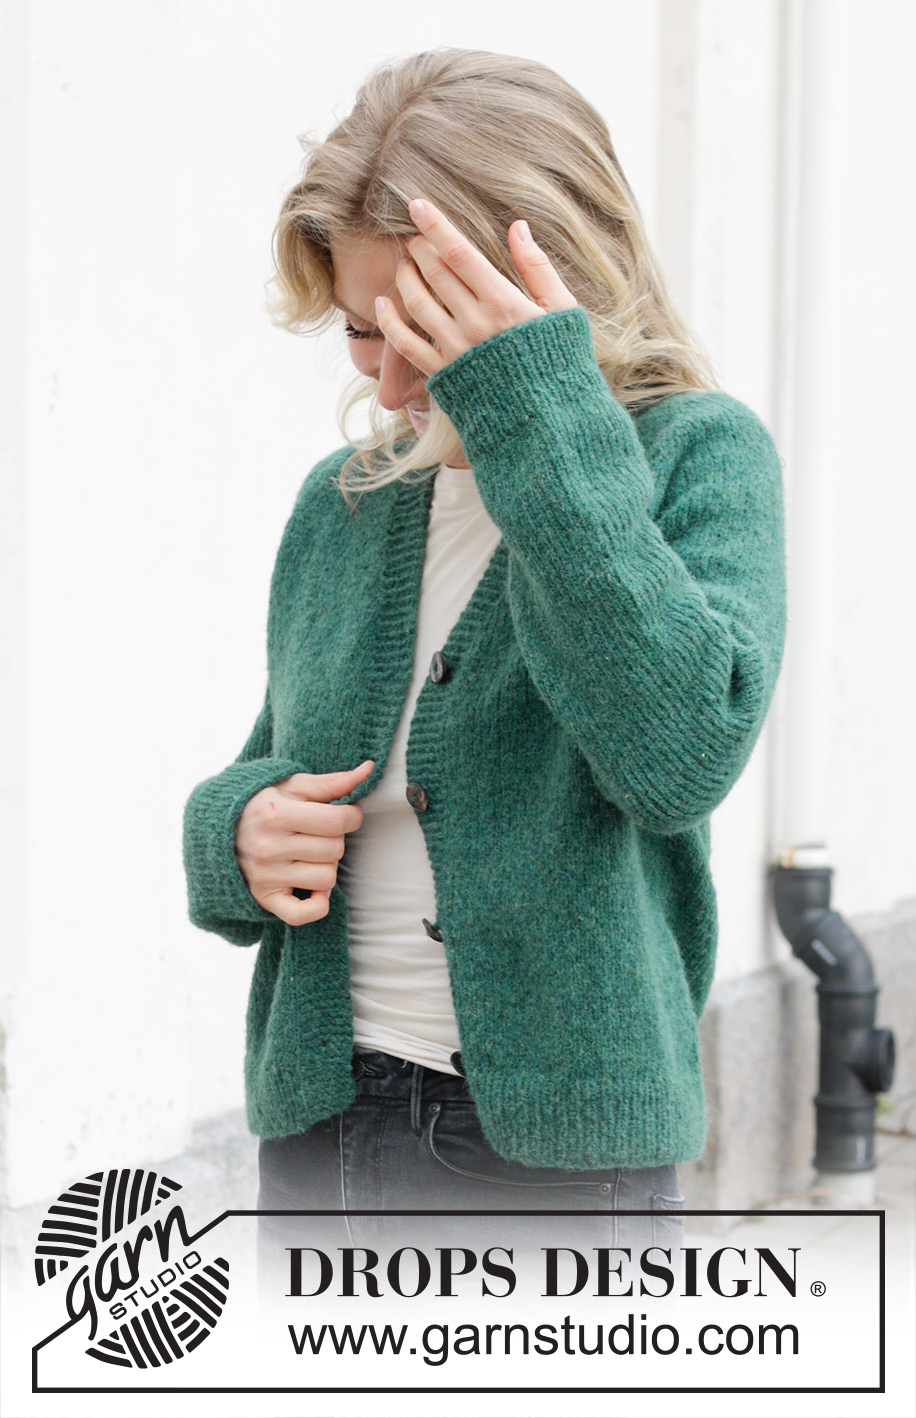
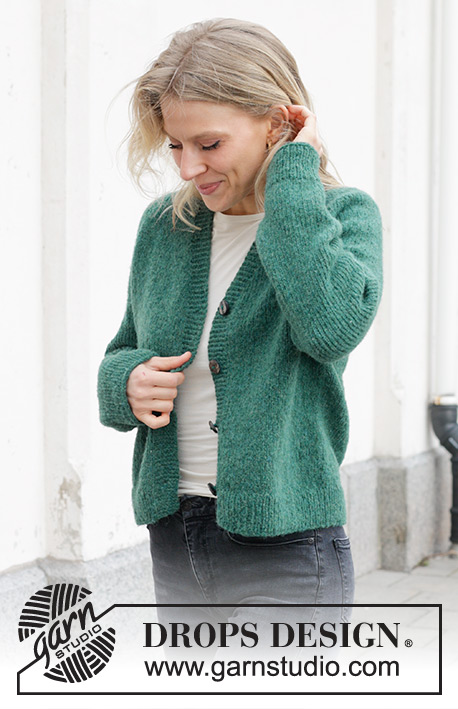
No Nonsense Cardigan#nononsensecardigan |
|
 |
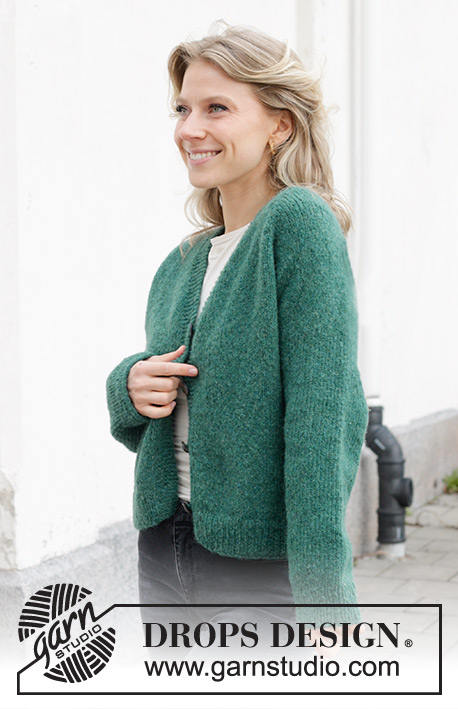 |
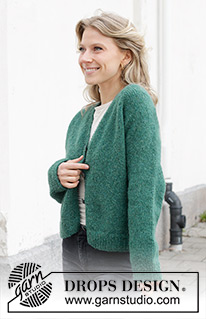
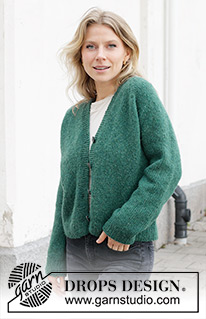
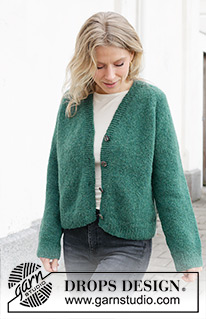
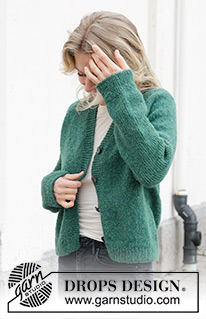
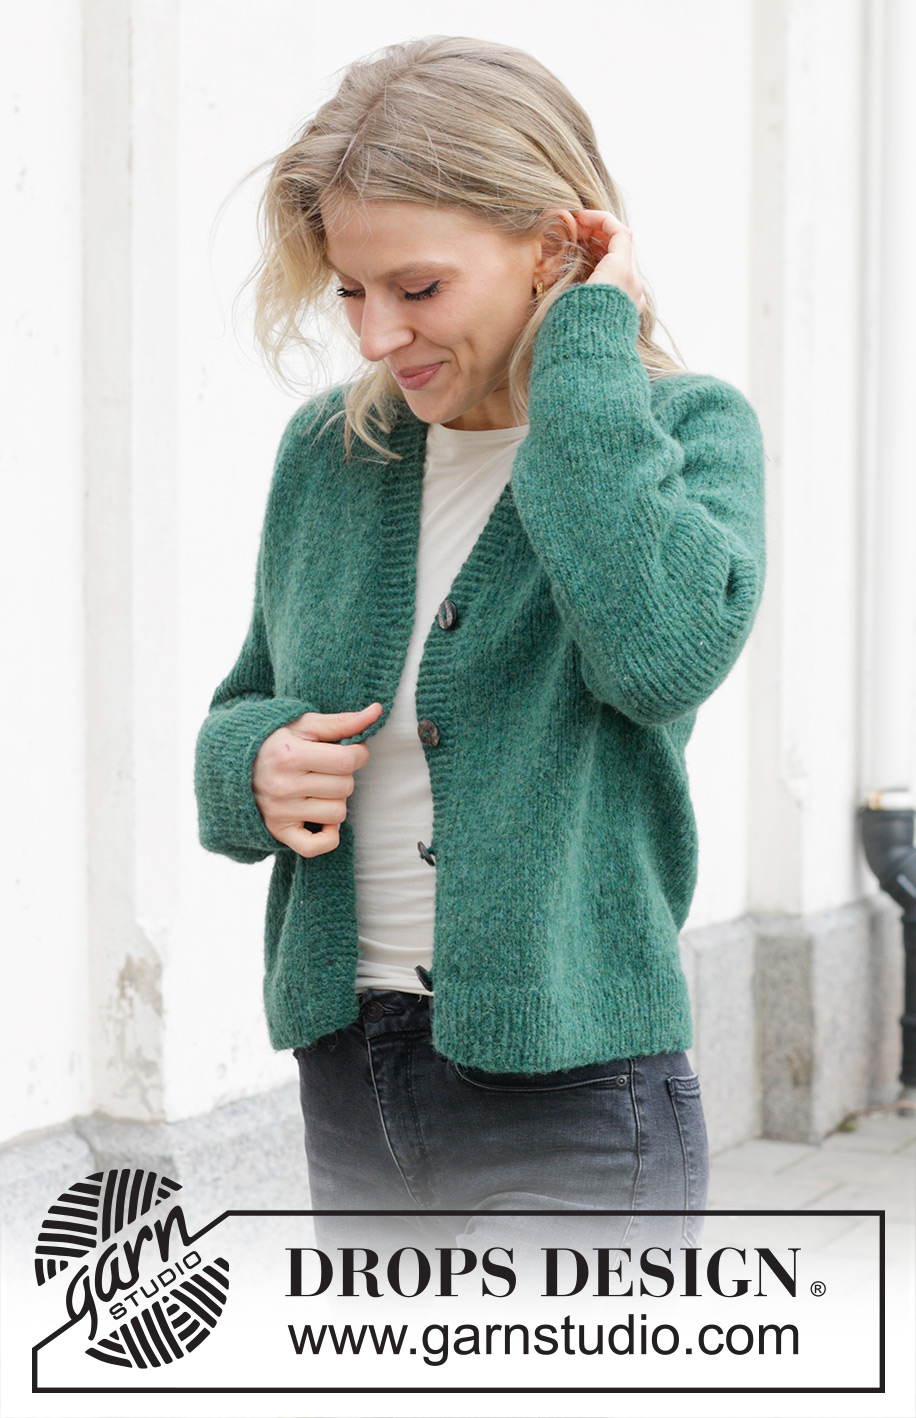
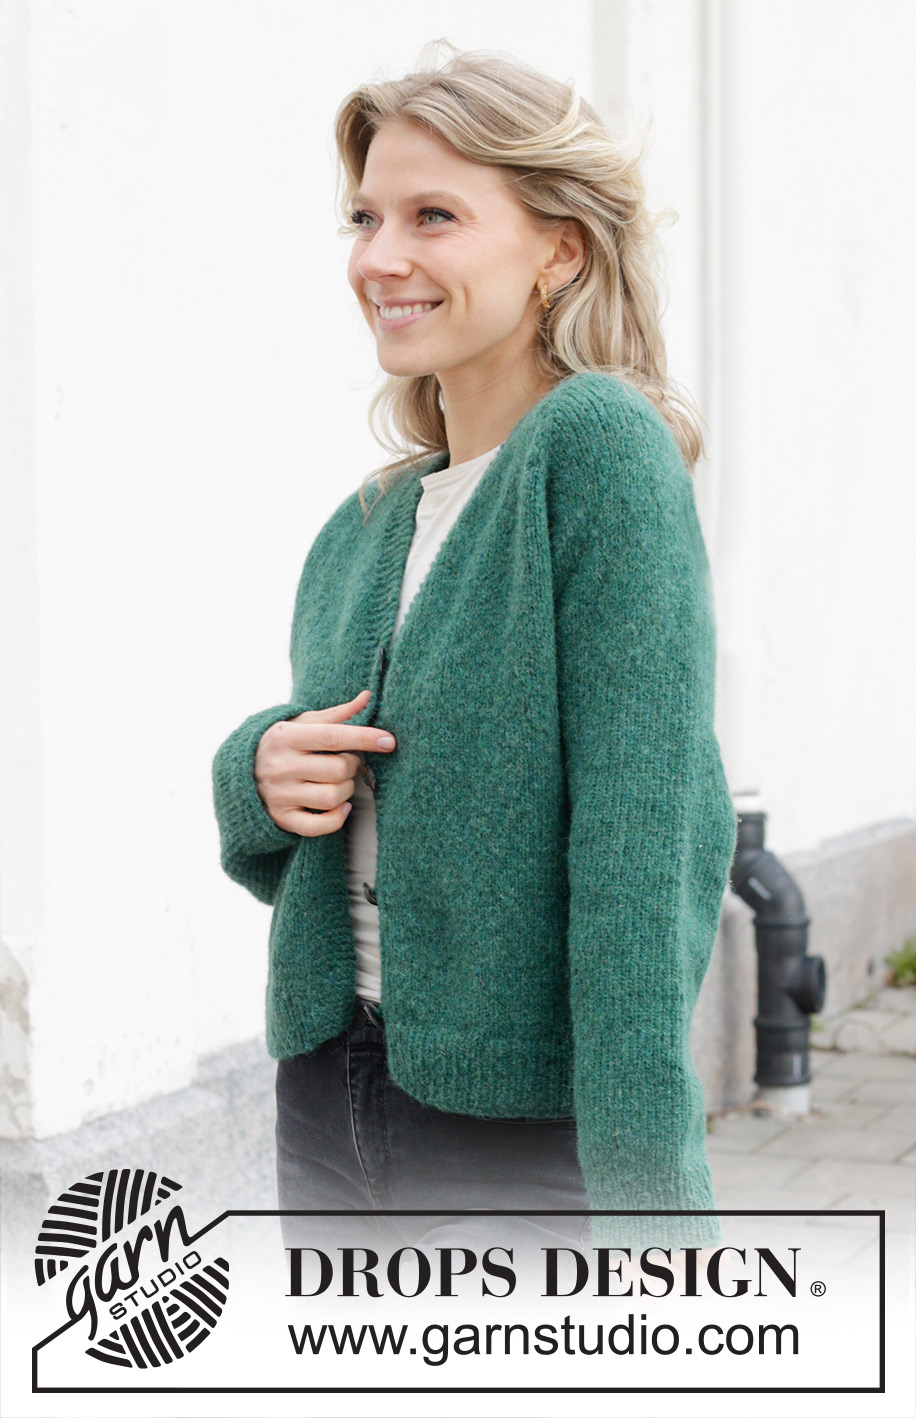
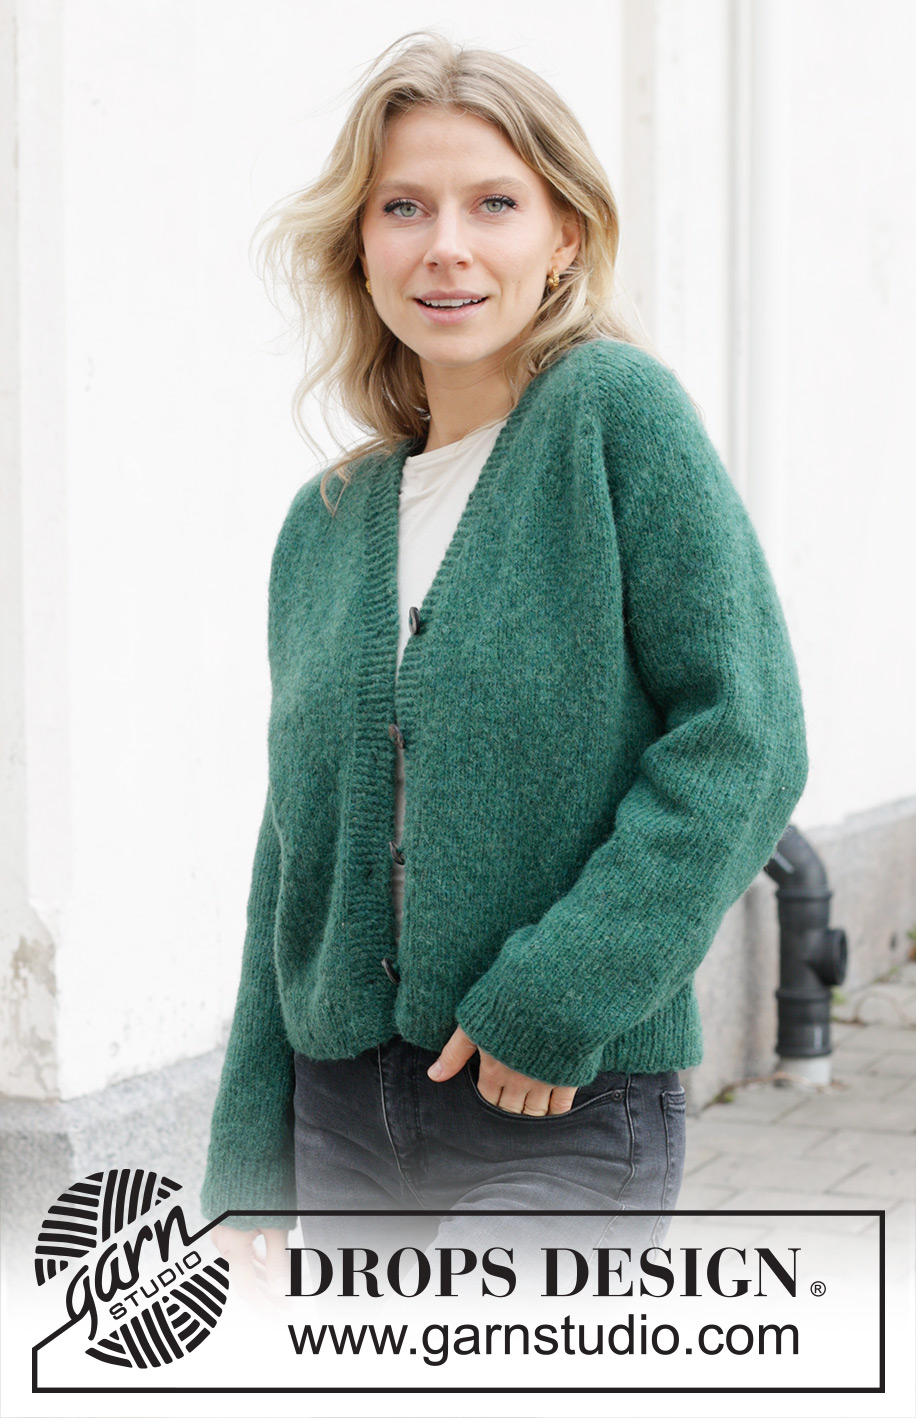
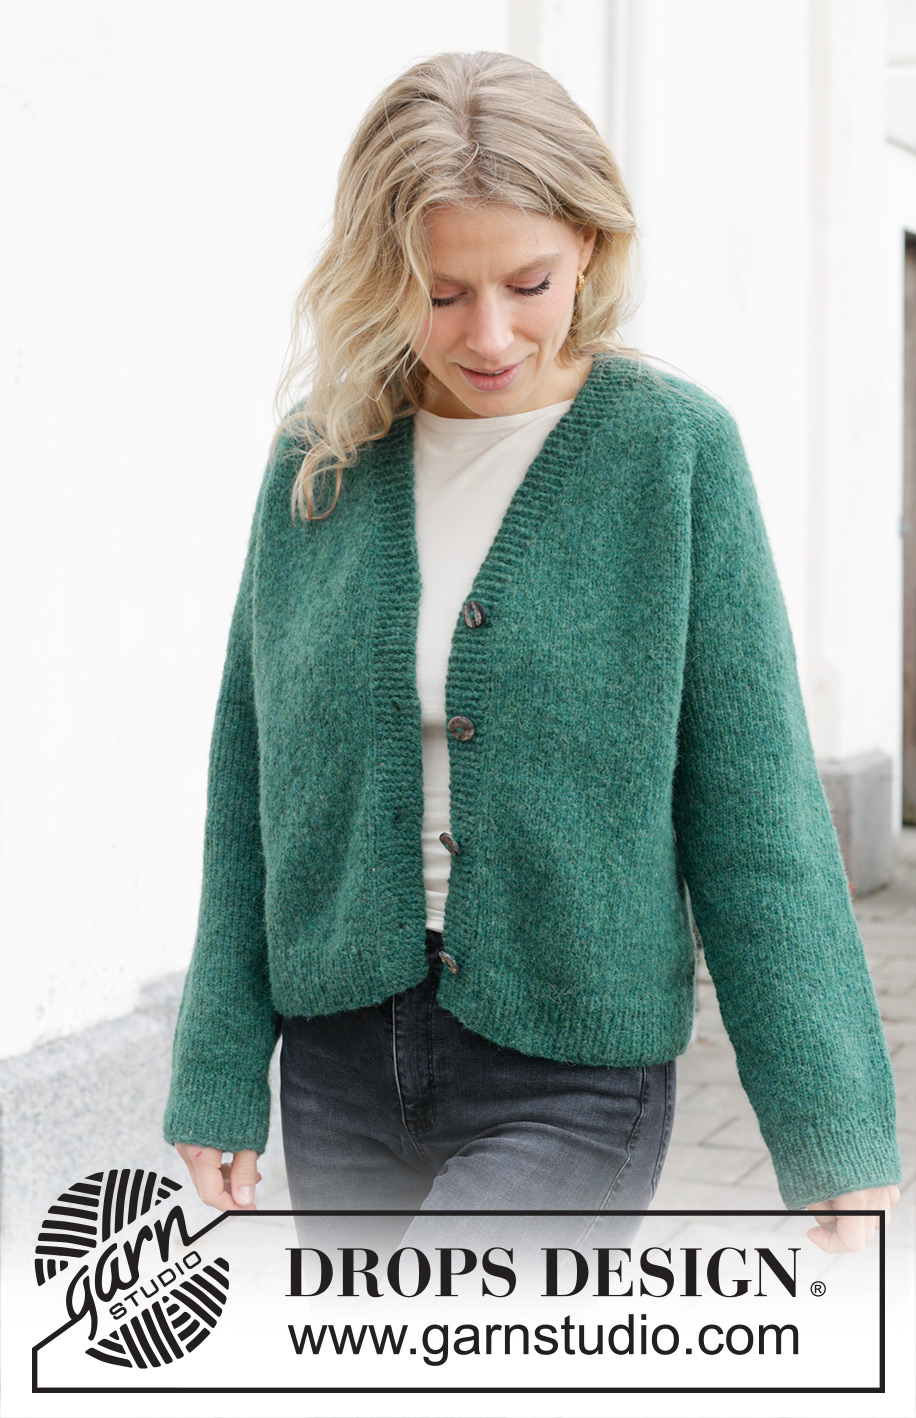
Knitted jacket in DROPS Air. The piece is worked top down with raglan and V-neck. Sizes S - XXXL.
DROPS 244-8 |
|
|
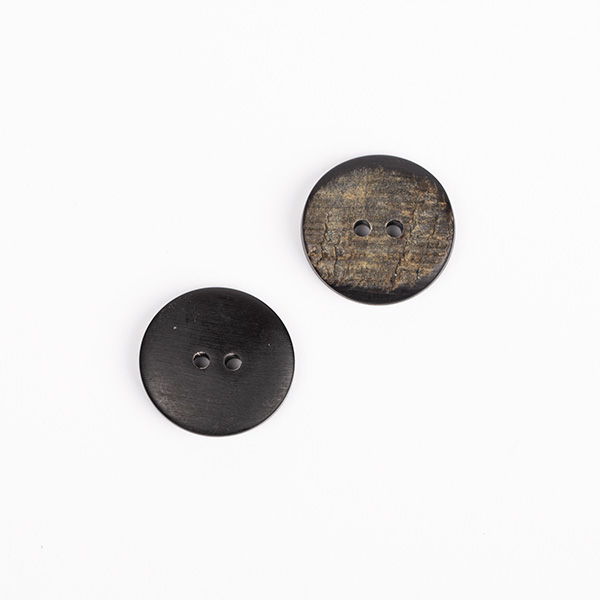
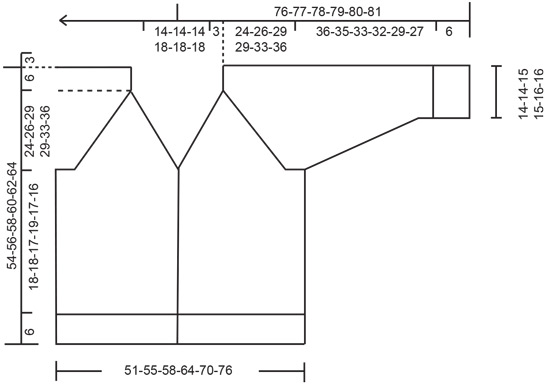
------------------------------------------------------- EXPLANATIONS FOR THE PATTERN: ------------------------------------------------------- GARTER STITCH (worked back and forth): Knit all rows. 1 ridge = knit 2 rows. RAGLAN: Increase 1 stitch before/after 2 stitches in each transition between the body and sleeves; the marker-thread sits between these 2 stitches. Increase 1 stitch by making 1 yarn over which is worked twisted on the next row/round to avoid a hole. The new stitches are then worked in stocking stitch. BUTTONHOLES: Work buttonholes on the right band (when the garment is worn). Work from the right side when there are 4 stitches left on the row as follows: Make 1 yarn over, knit 2 together and knit 2. On the next row (wrong side), knit the yarn over to leave a hole. The first buttonhole is worked 1 cm after the last increase for the V-neck, then the other 3 buttonholes with approx. 7-8-8½-7½-8-9 cm between each one. DECREASE TIP (for sleeves): Start 3 stitches before the marker-thread, knit 2 together, knit 2 (marker-thread sits between these 2 stitches), slip 1 stitch knit-wise, knit 1 and pass the slipped stitch over the knitted stitch (2 stitches decreased). ------------------------------------------------------- START THE PIECE HERE: ------------------------------------------------------- JACKET – SHORT OVERVIEW OF THE PIECE: Piece is worked back and forth, top down. Start by working 2 loose bands in garter stitch. Stitches are cast on between the 2 bands for the shoulders and back neck and the yoke continued back and forth with circular needle from mid-front. Stitches are increased for raglan and the V-neck. The yoke is divided for the body and sleeves and the body continued back and forth with circular needle. The sleeves are worked in the round with short circular needle/double pointed needles. RIGHT BAND (when the garment is worn): Cast on 7 stitches with circular needle size 5 mm and DROPS Air. Work GARTER STITCH – read description above, until the band measures 17-17-17-19-19-19 cm, finishing after a row from the wrong side. Lay the piece to one side. LEFT BAND: Cast on 7 stitches with circular needle size 5 mm and DROPS Air. Work garter stitch until the band measures 17-17-17-19-19-19 cm, finishing after a row from the right side. Do not cut the strand. Cast on 68-68-68-74-74-74 stitches at the end of this row, then knit the right band stitches = 82-82-82-88-88-88 stitches. Work 1 row with garter stitch over each band and purling the cast-on stitches. Insert 4 marker-threads (used when increasing for RAGLAN – read explanation above), without working the stitches and inserting them between 2 stitches as follows: Count 9 stitches, insert marker-thread 1, count 20 stitches, insert marker-thread 2, count 24-24-24-30-30-30 stitches, insert marker-thread 3, count 20 stitches, insert marker-thread 4, there are 9 stitches left on the row. YOKE: REMEMBER THE KNITTING TENSION! Continue back and forth with stocking stitch and garter stitch over each band. At the same time increase for the V-neck and raglan as described below. Read the next 2 sections before continuing. Start mid-front, from the right side. V-NECK: Increase for the neck inside the bands every 4th row 11-11-11-14-14-14 times by making 1 yarn over, which is worked twisted on the next row to avoid a hole. 1 cm after the last increase for the neck begin working the BUTTONHOLES – read description above. RAGLAN: Increase on each side of 2 stocking stitches in each transition between the front/back pieces and the sleeves every 2nd row (each row from the right side = 8 increased stitches) 6 times – read description above. Continue to increase for raglan every 2nd round but every 2nd increase is only on the front/back pieces (4 increased stitches), i.e., increase on the front/back pieces every 2nd row (each row from the right side) and on the sleeves every 4th row (every 2nd row from the right side). Increase like this 18-22-26-26-30-30 times on the body (9-11-13-13-15-15 times on the sleeves). SIZES S, M, XL, XXL and XXXL (the increases in size L are finished): Continue with stocking stitch and increase for raglan but now only increase on the body every 2nd row (the sleeve increases are finished) 2-1-1-1-5 times. ALL SIZES: You have increased a total of 26-29-32-32-37-41 times on the body and 15-17-19-19-21-21 times on the sleeves. After the last increase there are 268-288-308-324-348-364 stitches. Continue with stocking stitch and the bands in garter stitch until the yoke measures 24-26-29-29-33-36 cm, measured mid-back. Divide for the body and sleeves as follows: Work the first 46-49-52-56-60-64 stitches (front piece), place the next 50-54-58-58-62-62 stitches on a thread for the sleeve, cast on 10-10-10-12-14-16 stitches (in side under sleeve), work 76-82-88-96-104-112 stitches (back piece), place the next 50-54-58-58-62-62 stitches on a thread for the sleeve, cast on 10-10-10-12-14-16 stitches (in side under sleeve), work the last 46-49-52-56-60-64 stitches (front piece). BODY: = 188-200-212-232-252-272 stitches. Continue with stocking stitch and the bands in garter stitch for a further 18-18-17-19-17-16 cm. Knit 1 row from the right side and increase 19-21-21-23-25-27 stitches evenly spaced (do not increase over the bands) = 207-221-233-255-277-299 stitches. Change to circular needle size 4 mm and work as follows from the wrong side: 7 band stitches in garter stitch, * purl 1, knit 1 *, work from *-* until there are 8 stitches left, purl 1 and 7 band stitches in garter stitch. Continue this rib for 6 cm. Cast off. The jacket measures approx. 54-56-58-60-62-64 cm from the shoulder. SLEEVES: Place the 50-54-58-58-62-62 stitches from the thread on the one side of the piece on short circular needle/double pointed needles size 5 mm and knit up 1 stitch in each of the 10-10-10-12-14-16 stitches cast on under the sleeve = 60-64-68-70-76-78 stitches. Insert a marker-thread in the middle of the new stitches under the sleeve. Work stocking stitch in the round. When the sleeve measures 4 cm, decrease 2 stitches under the sleeve – read DECREASE TIP. Decrease like this every 5-3½-2½-2½-2-1½ cm a total of 6-8-9-10-11-11 times = 48-48-50-50-54-56 stitches. Continue working until the sleeve measures 36-35-33-32-29-27 cm from the division. Knit 1 round and increase 8-8-10-10-10-12 stitches evenly spaced = 56-56-60-60-64-68 stitches. Change to double pointed needles size 4 mm and work rib (knit 1, purl 1) for 6 cm. Cast off. The sleeve measures approx. 42-41-39-38-35-33 cm from the division. Work the other sleeve in the same way. ASSEMBLY: Sew the buttons onto the left band. Sew together the 2 loose bands mid-back and sew them to the neckline. |
|
 |
|
Have you finished this pattern?Tag your pictures with #dropspattern #nononsensecardigan or submit them to the #dropsfan gallery. Do you need help with this pattern?You'll find 22 tutorial videos, a Comments/Questions area and more by visiting the pattern on garnstudio.com. © 1982-2026 DROPS Design A/S. We reserve all rights. This document, including all its sub-sections, has copyrights. Read more about what you can do with our patterns at the bottom of each pattern on our site. |
|






With over 40 years in knitting and crochet design, DROPS Design offers one of the most extensive collections of free patterns on the internet - translated to 17 languages. As of today we count 333 catalogues and 12532 patterns translated into English (UK/cm). 12532
We work hard to bring you the best knitting and crochet have to offer, inspiration and advice as well as great quality yarns at incredible prices! Would you like to use our patterns for other than personal use? You can read what you are allowed to do in the Copyright text at the bottom of all our patterns. Happy crafting!
Post a comment to pattern DROPS 244-8
We would love to hear what you have to say about this pattern!
If you want to leave a question, please make sure you select the correct category in the form below, to speed up the answering process. Required fields are marked *.