


Komentáře / Otázky (91)
![]() Dumet napsala:
Dumet napsala:
Bonjour pour ce modèle en taille m pouvez-vous me dire combien je dois commander de pelotes. Je vous remercie
25.06.2025 - 20:50Odpověď DROPS Design :
Bonjour Mme Dumet, vous trouverez toujours la quantité requise pour chaque taille en haut de page, dans l'onglet "Explications", il faut ainsi en taille M 400 g DROPS Air/50 g la pelote Air = il vous faudra ainsi 8 pelotes DROPS Air pour ce pull en taille M. Bon tricot!
26.06.2025 - 08:43
![]() Inge napsala:
Inge napsala:
De stekenverhouding is 17 stkn = 10cm. Na de pas, als het meerderen klaar is, komen we op een totaal van 288 steken (m) Dat betekent 288:17=169cm. Is dat niet enorm groot? Het lijf zelf wordt immers 2x55cm?
24.06.2025 - 19:01Odpověď DROPS Design :
Dag Inge,
Als de pas klaar is, staan de steken voor de mouwen en het lijf samen op de naald. Na het splitsen van het werk voor de mouwen en het lijf heb je 200 steken voor het lijf.
26.06.2025 - 20:10
![]() Jacqueline napsala:
Jacqueline napsala:
Waarom word iets van boven naar beneden gebreid? Ik brei liever alle panden apart maar kom er dan zo niet uit
12.06.2025 - 19:56Odpověď DROPS Design :
Dag Jacqueline,
Een voordeel hiervan is dat je tijdens het breien het kledingstuk kunt passen en op de juiste lengte maken. Verder zie je het vaak (hoewel bij dit patroon niet van toepassing) in Scandinavische patronen met ingebreide motieven in een ronde pas. Dit is lastiger als je losse panden heen en weer breit. Via deze link vind je meer informatie.
13.06.2025 - 22:23
![]() Inge Umans napsala:
Inge Umans napsala:
Waarom worden eerst biezen gebreid en wat wordt daar mee gedaan?
01.06.2025 - 19:22Odpověď DROPS Design :
Dag Inge,
De 2 biezen de eerst worden gebreid worden aan het einde tegen elkaar genaaid en dan aan de achterkant aan de halslijn genaaid. Op die manier lopen de biezen door over de schouder en heb je alleen midden achter een naad in de bies.
01.06.2025 - 20:42
![]() Miruna napsala:
Miruna napsala:
Hello. Can you simplify a little the increases in raglan? I don't seem to quite understand when to increase. And the increases for v-neck are separated from the thread marks? Thank you for your time!
26.04.2025 - 23:49Odpověď DROPS Design :
Dear Miruna, the V-neck increases are worked in the bands (so you don't use the markers for these increases). The raglan increases are worked on each side of the markers. Each marker is located between 2 stocking stitch stitches that represent the transition between the sleeves and back/front pieces. So you increase before and after the stitches next to the marker as follows: 1 yarn over, 1 stitch in stocking stitch, marker, 1 stitch in stocking stitch, 1 yarn over. After increasing like this 6 times you will then increase alternately on each side or only on the side of the front/back piece (before marker 1, after marker 2, before marker 3, after marker 4). Happy knitting!
27.04.2025 - 12:46
![]() Kateryna napsala:
Kateryna napsala:
What does it mean “increase inside the bands” (the v-neck part)? Where exactly should it be? Right after garter stitches?
20.03.2025 - 19:11Odpověď DROPS Design :
Dar Kateryna, you will increase at the beginning of a row from RS after the first 7 stitches, ie after the front band stitches; and you will increase at the end of a row from RS before the last 7 stitches, ie before the front band stitches. Happy knitting!
21.03.2025 - 08:00
![]() Daniela napsala:
Daniela napsala:
Nesedí mi u tohoto návodu počet ok u rukávu vel.Xxxl, počátek 20+6x2+15×2=52, na oddělení v podpaží je třeba 62 ok. Kde je vzít? Děkuji za odpověď, Daniela
06.03.2025 - 08:25Odpověď DROPS Design :
Milá Danielo, vždyť vy tam ta oka máte :-) - váš výpočet je naprosto správný (20 + 12 + 30)! Hodně zdaru, Hana
29.03.2025 - 10:59
![]() Britt Caroline Soffie Kaae napsala:
Britt Caroline Soffie Kaae napsala:
Jeg vil gerne høre om jeg bare kan bytte garnet i opskriften til "no nonsens cardigan", ud med Drops brushed alpaca silk? Jeg tænker bare at den måske bliver lidt "slasket"
05.03.2025 - 10:18Odpověď DROPS Design :
Hej Britt. Ja du kan byta ut garnet till Brushed Alpaca Silk eftersom de garnen tillhör samma garngrupp/har samma stickfasthet. Det är en annan typ av garn så det kommer få ett annat uttryck, men det kommer an på vad du själv önskar (se gärna på bilder på plagg i Brushed Alpaca Silk för att få en uppfattning av hur det kommer se ut). Mvh DROPS Design
07.03.2025 - 08:47
![]() Sylvia Dreiser Farnsworth napsala:
Sylvia Dreiser Farnsworth napsala:
Ich habe gerade die re und die li Blende gestrickt (17 cm) und diese beiden mit 68 Maschen verbunden. Danach heisst es, “weiterstricken und die 7 ersten und letzten Maschen weiter kraus stricken - diese krausen, sind das die Fortsetzung der Blenden? Ich verstehe nicht, was mit den 17 cm Blenden passiert, wenn ich nun weiter Blende - Rückteil - Blende im V-Ausschnitt stricke. Wo kommen die 17 cm Blenden denn hin?
06.02.2025 - 20:35Odpověď DROPS Design :
Liebe Frau Dreiser Farnsworth, man wird jetzt beide Blenden krausrechts und dazwischen Glattrechts stricken; die ersten 17 cm von den beiden Blenden werden danach am Halsausschnitt genäht (und die Anschlagskante beide Blende zusammengenäht) - siehe z.B. dieses Video als Beispiel. Viel Spaß beim Stricken!
07.02.2025 - 08:25
![]() Chrissy napsala:
Chrissy napsala:
Hello! Should the yarn over increases be mirrored, and if so, how? I've been trying to figure out if I have to do one YO and one reverse YO for example for each pair of increases, or use some other pattern for symmetry. Also, do I start the V neck increases on a right side or wrong side row? Thank you.
18.01.2025 - 16:03Odpověď DROPS Design :
Dear Chrissy, you can knit the yarnovers mirrored, if you like. Since you have to knit the stitch twisted anyway, you can adjust the stitch (by slipping and replacing it) so either the left or the right leg crosses the other on the front. Happy Knitting!
19.01.2025 - 14:28
|
|
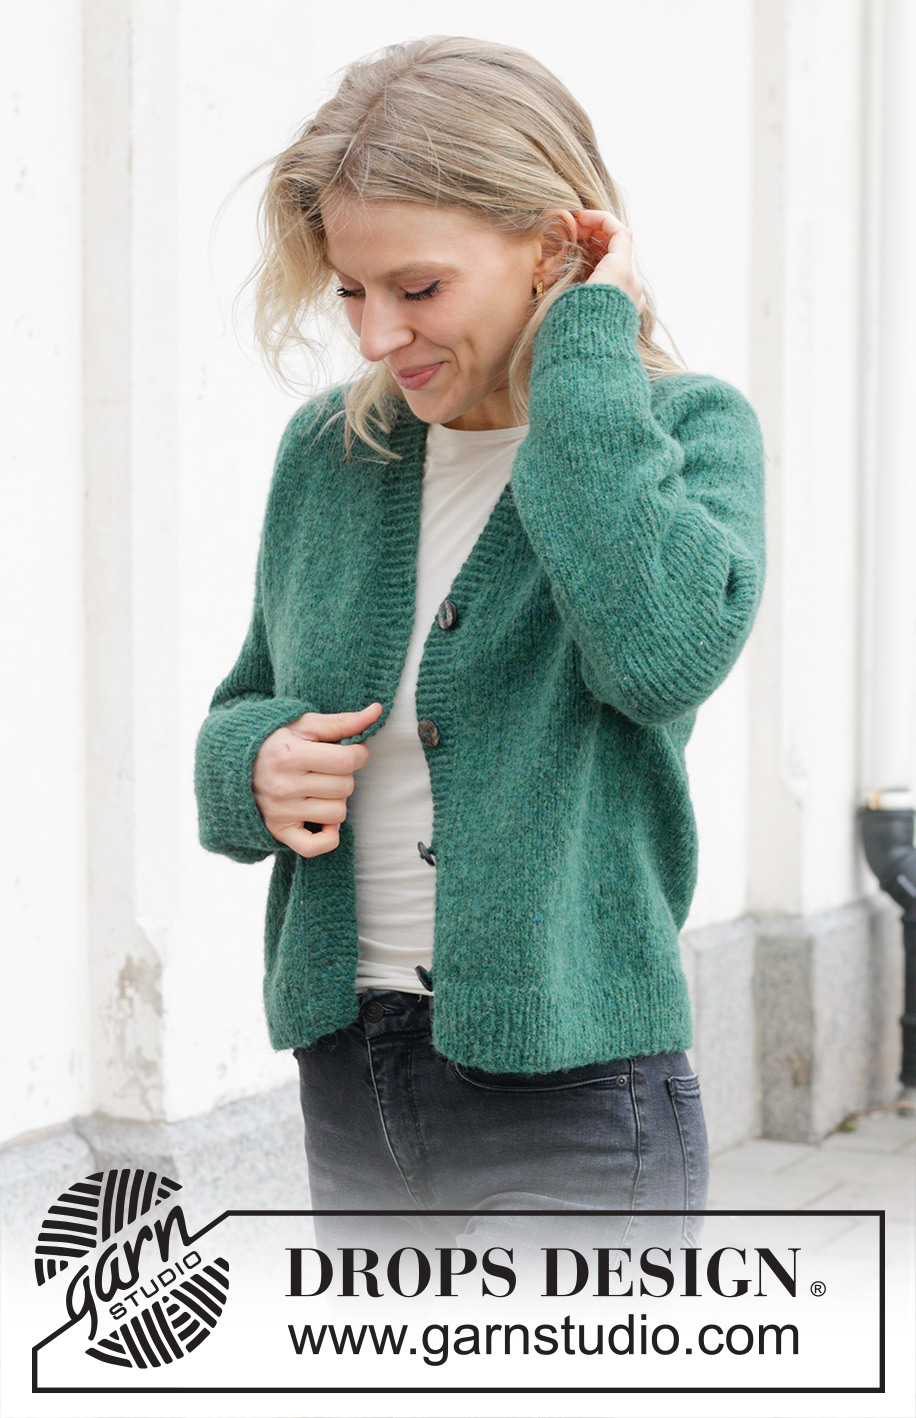
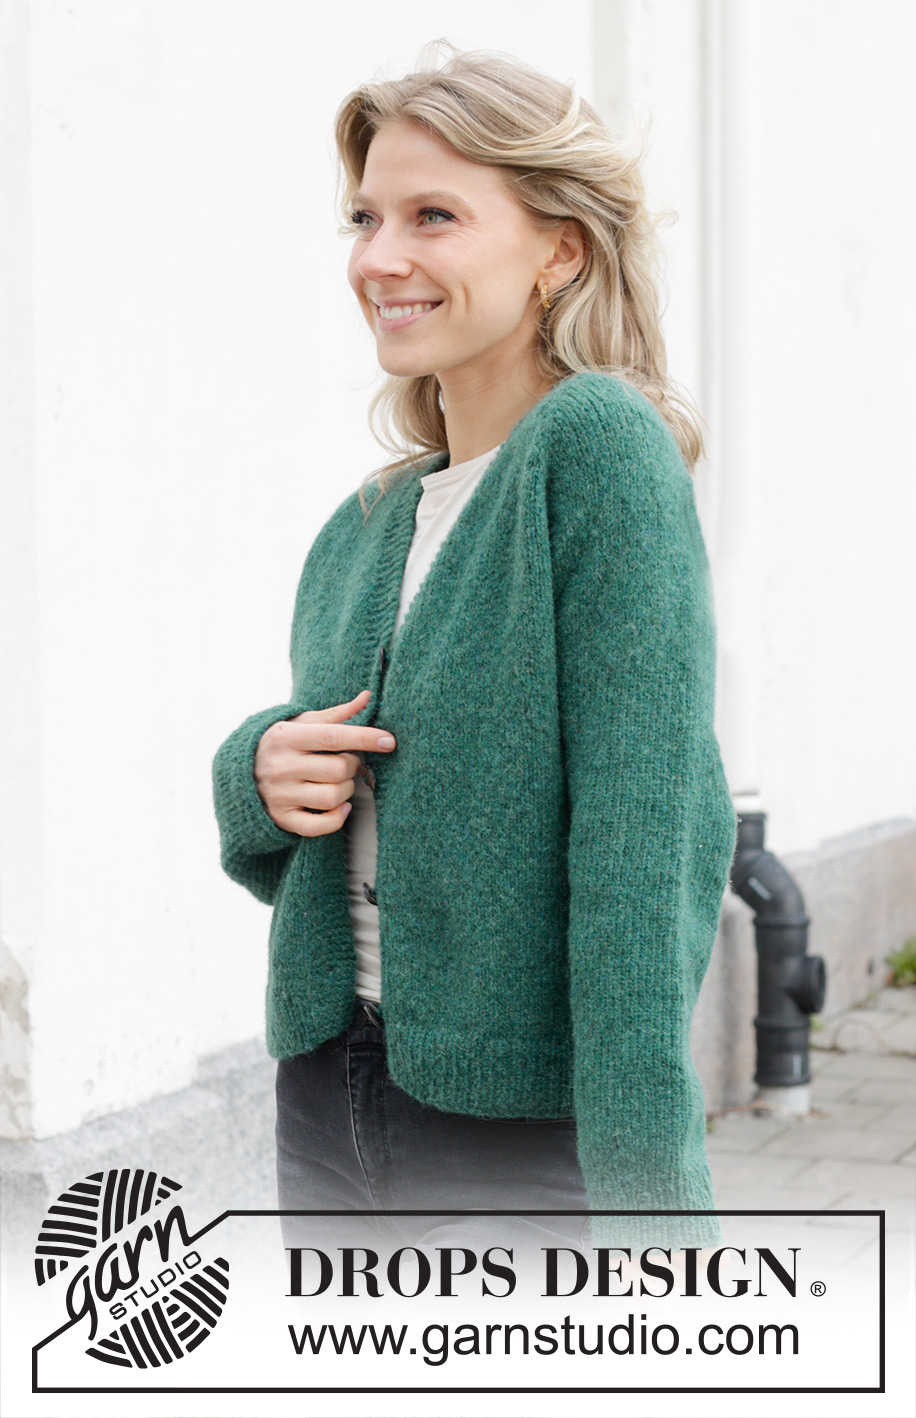
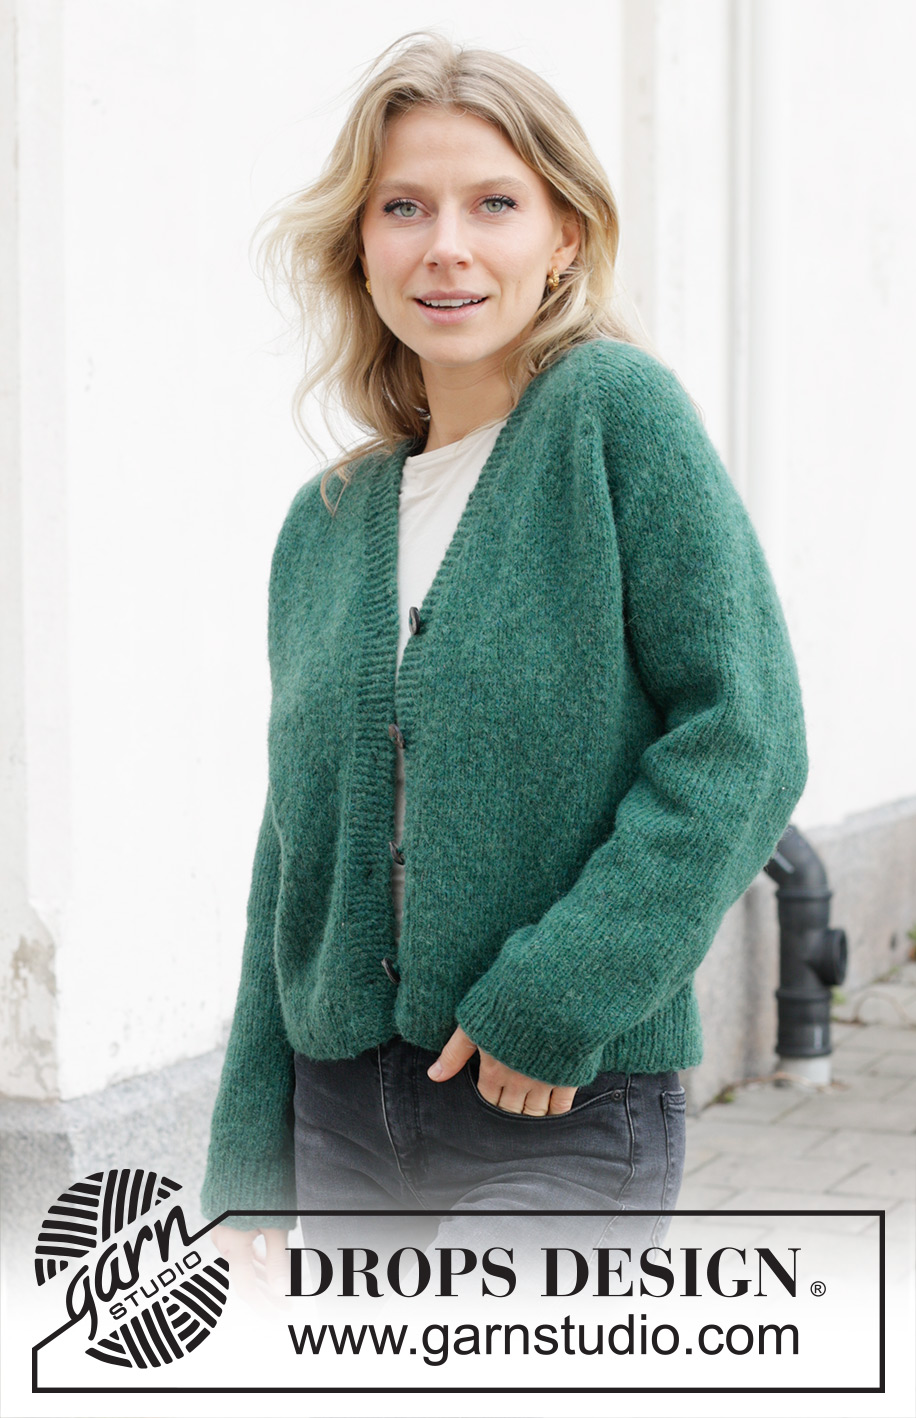
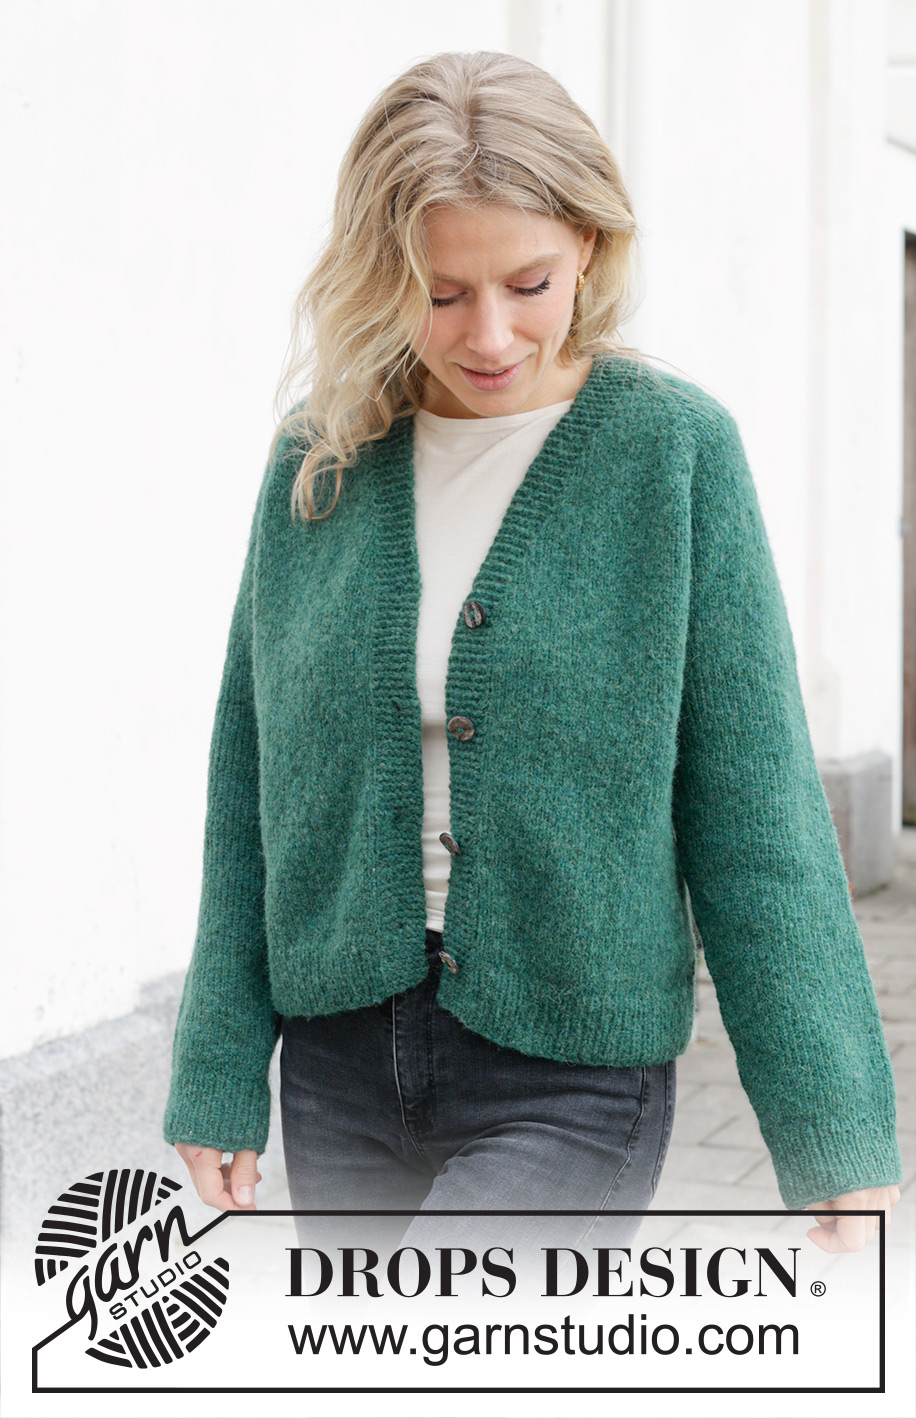
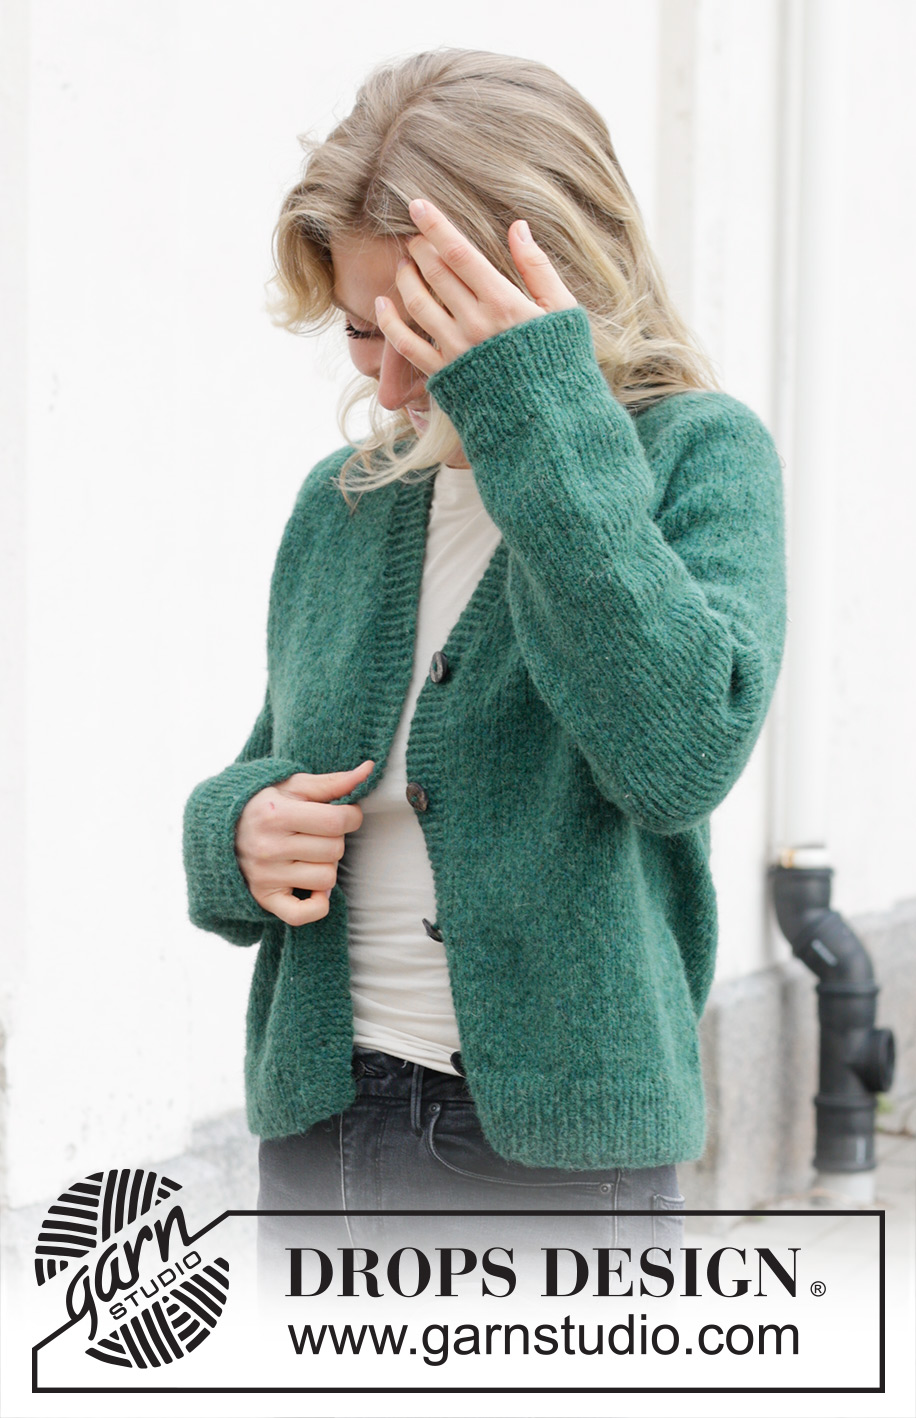
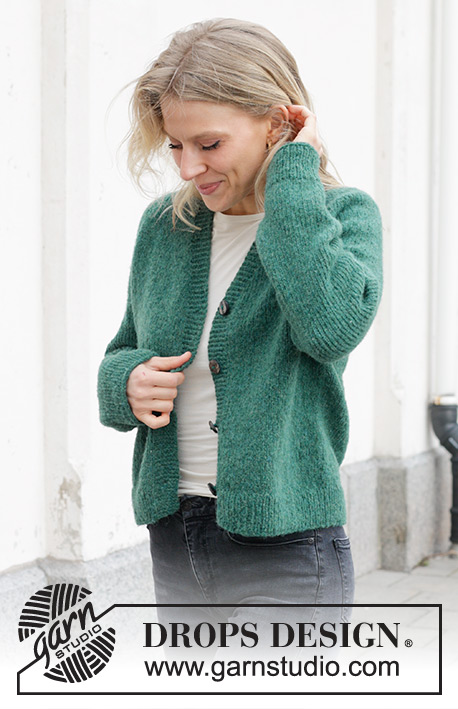
No Nonsense Cardigan#nononsensecardigan |
|
 |
 |
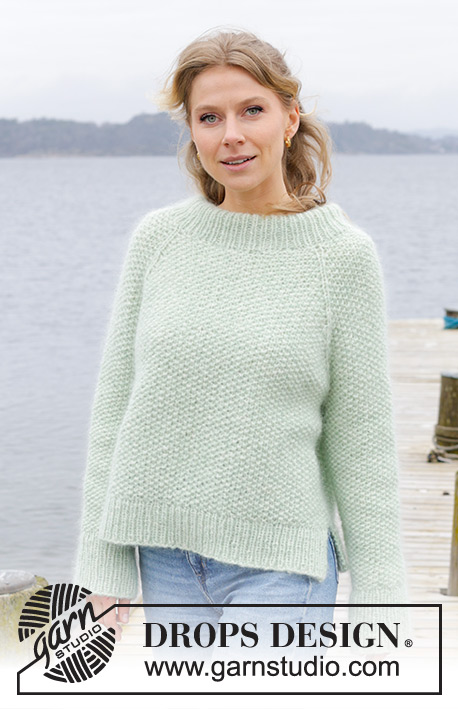
Raglánový propínací svetr s V-výstřihem pletený shora dolů z příze DROPS Air. Velikost S – XXXL.
DROPS 244-8 |
|
|
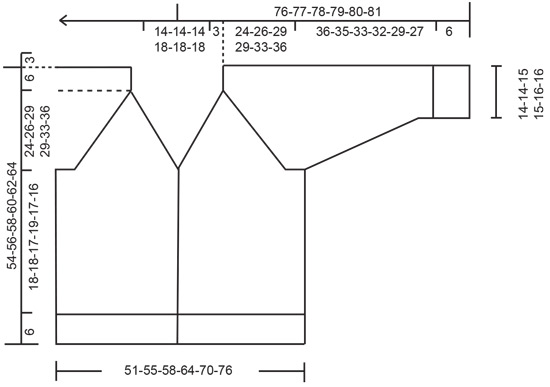
------------------------------------------------------- VYSVĚTLIVKY: ------------------------------------------------------- VROUBKOVÝ VZOR: Pleteme stále hladce, lícové i rubové řady. 1 vroubek = 2 řady hladce. RAGLÁNOVÉ ZKOSENÍ: Přidáváme 1 oko nahozením před/za 2 oky v každém raglánovém „švu“, tj. všude tam, kde se stýkají rukávy s trupem – značka leží vždy mezi těmito 2 oky. Nahození pleteme v následující řadě/kruhové řadě za zadní nit, aby se v pletenině netvořily dírky; nová oka pak pleteme lícovým žerzejem. KNOFLÍKOVÉ DÍRKY: Knoflíkové dírky vyplétáme v léze pravého předního dílu (na svetr se díváme, jako by byl oblečený). Dírky vyplétáme takto: pleteme lícovou řadu až po poslední 4 oka, 1x nahodíme, 2 oka spleteme hladce a poslední 2 oka upleteme hladce. V následující (rubové) řadě pleteme nahození hladce – vznikne dírka. První knoflíkovou dírku vypleteme ve výši 1 cm po posledním přidání pro V-výstřih. Každou z dalších 3 knoflíkových dírek pak vypleteme vždy po zhruba 7-8-8,5-7,5-8-9 cm výšky. TIP – UJÍMÁNÍ (rukávy): Ujímáme 1 oko na každé straně značky takto - začínáme 3 oka před značkou: 2 oka spleteme hladce, 2 oka upleteme hladce (značka leží mezi nimi), 1 oko sejmeme hladce, 1 upleteme hladce a sejmuté přes ně přetáhneme (= ujmuli jsme 2 oka). ------------------------------------------------------- POPIS PRÁCE: ------------------------------------------------------- SVETR – JAK BUDEME POSTUPOVAT: Pleteme v řadách, shora dolů. Nejprve upleteme 2 samostatné légy vroubkovým vzorem. Mezi těmito dvěma légami pak nahodíme oka pro náramenice a zadní průkrčník a pleteme sedlo v řadách na kruhové jehlici, od jednoho předního okraje ke druhému. Současně přidáváme oka pro vytvarování raglánového zkosení průramků a V-výstřihu. Od sedla potom oddělíme rukávy a trup dokončíme v řadách na kruhové jehlici. Rukávy upleteme v kruhových řadách na krátké kruhové jehlici/ponožkových jehlicích. PRAVÁ LÉGA (na svetr se díváme, jako by byl oblečený): Na kruhovou jehlici č.5 nahodíme přízí DROPS Air 7 ok a pleteme VROUBKOVÝM VZOREM – viz výše – až do výše 17-17-17-19-19-19 cm, končíme rubovou řadou. Díl odložíme. LEVÁ LÉGA: Na kruhovou jehlici č.5 nahodíme přízí DROPS Air 7 ok a pleteme vroubkovým vzorem až do výše 17-17-17-19-19-19 cm, končíme lícovou řadou. Přízi NEstříháme, ale na konci této řady nahodíme 68-68-68-74-74-74 nových ok a připleteme k nim i odložená oka pravé légy = na jehlici máme celkem 82-82-82-88-88-88 ok. Upleteme 1 řadu: každou légu pleteme vroubkovým vzorem, nová oka mezi légami upleteme obrace. Do pleteniny vložíme 4 značky (využijeme při přidávání pro RAGLÁNOVÉ ZKOSENÍ průramků – viz výše); oka teď nepleteme, jen rozmístíme značky, vkládáme je vždy mezi 2 oka v těchto rozestupech: odpočítáme 9 ok, vložíme 1. značku, odpočítáme 20 ok, vložíme 2. značku, odpočítáme 24-24-24-30-30-30 ok, vložíme 3. značku, odpočítáme 20 ok, vložíme 4. značku, v řadě zbývá 9 ok. SEDLO: Pokračujeme v řadách lícovým žerzejem, obě légy pleteme dál vroubkovým vzorem. SOUČASNĚ přidáváme pro V-výstřih a RAGLÁN podle popisu níže. NEŽ BUDETE PLÉST DÁL, PŘEČTĚTE SI POZORNĚ NÁSLEDUJÍCÍ 2 ODSTAVCE. Začínáme u jednoho předního okraje, lícovou řadou. V-VÝSTŘIH: Pro vytvarování V-výstřihu přidáváme nahozením vedle ok légy, a to v každé 4. řadě, celkem 11-11-11-14-14-14x; nahození pleteme v následující řadě za zadní nit, aby se v pletenině netvořily dírky. Ve výši 1 cm za posledním přidáním začneme vyplétat KNOFLÍKOVÉ DÍRKY – viz výše. RAGLÁN: Přidáváme na každé straně 2 ok lícovým žerzejem v každém raglánovém „švu“, tj. všude tam, kde se rukávy stýkají s trupem. Přidáváme v každé 2. řadě (tj. v každé lícové = 8 přidaných ok), a to celkem 6x – viz výše. Dál přidáváme pro raglán v každé 2. řadě, ale každé 2. přidání ale každé 2. přidání je POUZE na předních dílech a zadním dílu (= 4 přidaná oka), tj. na předních dílech a na zadním dílu přidáváme v každé 2. řadě (= v každé lícové) a na rukávech v každé 4. řadě (= v každé 2. lícové). Takto přidáme celkem 18-22-26-26-30-30x na předních dílech a zadním dílu (9-11-13-13-15-15x na rukávech). VELIKOST S, M, XL, XXL a XXXL (přidávání pro velikost L je dokončeno): Pokračujeme lícovým žerzejem a dál přidáváme pro raglán, ale teď přidáváme POUZE na předních dílech a na zadním dílu (přidávání pro rukávy je už dokončeno), a to v každé 2. řadě, celkem 2-1-1-1-5x. VŠECHNY VELIKOSTI: Na předních dílech a na zadním dílu jsme přidali celkem 26-29-32-32-37-41x, na rukávech celkem 15-17-19-19-21-21x. Po posledním přidání máme na jehlici 268-288-308-324-348-364 ok. Dál pleteme lícovým žerzejem s légami vroubkovým vzorem, a to až do výše 24-26-29-29-33-36 cm (měřeno uprostřed zadního dílu). V následující řadě rozdělíme pleteninu na rukávy a trup: prvních 46-49-52-56-60-64 ok upleteme jako dříve (= přední díl), následujících 50-54-58-58-62-62 ok odložíme na pomocnou jehlici (= rukáv), nahodíme 10-10-10-12-14-16 nových ok (= podpaží), 76-82-88-96-104-112 ok upleteme jako dříve (= zadní díl), dalších 50-54-58-58-62-62 ok odložíme na pomocnou jehlici (= rukáv), nahodíme 10-10-10-12-14-16 nových ok (= podpaží) a posledních 46-49-52-56-60-64 ok upleteme jako dříve (= přední díl). TRUP: = 188-200-212-232-252-272 ok. Dál pleteme lícovým žerzejem s légami vroubkovým vzorem. Ve výši 18-18-17-19-17-16 cm od podpaží upleteme 1 lícovou řadu hladce a SOUČASNĚ přidáme rovnoměrně 19-21-21-23-25-27 ok (přidáváme mimo obě légy) = 207-221-233-255-277-299 ok. Pleteninu převedeme na kruhovou jehlici č.4 a pleteme rubovou řadu, takto: 7 ok légy vroubkovým vzorem, *1 oko obrace, 1 hladce*, *-* opakujeme až po posledních 8 ok, 1 oko obrace a 7 ok légy vroubkovým vzorem. V tomto rozvržení pleteme lem pružným vzorem. Když je lem vysoký 6 cm, všechna oka volně dle vzoru uzavřeme. Svetr měří asi 54-56-58-60-62-64 cm (od ramene). RUKÁVY: Odložených 50-54-58-58-62-62 ok jednoho rukávu vrátíme z pomocné jehlice zpět na krátkou kruhovou jehlici/ponožkové jehlice č.5 a navíc k nim nabereme po 1 oku z každého z 10-10-10-12-14-16 nových ok v podpaží = 60-64-68-70-76-78 ok Doprostřed nových ok v podpaží vložíme značku. Začínáme u značky a pleteme v kruhových řadách lícovým žerzejem. Ve výši 4 cm ujmeme na každé straně značky 1 oko – viz TIP - UJÍMÁNÍ. Toto ujímání opakujeme vždy po 5-3,5-2,5-2,5-2-1,5 cm výšky, celkem 6-8-9-10-11-11x = 48-48-50-50-54-56 ok. Pleteme až do výše 36-35-33-32-29-27 cm cm od podpaží. Pak upleteme 1 kruhovou řadu hladce a SOUČASNĚ přidáme rovnoměrně 8-8-10-10-10-12 ok = 56-56-60-60-64-68 ok. Pleteninu převedeme na ponožkové jehlice č. 4 a pleteme lem pružným vzorem 1/1 (tj. střídáme 1 oko hladce, 1 obrace). Když je lem vysoký 6 cm, všechna oka dle vzoru volně uzavřeme. Rukáv měří asi 42-41-39-38-35-33 cm (od podpaží). Stejným způsobem upleteme i druhý rukáv. DOKONČENÍ: Na levou légu přišijeme knoflíky. Volné konce obou lég na zátylku sešijeme a všijeme je do zadního průkrčníku. |
|
|
|
Dokončili jste tento model?Pak označte své fotky tagem #dropspattern #nononsensecardigan nebo je pošlete do galerie #dropsfan. Potřebujete s tímto návodem poradit?Otevřete-li si návod na stránce garnstudio.com, najdete tam 27 výukových video-ukázek, Komentáře/Dotazy a další užitečné informace. © 1982-2025 DROPS Design A/S. Vyhrazujeme si veškerá práva. Tento dokument, včetně všech jeho dílčích částí, podléhá autorským právům. Podrobnější komentář k možnostem užití našich návodů najdete dole pod každým návodem na našich stránkách. |
|


V oblasti pletené a háčkované módy působí DROPS Design více než 40 let. Díky tomu vám můžeme nabídnout jednu z nejrozsáhlejších kolekcí modelů s bezplatnými návody dostupnými na internetu - navíc v 17 jazycích. K dnešnímu dni máme na 314 katalogů a 11822 návodů celkem - z nich je už 7048 dostupných v [češtině].
Přidejte komentář k návodu DROPS 244-8
Rádi bychom věděli, co si o tomto modelu myslíte!
Pokud se chcete na něco zeptat, dbejte prosím na to, abyste ve formuláři níže vybrali správnou kategorii - díky tomu se dříve dozvíte, co potřebujete vědět. Povinná pole jsou označena *.