
Popular categories
Looking for a yarn?


Comments / Questions (92)
![]() Katell wrote:
Katell wrote:
Je ne comprends rien aux explications de ce modèle (pourtant je ne tricote que d'après vos modèles que je trouve très clairs habituellement et ai l'habitude des raglans updown) et de voir tous ces commentaires me rassure. Il manque peut-être un petit schéma de géométrie dans l'espace pour visualiser la progression. Je vais chercher un modèle moins ésotérique pour utiliser ma magnifique laine Drops Air.
11.07.2025 - 11:28
![]() Dumet wrote:
Dumet wrote:
Bonjour pour ce modèle en taille m pouvez-vous me dire combien je dois commander de pelotes. Je vous remercie
25.06.2025 - 20:50DROPS Design answered:
Bonjour Mme Dumet, vous trouverez toujours la quantité requise pour chaque taille en haut de page, dans l'onglet "Explications", il faut ainsi en taille M 400 g DROPS Air/50 g la pelote Air = il vous faudra ainsi 8 pelotes DROPS Air pour ce pull en taille M. Bon tricot!
26.06.2025 - 08:43
![]() Inge wrote:
Inge wrote:
De stekenverhouding is 17 stkn = 10cm. Na de pas, als het meerderen klaar is, komen we op een totaal van 288 steken (m) Dat betekent 288:17=169cm. Is dat niet enorm groot? Het lijf zelf wordt immers 2x55cm?
24.06.2025 - 19:01DROPS Design answered:
Dag Inge,
Als de pas klaar is, staan de steken voor de mouwen en het lijf samen op de naald. Na het splitsen van het werk voor de mouwen en het lijf heb je 200 steken voor het lijf.
26.06.2025 - 20:10
![]() Jacqueline wrote:
Jacqueline wrote:
Waarom word iets van boven naar beneden gebreid? Ik brei liever alle panden apart maar kom er dan zo niet uit
12.06.2025 - 19:56DROPS Design answered:
Dag Jacqueline,
Een voordeel hiervan is dat je tijdens het breien het kledingstuk kunt passen en op de juiste lengte maken. Verder zie je het vaak (hoewel bij dit patroon niet van toepassing) in Scandinavische patronen met ingebreide motieven in een ronde pas. Dit is lastiger als je losse panden heen en weer breit. Via deze link vind je meer informatie.
13.06.2025 - 22:23
![]() Inge Umans wrote:
Inge Umans wrote:
Waarom worden eerst biezen gebreid en wat wordt daar mee gedaan?
01.06.2025 - 19:22DROPS Design answered:
Dag Inge,
De 2 biezen de eerst worden gebreid worden aan het einde tegen elkaar genaaid en dan aan de achterkant aan de halslijn genaaid. Op die manier lopen de biezen door over de schouder en heb je alleen midden achter een naad in de bies.
01.06.2025 - 20:42
![]() Miruna wrote:
Miruna wrote:
Hello. Can you simplify a little the increases in raglan? I don't seem to quite understand when to increase. And the increases for v-neck are separated from the thread marks? Thank you for your time!
26.04.2025 - 23:49DROPS Design answered:
Dear Miruna, the V-neck increases are worked in the bands (so you don't use the markers for these increases). The raglan increases are worked on each side of the markers. Each marker is located between 2 stocking stitch stitches that represent the transition between the sleeves and back/front pieces. So you increase before and after the stitches next to the marker as follows: 1 yarn over, 1 stitch in stocking stitch, marker, 1 stitch in stocking stitch, 1 yarn over. After increasing like this 6 times you will then increase alternately on each side or only on the side of the front/back piece (before marker 1, after marker 2, before marker 3, after marker 4). Happy knitting!
27.04.2025 - 12:46
![]() Kateryna wrote:
Kateryna wrote:
What does it mean “increase inside the bands” (the v-neck part)? Where exactly should it be? Right after garter stitches?
20.03.2025 - 19:11DROPS Design answered:
Dar Kateryna, you will increase at the beginning of a row from RS after the first 7 stitches, ie after the front band stitches; and you will increase at the end of a row from RS before the last 7 stitches, ie before the front band stitches. Happy knitting!
21.03.2025 - 08:00
![]() Daniela wrote:
Daniela wrote:
Nesedí mi u tohoto návodu počet ok u rukávu vel.Xxxl, počátek 20+6x2+15×2=52, na oddělení v podpaží je třeba 62 ok. Kde je vzít? Děkuji za odpověď, Daniela
06.03.2025 - 08:25DROPS Design answered:
Milá Danielo, vždyť vy tam ta oka máte :-) - váš výpočet je naprosto správný (20 + 12 + 30)! Hodně zdaru, Hana
29.03.2025 - 10:59
![]() Britt Caroline Soffie Kaae wrote:
Britt Caroline Soffie Kaae wrote:
Jeg vil gerne høre om jeg bare kan bytte garnet i opskriften til "no nonsens cardigan", ud med Drops brushed alpaca silk? Jeg tænker bare at den måske bliver lidt "slasket"
05.03.2025 - 10:18DROPS Design answered:
Hej Britt. Ja du kan byta ut garnet till Brushed Alpaca Silk eftersom de garnen tillhör samma garngrupp/har samma stickfasthet. Det är en annan typ av garn så det kommer få ett annat uttryck, men det kommer an på vad du själv önskar (se gärna på bilder på plagg i Brushed Alpaca Silk för att få en uppfattning av hur det kommer se ut). Mvh DROPS Design
07.03.2025 - 08:47
![]() Sylvia Dreiser Farnsworth wrote:
Sylvia Dreiser Farnsworth wrote:
Ich habe gerade die re und die li Blende gestrickt (17 cm) und diese beiden mit 68 Maschen verbunden. Danach heisst es, “weiterstricken und die 7 ersten und letzten Maschen weiter kraus stricken - diese krausen, sind das die Fortsetzung der Blenden? Ich verstehe nicht, was mit den 17 cm Blenden passiert, wenn ich nun weiter Blende - Rückteil - Blende im V-Ausschnitt stricke. Wo kommen die 17 cm Blenden denn hin?
06.02.2025 - 20:35DROPS Design answered:
Liebe Frau Dreiser Farnsworth, man wird jetzt beide Blenden krausrechts und dazwischen Glattrechts stricken; die ersten 17 cm von den beiden Blenden werden danach am Halsausschnitt genäht (und die Anschlagskante beide Blende zusammengenäht) - siehe z.B. dieses Video als Beispiel. Viel Spaß beim Stricken!
07.02.2025 - 08:25
|
|
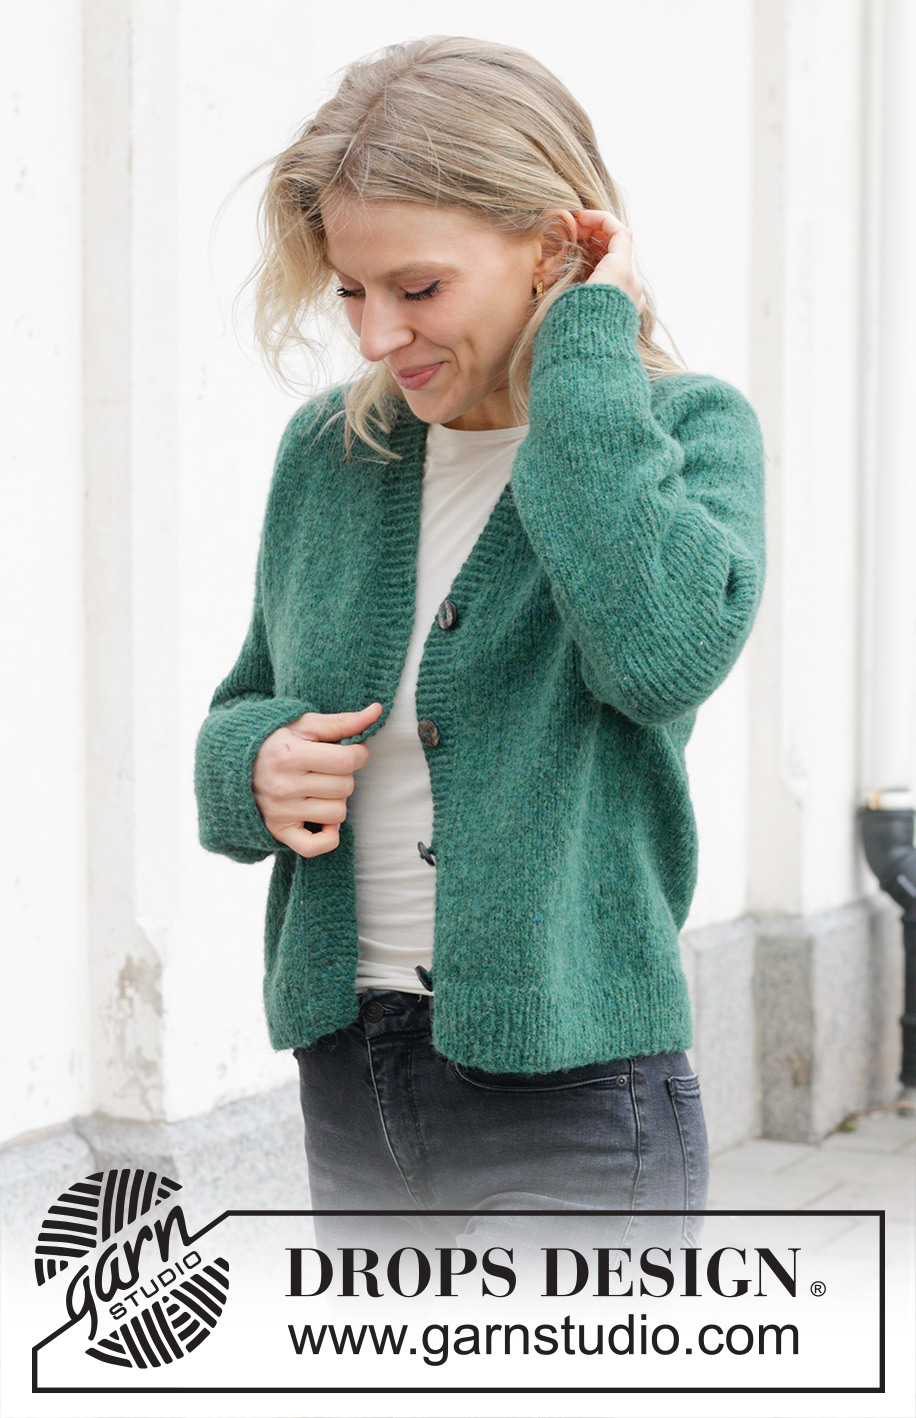
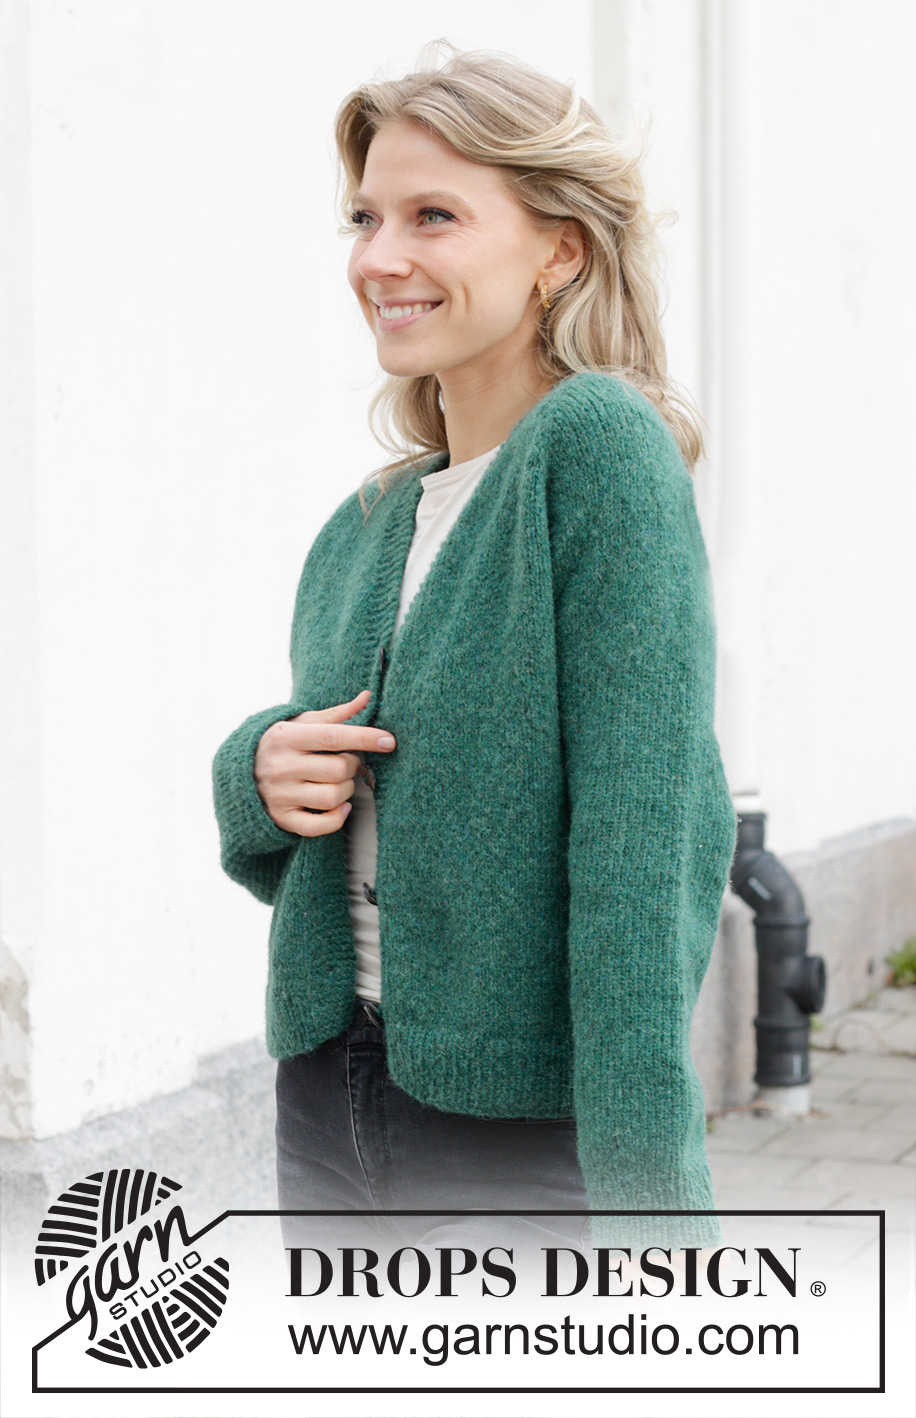
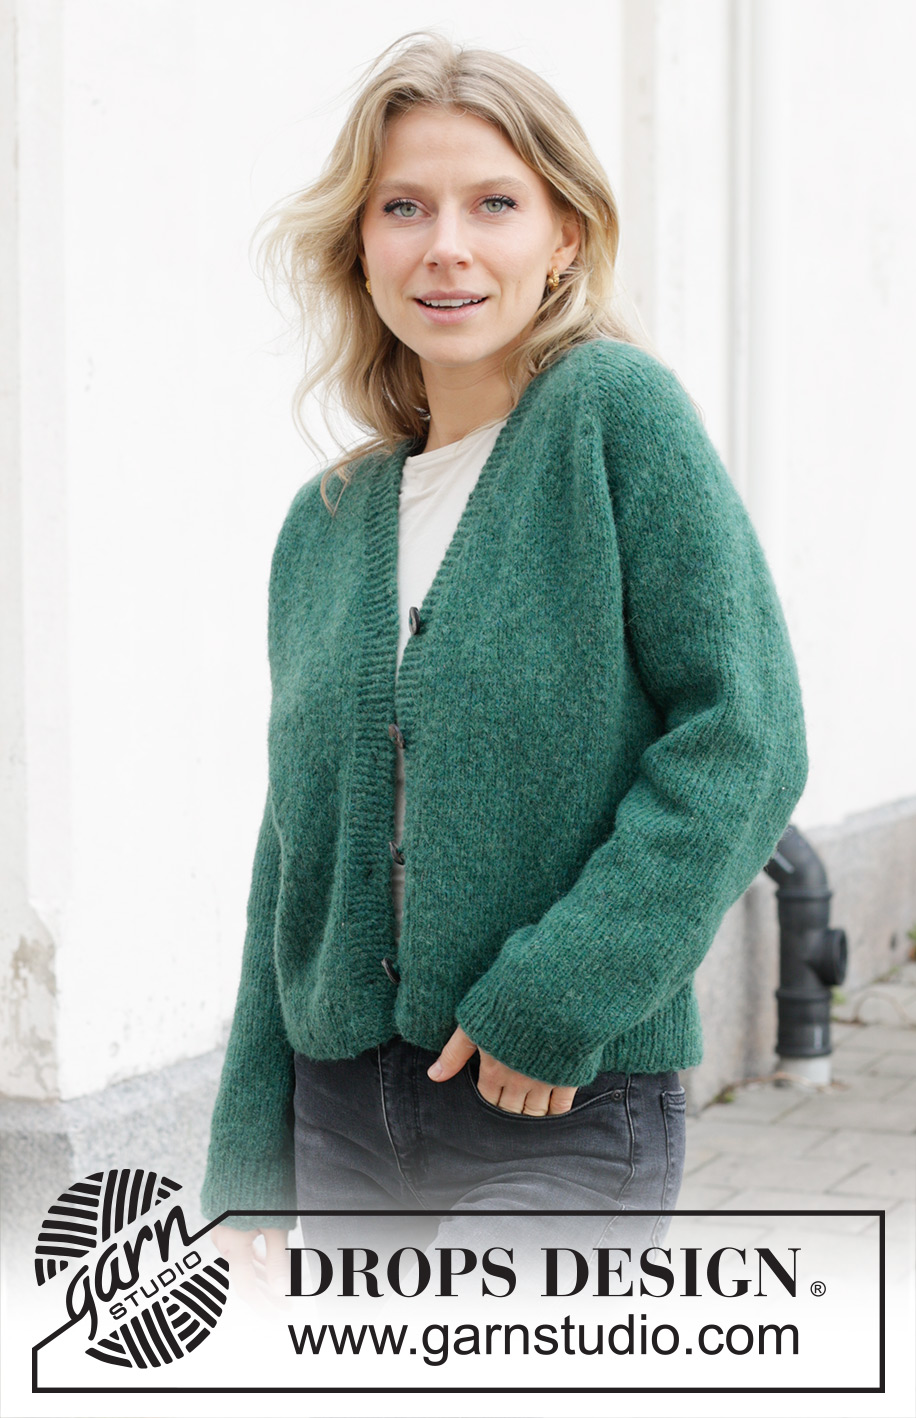
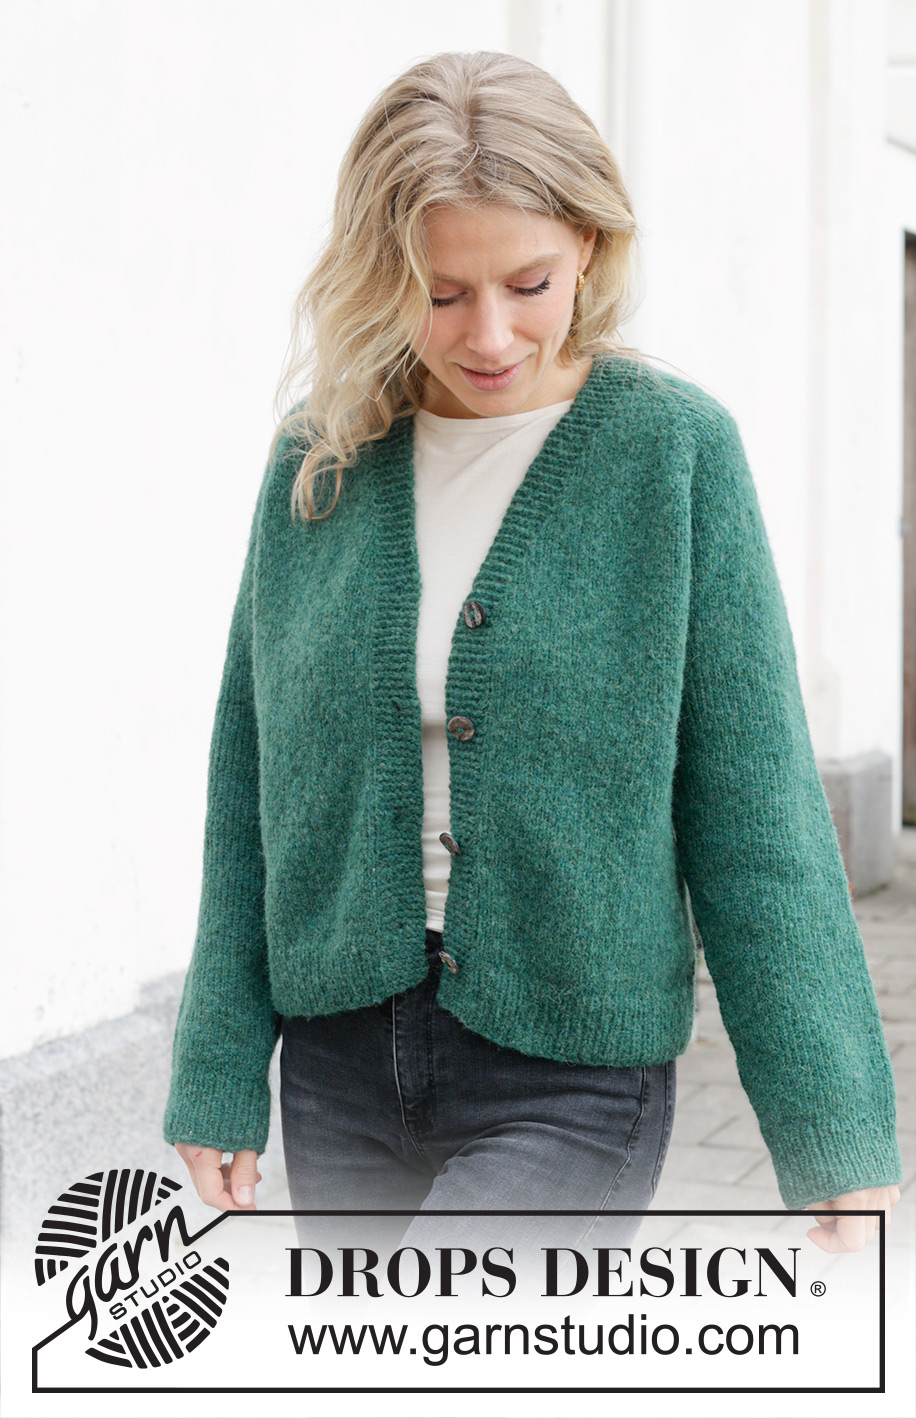
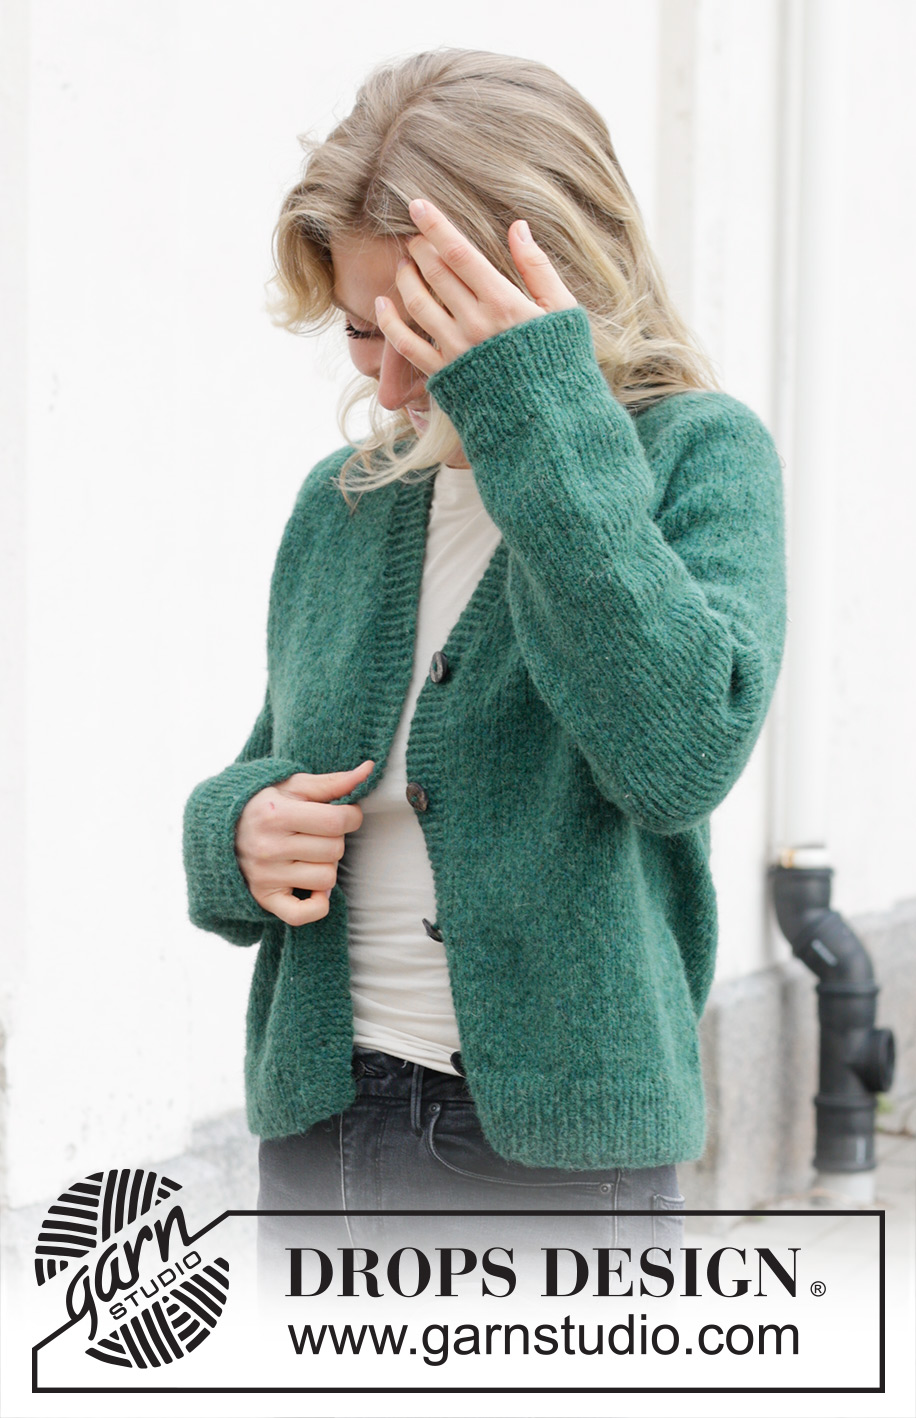
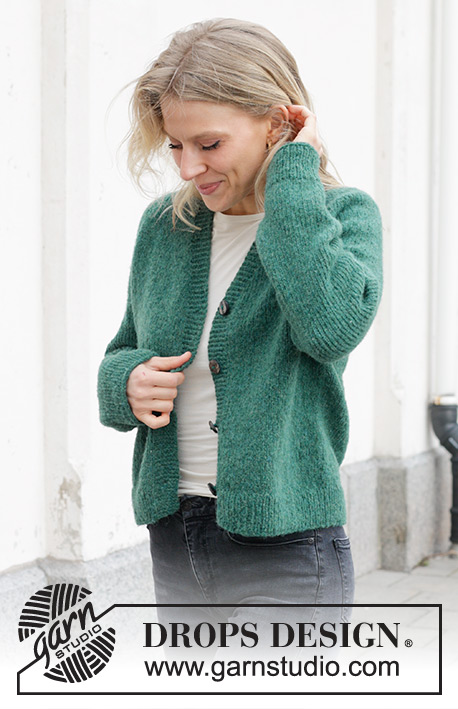
No Nonsense Cardigan#nononsensecardigan |
|
 |
 |
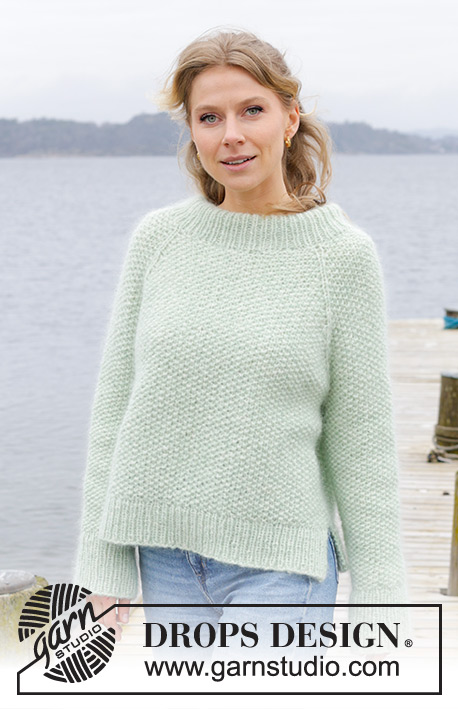
Knitted jacket in DROPS Air. The piece is worked top down with raglan and V-neck. Sizes S - XXXL.
DROPS 244-8 |
|
|
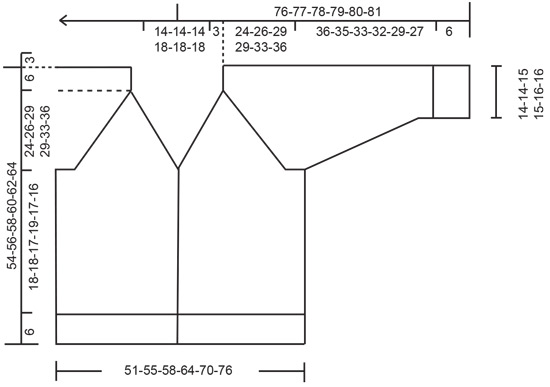
------------------------------------------------------- EXPLANATIONS FOR THE PATTERN: ------------------------------------------------------- GARTER STITCH (worked back and forth): Knit all rows. 1 ridge = knit 2 rows. RAGLAN: Increase 1 stitch before/after 2 stitches in each transition between the body and sleeves; the marker-thread sits between these 2 stitches. Increase 1 stitch by making 1 yarn over which is worked twisted on the next row/round to avoid a hole. The new stitches are then worked in stocking stitch. BUTTONHOLES: Work buttonholes on the right band (when the garment is worn). Work from the right side when there are 4 stitches left on the row as follows: Make 1 yarn over, knit 2 together and knit 2. On the next row (wrong side), knit the yarn over to leave a hole. The first buttonhole is worked 1 cm after the last increase for the V-neck, then the other 3 buttonholes with approx. 7-8-8½-7½-8-9 cm between each one. DECREASE TIP (for sleeves): Start 3 stitches before the marker-thread, knit 2 together, knit 2 (marker-thread sits between these 2 stitches), slip 1 stitch knit-wise, knit 1 and pass the slipped stitch over the knitted stitch (2 stitches decreased). ------------------------------------------------------- START THE PIECE HERE: ------------------------------------------------------- JACKET – SHORT OVERVIEW OF THE PIECE: Piece is worked back and forth, top down. Start by working 2 loose bands in garter stitch. Stitches are cast on between the 2 bands for the shoulders and back neck and the yoke continued back and forth with circular needle from mid-front. Stitches are increased for raglan and the V-neck. The yoke is divided for the body and sleeves and the body continued back and forth with circular needle. The sleeves are worked in the round with short circular needle/double pointed needles. RIGHT BAND (when the garment is worn): Cast on 7 stitches with circular needle size 5 mm and DROPS Air. Work GARTER STITCH – read description above, until the band measures 17-17-17-19-19-19 cm, finishing after a row from the wrong side. Lay the piece to one side. LEFT BAND: Cast on 7 stitches with circular needle size 5 mm and DROPS Air. Work garter stitch until the band measures 17-17-17-19-19-19 cm, finishing after a row from the right side. Do not cut the strand. Cast on 68-68-68-74-74-74 stitches at the end of this row, then knit the right band stitches = 82-82-82-88-88-88 stitches. Work 1 row with garter stitch over each band and purling the cast-on stitches. Insert 4 marker-threads (used when increasing for RAGLAN – read explanation above), without working the stitches and inserting them between 2 stitches as follows: Count 9 stitches, insert marker-thread 1, count 20 stitches, insert marker-thread 2, count 24-24-24-30-30-30 stitches, insert marker-thread 3, count 20 stitches, insert marker-thread 4, there are 9 stitches left on the row. YOKE: REMEMBER THE KNITTING TENSION! Continue back and forth with stocking stitch and garter stitch over each band. At the same time increase for the V-neck and raglan as described below. Read the next 2 sections before continuing. Start mid-front, from the right side. V-NECK: Increase for the neck inside the bands every 4th row 11-11-11-14-14-14 times by making 1 yarn over, which is worked twisted on the next row to avoid a hole. 1 cm after the last increase for the neck begin working the BUTTONHOLES – read description above. RAGLAN: Increase on each side of 2 stocking stitches in each transition between the front/back pieces and the sleeves every 2nd row (each row from the right side = 8 increased stitches) 6 times – read description above. Continue to increase for raglan every 2nd round but every 2nd increase is only on the front/back pieces (4 increased stitches), i.e., increase on the front/back pieces every 2nd row (each row from the right side) and on the sleeves every 4th row (every 2nd row from the right side). Increase like this 18-22-26-26-30-30 times on the body (9-11-13-13-15-15 times on the sleeves). SIZES S, M, XL, XXL and XXXL (the increases in size L are finished): Continue with stocking stitch and increase for raglan but now only increase on the body every 2nd row (the sleeve increases are finished) 2-1-1-1-5 times. ALL SIZES: You have increased a total of 26-29-32-32-37-41 times on the body and 15-17-19-19-21-21 times on the sleeves. After the last increase there are 268-288-308-324-348-364 stitches. Continue with stocking stitch and the bands in garter stitch until the yoke measures 24-26-29-29-33-36 cm, measured mid-back. Divide for the body and sleeves as follows: Work the first 46-49-52-56-60-64 stitches (front piece), place the next 50-54-58-58-62-62 stitches on a thread for the sleeve, cast on 10-10-10-12-14-16 stitches (in side under sleeve), work 76-82-88-96-104-112 stitches (back piece), place the next 50-54-58-58-62-62 stitches on a thread for the sleeve, cast on 10-10-10-12-14-16 stitches (in side under sleeve), work the last 46-49-52-56-60-64 stitches (front piece). BODY: = 188-200-212-232-252-272 stitches. Continue with stocking stitch and the bands in garter stitch for a further 18-18-17-19-17-16 cm. Knit 1 row from the right side and increase 19-21-21-23-25-27 stitches evenly spaced (do not increase over the bands) = 207-221-233-255-277-299 stitches. Change to circular needle size 4 mm and work as follows from the wrong side: 7 band stitches in garter stitch, * purl 1, knit 1 *, work from *-* until there are 8 stitches left, purl 1 and 7 band stitches in garter stitch. Continue this rib for 6 cm. Cast off. The jacket measures approx. 54-56-58-60-62-64 cm from the shoulder. SLEEVES: Place the 50-54-58-58-62-62 stitches from the thread on the one side of the piece on short circular needle/double pointed needles size 5 mm and knit up 1 stitch in each of the 10-10-10-12-14-16 stitches cast on under the sleeve = 60-64-68-70-76-78 stitches. Insert a marker-thread in the middle of the new stitches under the sleeve. Work stocking stitch in the round. When the sleeve measures 4 cm, decrease 2 stitches under the sleeve – read DECREASE TIP. Decrease like this every 5-3½-2½-2½-2-1½ cm a total of 6-8-9-10-11-11 times = 48-48-50-50-54-56 stitches. Continue working until the sleeve measures 36-35-33-32-29-27 cm from the division. Knit 1 round and increase 8-8-10-10-10-12 stitches evenly spaced = 56-56-60-60-64-68 stitches. Change to double pointed needles size 4 mm and work rib (knit 1, purl 1) for 6 cm. Cast off. The sleeve measures approx. 42-41-39-38-35-33 cm from the division. Work the other sleeve in the same way. ASSEMBLY: Sew the buttons onto the left band. Sew together the 2 loose bands mid-back and sew them to the neckline. |
|
|
|
Have you finished this pattern?Tag your pictures with #dropspattern #nononsensecardigan or submit them to the #dropsfan gallery. Do you need help with this pattern?You'll find 28 tutorial videos, a Comments/Questions area and more by visiting the pattern on garnstudio.com. © 1982-2025 DROPS Design A/S. We reserve all rights. This document, including all its sub-sections, has copyrights. Read more about what you can do with our patterns at the bottom of each pattern on our site. |
|


With over 40 years in knitting and crochet design, DROPS Design offers one of the most extensive collections of free patterns on the internet - translated to 17 languages. As of today we count 314 catalogues and 11821 patterns translated into English (UK/cm).
We work hard to bring you the best knitting and crochet have to offer, inspiration and advice as well as great quality yarns at incredible prices! Would you like to use our patterns for other than personal use? You can read what you are allowed to do in the Copyright text at the bottom of all our patterns. Happy crafting!
Post a comment to pattern DROPS 244-8
We would love to hear what you have to say about this pattern!
If you want to leave a question, please make sure you select the correct category in the form below, to speed up the answering process. Required fields are marked *.