Comments / Questions (22)
![]() Maddalena wrote:
Maddalena wrote:
è possibile avere il modello da lavorare con ferri dritti? non so lavorare con i ferri circolari. Grazie per una cortese risposta
30.12.2025 - 01:03DROPS Design answered:
Buonasera Maddalena, può lavorare in piano con i ferri dritti e aggiungere una maglia per lato per la cucitura. Buon lavoro!
30.12.2025 - 22:05
![]() Pia Sjøholm wrote:
Pia Sjøholm wrote:
Kan ikke tyde hvilke diagram der er til hvad.. Er a1 til ærme? A2 til forstykke og ryg? A3 til ærme 2? Eller hvordan skal det forstås.
17.11.2025 - 07:35DROPS Design answered:
Hei Pia. Når du strikker bærestykket strikker man etter alle diagram (A.1 + A.2 + A.3). Etter delingen strikkes A.2 til ryg-og forstykke og A.2 til ærme. mvh DROPS Design
24.11.2025 - 09:45
![]() Rigmor wrote:
Rigmor wrote:
Når man går fra og øke på annenhver omg. til og kun øke på hver 4. omgang på arm blir det en maske for lite på begynnelsen/slutten på den omg. man strikker mønsteret. For man skal vel fortsatt starte og slutte med en maske rett på armene på den omgangen?Har jeg misforstått noe?
25.09.2025 - 16:18DROPS Design answered:
Hei Rigmor. Etterhvert som det økes masker til raglan, strikkes de nye maskene inn i mønsteret som vist i diagrammene, dvs maskene strikkes i glattstrikk til de går opp med 3 eller 6 masker i mønsteret. Masker som ikke går opp i mønsteret, strikkes i glattstrikk. mvh DROPS Design
06.10.2025 - 13:56
![]() Rigmor wrote:
Rigmor wrote:
Når man går fra og felle på annenhver omg. til hver fjerde omgang på arm (raglan) blir det en maske for lite på begynnelsen og slutten på den omg man strikker mønsteret på armene. Er det noe jeg har misforstått? Man skal vel fortsatt begynne/slutte med en rett maske på armene?
25.09.2025 - 16:12
![]() Christine wrote:
Christine wrote:
Les explications données dans l'échantillon du modèle ne me paraissent pas correct. Ne faut-il pas faire l'inverse, c'est à dire aiguille plus fine si trop de maille pour 10 cm et plus grosse si pas assez de mailles pour 10 cm. Dite moi si je me trompe !?
02.11.2024 - 10:18DROPS Design answered:
Bonjour Christine, si vous avez trop de mailles pour 10 cm c'est que vos mailles sont trop petites, il vous faut alors essayer avec des aiguilles plus grosses pour vous rapprocher de la taille de celles de l'échantillon. Retrouvez plus d'infos ici. Bon tricot!
04.11.2024 - 11:09
![]() Lizette wrote:
Lizette wrote:
Når raglan går til hver 2. Omgang udt ved for/bagstykke og hver 4. Omgang udt både ærme og for/bagstykke, synes jeg ikke det er tydeligt hvordan mønsteret skal implicered Det ville være fint med et diagram som følger én helt igennem raglan delen.
21.01.2024 - 10:26
![]() Caro wrote:
Caro wrote:
Buen día: Quería avisar de un error en la cantidad de puntos que debo aumentar al finalizar el cuello. Dice de aumentar 13 puntos para que de un total de 100, pero luego al colocar los marcadores resultan ser sólo 96 (18 + 30 + 18 + 30). ¿No sería correcto aumentar sólo 9 puntos? Estoy probando esa opción. ¡Gracias!
22.05.2023 - 16:54
![]() Rebecca wrote:
Rebecca wrote:
This shows two colors used, and to cast on with two colors, but there isn't any mention of a MC or CC; where does the CC come in, and why/where is it used?
31.01.2023 - 16:45DROPS Design answered:
Dear Rebecca, the whole jumper is worked with 2 strands held together as there were just one, so that you will work with 1 yarn each quality (Sky + Kid-Silk or Merino Extra Fine + Kid-Silk). Just remember to check your gauge (read more here). Happy knitting!
31.01.2023 - 17:05
![]() Hellu wrote:
Hellu wrote:
I can’t see the pattern grid photos in Finnish version. :-( Could you please reupload those, thanks?! :)
23.01.2023 - 15:24DROPS Design answered:
The charts will open now.
23.01.2023 - 18:13
![]() Inger Hurum wrote:
Inger Hurum wrote:
Modell sk-176 forklarer om kast mellom 2masker. Men det er ikke tegnet inn noen kast her 😏
21.10.2022 - 07:52DROPS Design answered:
Hej Inger, nej det har du ret i, vi skal høre med design, så bliver symbolen sikkert fjernet. Tak for info :)
25.10.2022 - 12:20
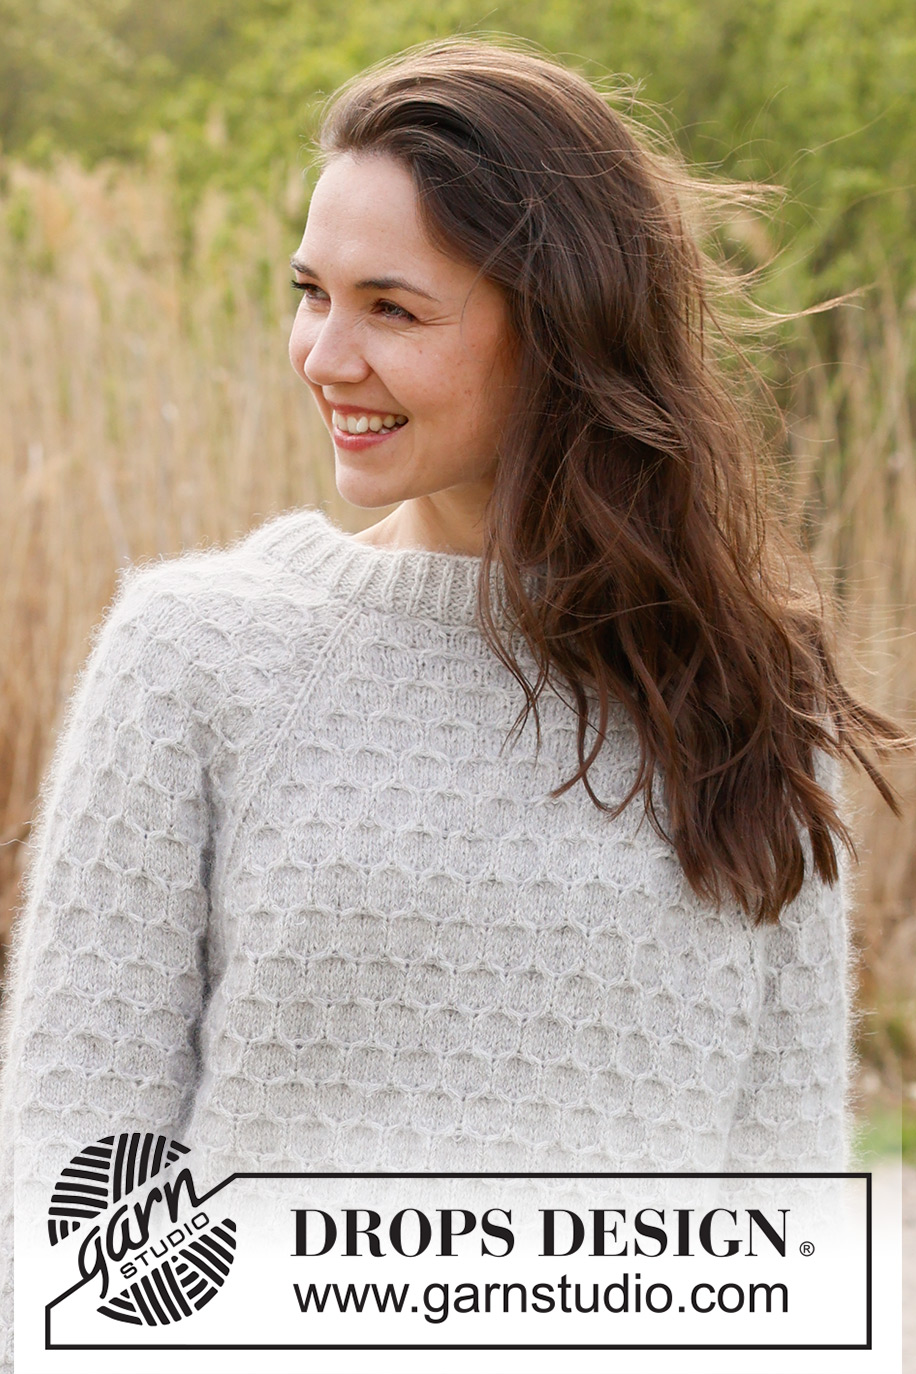
Northern Mermaid Sweater#northernmermaidsweater |
||||||||||
 |
 |
|||||||||
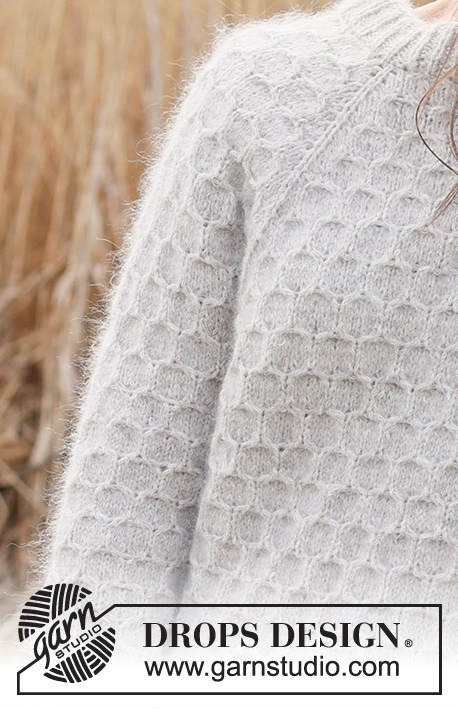
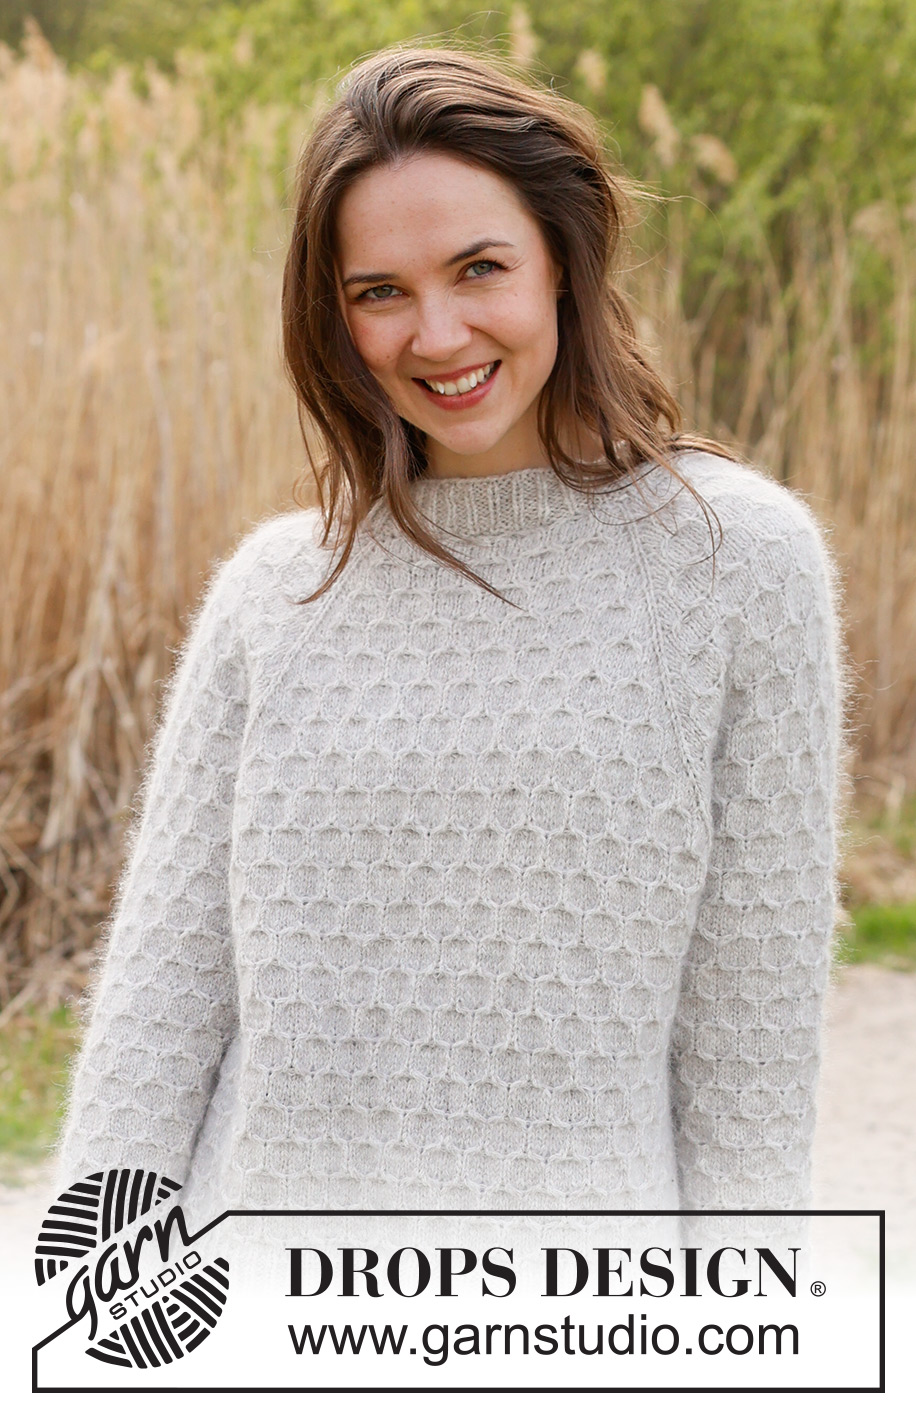
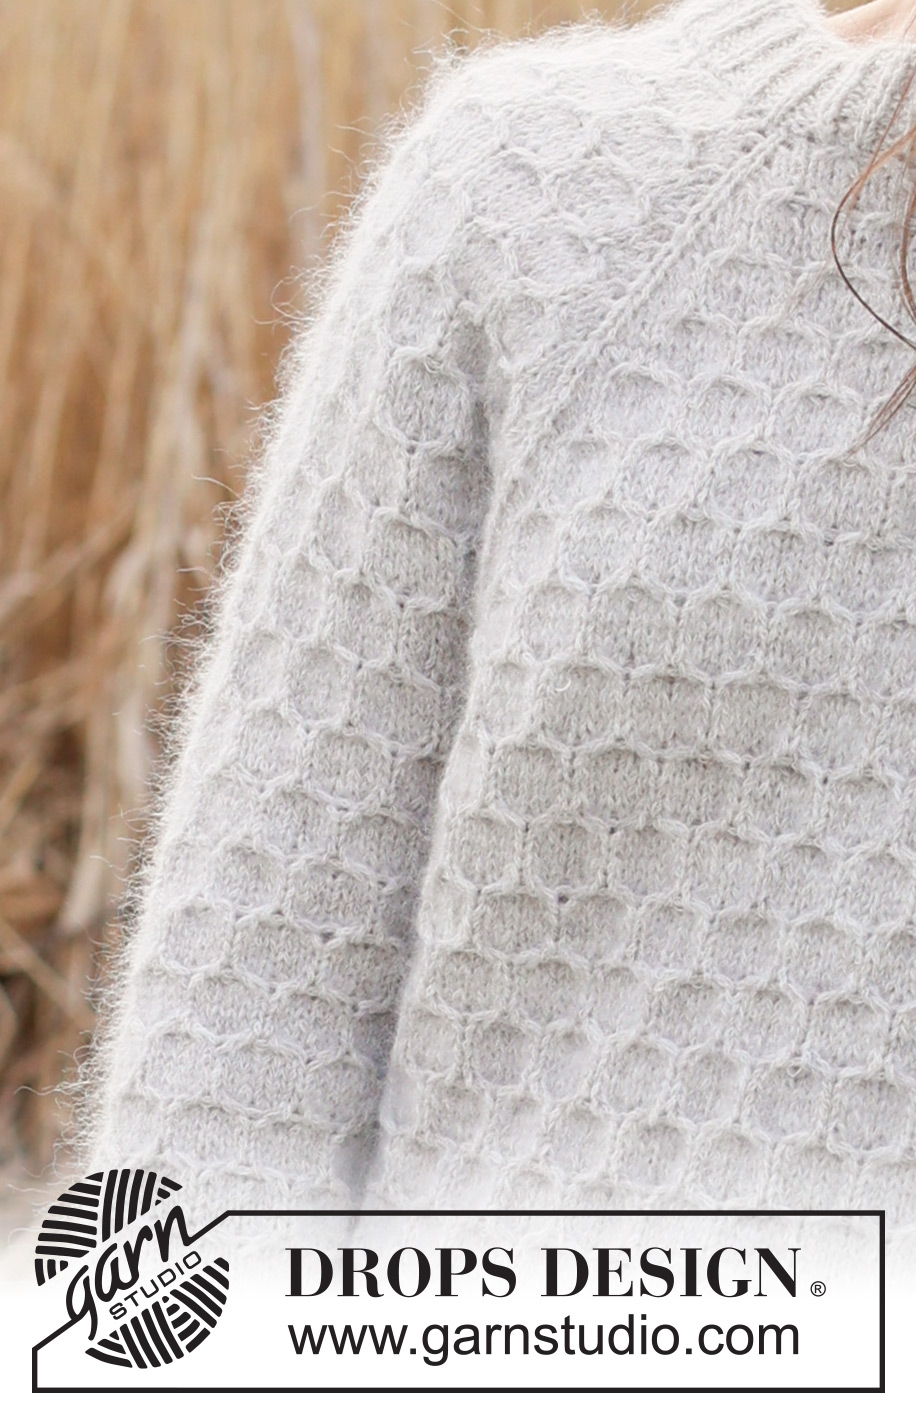
Knitted jumper in DROPS Sky / DROPS Merino Extra Fine and DROPS Kid-Silk. The piece is worked top down, with raglan and honeycomb pattern. Sizes XS/S - XXXL.
DROPS 236-6 |
||||||||||
|
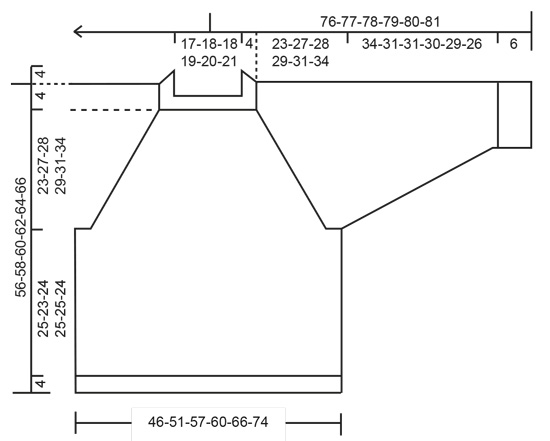
------------------------------------------------------- EXPLANATIONS FOR THE PATTERN: ------------------------------------------------------- PATTERN: See diagrams A.1 to A.3. As you increase to raglan, work the new stitches into the pattern as shown in the diagrams, i.e. work them in stocking stitch until they fit 3 or 6 stitches in the pattern. RAGLAN: Increase 1 stitch before/after the 4 marker-stitches (in each transition between body and sleeves). Increase 1 stitch by making 1 yarn over. On the next round work the yarn overs as follows: BEFORE MARKER: Slip the yarn over onto the right needle as if to knit, place it twisted back onto the left needle, knit in the front loop (stitch twists to the right). No hole. AFTER MARKER: Knit in the back loop of the yarn over (stitch twists to the left). No hole. Work the new stitches into the pattern as described above. DECREASE TIP (for sleeves): Decrease 1 stitch on either side of the marker as follows: Start 2 stitches before the marker-thread, knit 2 together, marker-thread, slip 1 stitch as if to knit, knit 1 and pass the slipped stitch over the knitted stitch. ------------------------------------------------------- START THE PIECE HERE: ------------------------------------------------------- JUMPER – SHORT OVERVIEW OF THE PIECE: The neck and yoke are worked in the round with circular needle, top down. The yoke is divided for body and sleeves and the body is continued in the round with circular needle. The sleeves are worked with short circular needle/double pointed needles. NECK: Cast on 84-87-90-93-96-99 stitches with short circular needle size 3.5 mm and 1 strand of each quality (2 strands). Knit 1 round, then work rib (knit 1, purl 2) in the round for 4 cm. Knit 1 round and increase 16-13-22-19-28-25 stitches evenly spaced = 100-100-112-112-124-124 stitches. YOKE: Change to circular needle size 5 mm. Insert 4 markers without working the stitches. These are used when increasing to raglan. Insert marker-1 in the first stitch, count 18 stitches (sleeve), insert marker-2 in the next stitch, count 30-30-36-36-42-42 stitches (front piece), insert marker-3 in the next stitch, count 18 stitches (sleeve), insert marker-4 in the next stitch. There are 30-30-36-36-42-42 stitches left after the last marker (back piece). Work the first round as follows: Knit 1 (marker-stitch 1), increase 1 stitch to RAGLAN – read description above, work A.1, A.2, A.3, increase 1 stitch to raglan on each side of marker-stitch 2 (which is knitted), A.1, work A.2, 3-3-4-4-5-5 times, A.3, increase 1 stitch to raglan on each side of marker-stitch 3 (which is knitted), A.1, A.2, A.3, increase 1 stitch to raglan on each side of marker-stitch 4 (which is knitted), A.1, work A.2, 3-3-4-4-5-5 times, A.3, increase 1 stitch to raglan before marker-stitch 1. Continue this pattern and increase as described below – REMEMBER THE KNITTING TENSION! RAGLAN: Increase on each side of all marker-stitches (8 stitches increased) every 2nd round a total of 13-13-13-19-16-10 times, including the first increase. The increased stitches are worked into the pattern as shown in the diagrams – read PATTERN above = 204-204-216-264-252-204 stitches. Then continue to increase to raglan, but every second time you increase only increase on the front and back pieces (4 stitches increased). You therefore increase every 2nd round on the front/back and every 4th round on the sleeves. Increase like this 18-24-24-18-24-36 times on the front/back piece (9-12-12-9-12-18 times on the sleeves). You have increased a total of 31-37-37-37-40-46 times on the front/back piece and 22-25-25-28-28-28 times on the sleeves. There are 312-348-360-372-396-420 stitches. Continue working without further increases until the yoke measures 23-27-28-29-31-34 cm, measured mid-front and from the neck down. AT THE SAME TIME on the last round decrease 4 stitches by working the marker-stitches as follows: Marker-stitches 2 and 4: Knit the stitch with the marker twisted together with the following stitch. Marker-stitches 1 and 3: Start 1 stitch before the marker-stitch and knit 2 together. 308-344-356-368-392-416 stitches. On the next round divide for the body and sleeves as follows: Place the first 62-68-68-74-74-74 stitches on a thread for the sleeve, cast on 4-4-10-16-16-22 stitches (in side under sleeve), work the next 92-104-110-110-122-134 stitches as before (front piece), place the next 62-68-68-74-74-74 stitches on a thread for the sleeve, cast on 4-4-10-16-16-22 stitches (in side under sleeve), work the last 92-104-110-110-122-134 stitches (back piece). The piece measures approx. 27-31-32-33-35-38 cm from the shoulder. The body and sleeves are finished separately – the piece is now measured from here. BODY: = 192-216-240-252-276-312 stitches. Work A.2 in the round over all stitches (make sure the pattern continues correctly from the yoke). Work until the body measures approx. 25-23-24-25-25-24 cm from the division – finish after round 4 or 10 in A.2. Knit 1 round and decrease 15-21-21-21-24-30 stitches evenly spaced = 177-195-219-231-252-282 stitches. Change to circular needle size 3.5 mm. Work rib (knit 1, purl 2) for 4 cm. Cast off with knit a little loosely. The jumper measures approx. 56-58-60-62-64-66 cm from the shoulder down. SLEEVES: Place the 62-68-68-74-74-74 stitches from the thread on the one side of the piece on double pointed needles/short circular needle size 5 mm and knit up 1 stitch in each of the new stitches cast on under the sleeve = 66-72-78-90-90-96 stitches. Insert a marker thread in the middle of the new stitches under the sleeve. Continue A.2 in the round over all stitches (make sure the pattern continues correctly from the yoke). When the sleeve measures 4-4-4-2-2-2 cm from the division, decrease 2 stitches under the sleeve – read DECREASE TIP. Decrease like this every 5-5-3-2½-2-1½ cm a total of 6-6-9-12-12-15 times = 54-60-60-66-66-66 stitches. Continue working until the sleeve measures approx. 34-31-31-30-29-26 cm from the division – finish after round 4 or 10 in A.2. There is 6 cm left to finished length; try the jumper on and work to desired length. Change to double pointed needles size 3.5 mm and work rib (knit 1, purl 2) for 6 cm. Cast off with knit a little loosely. The sleeve measures approx. 40-37-37-36-35-32 cm from the division. Work the other sleeve in the same way. |
||||||||||
Diagram explanations |
||||||||||
|
||||||||||
 |
||||||||||
 |
||||||||||
Have you finished this pattern?Tag your pictures with #dropspattern #northernmermaidsweater or submit them to the #dropsfan gallery. Do you need help with this pattern?You'll find 30 tutorial videos, a Comments/Questions area and more by visiting the pattern on garnstudio.com. © 1982-2026 DROPS Design A/S. We reserve all rights. This document, including all its sub-sections, has copyrights. Read more about what you can do with our patterns at the bottom of each pattern on our site. |
||||||||||







Post a comment to pattern DROPS 236-6
We would love to hear what you have to say about this pattern!
If you want to leave a question, please make sure you select the correct category in the form below, to speed up the answering process. Required fields are marked *.