
Popular categories
Looking for a yarn?


Comments / Questions (40)
![]() María Gehwolf wrote:
María Gehwolf wrote:
Ich habe ein Problem mit der Halsblende. Die 11cm beidseits sind bei mir zu kurz für den hinteren Halsausschnitt. Auch der Maschenprpbe entsprechend sind sie zu kurz, da 60 Maschen mehr als 22cm sind.
11.10.2025 - 08:59DROPS Design answered:
Liebe Frau Gehwolf, die 11 cm sind nur die Hälfte, bis zum hinteren Mitten, die Blende soll sich etwas ziehen - schauen Sie als Beispiel dieses Video (für ein anderes Modell, mit verkürzten Reihen, die hat man hier keine), am Ende vom Video sieht man wie diese beide Blende an der Hals passt. Denken Sie auch daran, daß man mehr Maschen für Zöpfe als fürs Glattrechts braucht, so werden die 60 neuen Maschen etwas weniger als 60 Maschen glattrechts messen. Viel Spaß beim Stricken!
18.11.2025 - 10:37
![]() Mei Li wrote:
Mei Li wrote:
Hoe zit het met de 2 soorten wol die hiervoor gebruikt moeten worden? Ik zie in het patroon niet aangegeven worden wanneer ik welke soort moet gebruiken…..
25.09.2025 - 09:58DROPS Design answered:
Hi Mei Li, you work the entire piece with 2 strands. There are 2 options in the pattern: either you use 1 strand DROPS Sky + 1 strand DROPS Kid-Silk (2 strands together) or 1 strand DROPS Merino Extra Fine + 1 strand DROPS Kid-Silk (2 strands together). Happy knitting!
25.09.2025 - 17:40
![]() Olya wrote:
Olya wrote:
Hello! I have a question about charts… it is said that they show all rows, increases are made in RS rows, but then it looks like the pattern is knitted from WS. Otherwise the pattern should coincide with increases. But it’s not like that on your charts
14.04.2025 - 21:54DROPS Design answered:
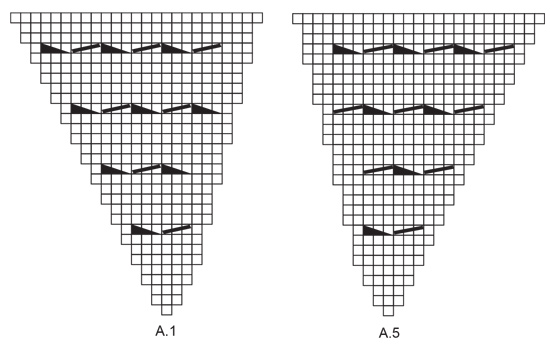
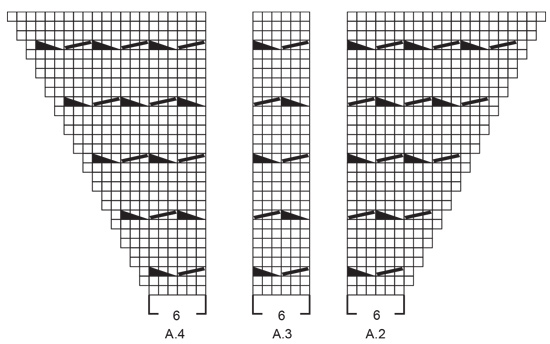
Dear Olya, you start the charts on a right side row and read the chart from the bottom up. So the first row of A.1 is the single knit stitch. On the next row, from the wrong side, read the chart from left to right and work 3 knit stitches. The first cable stitch is worked on row 9 of the chart, which is an odd row and, therefore, worked on the right side. You can find more information on how to read our charts here. Happy knitting!
19.04.2025 - 18:28
![]() Bernard Lhuissier wrote:
Bernard Lhuissier wrote:
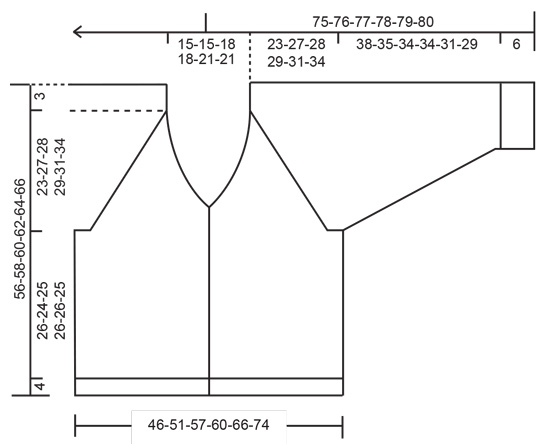
De toute manière les dimensions du croquis sont fausses...au plus large des manches on a 66 mailles...avec un échantillon de 21 mailles pour 10cm on ne peut pas arriver aux dimensions -52 cm- que vous indiquez sur le croquis !
08.03.2025 - 13:02DROPS Design answered:
Bonjour Mme Lhuissier, si ces 52 cm en taille S sont bien les (23 cm d'empiècement/raglan + 3 cm d'épaules) x 2 ), notez que ces 26 cm correspondent bien à la profondeur du raglan et pas à la circonférence des manches. Bon tricot!
10.03.2025 - 10:21
![]() Lhuissier wrote:
Lhuissier wrote:
66 mailles donnent 30cm!Et non 52cmm d'où une manche très étroite en haut....je ne comprends pas ou es l'erreur car la laine et l'échantillon son correctes
06.03.2025 - 10:56DROPS Design answered:
Bonjour Mme Lhuissier, cf réponse ci-dessous. Notez également que lors de la division de l'empiècement, la manche n'est pas au niveau de l'épaule mais plus bas, on aura ainsi besoin de moins de mailles/cm. Si votre échantillon est juste à la fois en largeur et en hauteur, alors les mesures finales devraient être juste et donner le même rendu que sur la photo. Bon tricot!
07.03.2025 - 11:57
![]() Lh wrote:
Lh wrote:
Comment le raglan qui fait 52 cm au plus large pour la petite taille peut il faire cette dimension avec seulement 66 mailles ????ça fait une manche très étroite en haut!
06.03.2025 - 10:38DROPS Design answered:
Bonjour Mme Lh, la circonférence de la manche fait rarement la même mesure que celle la profondeur de l'emmanchures sauf dans le cas d'une manche sans tête de manche (ex. ce modèle), sinon, les manches sont généralement toujours plus étroites pour éviter qu'elles ne soient justement trop larges; la mesure autour de la manche est calculée en fonction de la mesure du biceps ajustée en fonction du type de manche souhaité (plus ou moins ajustée). Bon tricot!
07.03.2025 - 11:55
![]() Fran Priestman wrote:
Fran Priestman wrote:
I purchased the Drops yarn in this pattern from Lunde Hobby. I have started the project in size XXL. I have knit the bands of 9 stitches each and have cast on 72 stitches as the pattern calls for giving me 90 stitches. However when I insert the markers there are 4 stitches left. How do I correct this?
25.02.2025 - 19:53DROPS Design answered:
Dear Mrs Priestman, insert the markers each in a stitch (not between stitches), so that you should vhe: 10 sts, 1 st with a marker, 12 sts, 1 st with a marker, 42 sts, 1 st with a marker, 12 sts, 1 st with a marker, 10 sts = 10+1+12+1+42+1+12+1+10= 90 sts. Happy knitting!
26.02.2025 - 11:26
![]() Lily wrote:
Lily wrote:
Hallo ich habe fragen zur passe ist mit a.1 1x und so.weiter gemeint dies in der Höhe zu stricken oder dies in der Reihe also a.1 dannA.2 Danke
01.01.2025 - 23:06DROPS Design answered:
Liebe Lily, bei der Beschreibung von Diagrammen unter Passe wird man die Diagramme so in der Reihe/Breite stricken, so 1Mal das Diagram A.1 usw. Viel Spaß beim Stricken!
02.01.2025 - 16:11
![]() Clare wrote:
Clare wrote:
I am interested in knitting this pattern but I don't understand the strands - is this knitting with 2 balls of wool of different thicknesses together, or will I have to split the yarn from each ball to get the number of strands mentioned?
01.12.2024 - 13:41DROPS Design answered:
Hi Clare, The pattern is worked in 1 strand of either Drops Sky or Drops Merino Extra Fine (which are of the same thickness and can be interchanged), plus 1 strand of Drop Kid-Silk. So you use 2 strands (1 from each yarn type), neither of which have been split. Happy knitting!
02.12.2024 - 07:20
![]() Christine wrote:
Christine wrote:
Petite idée après avoir tricoté mes 2 bandes d'encolure que je ne ferme pas (attende sur une aiguille auxiliaire) je fait la couture au milieu dos. Ensuite je relève le nombre de maille donnée dans l'explication sur la bande d'encolure que je viens de tricoter en rajoutant les mailles de bordure droite et gauche. cela me permet de ne pas me tromper et surtout de ne pas avoir de couture en fin d'ouvrage. Bon courage
30.10.2024 - 08:02
|
||||||||||
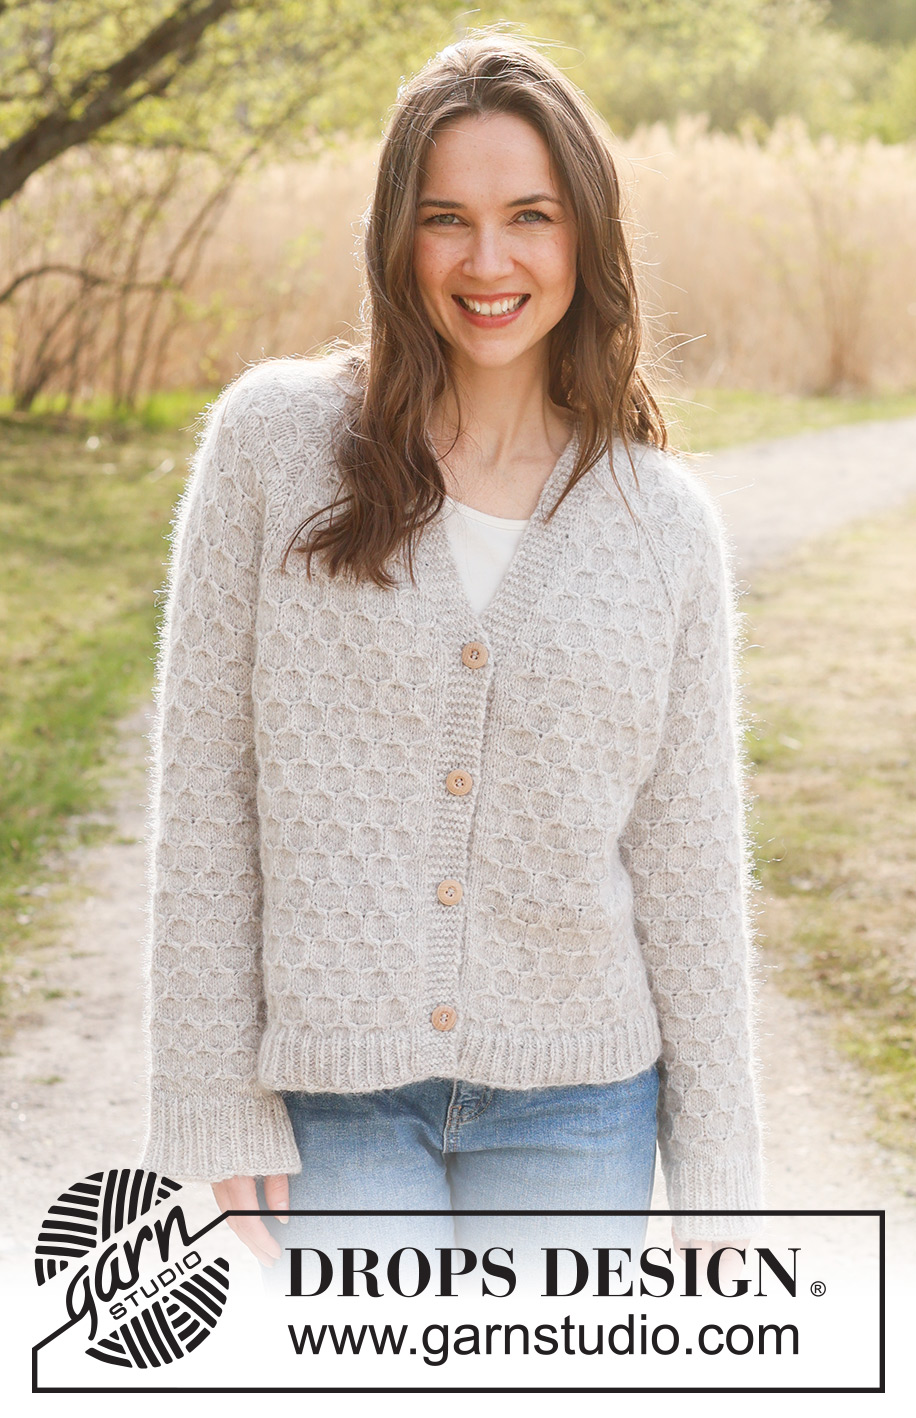
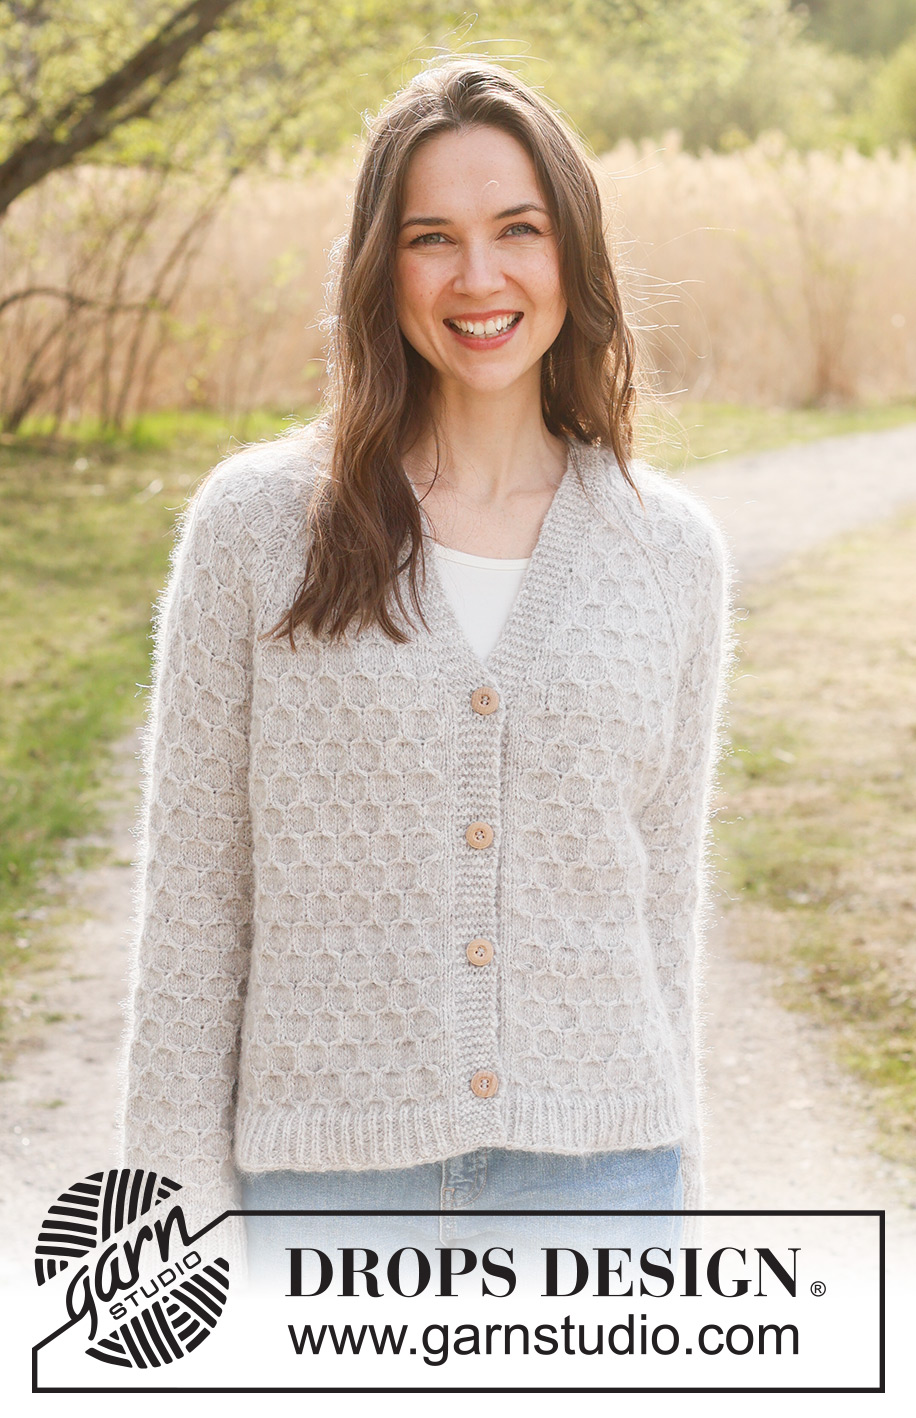
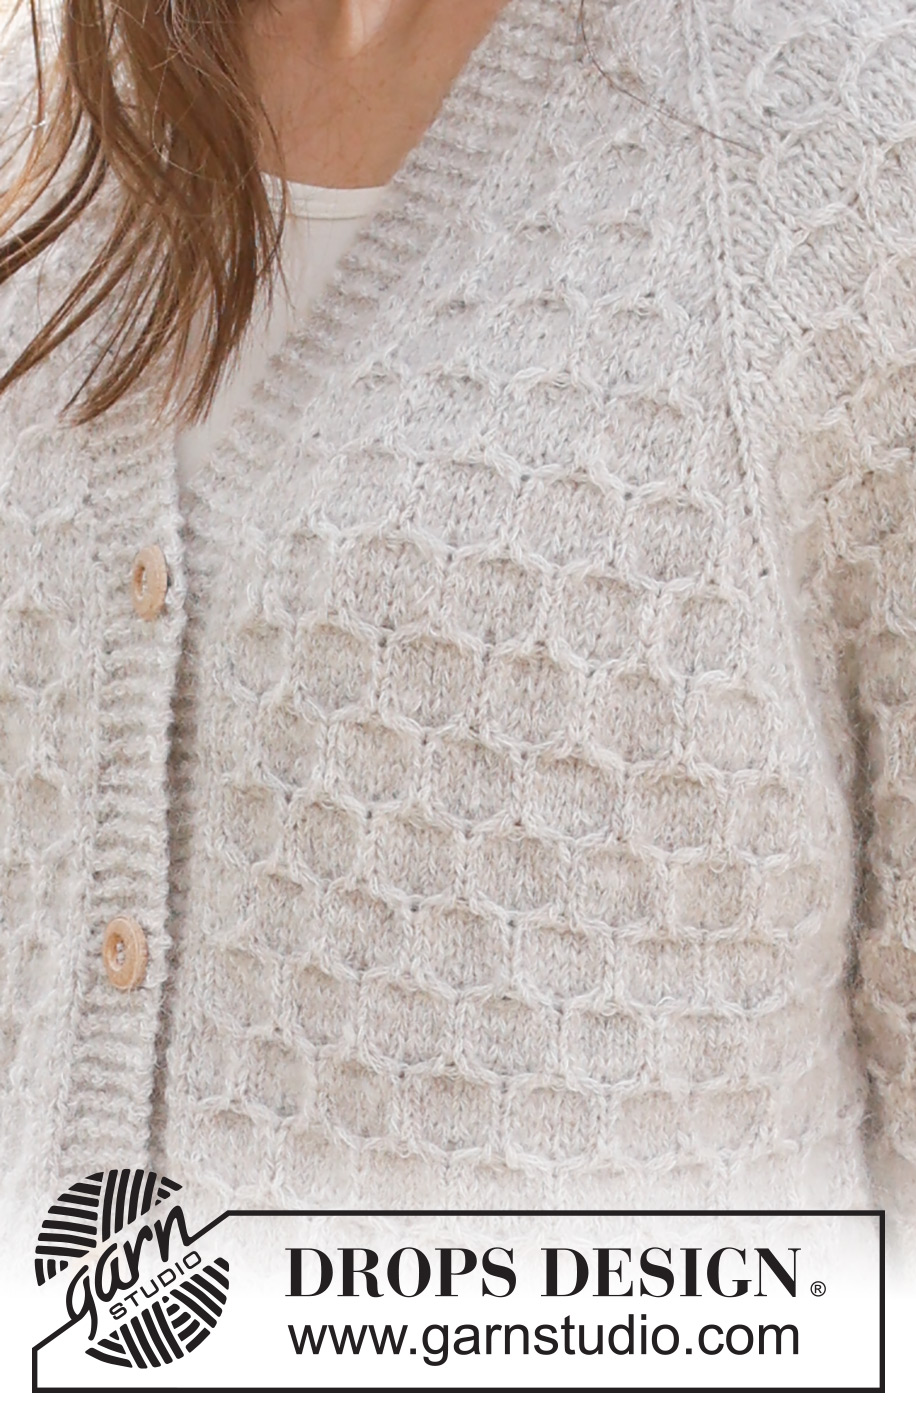
Northern Mermaid Cardigan#northernmermaidcardigan |
||||||||||
 |
 |
|||||||||
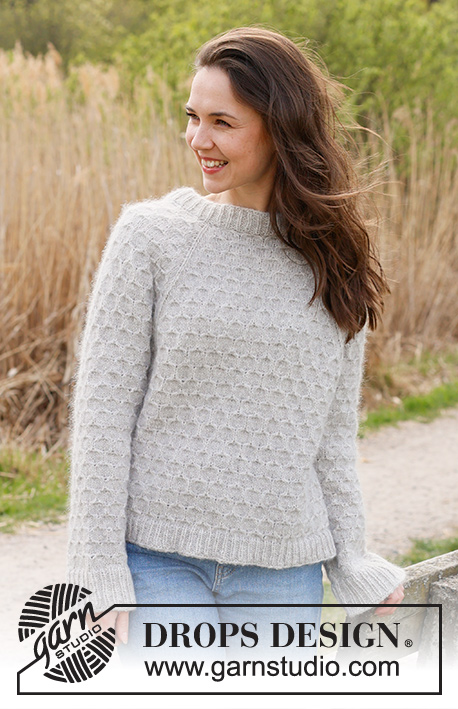
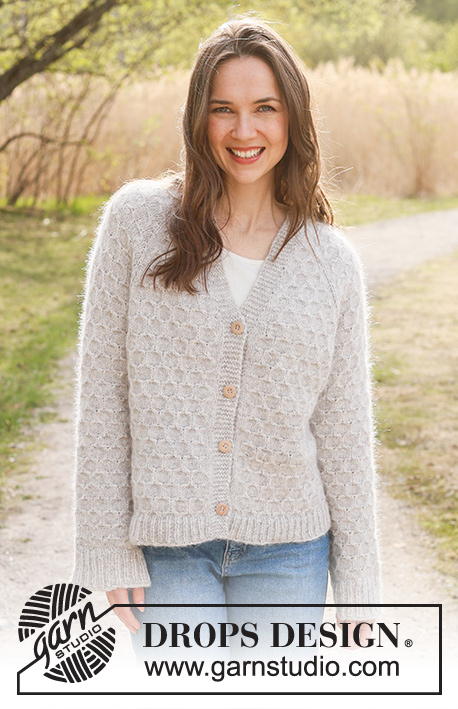
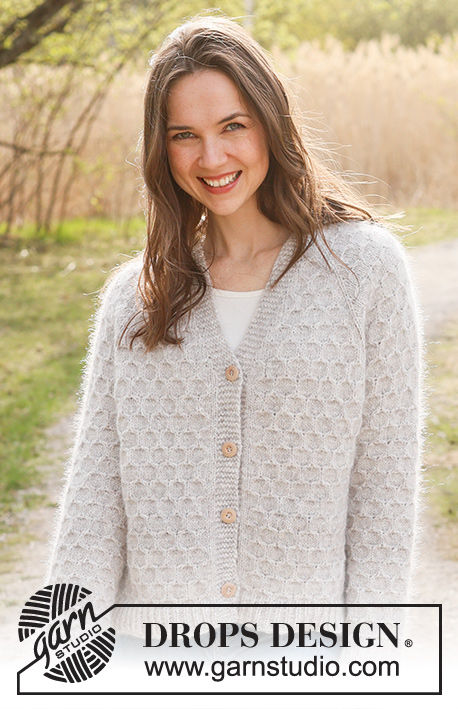
Knitted jacket in DROPS Sky / DROPS Merino Extra Fine and DROPS Kid-Silk. The piece is worked top down with raglan, V-neck and honeycomb pattern. Sizes XS/S - XXXL.
DROPS 236-5 |
||||||||||
|
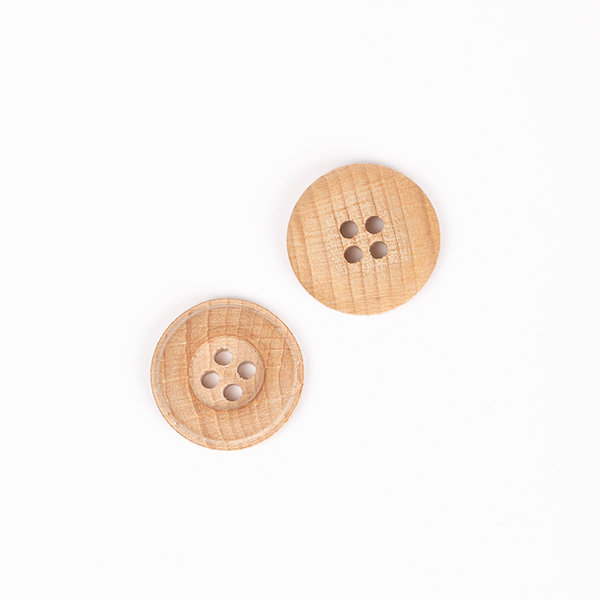
------------------------------------------------------- EXPLANATIONS FOR THE PATTERN: ------------------------------------------------------- RIDGE/GARTER STITCH (worked back and forth): Knit all rows. 1 ridge = knit 2 rows. PATTERN: See diagrams A.1 to A.5. The diagrams show all rows in the pattern from the right side. As you increase for raglan and V-neck, work the new stitches into the pattern as shown in the diagrams, i.e. work them in stocking stitch until they fit the 3 or 6 stitches in the pattern. RAGLAN: All increases are worked from the right side! Increase 1 stitch before/after the 4 marker-stitches (in each transition between the body and sleeves). Increase 1 stitch by making 1 yarn over. The yarn overs are worked as follows from the wrong side: BEFORE MARKER: Purl the back loop. No hole. AFTER MARKER: Slip the yarn over off the left needle and replace it twisted (insert the left needle through the back when replacing it). Purl the front loop. No hole. V-NECK: All increases are worked from the right side! Increase 1 stitch after/before the bands. Increase 1 stitch by making 1 yarn over. The yarn overs are worked as follows from the wrong side: BEFORE THE BAND: Purl the back loop. No hole. AFTER THE BAND: Slip the yarn over off the left needle and replace it twisted (insert the left needle through the back when replacing it). Purl the front loop. No hole. BUTTONHOLES: Work buttonholes on the right band (when the garment is worn). Work from the right side when there are 4 stitches left on the row as follows: Make 1 yarn over, knit 2 together and knit 2. On the next row (wrong side), knit the yarn over to leave a hole. The first buttonhole is worked 1 cm after the final increase for the V-neck. Then work the other 3-3-4-4-4-4 buttonholes with approx. 9-10-7-7½-6½-7 cm between each one. DECREASE TIP (for sleeves): Decrease 1 stitch on either side of the marker as follows: Start 2 stitches before the marker, knit 2 together, marker, slip 1 stitch as if to knit, knit 1 and pass the slipped stitch over the knitted stitch. ------------------------------------------------------- START THE PIECE HERE: ------------------------------------------------------- JACKET – SHORT OVERVIEW OF THE PIECE. Start by working 2 bands in garter stitch – which are later sewn onto the neck-line. Then cast on stitches between the bands for the neck-line and work the yoke back and forth, from mid-front and top down. Stitches are increased for raglan and V-neck. The yoke is divided for body and sleeves and the body continued back and forth with circular needle. The sleeves are worked in the round with double pointed needles/short circular needle. RIGHT BAND (when the garment is worn): Cast on 7-7-7-9-9-9 stitches with circular needle size 3.5 mm and 1 strand of each quality (2 strands). Work GARTER STITCH – read description above, for 13-13-14-14-16-16 cm. Finish after a row from the wrong side. Lay the piece to one side. LEFT BAND: Cast on 7-7-7-9-9-9 stitches with circular needle size 3.5 mm and 1 strand of each quality (2 strands). Work garter stitch for 13-13-14-14-16-16 cm, finish after a row from the right side, do not cut the strand. Cast on 60-60-66-66-72-72 stitches at the end of the row, then knit the 7-7-7-9-9-9 stitches from the right band = 74-74-80-84-90-90 stitches. Change to circular needle size 5 mm. Purl 1 row from the wrong side, working the 7-7-7-9-9-9 band stitches on each side in garter stitch. REMEMBER THE KNITTING TENSION! YOKE: Insert 4 markers without working the stitches. These are used when increasing to RAGLAN – read description above. Count 8-8-8-10-10-10 stitches, insert marker-1 in the next stitch, count 12 stitches, (sleeve) insert marker-2 in the next stitch, count 30-30-36-36-42-42 stitches (back piece), insert marker-3 in the next stitch, count 12 stitches (sleeve), insert marker-4 in the next stitch. There are 8-8-8-10-10-10 stitches left after the last marker. Work the first row from the right side as follows: 7-7-7-9-9-9 band stitches in garter stitch, increase 1 stitch for the V-NECK – read description above, work A.1, increase 1 stitch for RAGLAN on each side of marker-1 – read description above (marker stitch is worked in stocking stitch), A.2, A.4, increase 1 stitch for raglan on each side of marker-2, A.2, work A.3 3-3-4-4-5-5 times, A.4, increase 1 stitch for raglan on each side of marker-3, A.2, A.4, increase 1 stitch for raglan on each side of marker-4, A.5, increase 1 stitch for the V-neck, 7-7-7-9-9-9 band stitches in garter stitch. Continue this pattern back and forth, increasing for raglan and V-neck simultaneously as described below; therefore read the next 2 sections before continuing! RAGLAN: Increase on each side of the 4 marker-stitches, on each row from the right side (8 stitches increased) a total of 19-19-19-25-22-16 times, including the first increase. The new stitches are worked into the pattern as shown in the diagrams – read PATTERN in the explanations above. Then continue to increase for raglan, but every other increase is only on the front and back pieces (4 stitches increased). You now increase every 2nd row on the body (every row from the right side) and every 4th row on the sleeves (every 2nd row from the right side). Increase like this 12-18-18-12-18-30 times on the body (6-9-9-6-9-15 times on the sleeves). A total of 31-37-37-37-40-46 times on the body and 25-28-28-31-31-31 times on the sleeves. V-NECK: Increase for the V-neck inside the bands every 2nd row 3 times, including the first increase. Then increase every 4th row 12-12-15-15-18-18 times. After the last increase there are 328-364-376-392-416-440 stitches. Continue working without further increases until the yoke measures 23-27-28-29-31-34 cm from the cast-on edge at the back – remember the BUTTONHOLES on the right band – read description above. AT THE SAME TIME on the last row from the right side decrease 4 stitches by working the marker-stitches as follows: Marker-stitches 2 and 4: Knit the marker-stitch and the next stitch twisted together. Marker-stitches 1 and 3: Start 1 stitch before the marker-stitch, knit 2 together = 324-360-372-388-412-436 stitches. On the next row (wrong side) divide for the body and sleeves: Work the first 54-60-63-65-71-77 stitches as before (right front piece), place the next 62-68-68-74-74-74 stitches on a thread for the sleeve, cast on 4-4-10-16-16-22 stitches (in side under sleeve), work 92-104-110-110-122-134 stitches (back piece), place the next 62-68-68-74-74-74 stitches on a thread for the sleeve, cast on 4-4-10-16-16-22 stitches (in side under sleeve), work the last 54-60-63-65-71-77 stitches as before (left front piece). The piece measures approx. 26-30-31-32-34-37 cm from the shoulder. The body and sleeves are finished separately – the piece is now measured from here. BODY: = 208-232-256-272-296-332 stitches. Work pattern as follows: 7-7-7-9-9-9 band stitches in garter stitch, 1 stocking stitch, work A.3 until there are 8-8-8-10-10-10 stitches left, (match the pattern to the pattern on the yoke), 1 stocking stitch, 7-7-7-9-9-9 band stitches in garter stitch. Continue this pattern for 26-24-25-26-26-25 cm – finish after row 4 or 10 in A.3. Knit 1 row from the right side and decrease 19-22-22-22-25-31 stitches evenly spaced = 189-210-234-250-271-301 stitches. Change to circular needle size 3.5 mm. Work rib as follows from the wrong side: 7-7-7-9-9-9 band stitches in garter stitch, * purl 1, knit 2 *, work from *-* until there are 8-8-8-10-10-10 stitches left, purl 1, 7-7-7-9-9-9 band stitches in garter stitch. Continue this rib for 4 cm. Cast off a little loosely with knit from the right side. The jacket measures approx. 56-58-60-62-64-66 cm from the shoulder down. SLEEVES: Place the 62-68-68-74-74-74 stitches from the thread on the one side of the piece on short circular needle/double pointed needles size 5 mm and knit up 1 stitch in each of the new stitches cast on under the sleeve = 66-72-78-90-90-96 stitches. Insert a marker in the middle of the new stitches under the sleeve. Work A.3 in the round (make sure it matches A.3 on the yoke). When the sleeve measures 4-4-4-3-2-3 cm decrease 2 stitches on each side of the marker – read DECREASE TIP. Decrease like this every 6-5½-3½-2½-2½-1½ cm a total of 6-6-9-12-12-15 times = 54-60-60-66-66-66 stitches. The stitches which do not fit into the pattern while decreasing are worked in stocking stitch. Continue working until the sleeve measures 38-35-34-34-31-29 cm from the division, finishing after round 4 or 10 in A.3 (continue with stocking stitch if necessary or to desired length - 6 cm left). Change to double pointed needles size 3.5 mm and work rib (knit 1, purl 2) for 6 cm. Loosely cast off with knit. The sleeve measures approx. 44-41-40-40-37-35 cm from the division. Work the other sleeve in the same way. ASSEMBLY: Sew the bands together mid-back then sew them to the neck-line. Sew the buttons onto the left band. |
||||||||||
Diagram explanations |
||||||||||
|
||||||||||
 |
||||||||||
 |
||||||||||
 |
||||||||||
Have you finished this pattern?Tag your pictures with #dropspattern #northernmermaidcardigan or submit them to the #dropsfan gallery. Do you need help with this pattern?You'll find 33 tutorial videos, a Comments/Questions area and more by visiting the pattern on garnstudio.com. © 1982-2026 DROPS Design A/S. We reserve all rights. This document, including all its sub-sections, has copyrights. Read more about what you can do with our patterns at the bottom of each pattern on our site. |
||||||||||


With over 40 years in knitting and crochet design, DROPS Design offers one of the most extensive collections of free patterns on the internet - translated to 17 languages. As of today we count 324 catalogues and 12290 patterns translated into English (UK/cm). 12290
We work hard to bring you the best knitting and crochet have to offer, inspiration and advice as well as great quality yarns at incredible prices! Would you like to use our patterns for other than personal use? You can read what you are allowed to do in the Copyright text at the bottom of all our patterns. Happy crafting!
Post a comment to pattern DROPS 236-5
We would love to hear what you have to say about this pattern!
If you want to leave a question, please make sure you select the correct category in the form below, to speed up the answering process. Required fields are marked *.