Comments / Questions (6)
![]() Hanny Sintenie wrote:
Hanny Sintenie wrote:
Graag patroon rugpand met raglanmouw voor meisje 4 jaar
10.10.2024 - 15:27DROPS Design answered:
Dag Hanny,
Als je naar de kinderpatronen gaat kun je filteren op raglanmouwen. Er zit vast iets leuks bij!
10.10.2024 - 18:53
![]() Tove Jonassen wrote:
Tove Jonassen wrote:
Hei. Skal det virkelig økes 6 ganger i sidene på str 9/10 år??? Har økt 4 ganger i hver side nå, og har allerede 8 masker for mye. Synes jakken skrår for mye. Mvh Tove.
11.07.2024 - 12:11DROPS Design answered:
Hei Tove. Denne modellen er litt A-formet. Brystmålet er 41 x 2 cm og så skal det økes med 12 masker i hver side slik at målet før vrangeborden skal være 47 x 2 cm. Men du kan fint la være å øke i sidene om du ønsker en annen form, bare husk å tilpass maskeantallet før det strikkes vrangbord. mvh DROPS Design
11.07.2024 - 13:25
![]() Ülle Grünberg wrote:
Ülle Grünberg wrote:
Tere! Avastasin tekstis vea enne kehaosa allääre sooniku tegemist, kus oleks vaja kasvatada sooniku jaoks silmuseid, aga õpetuses on öeldud, et vaja KAHANDADA silmused. :)
16.09.2021 - 01:01
![]() Maj-Lis Olofsson wrote:
Maj-Lis Olofsson wrote:
Hej! Har kommit till första ”stjärnan ” i diagrammet som tydligen innebär att man ökar i sidan på fram och bakstycket. Borde inte ökningen på oket vid pil 8 göras före? Vad betyder ”stjärna” nr två? Stickar i syl 110 -116. Trodde att ”stjärnan” innebär deln av arbetet i bak - och framstycken??? Tacksam för hjälp!
14.05.2020 - 16:22DROPS Design answered:
Hei Maj-Lis. Du strikker diagram A.1+A.2 1 gang i høyden med økningene forklart med piler (1.-8. pil). Etter at diagram A.1+A.2 er strikket 1 gang i høyden, skal A.X strikkes/gjentas og da er det bare med økninger markert med stjerne og kun i sidene av jakken. God Fornøyelse!
25.05.2020 - 10:15
![]() Pirkko Björn wrote:
Pirkko Björn wrote:
Kiitos, aivan ihanaa , että saan täältä myös tulostettua nämä ohjeet. Ostin Liljan lankakaupasta viime kesänä langat ja nyt olen aloittamassa villatakkia lapsenlapselle.
15.02.2020 - 09:57
![]() Riitta Haanpää wrote:
Riitta Haanpää wrote:
Hei! Löytyisikö tähän malliin lisäystä niin, että villatakki voidaan neuloa yhtenäisenä niin, että se leikataan viimeistelyssä keskeltä auki.?
02.01.2020 - 13:31DROPS Design answered:
Hei, valitettavasti meillä ei ole mahdollisuutta kirjoittaa tätä ohjetta uudestaan. Voit kuitenkin kysyä neuvoa paikallisessa DROPS jälleenmyyjäliikkeessäsi.
14.01.2020 - 19:19
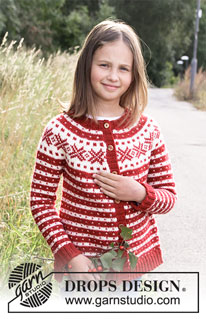
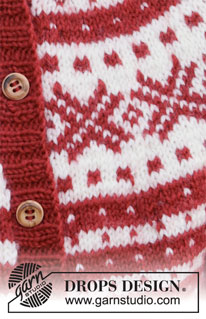
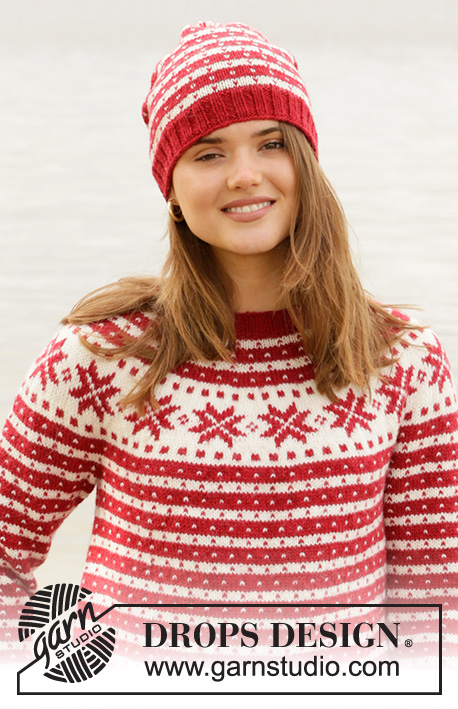
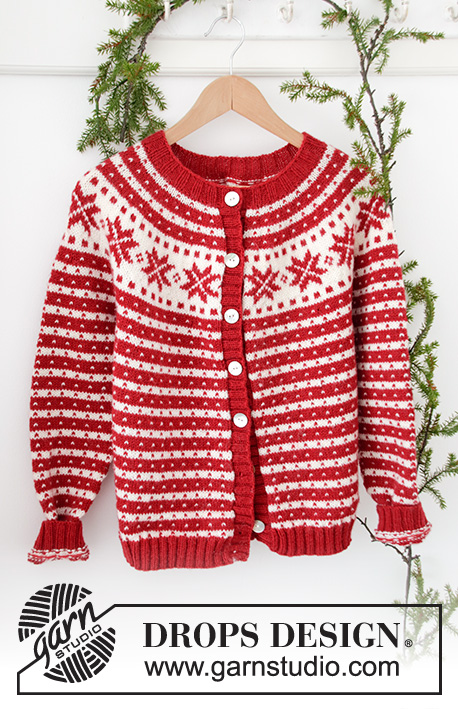
Candy Cane Lane Kids Jacket#candycanelanejacket |
|||||||||||||
 |
 |
||||||||||||
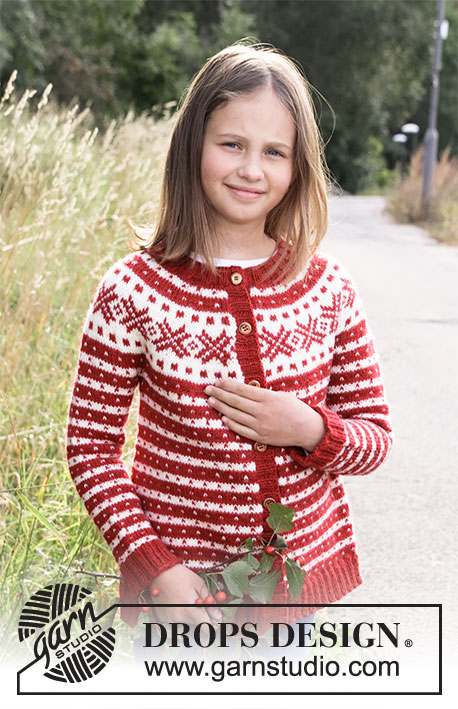
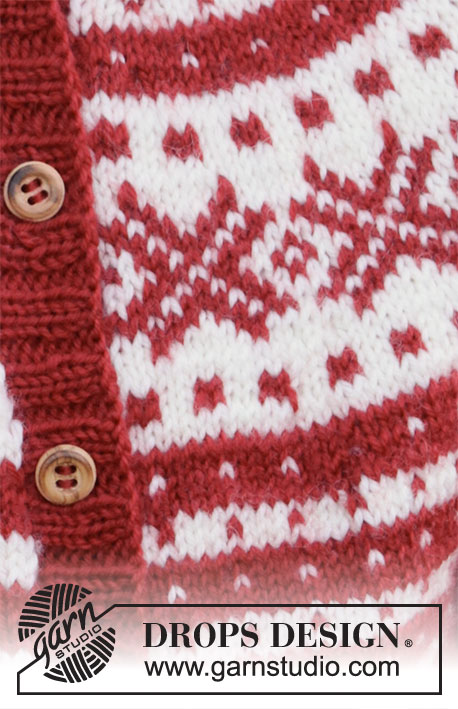
Knitted jacket for kids with Nordic Fana pattern in DROPS Karisma or DROPS Lima. Piece is knitted top down with Nordic pattern. Size 2-12 years
DROPS Children 34-31 |
|||||||||||||
|
---------------------------------------------------------- EXPLANATION FOR THE PATTERN: ---------------------------------------------------------- GARTER STITCH (back and forth): Knit all rows. 1 ridge vertically = knit 2 rows. PATTERN: See diagrams A.1 and A.2. Work the entire pattern in stocking stitch. INCREASE TIP-1 (evenly): To calculate how to increase evenly, use the total number of stitches on row (e.g. 80 stitches) and divide stitches by number of increases to be done (e.g. 17) = 4.7. In this example increase by making 1 yarn over after alternately approx. every 4th and 5th stitch. On next round work yarn overs twisted to avoid holes. INCREASE TIP-2 (applies to sides of body): Work until 2 stitches remain before marker thread, 1 yarn over, work 4 stitches (marker thread is in the middle of these stitches), 1 yarn over = 2 stitches increased. On next round work yarn overs twisted to avoid holes. Then work the new stitches in stocking stitch. DECREASE TIP (applies to sleeves): Decrease 1 stitch on each side of marker thread as follows: Work until 3 stitches remain before marker thread, knit 2 together, knit 2 stitches (marker thread is between these stitches), slip 1 stitch knitwise, knit 1, pass slipped stitch over stitch worked = 2 stitches decreased. Adjust pattern mid under sleeve so that pattern continues nicely around the rest of sleeve. BUTTONHOLES (applies to right band when garment is worn): Decrease for buttonholes on right band. 1 buttonhole = work 2 stitches together, make 1 yarn over - NOTE: It will look nicer if you decrease for buttonhole by purling 2 together in a section with 2 purl stitches (seen from right side). On next row knit yarn over to make holes. Place bottom buttonhole approx. 2 cm from bottom edge, decrease top buttonhole on neck edge, make sure that the other buttonholes are evenly placed according to these. ---------------------------------------------------------- START THE PIECE HERE: ---------------------------------------------------------- JACKET - SHORT OVERVIEW OF THE PIECE: Work neck edge and yoke back and forth on circular needle from mid front, work top down. Now divide yoke for body and sleeves. Work body back and forth on circular needle, top down. Work sleeves in the round on double pointed needles/a short circular needle, top down. NECK EDGE: Cast on 92-96-96-100-100-104 stitches on circular needle size 2.5 mm with wine red / red. Purl 1 row (= wrong side). Work next row as follows from right side: 1 edge stitch in GARTER STITCH - read explanation above, * knit 2, purl 2 *, work from *-* until 3 stitches remain, knit 2 and finish with 1 edge stitch in garter stitch. Continue rib like this for 2-2-2-3-3-3 cm, but after approx. 1-1-1-1½-1½-1½ cm decrease for 1 buttonhole on right band (when garment is worn) by working from right side until 5 stitches remain, purl 2 together, make 1 yarn over, knit 2 and finish with 1 edge stitch in garter stitch. Work next row as follows from wrong side: Cast off 6 stitches at beginning of row (fasten band here later), purl the next 80-84-84-88-88-92 stitches and increase at the same time 17-17-17-17-17-21 stitches evenly over these stitches – read INCREASE TIP, then continue over the remaining 5 stitches and work 1 edge stitch in garter stitch. Turn piece and cast off the first 6 stitches at beginning of row = 97-101-101-105-105-113 stitches. Insert 1 marker on row – NOW MEASURE YOKE FROM HERE! Work yoke as explained below. YOKE: Switch to circular needle size 4 mm. Work first row as follows from right side: 1 edge stitch in garter stitch, work A.1 until 4 stitches remain on row (= 23-24-24-25-25-27 repetitions of 4 stitches), work A.2 over 3 stitches and finish with 1 edge stitch in garter stitch. Continue pattern like this. REMEMBER THE KNITTING TENSION! AT THE SAME TIME increase stitches evenly on every row marked with arrow in A.1 as explained below, work different number of stitch according to diagram A.2 when increasing stitch to make the pattern fit nicely along the band. Arrow-1: Increase 12-12-12-12-12-12 stitches evenly = 109-113-113-117-117-125 stitches. Arrow-2: Increase 12-12-12-16-16-24 stitches evenly = 121-125-125-133-133-149 stitches. Arrow-3: Increase 15-19-19-23-23-31 stitches evenly = 136-144-144-156-156-180 stitches. Continue the pattern as follows: 1 edge stitch in garter stitch, work A.1 until 3 stitches remain on row (= 33-35-35-38-38-44 repetitions of 4 stitches), work A.2 over 2 stitches and finish with 1 edge stitch in garter stitch. Arrow-4: Increase 35-39-39-39-39-27 stitches evenly = 171-183-183-195-195-207 stitches. Continue the pattern as follows: 1 edge stitch in garter stitch, work A.1 until 3 stitches remain on row (= 14-15-15-16-16-17 repetitions of 12 stitches), work A.2 over 1 stitch and finish with 1 edge stitch in garter stitch. Arrow-5: Increase 13-13-21-17-29-25 stitches evenly = 184-196-204-212-224-232 stitches. Continue the pattern as follows: 1 edge stitch in garter stitch, work A.1 until 3 stitches remain on row (= 45-48-50-52-55-57 repetitions of 4 stitches), work A.2 over 2 stitches and finish with 1 edge stitch in garter stitch. Arrow-6: Increase 13-21-21-21-25-25 stitches evenly = 197-217-225-233-249-257 stitches. Continue the pattern as follows: 1 edge stitch in garter stitch, work A.1 until 4 stitches remain on row (= 48-53-55-57-61-63 repetitions of 4 stitches), work A.2 over 3 stitches and finish with 1 edge stitch in garter stitch. Arrow-7: Increase 8-4-8-12-12-12 stitches evenly = 205-221-233-245-261-269 stitches. Arrow-8: Increase 4-4-4-4-4-4 stitches evenly = 209-225-237-249-265-273 stitches. Continue A.X and A.Y and when piece measures approx. 14-14-15-16-17-17 cm from marker, work as follows from right side: Work 34-37-39-41-44-45 stitches as before (= front piece), slip the next 40-43-45-47-49-51 stitches on 1 stitch holder for sleeve, cast on 6-6-6-8-8-8 new stitches on row (= in the side under sleeve), work 61-65-69-73-79-81 stitches as before (= back piece), slip the next 40-43-45-47-49-51 stitches on 1 stitch holder for sleeve, cast on 6-6-6-8-8-8 new stitches on row (= in the side under sleeve) and work the 34-37-39-41-44-45 stitches as before (= front piece). Finish body and sleeves separately. NOW MEASURE PIECE FROM HERE! BODY: = 141-151-159-171-183-187 stitches. Insert 1 marker thread in the middle of the new stitches cast on under sleeve. Continue A.X and A.Y from wrong side and increase at the same time 0-2-2-2-2-2 stitches evenly on row = 141-153-161-173-185-189 stitches. Continue pattern as shown in A.X and A.Y until piece measures approx. 4 cm, now increase stitch on each side of every marker - read INCREASE TIP-2 in explanation above. Make sure that increases are done on the rows marked with a star (this way the pattern will continue to fit the entire round, when 4 stitches are increased in each side between every row worked in colour pattern). Increase as follows in the different sizes: SIZE 2 - 3/4 - 5/6 - 7/8 years: Increase 4-4-4-6 times in total – increase every time A.X - A.Y are worked vertically. SIZE 9/10 - 11/12 years: Increase 6-6 times in total – increase every other time A.X - A.Y are worked vertically. ALL SIZES: = 157-169-177-197-209-213 stitches. Work until piece measures 16-20-23-25-28-32 cm from division, or desired length. Knit 1 row from right side while increasing 43-43-47-51-51-55 stitches evenly = 200-212-224-248-260-268 stitches. Switch to circular needle size 2.5 mm and wine red / red and work next row from wrong side as follows: 1 edge stitch in garter stitch, * purl 2, knit 2 *, repeat from *-* until 3 stitches remain on needle, purl 2 and finish with 1 edge stitch in garter stitch. Continue rib like this for 4 cm. Then cast off stitches with garter stitch over garter stitch, knit over knit and purl over purl - make sure to avoid a tight cast-off edge. Jacket measures approx. 38-42-46-50-54-58 cm from shoulder and down. SLEEVE: Slip the 40-43-45-47-49-51 stitches from stitch holder in one side of piece on double pointed needles size 4 mm and pick in addition up 1 stitch in each of the 6-6-6-8-8-8 new stitches cast on under sleeve = 46-49-51-55-57-59 stitches. Insert 1 marker thread in the middle of the 6-6-6-8-8-8 stitches under sleeve and move the marker thread upwards when working. Use marker thread later when decreasing mid under sleeve. Begin round at marker thread and work pattern A.X in the round as before, adjust so that pattern fits over pattern worked on yoke (it will not fit on the under side of sleeve). When piece measures 2-2-2-2-3-3 cm from division, decrease 2 stitches mid under sleeve - read DECREASE TIP. Decrease like this every 2½-3-3½-3½-4-4 cm 7-7-7-8-8-9 times in total = 3235-37-39-41-41 stitches. When sleeve measures 18-22-26-30-34-38 cm from division, knit 1 round while increasing 4-5-3-5-3-7 stitches evenly = 36-40-40-44-44-48 stitches. Switch to double pointed needles size 2.5 mm and wine red / red. Work rib in the round = knit 2/purl 2 for 4 cm. Cast off stitches with knit over knit and purl over purl but make sure to avoid a tight cast-off edge. Sleeve measures approx. 22-26-30-34-38-42 cm from division. Work the other sleeve the same way. LEFT BAND: Pick up approx. 76-84-92-100-108-116 stitches from inside 1 edge stitch in garter stitch on circular needle size 2.5 mm with wine red / red (number of stitches should be divisible by 4). Work rib as follows from wrong side: 1 edge stitch in garter stitch, * purl 2, knit 2 *, repeat from *-* until 3 stitches remain on needle, purl 2 and finish with 1 edge stitch in garter stitch. Continue rib like this for approx. 3 cm – adjust so that it is the same width as the 6 stitches cast off in the neck, to make it nice when sewing the towards each other. Loosely cast off stitches with knit over knit and purl over purl. RIGHT BAND: Work the same way as left band but after 1-1½ cm decrease evenly for 5-5-5-6-6-7 BUTTONHOLES- read explanation above. ASSEMBLY: Sew neck edge nicely towards edge on band so that seam is almost invisible. Sew the buttons on to the left band. |
|||||||||||||
Diagram explanations |
|||||||||||||
|
|||||||||||||
 |
|||||||||||||
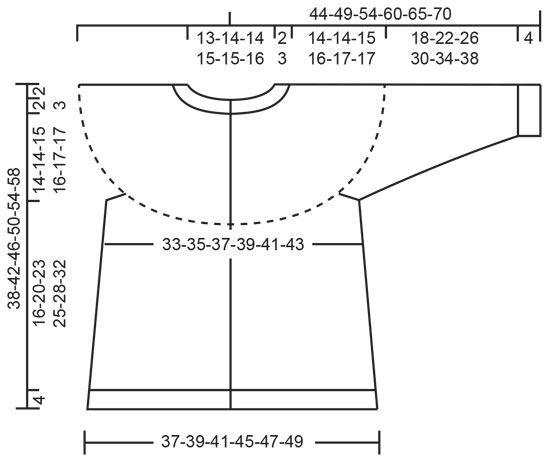 |
|||||||||||||
Have you finished this pattern?Tag your pictures with #dropspattern #candycanelanejacket or submit them to the #dropsfan gallery. Do you need help with this pattern?You'll find 31 tutorial videos, a Comments/Questions area and more by visiting the pattern on garnstudio.com. © 1982-2026 DROPS Design A/S. We reserve all rights. This document, including all its sub-sections, has copyrights. Read more about what you can do with our patterns at the bottom of each pattern on our site. |
|||||||||||||







Post a comment to pattern DROPS Children 34-31
We would love to hear what you have to say about this pattern!
If you want to leave a question, please make sure you select the correct category in the form below, to speed up the answering process. Required fields are marked *.