
Popular categories
Looking for a yarn?


Comments / Questions (3)
![]() Cindy wrote:
Cindy wrote:
Patroon rose vestje
02.03.2010 - 09:57
![]() Gun wrote:
Gun wrote:
Kyseinen ohje on nyt korjattu!
28.02.2008 - 20:28
![]() Enni wrote:
Enni wrote:
Hei. Aloitin jakun DROPSin ohjeella 90-10 ja huomasin, että suomenkielisestä ohjeesta puuttuu resorin osuus. Ruotsinkielisestä se löytyy, mutta olisi tietysti helpompaa, jos se olisi jo valmiiksi suomeksi, ettei itse tarvitsisi ruveta kääntämään (ruotsinkieliset neulontatermit ja lyhenteet kun on vielä hiukan hakusessa).
28.02.2008 - 11:34
|
|||||||||||||
DROPS 90-10 |
|||||||||||||
|
|
|||||||||||||
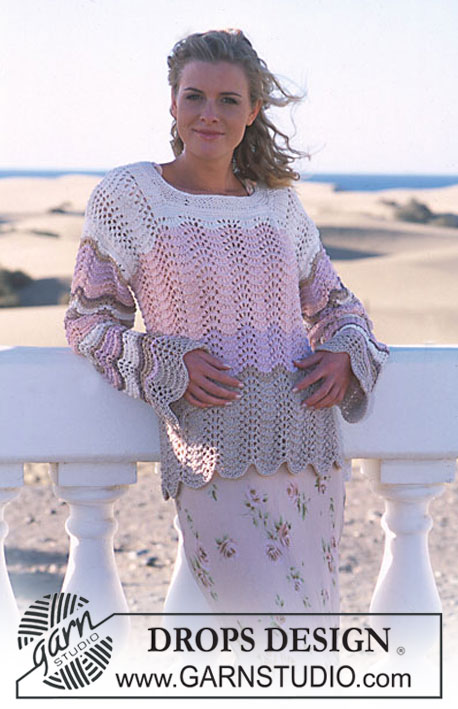
DROPS knitted jacket with rounded front and flower-brooch in "Muskat"
DROPS 90-10 |
|||||||||||||
|
Knitting tension: Remember needle size is only a guide. 20 stitches x 26 rows with needle size 4.5 mm and stocking stitch = 10 x 10 cm Pattern: See diagram M.1. The diagram shows the pattern seen from the right side. Decrease tip (for raglan): Decrease on the inside of 2 edge stitches worked in stocking stitch. From the right side: Decrease as follows after the 2 edge stitches: Slip 1 stitch as if to knit, K1, pass the slipped stitch over. Decrease as follows before the 2 edge stitches: K2 together. From the wrong side: Decrease as follows after the 2 edge stitches: P2 twisted together. Decrease as follows before the 2 edge stitches: P2 together. NOTE: Make sure the stitches lie the right way as you decrease. Rib-1: * K3, P4 *, repeat from *-*. Rib-2: * K3, P3 *, repeat from *-*. --------------------------------------------------------- Back piece: Cast on 24-32-40-40-50 stitches with needle size 4.5 mm and Muskat and work stocking stitch - at the same time increase for rounded edge in each side as follows: Loosely cast on new stitches in each side every 2nd row (i.e. at the end of each row): 4-4-4-5-5 stitches 6 times = 72-80-88-100-110 stitches. Insert 1 marker thread in each side - the piece is now measured from here. When piece measures 2 cm increase 1 stitch in each side every 2-2-2-3-3 cm a total of 6-6-6-5-5 times = 84-92-100-110-120 stitches (incl. 1 edge stitch in each side). When piece measures 15-16-17-18-18 cm, cast off 4-5-6-7-9 stitches in each side for armholes. Then decrease to raglan in each side - see Decrease tip: Every 4th row: 1 stitch 5-4-2-0-0 times and then every 2nd row: 1 stitch 14-18-23-28-30 times = 38-38-38-40-42 stitches, place stitches on 1 thread. Left front piece: Read the whole section before continuing. Cast on 10-12-14-19-24 stitches with needle size 4.5 mm and Muskat and work stocking stitch - at the same time increase for rounded edge towards mid front as follows: Loosely cast on new stitches every 2nd row (i.e. at end of each row towards mid front): 3 stitches 1-1-1-2-2 times, 2 stitches 3-4-5-5-5 times and 1 stitch 7-7-7-5-5 times. At the same time, when piece measures 2 cm increase in the side as for back piece = 32-36-40-45-50 stitches. When piece measures 15-16-17-18-18 cm, cast off 4-5-6-7-9 stitches in the side for armhole. Then decrease to raglan in the side as for back piece - see Decrease tip. At the same time, when piece measures 17-17-18-18-18 cm decrease towards mid front: 1 stitch a total of 9-9-9-10-11 times in Size S: Alternately every 4th and 5th row, Sizes M + L: Every 5th row and Sizes XL + XXL: Alternately every 5th and 6th row. All stitches are now cast off. Right front piece: Work as for left, but in reverse. Sleeve: The cuff is worked back and forth with circular needle. Cast on 51-58-58-65-65 stitches with circular needle size 4 mm and Muskat and purl 1 row (row 1 = wrong side), then work Rib-1 with 1 edge stitch in each side. When piece measures 3 cm decrease all P4 to P3 = 44-50-50-56-56 stitches. Continue the rib in this way. When piece measures 14 cm knit 1 row from the right side and knit 1 row from the wrong side. Change to needle size 4.5 mm and continue with M.1 with 1 edge stitch in each side - Ensure you have 1 repeat mid top of sleeve (see arrow in diagram which marks the middle) and work out where to start in diagram; the stitches which do not fit into a complete repeat are worked in stocking stitch. At the same time, when piece measures 16-18-16-16-16 cm increase 1 stitch in each side every 2-2-2-2-1.5 cm a total of 15-14-16-15-19 times = 74-78-82-86-94 stitches - the increased stitches are worked in stocking stitch until you have enough for a new repeat of the pattern. When piece measures 47-48-48-47-46 cm cast off 4-5-6-7-9 stitches in each side. Then decrease to raglan in each side - see Decrease tip: Every 2nd row: 1 stitch 21-23-25-26-30 times and then every row: 1 stitch 5-4-3-3-1 times = 14 stitches left on needle - the stitches which do not fit into a complete repeat as you decrease, are worked in stocking stitch. Place stitches on 1 thread and work 1 more sleeve. Assembly: Sew raglan seams inside the 1 edge stitch. Sew sleeve and side seams in one go inside the 1 edge stitch. Rib: Knit up approx. 336-354-372-408-450 stitches (incl. stitches from threads) along the opening of the jacket (i.e. along the right front piece, around the neck, down the left front piece and then around the back piece) with circular needle size 4 mm and Muskat (the number of stitches should be divisible by 6) - NOTE: Make sure that you have enough stitches in each side of the body, so that the rib is not tight. Work in the round on the needle as follows: Purl1 round and knit 1 round, then work Rib-2. When rib measures 2-3-3-4-4 cm increase all P3 to P4 = approx. 392-413-434-476-525 stitches - NOTE: Increase 1 stitch by working 2 stitches in the last knitted stitch before the purl stitch so that the knot lies towards the purl stitch. When rib measures 5-6-6-7-7 cm increase all P4 to P5 = approx. 448-472-496-544-600 stitches. When rib measures 8-9-9-10-10 cm increase all P5 to P6, but do not increase over the middle 81-81-81-87-93 stitches in back of neck = approx. 491-518-545-598-660 stitches. Work 1 round of rib in this way and then cast off with knit over knit and purl over purl. Flower-brooch: Crochet 20 loose chain stitches with hook size 3.5 mm and Muskat. Row 1: Work 3 double crochets in the second chain stitch from the hook then work 3 double crochets in each of the next 2 chain stitches. Then work 3 half treble crochets in each of the next 3 chain stitches, 3 treble crochets in each of the next 6 chain stitches,3 double treble crochets in each of the next 6 chain stitches and finally 5 double treble crochets in the last chain stitch, turn piece. Row 2: 1 double crochet in the first stitch, * 3 chain stitches, 1 double crochet in next stitch * repeat from *-* until there are 9 stitches left on row and cut strand. Lay the crochet strip in a spiral (the narrowest part at the top and the widest part at the underneath); fasten all layers with a couple of stitches. Fasten a safety pin to the back of the flower. |
|||||||||||||
Diagram explanations |
|||||||||||||
|
|||||||||||||
 |
|||||||||||||
Have you finished this pattern?Tag your pictures with #dropspattern or submit them to the #dropsfan gallery. Do you need help with this pattern?You'll find 35 tutorial videos, a Comments/Questions area and more by visiting the pattern on garnstudio.com. © 1982-2026 DROPS Design A/S. We reserve all rights. This document, including all its sub-sections, has copyrights. Read more about what you can do with our patterns at the bottom of each pattern on our site. |
|||||||||||||


With over 40 years in knitting and crochet design, DROPS Design offers one of the most extensive collections of free patterns on the internet - translated to 17 languages. As of today we count 324 catalogues and 12290 patterns translated into English (UK/cm). 12290
We work hard to bring you the best knitting and crochet have to offer, inspiration and advice as well as great quality yarns at incredible prices! Would you like to use our patterns for other than personal use? You can read what you are allowed to do in the Copyright text at the bottom of all our patterns. Happy crafting!
Post a comment to pattern DROPS 90-10
We would love to hear what you have to say about this pattern!
If you want to leave a question, please make sure you select the correct category in the form below, to speed up the answering process. Required fields are marked *.