
Popular categories
Looking for a yarn?











































Comments / Questions (33)
 Alex wrote:
Jeśli tak to ja nie rozumiem które to są oczka reglanowe (punkt 1.) a które to są oczka na reglan (punkt 3) bo dla mnie, według opisu one są w tym samym miejscu ...
03.09.2026 - 16:13DROPS Design answered:
...Jak powtórzysz dodawanie oczek na reglan (te 12 razy), czyli pkt. 1 , to kontynuujesz dodawanie na dekolt (jak wcześniej) pkt. 2, a na reglan dodajesz oczka w innej częstotliwości, czyli wg pkt. 3. Mam nadzieję, że teraz jest nieco jaśniej. Pozdrawiamy!
03.09.2026 - 16:47
Alex wrote:
Czyli jesli dobrze rozumiem to przerabiam w ten sposob: 1. Dodaje 4 oczka reglanów 12x co dwa okrążenia 2. w tytm samym czasie dodaje na dekold V 1 oczko 10 razy (20 oczek) 3. Jak dwa powyższe punkty są zrobione (skończone) to dopiero wtedy zaczynam dodawać oczka na reglan co dwa rzędy i co 4 na rękawy (dodajemy na przemian 4 i 8 oczek) Czy dobrze rozumiem? A może chodzi o to, że wszystkie 3 wyzej przeze mnie wymienione punkty, powinny być przerabiane w tym samym momencie?
03.09.2026 - 16:12DROPS Design answered:
Witaj ponownie, oczko reglanu/reglanowe to jest 1 oczko prawe, w które jest włożony marker (mamy takich oczek 4 w rzędzie) i z każdej strony tego oczka dodajemy oczka na reglan (na poszerzanie naszego swetra) wg opisu w części REGLAN. W każdym kolejnym rzędzie przesuwamy te markery w oczko powyżej, bezpośrednio nad poprzednim oczkiem. Linia reglanu (1 oczko prawe) musi być prosta. Teraz jednocześnie dodajesz oczka na 1). reglan (8 o. w co drugim rzędzie, 12 razy) i 2). na dekolt 2 oczka w rzędzie (co 4 rzędy).
03.09.2026 - 16:44
Alex wrote:
Dzień dobry. Mam problem przy dodawaniu oczek na reglan, dekold i rekaw. Robię sweter rozmiar M i podążając za opisem mam : "Dodawać z każdej strony 4 oczek reglanów w sumie 12 razy co 2 rzędy" (czyli 96 oczek), Dodawać na dekolt V za/przed 10 oczkami z każdej strony w sumie 10 razy co 4 rzędy ( 40 oczek) no i mam na drutach nałożonych 76 oczek. Więc w sumie wychodzi mi 212 oczek a nie 276 które mieć powinnam. Gdzieś muszę dodać brakujące 64 oczka, ale nie wiem gdzie...
02.09.2026 - 17:23DROPS Design answered:
Witaj Alex, została przez Ciebie pominięta część ROZMIARY S, M, L, XXL i XXXL: i tutaj dodajesz jeszcze oczka na reglan co 2 rzędy na przody/tył i co 4 rzędy na rękawy (dodajemy na przemian 4 i 8 oczek) - w sumie 14 razy, co daje dodatkowych (7x8)+(7x4)=84. Na dekolt V dodasz nie 40 oczek, tylko 20 (10 razy po 1 oczku z każdej strony dekoltu). I podsumowując: 76 wyjściowe + (96+84) na reglan + 20 na dekolt = 276 oczek. Pozdrawiamy!
03.09.2026 - 12:17
 Birgit Thorkildsen wrote:
Vedr. str xl. Når alle udt. til ragl og vhals er lavet og jeg har det fulde antal m altså 332 m men antallet til delingerne passer ikke. Ifølge opskriften hedder delingen: 57-61 (12 nye m)-96-61-(12 nye m)-57. Men eks forst hvor man starter med 10 m, tager 12 m ud til v-hals +de28 til raglan giver i alt 50 m. Ærmet skal ifølge opsk have 61 m ved deling, men når der er taget ud til ragl 17+28+28 er der i alt 73 m. Hvad gør jeg forkert? Vh Birgit
12.06.2026 - 10:09DROPS Design answered:
Hei Birgit. Du gjør ingenting forkert, men når man skal dele til ryg & forstykke og erme vil noen av erm maskene gå over til ryg & forstykk. Så selv om det er økt til 73 masker på hvert erme, skal det bli færre masker på ermene når det deles. Du får da en bedre passform og plagget sitter pener. God Fornøyelse videre på jakken .) mvh DROPS Design
15.06.2026 - 08:24
 Kit wrote:
Till Storlek M, är det när man får ihop 47 maskor i ärm då man behöver inte öka mera? Stort tack !
22.04.2026 - 14:28DROPS Design answered:
Hej Kit, ja i størrelse M skal du have 47 masker til hvert ærme, da er du færdig med udtagningerne :)
23.04.2026 - 14:12
Kit wrote:
Man får ihop 76 maskor(9+9 +58maskor) Sedan sätter 4 markörer (10 +15 +22 +15 +10m) 72 maskor, 4 maskor kvar??? Missade jag något?
16.03.2026 - 22:34DROPS Design answered:
Hej Kit, du sætter markøren i de 4 masker du har kvar :)
08.04.2026 - 12:25
 Venetia wrote:
First of all does the pattern recommend using two yarns throughout the pattern? Then I have a problem because I want to knit in Raspberry Rose Alpaca but can only find kid-silk in Raspberry which looks like a slightly different colour on screen.
21.02.2026 - 19:58DROPS Design answered:
Hi Venetia, If you work with Alpaca, then you just need 1 strand of this yarn. It is the combination of Nord and Kid Silk which uses 2 strands as these yarns are thinner than Drops Alpaca. Regards, Drops Team.
23.02.2026 - 07:18
 Frauke wrote:
Model: DROPS 250-6: Det står at man trenger Drops Alpaca og Drops Kid-silk. Men i oppskriften står ikke nærmere forklart hvordan man skal bruke dem? Skal man strikke med begge garn samtidig? Eller hvilke deler skal strikkes med hvilket garn? Takk for oppklaringen :)
06.09.2025 - 22:12DROPS Design answered:
Hei Frauke, Hele plagg er strikket med 2 tråder holdt sammen (1 tråd av hvert garn). Hilsen Drops team.
08.09.2025 - 07:00
 Katleen wrote:
Thanks, So I have to do 2 increases after de 10 first st, one for de v neck and one for the raglan … ?
04.08.2025 - 02:17DROPS Design answered:
Dear Katleen, for the V-neck increases you work 1 increase after/before 9 band stitches on each side (you increase 1 time on each side of the piece). At the same time you increase on each side of each marker for the raglan (so in the first row the V-neck and raglan increases will be very closely located, but they will spread apart as you increase the number of stitches at the side of the marker). The increases for the V-neck are repeated every 4th row, while the increases for the raglan are worked on every row from the right side (every 2nd row). Happy knitting!
05.08.2025 - 12:15
Katleen wrote:
I don’t understand when I have to start with the V neck. Can anebody help me please … thanks ! Katleen
01.08.2025 - 02:23DROPS Design answered:
Dear Katleen, you start with the V-neck at exactly the same row as you start with the RAGLAN increases. So you will be working the RAGLAN increases as you increase for the V-neck as well. For example, you start increasing every other row for the RAGLAN while you increase every 4th row for the V-neck. So you work: 1 RAGLAN + V-NECK increase row, 1 normal row from the wrong side , 1 RAGLAN increase only row, 1 normal row from the wrong side. And you repeat these 4 rows, (unless the RAGLAN increases change for your size). Happy knitting!
04.08.2025 - 00:27
|
|||||||||||||
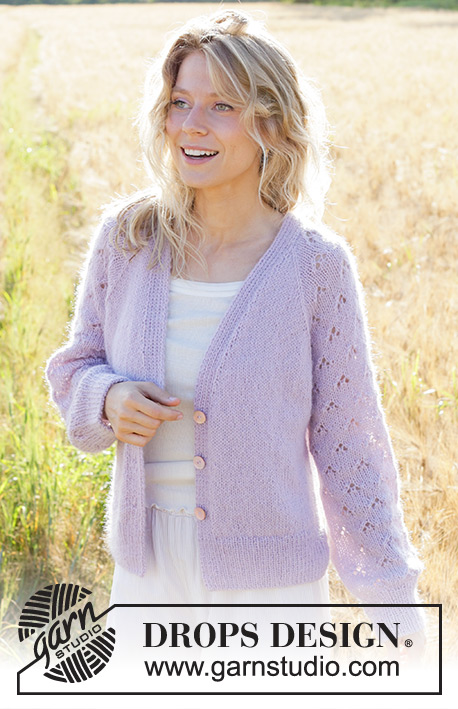
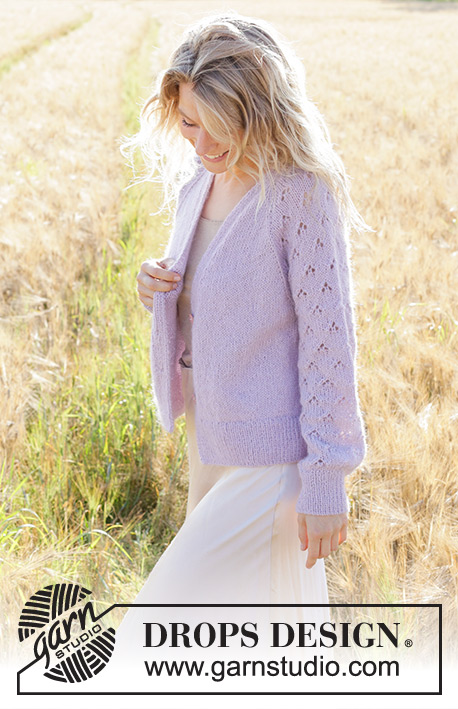
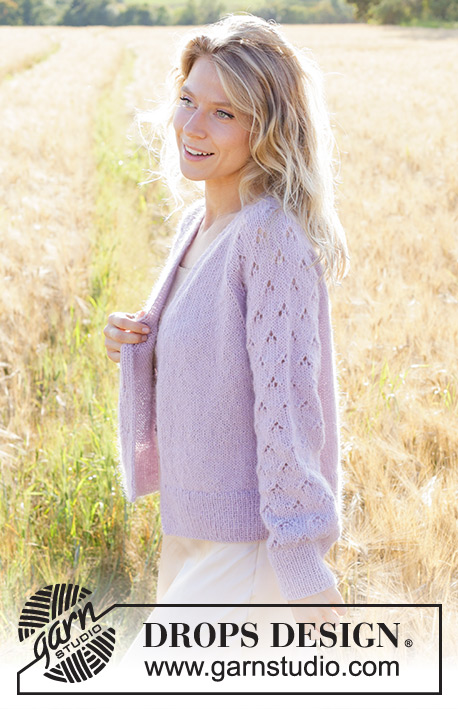
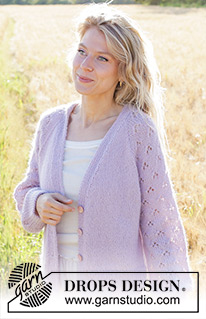
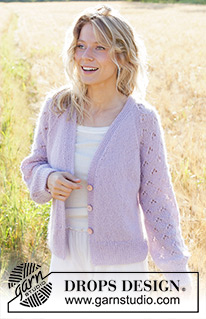
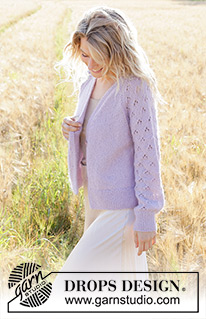
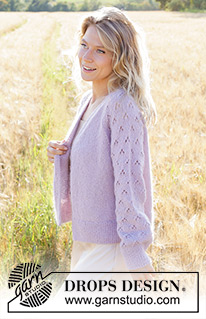
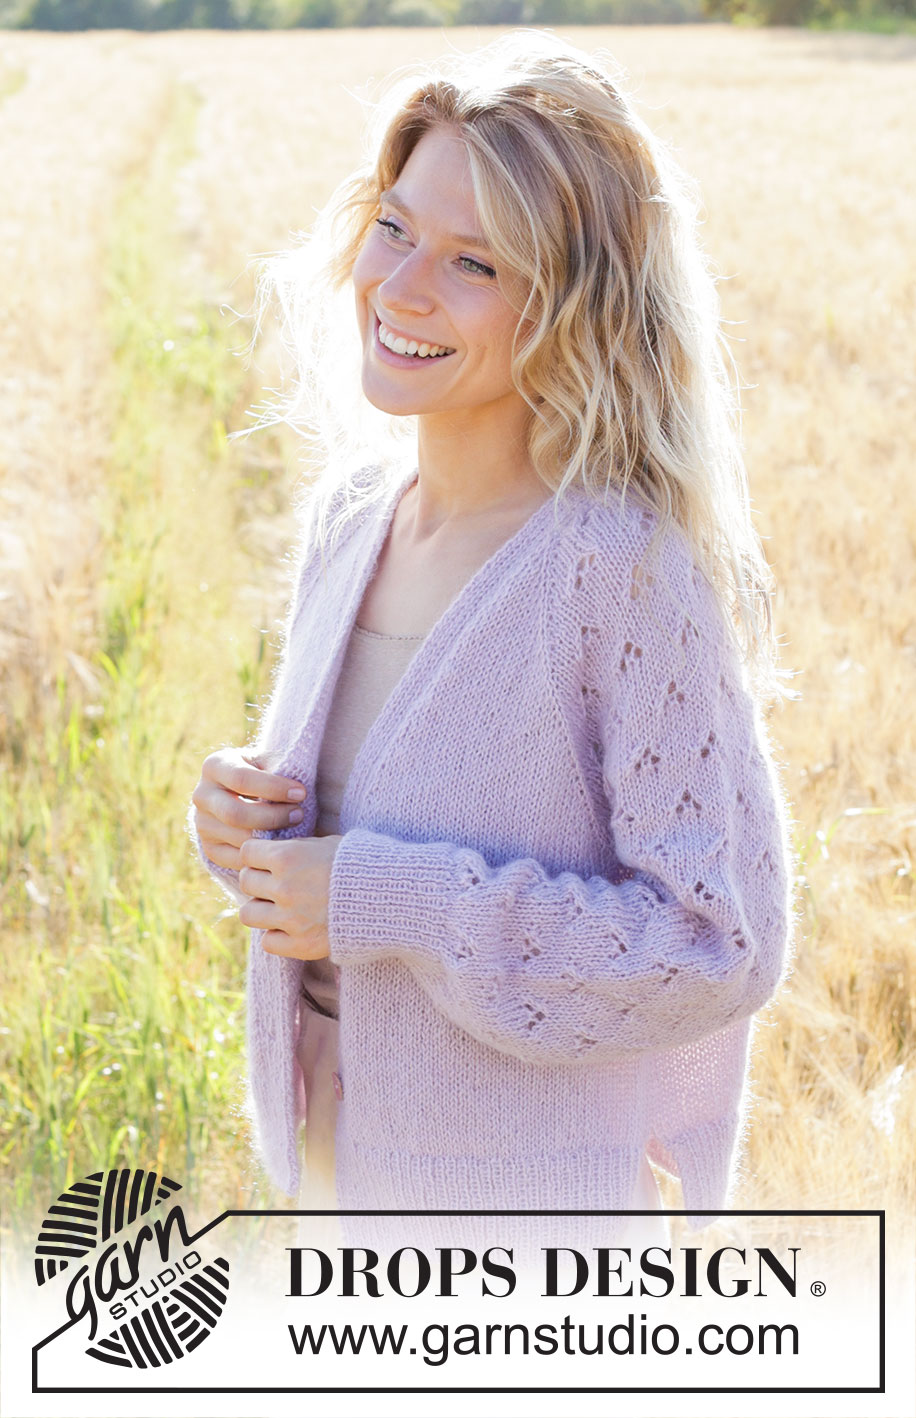
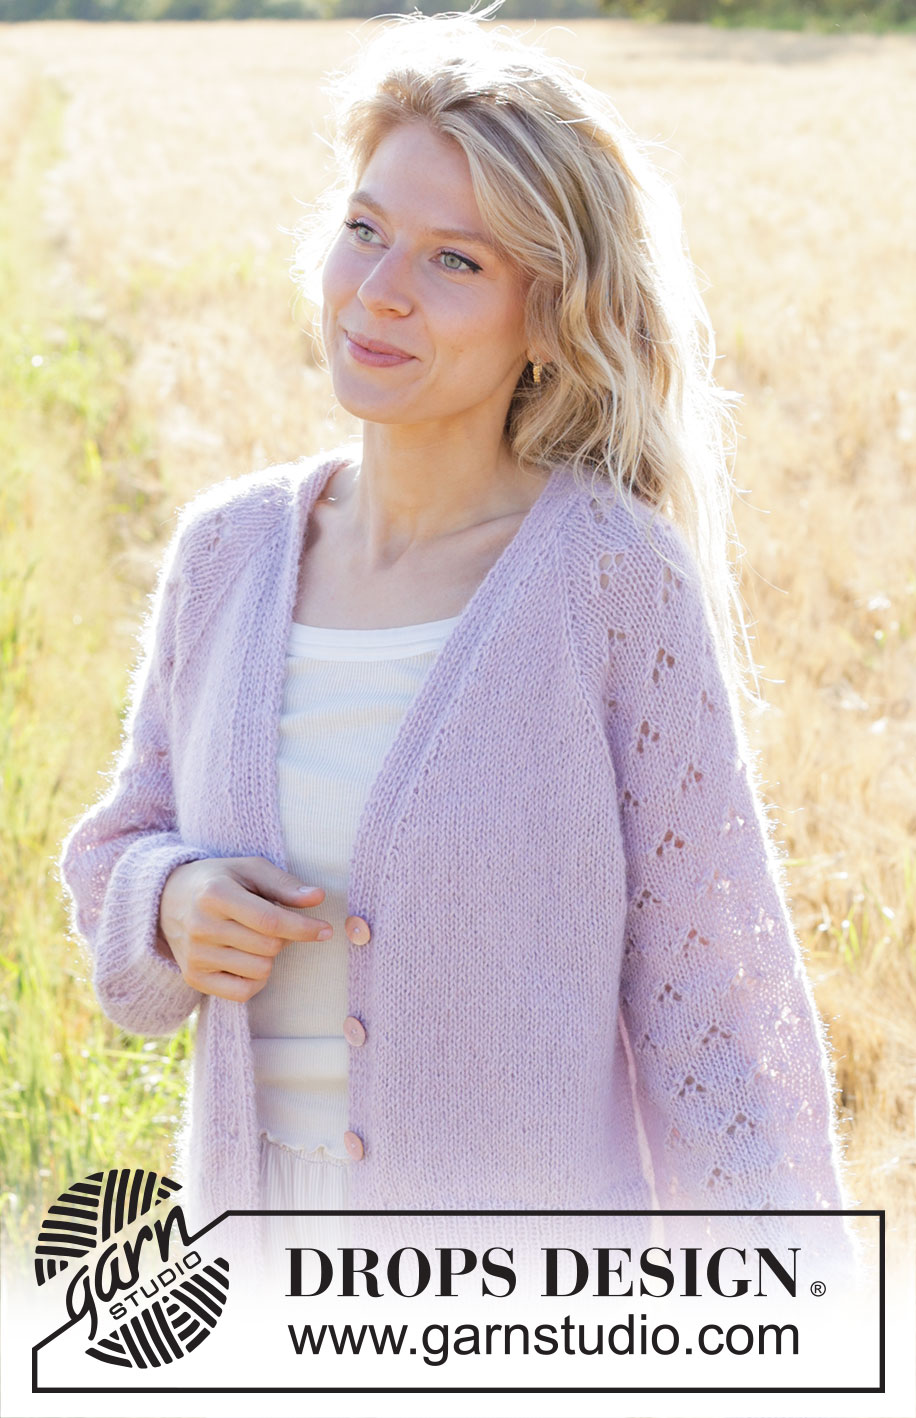
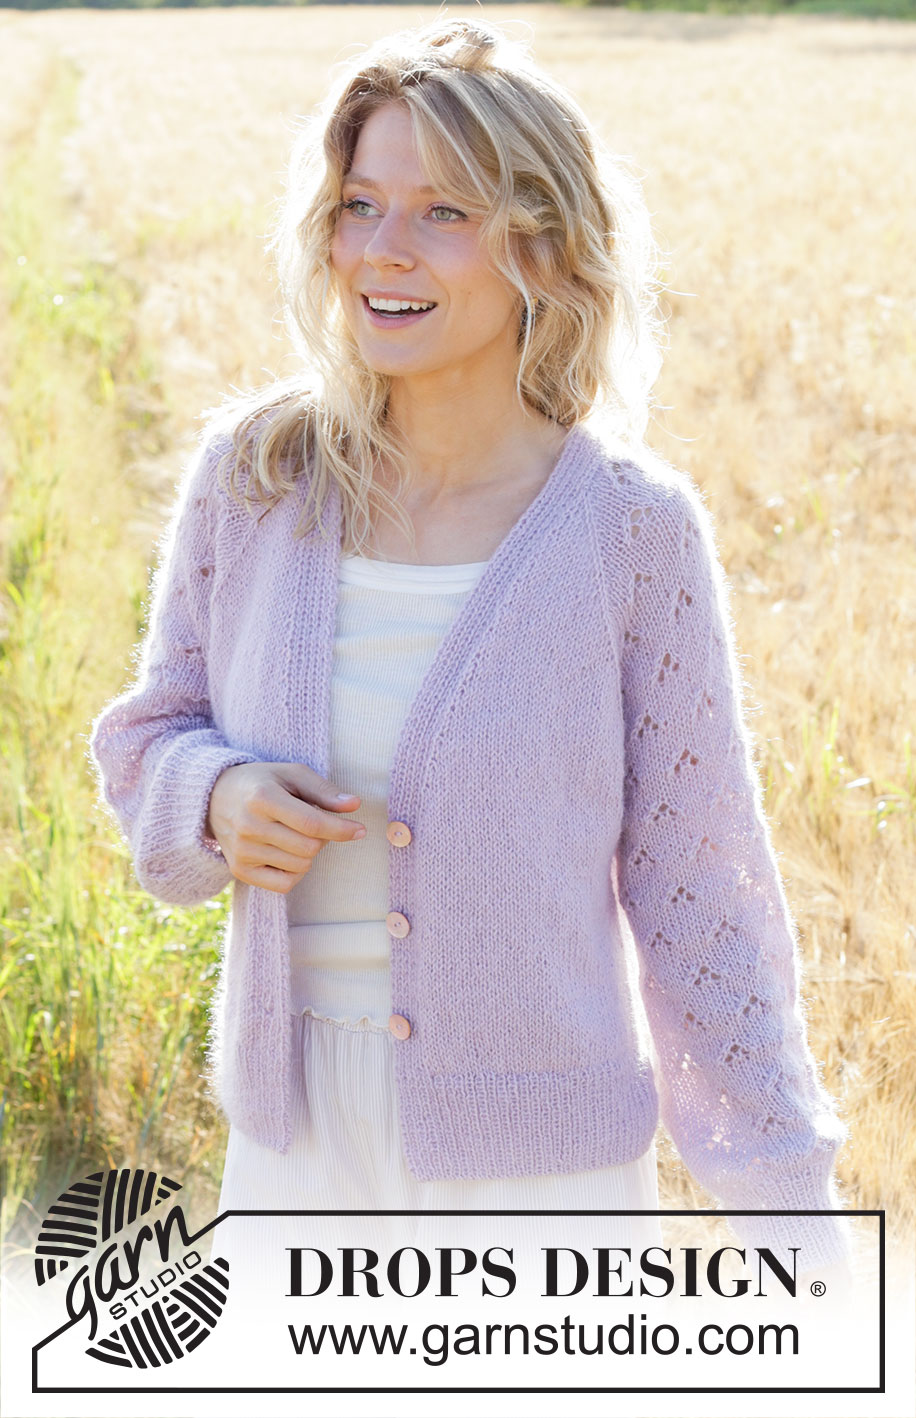
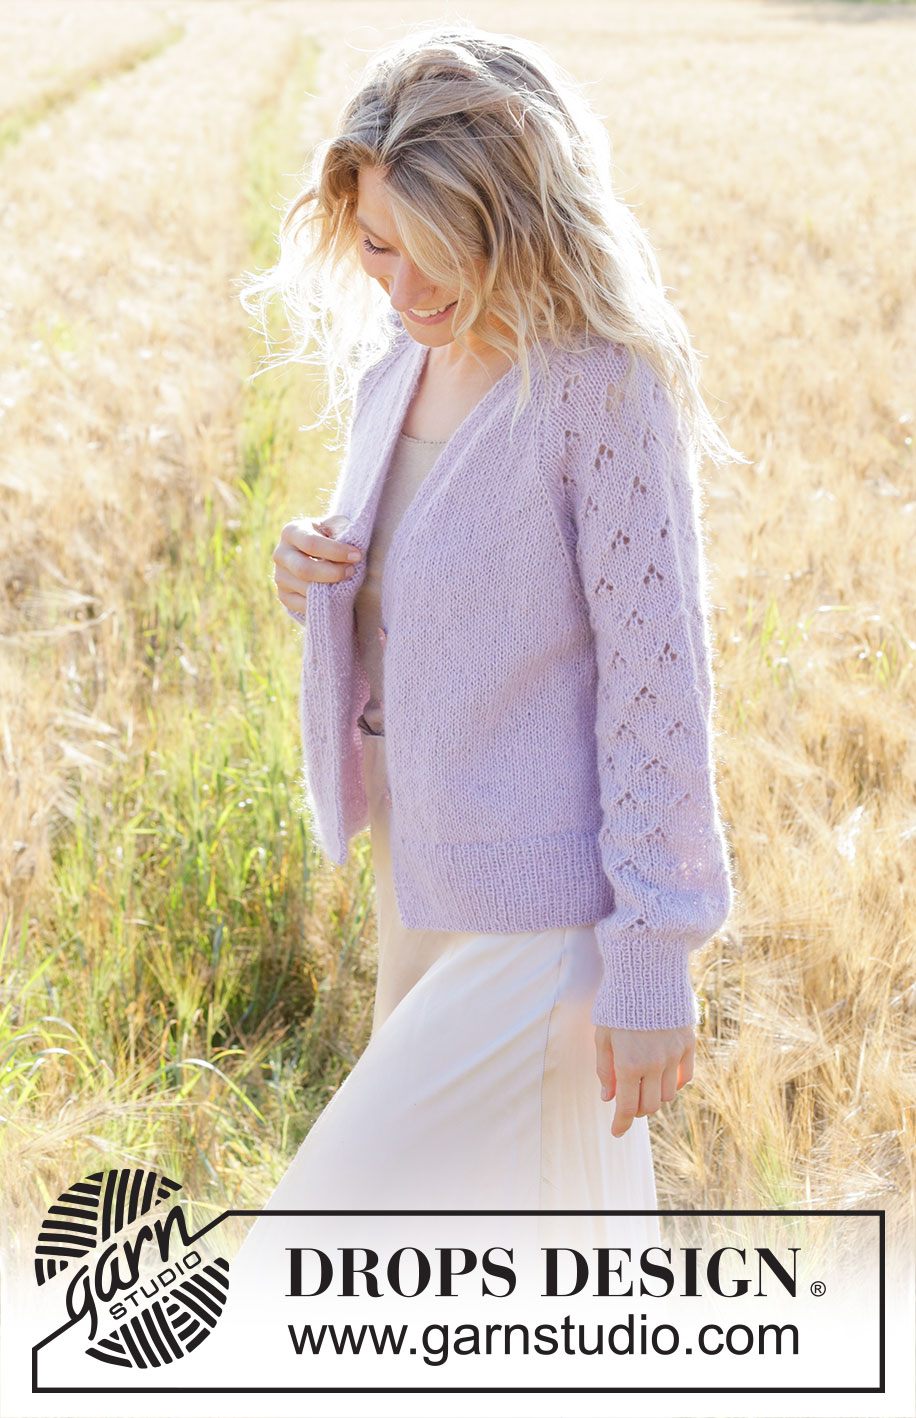
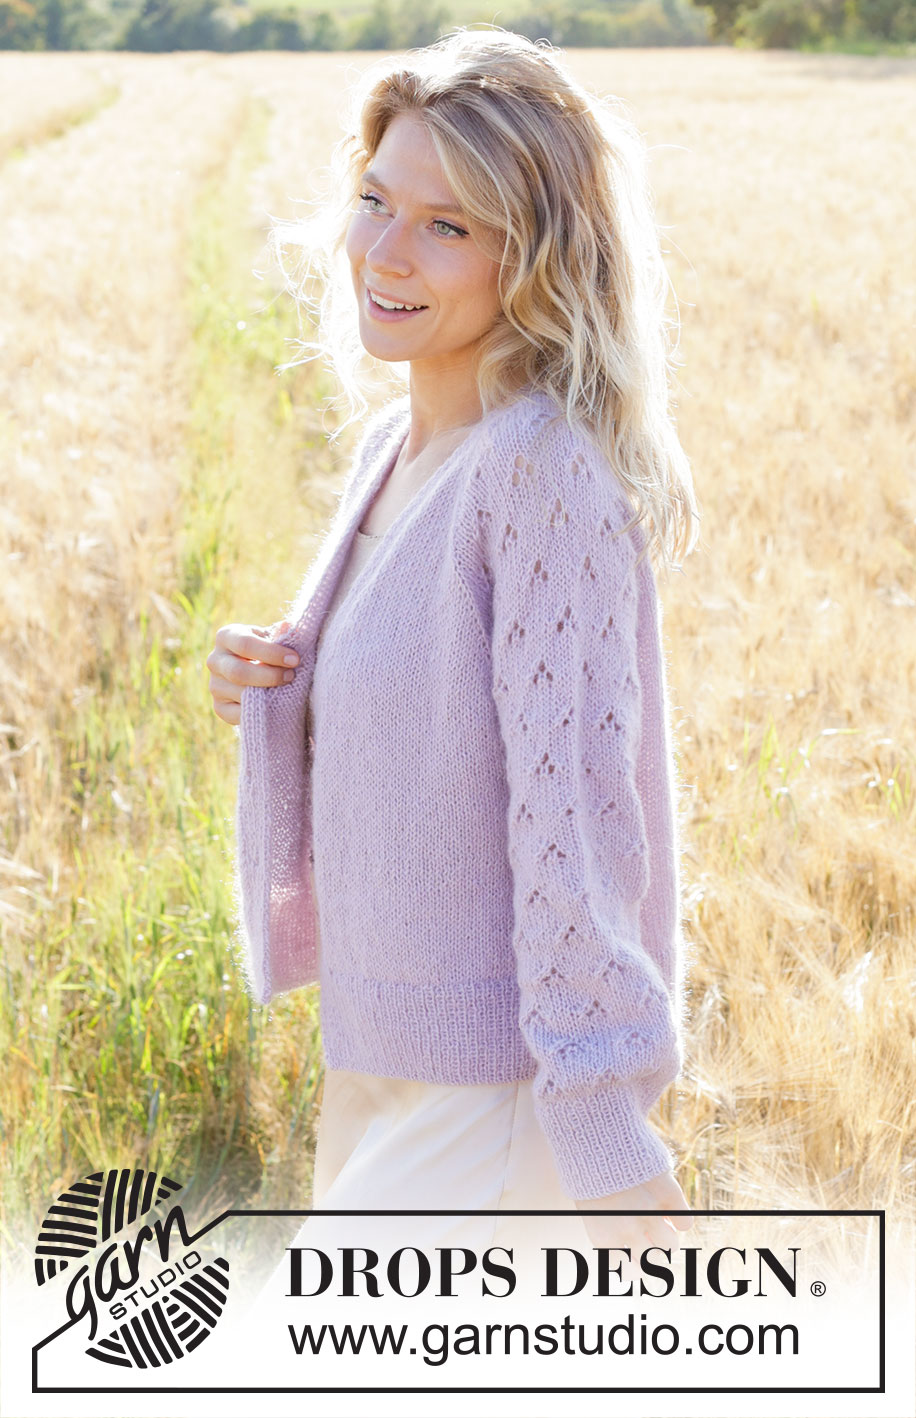
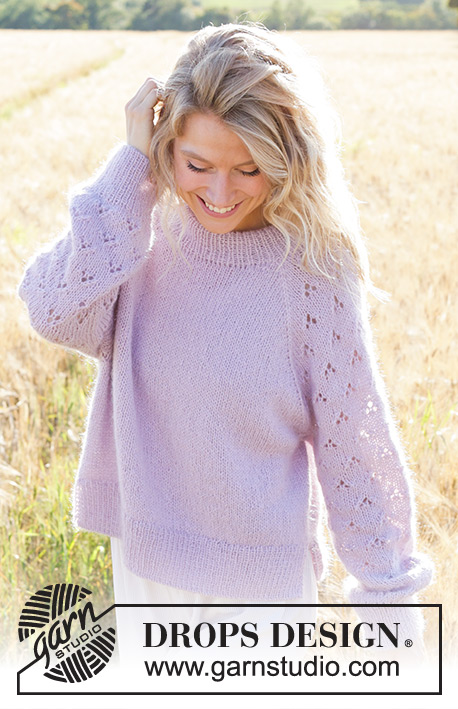
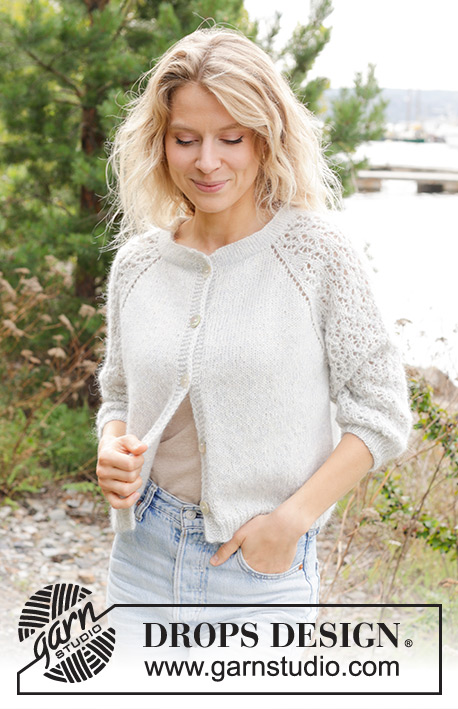
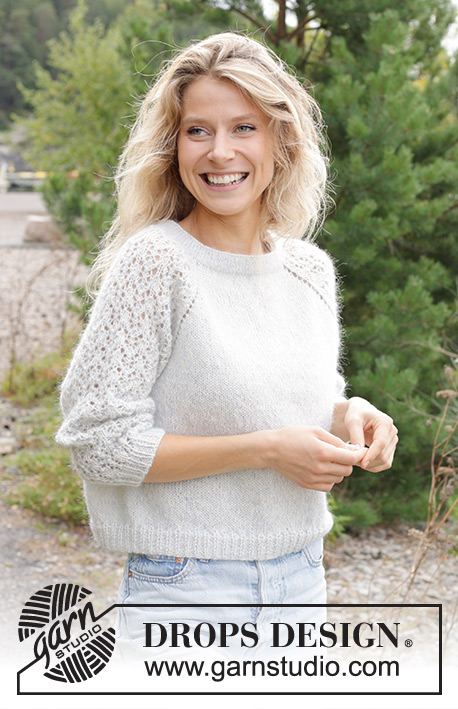
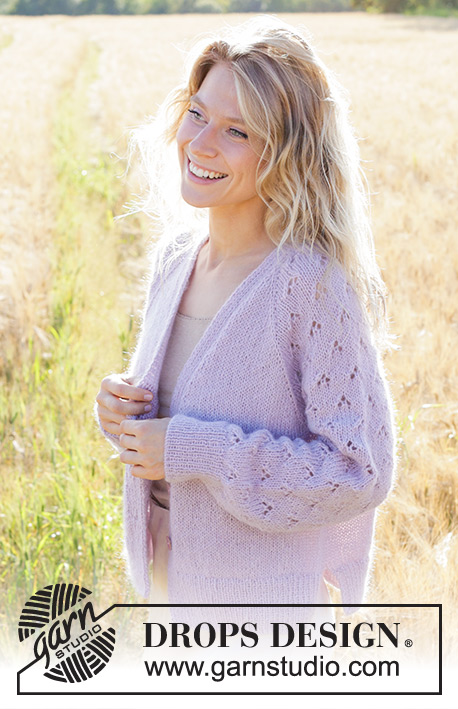
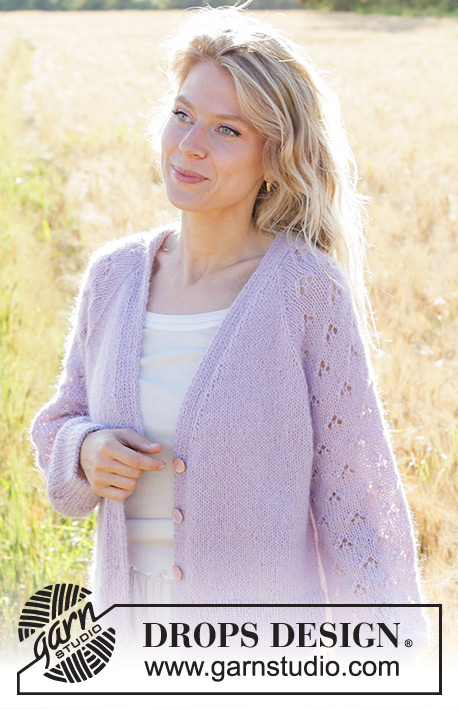
Afternoon in Provence Cardigan#afternooninprovencecardigan |
|||||||||||||
 |
 |
||||||||||||
Knitted jacket in DROPS Alpaca or DROPS Nord and DROPS Kid-Silk. Piece is knitted top down with V-neck, raglan, lace pattern, balloon sleeves and vents in the sides. Size: S - XXXL
DROPS 250-6 |
|||||||||||||
|
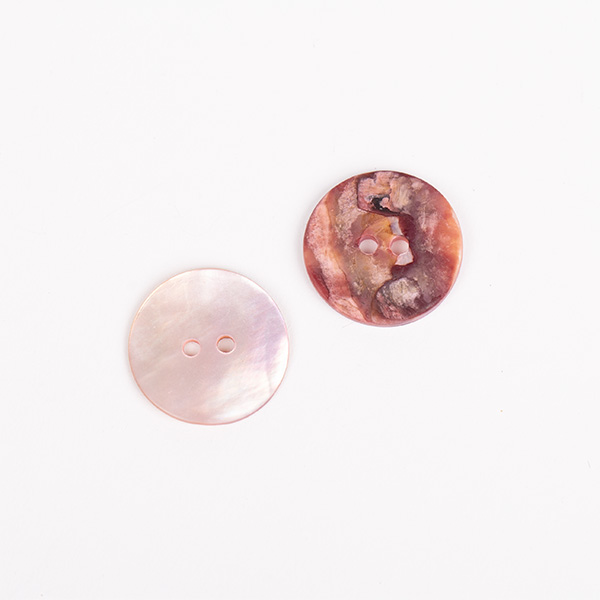
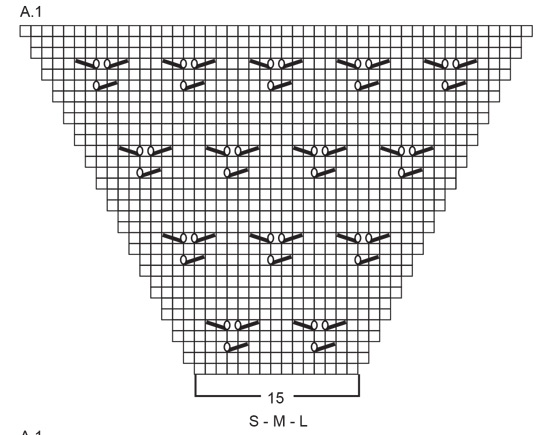
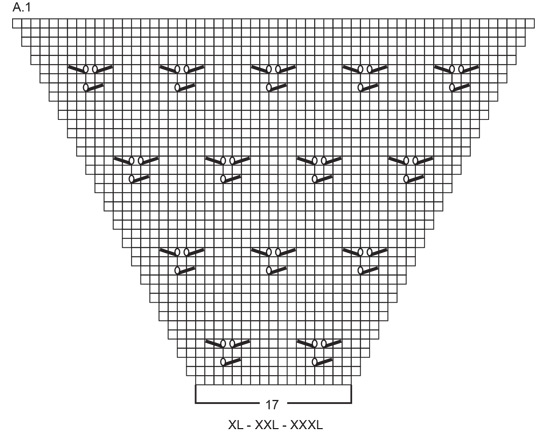
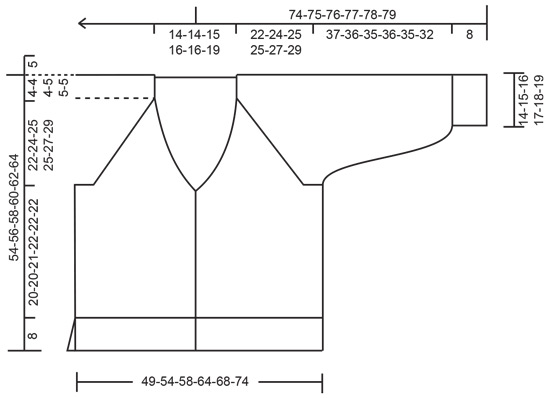
---------------------------------------------------------- EXPLANATION FOR THE PATTERN: ---------------------------------------------------------- GARTER STITCH (when working back and forth): Knit on all rows, i.e. knit from right side and knit from wrong side. 1 ridge vertically = knit 2 rows. PATTERN: See diagram A.1. Choose diagram for your size. Diagrams show all rows in pattern seen from the right side. When increasing stitches for raglan, increase the new stitches on sleeve in pattern as shown in A.1, i.e. work stitches in stocking stitch until there is room for a whole lace pattern. Work stitches that do not fit the pattern in stocking stitch when increasing. NOTE! When increases on sleeves goes from every other to every 4th row, the pattern will no longer follow the diagram. Make sure that the lace pattern continue correctly vertically. RAGLAN: All increases are done from the right side. Increase 1 stitch before/after the 4 stitches with marker in every transition between front pieces/back piece and sleeves (in pattern these stitches are called raglan stitches, and raglan stitches are worked in stocking stitch). Increase 1 stitch by making 1 yarn over. Work yarn overs as follows from wrong side: BEFORE RAGLAN STITCH: Purl yarn over in back loop of stitch. It should not make a hole. AFTER RAGLAN STITCH: Slip stitch off left needle and put it back on left needle but the opposite way (insert left needle in from behind when slipping it back on needle). Purl yarn over in front loop of stitch. It should not make a hole. V-NECK: All increases are done from the right side. Increase 1 stitch after the first 10 stitches at the beginning of row (band + 1 stitch in stocking stitch) / before the last 10 stitches at the end of row (1 stitch in stocking stitch + band). Increase 1 stitch by making 1 yarn over. Work yarn overs as follows from wrong side: BEFORE 10 STITCHES: Purl yarn over in back loop of stitch. It should not make a hole. AFTER 10 STITCHES: Slip stitch off left needle and put it back on left needle but the opposite way (insert left needle in from behind when slipping it back on needle). Purl yarn over in front loop of stitch. It should not make a hole. INCREASE TIP: Increase 1 stitch by making 1 yarn over. On next row work yarn overs twisted to avoid holes. Then work the new stitches in stocking stitch. DECREASE TIP (applies to mid under sleeves): Decrease 1 stitch on each side of marker thread as follows: Work until 3 stitches remain before marker thread and knit 2 together, knit 2 (marker thread is between these 2 stitches), slip 1 stitch knitwise, knit 1, pass slipped stitch over stitch worked (= 2 stitches decreased). BUTTONHOLES: Decrease for buttonholes on right band (when garment is worn). Decrease from right side when 7 stitches remain on row as follows: Knit 2 together, make 1 yarn over, purl 1, knit 1, purl 1, knit 1, 1 stitch in garter stitch. On next row (= wrong side) purl the yarn over to make a hole. Decrease for first buttonhole when 1 cm has been worked after last increase for V-neck. Then decrease the next 2 buttonholes, approx. 10-10½-10½-10-10½-10 cm apart. ---------------------------------------------------------- START THE PIECE HERE: ---------------------------------------------------------- JACKET - SHORT OVERVIEW OF THE PIECE: In this pattern long and short needles have been used, begin with fitting length and switch as needed. Begin by working 2 loose bands in rib. Then cast on stitches between these bands for shoulders and neck line at the back of neck. Then work yoke back and forth on circular needle, top down. When yoke is done, divide stitches for body and sleeves. Work body downwards back and forth on circular needle while putting the sleeves aside. Divide the piece for vents in each side, then finish front piece and back piece back and forth on circular needle separately. Then work sleeves downwards in the round on needle. Sew bands together mid back before sewing them on to neckline at the back of neck. RIGHT BAND (when garment is worn): Cast on 9 stitches on double pointed needle size 3.5 mm with 1 strand in each quality (= 2 strands). Work rib as follows from right side: * Purl 1, knit 1 *, work from *-* until 1 stitch remains, finish with 1 stitch in GARTER STITCH – read explanation above. Continue rib back and forth like this until band measures 14-14-14-17-17-18 cm, finish after 1 row from wrong side. Put piece aside. LEFT BAND (when garment is worn): Cast on 9 stitches on double pointed needle size 3.5 mm with 1 strand in each quality (= 2 strands). Work rib as follows from right side: 1 stitch in garter stitch, * knit 1, purl 1 *, work from *-* the entire row Continue rib back and forth like this until band measures 14-14-14-17-17-18 cm, finish after 1 row from right side, but do not cut the yarn. SHOULDERS AND NECKLINE AT THE BACK OF NECK: Now cast on 58-58-60-66-66-70 new stitches at the end of row, then slip the 9 stitches from right band back on needle and work rib as before over these 9 stitches = 76-76-78-84-84-88 stitches. Switch to circular needle size 5 mm. Purl 1 row from wrong side while working the 9 stitches in each side in rib as before. YOKE: Insert 4 markers in piece as explained below (without working the stitches). Use markers when increasing for raglan. Count 10 stitches (= left front piece), insert 1st marker in next stitch, count 15-15-15-17-17-17 stitches (= sleeve), insert 2nd marker in next stitch, count 22-22-24-26-26-30 stitches (= back piece), insert 3rd marker in next stitch, count 15-15-15-17-17-17 stitches (= sleeve), insert 4th marker in next stitch. 10 stitches remain on row after last marker (= right front piece). Work back and forth with stocking stitch on front pieces and back piece, PATTERN A.1 on sleeves - read explanation above (work A.1 between 1st and 2nd marker and between 3rd and 4th marker) and 9 band stitches in each side as before. REMEMBER THE KNITTING TENSION, AT THE SAME TIME increase for RAGLAN and V-NECK - read explanation above, this is done at the same time, therefore read both sections before continuing. Begin mid front and from right side. RAGLAN: Increase on each side of the 4 raglan stitches every other row (every row from right side) 14-12-14-28-26-30 times in total. Increases for raglan are now done in size XL. Work as explained below in the other sizes. SIZE S, M, L, XXL and XXXL: Continue increase for raglan on every other row but on every other increase, increase only on front pieces/back piece. I.e. increase on front pieces/back piece on every other row and on sleeves every 4th row (increase alternately 4 and 8 stitches). NOTE! When increasing on every 4th row on sleeves, make sure that lace pattern fits vertically. Increase like this 10-14-14-4-2 times on front pieces / back piece (5-7-7-2-1 times on sleeves). V-NECK: Increase for V-neck inside the outermost 10 stitches in each side every 4th row 10-10-11-12-12-14 times in total. Remember BUTTONHOLES on right band when increases for V-neck are done - read explanation above. ALL SIZES: When all increases for raglan and V-neck are done, there are 268-276-296-332-340-368 stitches on needle and piece measures approx. 22-24-25-25-27-29 cm measured from cast-on edge mid back. Now divide the yoke for body and sleeves. DIVIDING FOR BODY AND SLEEVES: Work the first 47-50-52-57-60-64 stitches as before (= front piece), slip the next 49-47-53-61-59-65 stitches on a thread for sleeve, cast on 8-10-12-12-14-16 new stitches on needle (= in the side under sleeve), work 76-82-86-96-102-110 stitches in stocking stitch (= back piece), slip the next 49-47-53-61-59-65 stitches on a thread for sleeve, cast on 8-10-12-12-14-16 new stitches on needle (= in the side under sleeve), and work the last 47-50-52-57-60-64 stitches as before (= front piece). Finish body and sleeves separately. Now measure piece from here! BODY: = 186-202-214-234-250-270 stitches. Insert 1 marker thread in each side on body, in the middle of the 8-10-12-12-14-16 stitches that were cast on under each sleeve. Move the marker threads upwards when working; they should be used for dividing for vents in each side. Work in stocking stitch back and forth with 9 band stitches in each side as before - remember BUTTONHOLES. Work until piece measures 20-20-21-22-22-22 cm. Now divide the piece at both marker threads to make a vent in each side and finish each part separately. LEFT FRONT PIECE: = 51-55-58-63-67-72 stitches. On next row (= right side) begin rib while AT THE SAME TIME increasing 15-17-18-19-21-22 stitches evenly on row (do not increase over band) = 66-72-76-82-88-94 stitches, work as follows: Switch to circular needle size 3.5 mm, work 1 stitch in garter stitch, work rib (= knit 1/purl 1 - remember increase) until 3 stitches remain, knit 1 and 2 stitches in garter stitch. When rib measures 8 cm, cast off all stitches with Italian cast off or cast off somewhat loosely with knit over knit and purl over purl. Jacket measures approx. 54-56-58-60-62-64 cm from shoulder. RIGHT FRONT PIECE: = 51-55-58-63-67-72 stitches. On next row (= right side) begin rib while AT THE SAME TIME increasing 15-17-18-19-21-22 stitches evenly on row (do not increase over band) = 66-72-76-82-88-94 stitches, work as follows: Switch to circular needle size 3.5 mm, work 2 stitches in garter stitch, work rib (= knit 1/purl 1 - remember increase) until 2 stitches remain, knit 1 and 1 stitch in garter stitch. When rib measures 8 cm, cast off all stitches with Italian cast off or cast off somewhat loosely with knit over knit and purl over purl. BACK PIECE: = 84-92-98-108-116-126 stitches. On next row (= right side) begin rib while AT THE SAME TIME increasing 29-33-35-39-41-45 stitches evenly = 113-125-133-147-157-171 stitches, work as follows: Switch to circular needle size 3.5 mm, work 2 stitches in garter stitch, work rib (= knit 1/purl 1 - remember increase) until 3 stitches remain, knit 1 and 2 stitches in garter stitch. When rib measures 8 cm, cast off the same way as on front pieces. SLEEVES: Slip the 49-47-53-61-59-65 stitches from thread in one side of piece on double pointed needles/a circular needle size 5 mm and pick in addition up 1 stitch in each of the 8-10-12-12-14-16 new stitches cast on under sleeve = 57-57-65-73-73-81 stitches. Insert 1 marker thread in the middle of the 8-10-12-12-14-16 stitches under sleeve. Begin round at the marker thread and continue with A.1 in the round. NOTE! Make sure to continue correctly over stitches from yoke, work the stitches that do not fit the pattern under sleeve in stocking stitch. When sleeve measures 2 cm from division, decrease 2 stitches mid under sleeve - read DECREASE TIP. Decrease like this every 2-2-2-1½-1½-1½ cm 4-3-5-8-6-8 times in total = 49-51-55-57-61-65 stitches. Work until sleeve measures 36-35-34-34-33-31 cm from division. 8 cm remain until finished measurements. Try the jumper and work to desired length before rib. Switch to double pointed needles size 3.5 mm and work rib (= knit 1/purl 1) while AT THE SAME TIME increasing 9-9-7-7-5-3 stitches evenly on 1st round = 58-60-62-64-66-68 stitches. When rib measures 8 cm, cast off all stitches with Italian cast off or cast off somewhat loosely with knit over knit and purl over purl. Sleeve measures approx. 44-43-42-42-41-39 cm from division. ASSEMBLY: Sew bands together mid back, and sew bands to neckline at the back of neck. Sew the buttons on to the left band. |
|||||||||||||
Diagram explanations |
|||||||||||||
|
|||||||||||||
 |
|||||||||||||
 |
|||||||||||||
 |
|||||||||||||
Have you finished this pattern?Tag your pictures with #dropspattern #afternooninprovencecardigan or submit them to the #dropsfan gallery. Do you need help with this pattern?You'll find 25 tutorial videos, a Comments/Questions area and more by visiting the pattern on garnstudio.com. © 1982-2026 DROPS Design A/S. We reserve all rights. This document, including all its sub-sections, has copyrights. Read more about what you can do with our patterns at the bottom of each pattern on our site. |
|||||||||||||






With over 40 years in knitting and crochet design, DROPS Design offers one of the most extensive collections of free patterns on the internet - translated to 17 languages. As of today we count 333 catalogues and 12525 patterns translated into English (UK/cm). 12525
We work hard to bring you the best knitting and crochet have to offer, inspiration and advice as well as great quality yarns at incredible prices! Would you like to use our patterns for other than personal use? You can read what you are allowed to do in the Copyright text at the bottom of all our patterns. Happy crafting!
Post a comment to pattern DROPS 250-6
We would love to hear what you have to say about this pattern!
If you want to leave a question, please make sure you select the correct category in the form below, to speed up the answering process. Required fields are marked *.