
Popular categories
Looking for a yarn?


Comments / Questions (57)
![]() Christine wrote:
Christine wrote:
Hello again! Thank you so much for such a helpful answer. I love your patterns, especially the huge choice of cardigan ones (because I love cardigans!). Your yarns are wonderful too.
03.03.2026 - 08:58
![]() Christine wrote:
Christine wrote:
Hello! I would like to knit the BANDS using the I-CORD method (as on your Tide Song Cardigan pattern for example). It gives a nice edge! To do this, would I need to add 2 extra band stitches i.e. 7 garter stitches instead of 5 to achieve a band the right width? Many thanks!
02.03.2026 - 15:32DROPS Design answered:
Hi Christine, You could increase the number of band stitches to 6 (instead of 7) to keep the width of the band the same. So, slip 1 purl-wise with strand in front, knit 1, work 4 garter stitches at the beginning of the row, work 4 garter stitches, slip 1 purl-wise with strand in front, knit 1 at the end of the row. Regards, Drops Team.
03.03.2026 - 06:58
![]() Tuija wrote:
Tuija wrote:
Aloitin mallin Wishing well yksinkertaisella langalla drops kid silk, koko s , tein nro 5 puikoilla kaarroketta ohjeen mukaan. Siitä tuli valtavan suuri. Kuviota piti tehdä 4 kertaa, mutta jo 3 tehtyäni, työn korkeus on jo 25 cm. Silmukoita on nyt 234. Miten nämä voisi jakaa etu-ja takakappaleiksi ja hihoiksi? Jos lisään silmukoita, miten ja mihin? Vai pitääkö aloittaa alusta pienemmillä puikoilla?
31.01.2026 - 13:18DROPS Design answered:
Hei, tämä malli neulotaan 2-kertaisella langalla. Voit halutessasi neuloa sen 2-kertaisella DROPS Kid-Silk -langalla, mutta tarkista aluksi, että neuletiheytesi on sama kuin ohjeessa annettu tiheys: 17 silmukkaa sileää neuletta leveyssuunnassa ja 22 kerrosta korkeussuunnassa, 2-kertaisella langalla = 10 x 10 cm. Vaihda tarvittaessa ohuempiin puikkoihin.
03.02.2026 - 17:45
![]() Diana wrote:
Diana wrote:
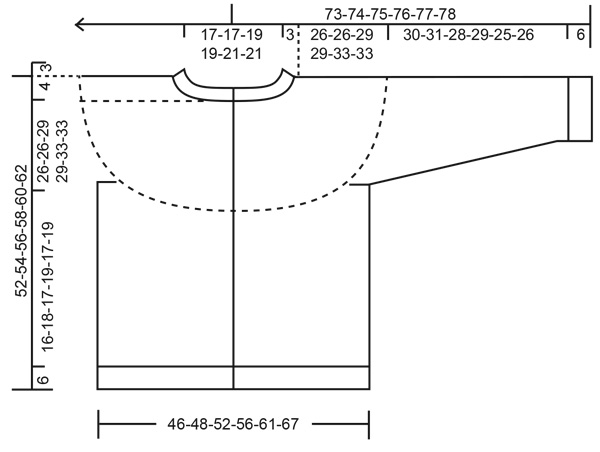
What does A.1 over the next xxx stitches mean here? Add 1 for the next xxxx stitches in one row or over several rows until I have the desired number of stitches? “ The next row is worked as follows from the right side: 5 band stitches in garter stitch, A.1 over the next 140-140-168-168-196-196 stitches, work the first stitch in A.1 “
29.12.2025 - 19:45
![]() Marianna wrote:
Marianna wrote:
Hello!! I want to make this cardigan with a substitute yarn, not DROPS unfortunately. The substitute is worsted, 18 sts/4 inches (10 cm) but it can work up at pattern gauge. I tried using your tools but I couldn't figure out how many yards of substitute yarn will be needed. Can you help me out?
13.12.2025 - 19:04DROPS Design answered:
Dear Marianna, considering your tension will be the exact same as recommended, you will find how to calculate new amount of yarn here. Happy knitting!
15.12.2025 - 12:06
![]() Irene wrote:
Irene wrote:
How do i know what size fits me - i could be a S or M
31.10.2025 - 04:34DROPS Design answered:
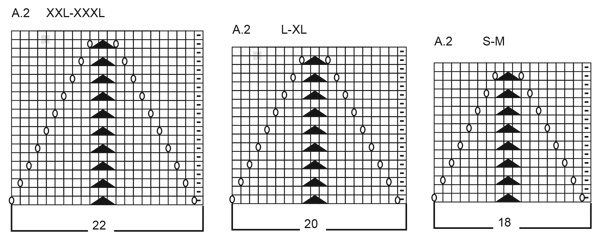
Hi, Irene, you fint the measurements for this garment in the diagram below the pattern, you can compare this to a garmet you have the you like the fit of. Happy knitting!
31.10.2025 - 08:06
![]() Maiten wrote:
Maiten wrote:
Hola, me gustaría saber si es posible tejer este modelo con 2 agujas (no con aguja circular). y de abajo a arriba. Muchas gracias
01.10.2025 - 22:50
![]() Linda wrote:
Linda wrote:
Hva gjør man når man har strikket de første ni radene i A 1 og skal begynne der hvor det er 12 masker, ikke 10 masker? Altså der man strikker fra vrangen og mønsteret er 12 masker. Skal man fortsatt starte med en rett? For i mønsteret ser det jo ikke slik ut? Firkanten med strek inni står ikke lenger rett ovenfor de andre?
14.09.2025 - 18:01DROPS Design answered:
Hei Linda. På raden under ble det økt masker, slik at du strikker slik at vrangmasken kommer over vrangmasken (1. maske i diagrammet). Sett maskemaskemarøkrer mellom hvert diagram, så har du en bedre oversikt. mvh DROPS Design
29.09.2025 - 11:01
![]() Nancy Crets wrote:
Nancy Crets wrote:
Wanneer de vest gebreid wordt is het telpatroon verkeerd gedrukt : bij terug gaande naalden brei je 1 steek recht en 11 steken averecht in de eerste naald
28.08.2025 - 10:54
![]() Olivia wrote:
Olivia wrote:
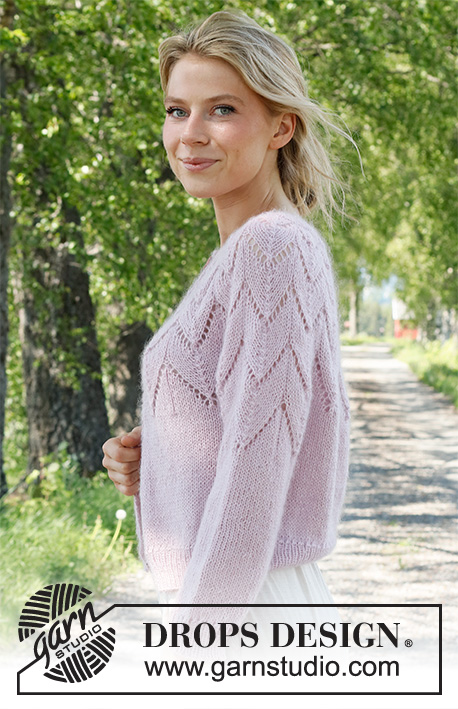
Hi, I'm trying to understand the pattern before knitting and in the pattern when you say "When A.2 has been completed in height continue with stocking stitch over all stitches." does it mean that I need to repeat A2 like 4 times? (if following the number of pattern on the picture)
07.04.2025 - 07:44DROPS Design answered:
Dear Olivia, A.2 should be worked only one time in height. The lace pattern is first worked with A.1 increasing in each A.1 in the round then you work A.2 only on sleeves only, not on body. Happy knitting!
07.04.2025 - 14:20
|
|||||||||||||
Wishing Well Cardigan#wishingwellcardigan |
|||||||||||||
 |
 |
||||||||||||
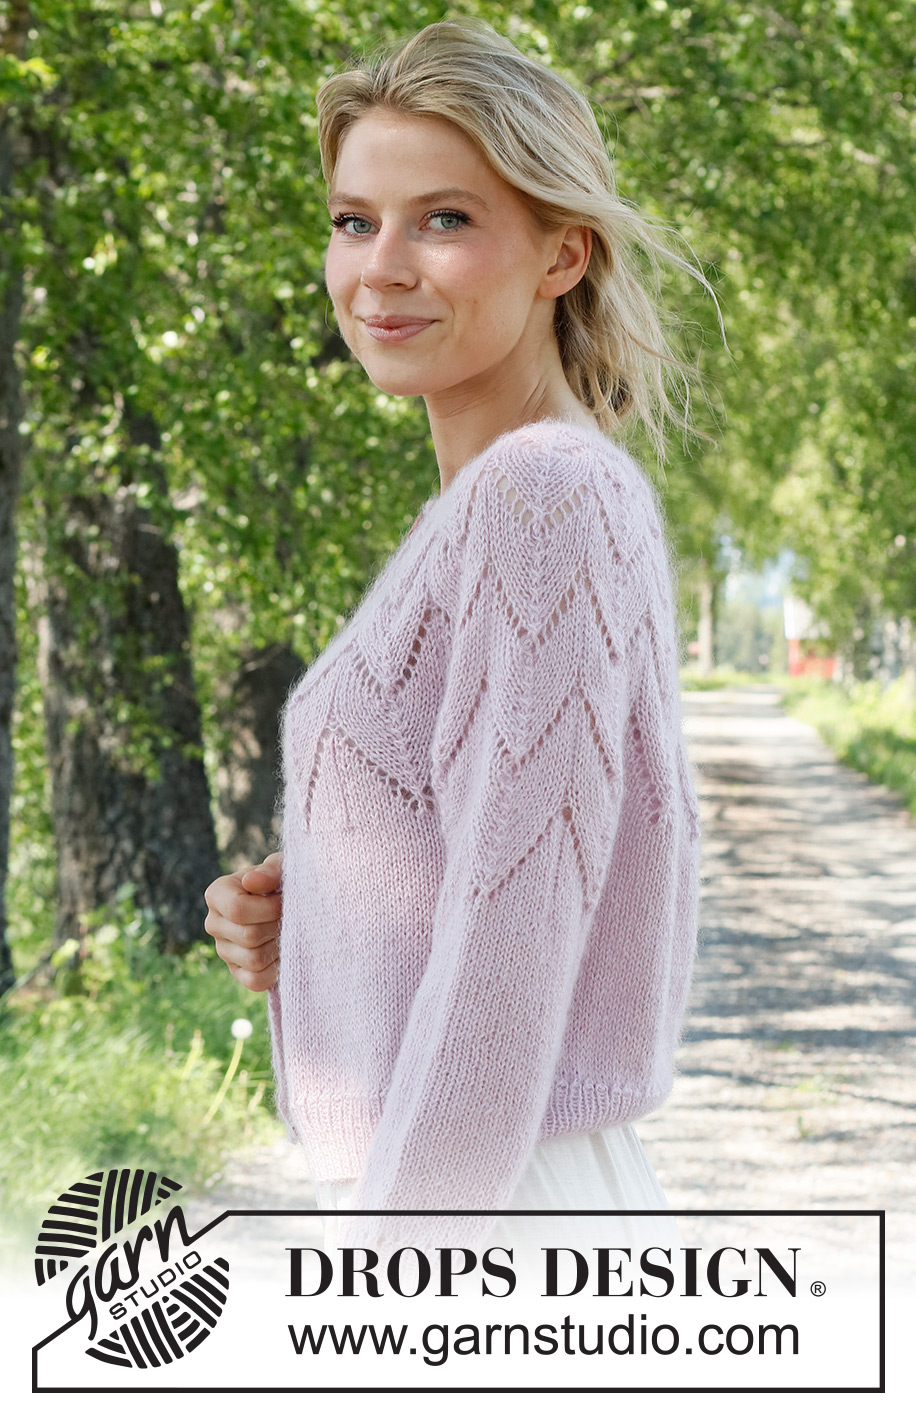
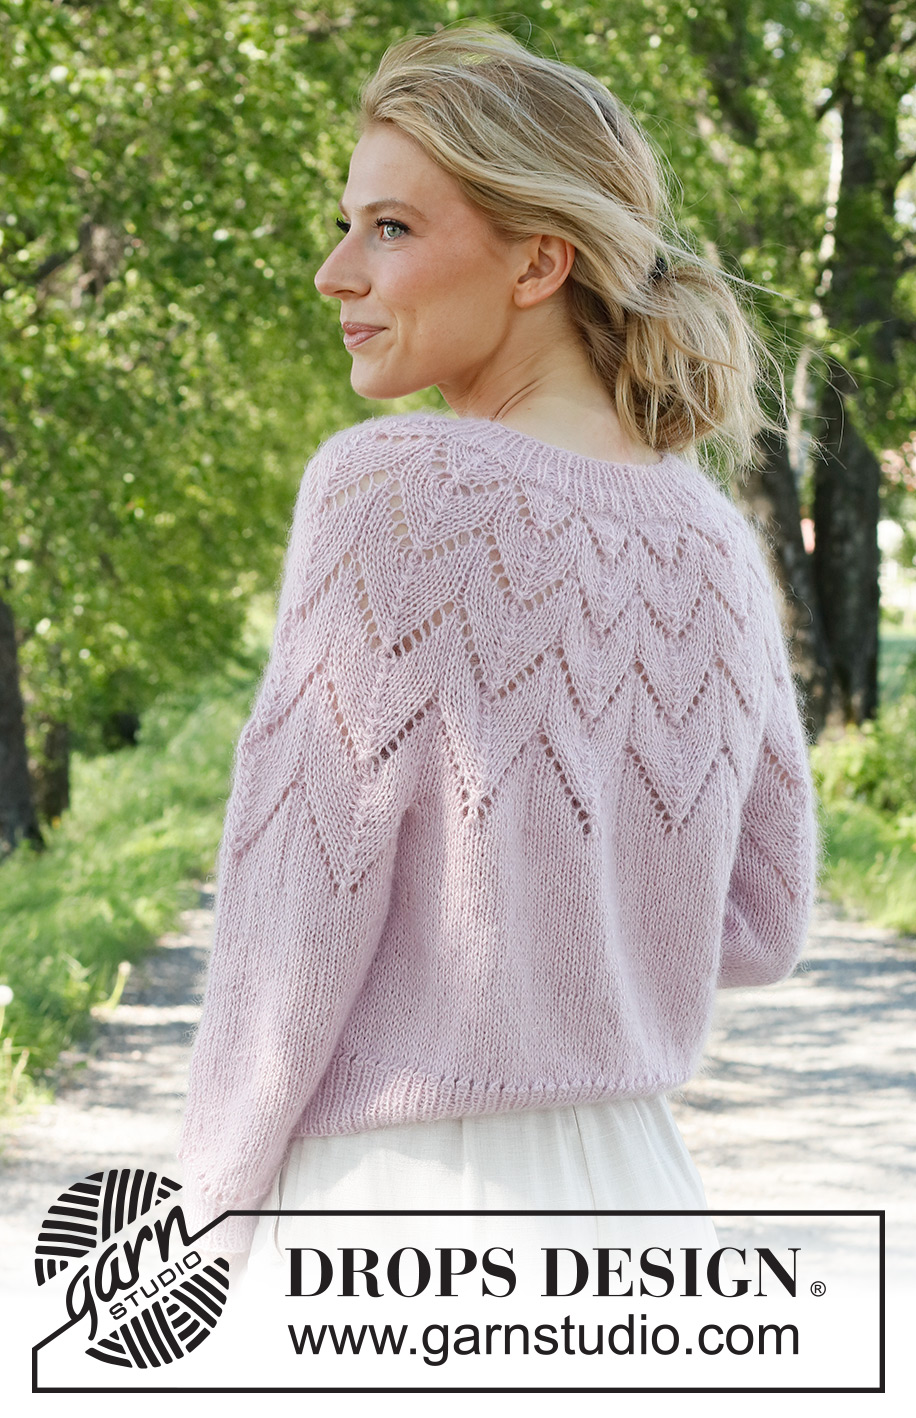
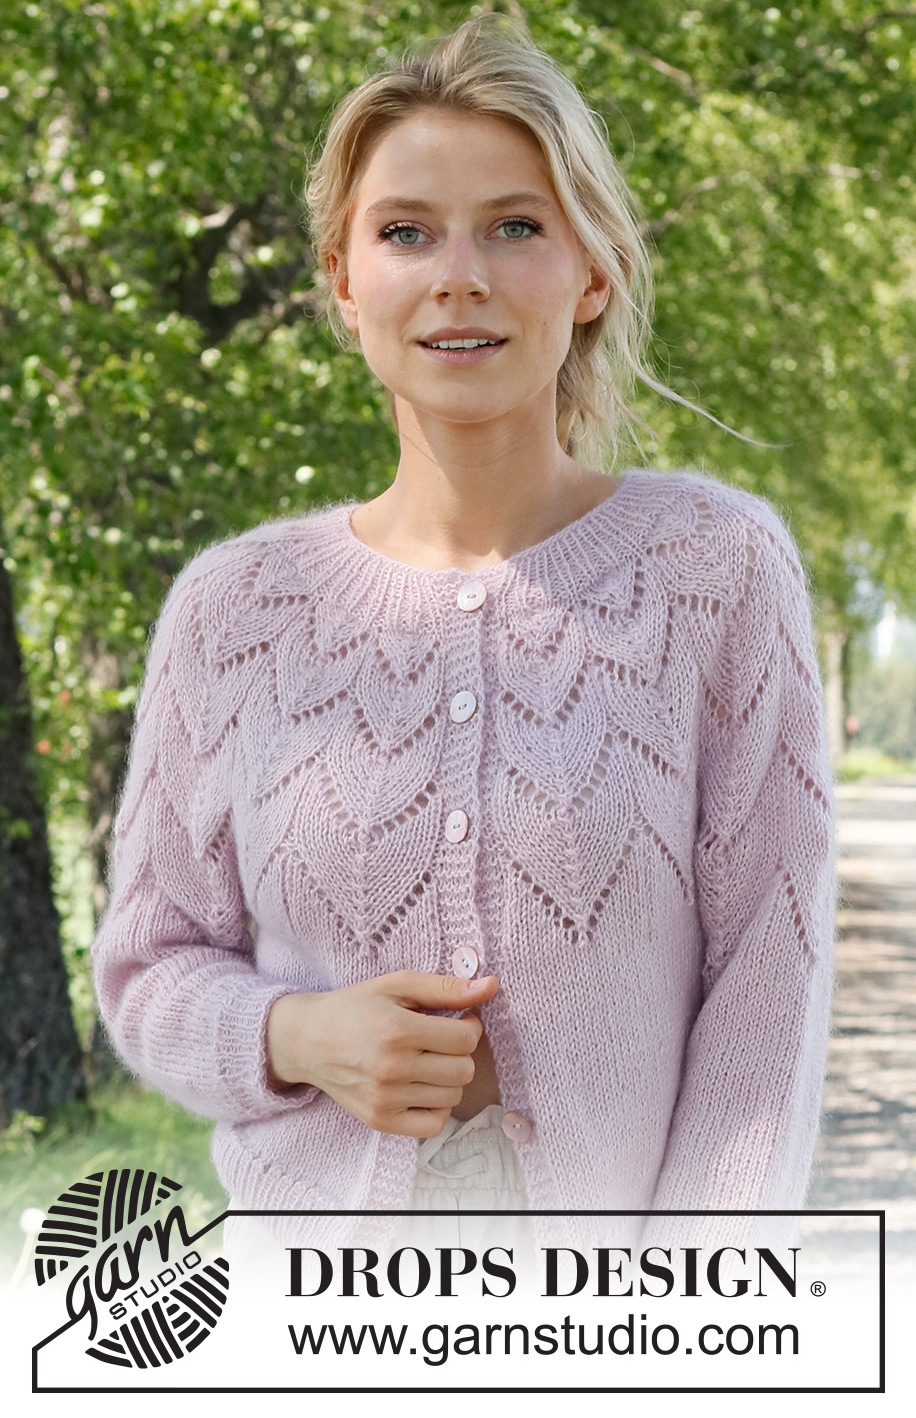
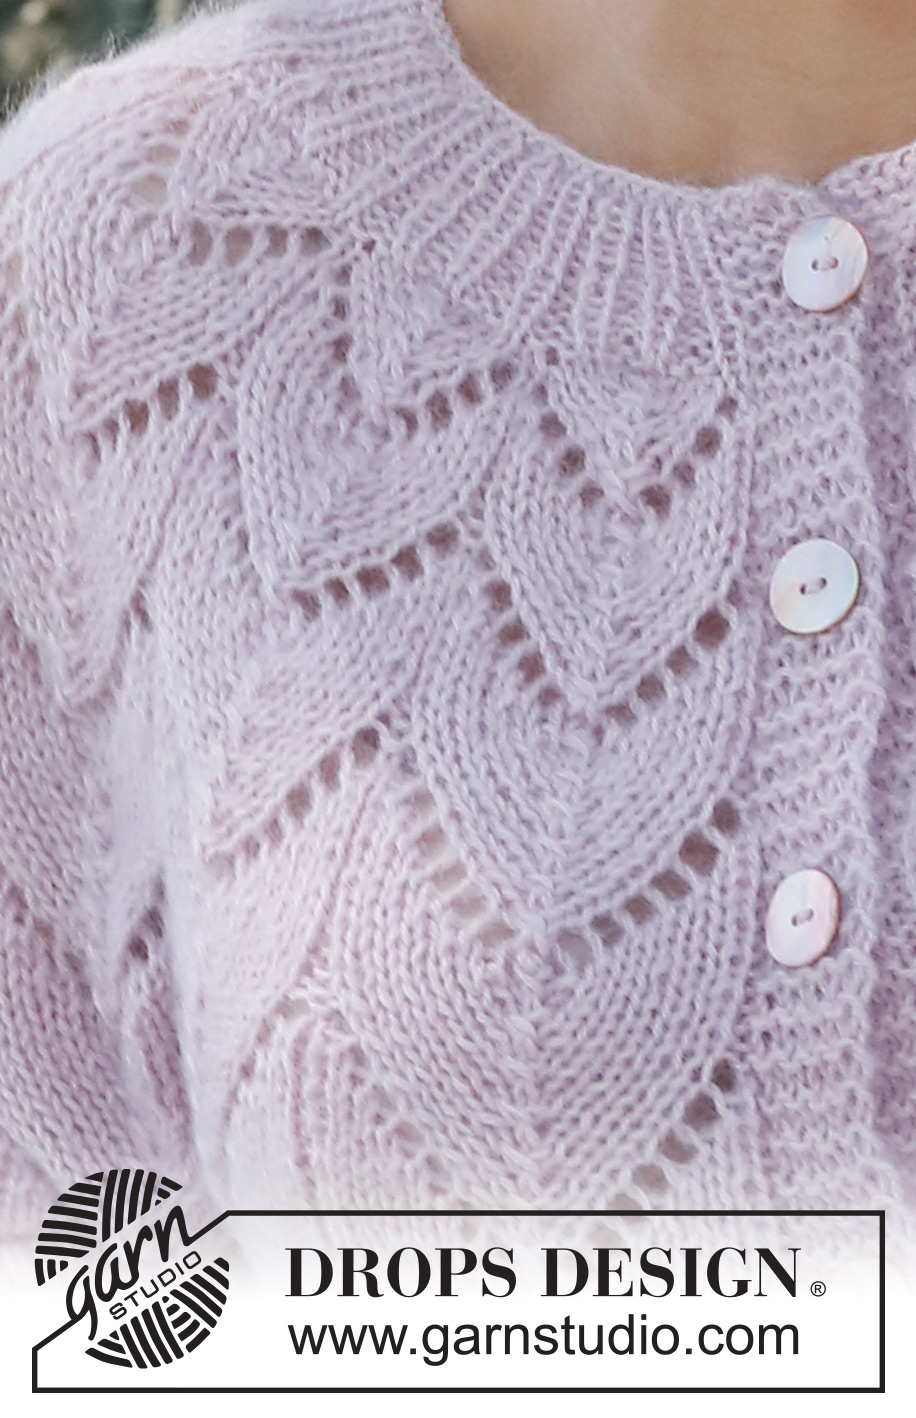
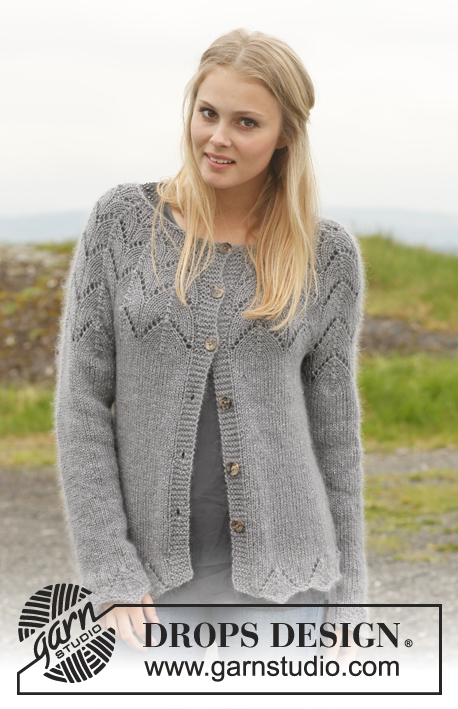
Knitted jacket in DROPS Alpaca and DROPS Kid-Silk. The piece is worked top down, with round yoke and lace pattern. Sizes S - XXXL.
DROPS 231-10 |
|||||||||||||
|
------------------------------------------------------- EXPLANATIONS FOR THE PATTERN: ------------------------------------------------------- RIDGE/GARTER STITCH (worked back and forth): Knit all rows. 1 ridge = knit 2 rows. PATTERN: See diagrams A.1 and A.2. The diagrams show all rows in the pattern from the right side. Choose diagram for your size. BUTTONHOLES: Work the buttonholes on the right band (when the garment is worn). 1 buttonhole: From the right side, work until there are 3 stitches left, make 1 yarn over, knit 2 together, knit 1. On the next row (wrong side) knit the yarn over to leave a hole. The first buttonhole is worked when the neck measures 3 cm, then the other 5-5-5-6-6-6 buttonholes with approx. 8½-9-9-8-8-9 cm between each one. DECREASE TIP (sleeves): Decrease 1 stitch on either side of the marker as follows: Work until there are 3 stitches left before the marker, knit 2 together, knit 2 (marker sits between these 2 stitches), slip 1 stitch as if to knit, knit 1 and pass the slipped stitch over the knitted stitch. ------------------------------------------------------- START THE PIECE HERE: ------------------------------------------------------- JACKET – SHORT OVERVIEW OF THE PIECE. The neck and yoke are worked back and forth with circular needle, from mid front and top down. The yoke is divided for body and sleeves and the body continued back and forth. The sleeves are worked in the round with double pointed needles/short circular needle, top down. NECK/YOKE: Cast on 95-95-101-101-107-107 stitches with circular needle size 4 mm and 1 strand DROPS Kid-Silk and 1 strand DROPS Alpaca. Purl 1 row (wrong side). The next row is worked as follows from the right side: 5 band stitches in GARTER STITCH – read description above, * knit 1, purl 1 *, work from *-* until there are 6 stitches left, knit 1 and 5 band stitches in garter stitch. Continue this rib for 3 cm. Work the first BUTTONHOLE on the right band – read description above. On the next row from the right side increase 1 stitch at the end of each purled section by making 1 yarn over. On the next row (wrong side) knit the yarn overs twisted = 137-137-146-146-155-155 stitches. Continue as follows from the right side: 5 band stitches in garter stitch, * knit 1, purl 2 *, work from *-* until there are 6 stitches left, knit 1 and 5 band stitches in garter stitch. Continue the new rib until the neck measures 5 cm; finish after a row from the wrong side. Knit 1 row from the right side where you increase 14-14-33-33-52-52 stitches evenly spaced = 151-151-179-179-207-207 stitches (do not increase over the bands). Change to circular needle size 5 mm. Purl 1 row from the wrong side (yarn overs purled twisted and bands knitted). The next row is worked as follows from the right side: 5 band stitches in garter stitch, A.1 over the next 140-140-168-168-196-196 stitches, work the first stitch in A.1 (so the pattern is symmetrical) and 5 band stitches in garter stitch. Work and increase according to A.1. When A.1 has been completed in height there are 263-263-291-291-319-319 stitches on the needle. The piece measures approx. 26-26-29-29-33-33 cm from the cast-on edge. Divide for the body on the next row as follows: Work the first 41-41-45-45-49-49 stitches (front piece), place the next 54-54-60-60-66-66 stitches on a thread for the sleeve, cast on 6-8-8-10-10-14 stitches (in side under sleeve), work 72-72-80-80-88-88 stitches (back piece), place the next 54-54-60-60-66-66 stitches on a thread for the sleeve, cast on 6-8-8-10-10-14 stitches (in side under sleeve), work the remaining 42-42-46-46-50-50 stitches (front piece). The body and sleeves are finished separately. BODY: = 167-171-187-191-207-215 stitches. Continue back and forth with stocking stitch and 5 band stitches in garter stitch on each side and on the first row increase 0-2-0-8-10-24 stitches evenly spaced = 167-173-187-199-217-239 stitches. When the piece measures 16-18-17-19-17-19 cm from the division work as follows from the right side: 5 band stitches in garter stitch, * knit 2 together, 1 yarn over *, work from *-* until there are 6 stitches left, knit 1 and 5 band stitches in garter stitch. Change to circular needle size 4 mm and work as follows from the wrong side: 5 band stitches in garter stitch, * purl 1, knit 1 *, work from *-* until there are 6 stitches left, purl 1 and 5 band stitches in garter stitch. Continue this rib for 6 cm. Cast off. The jacket measures approx. 52-54-56-58-60-62 cm from the shoulder down. SLEEVES: Place the 54-54-60-60-66-66 stitches from the thread on the one side of the piece on double pointed needles/short circular needle size 5 mm and knit up 1 stitch in each of the 6-8-8-10-10-14 stitches cast on under the sleeve = 60-62-68-70-76-80 stitches. Insert a marker in the middle of the 6-8-8-10-10-14 stitches under the sleeve. Allow the marker to follow your work onwards; it will be used when decreasing under the sleeve. Start at the marker and work 3-4-4-5-5-7 stitches in stocking stitch, A.2 over the next 54-54-60-66-66 stitches and 3-4-4-5-5-7 stitches in stocking stitch. When A.2 has been completed in height continue with stocking stitch over all stitches. When the sleeve measures 4 cm decrease 2 stitches under the sleeve – read DECREASE TIP. Decrease like this every 3½-3½-2½-2½-1½-1½ cm a total of 8-8-10-10-12-13 times = 44-46-48-50-52-54 stitches. Continue working until the sleeve measures 30-31-28-29-25-26 cm from the division. Work the next round as follows: * Knit 2 together, 1 yarn over *, work from *-* over all stitches. Change to double pointed needles size 4 mm. Work rib (knit 1, purl 1) for 6 cm. Cast off. The sleeve measures approx. 36-37-34-35-31-32 cm from the division. Work the other sleeve in the same way. ASSEMBLY: Sew the buttons onto the left band. |
|||||||||||||
Diagram explanations |
|||||||||||||
|
|||||||||||||
 |
|||||||||||||
 |
|||||||||||||
 |
|||||||||||||
Have you finished this pattern?Tag your pictures with #dropspattern #wishingwellcardigan or submit them to the #dropsfan gallery. Do you need help with this pattern?You'll find 33 tutorial videos, a Comments/Questions area and more by visiting the pattern on garnstudio.com. © 1982-2026 DROPS Design A/S. We reserve all rights. This document, including all its sub-sections, has copyrights. Read more about what you can do with our patterns at the bottom of each pattern on our site. |
|||||||||||||


With over 40 years in knitting and crochet design, DROPS Design offers one of the most extensive collections of free patterns on the internet - translated to 17 languages. As of today we count 324 catalogues and 12290 patterns translated into English (UK/cm). 12290
We work hard to bring you the best knitting and crochet have to offer, inspiration and advice as well as great quality yarns at incredible prices! Would you like to use our patterns for other than personal use? You can read what you are allowed to do in the Copyright text at the bottom of all our patterns. Happy crafting!
Post a comment to pattern DROPS 231-10
We would love to hear what you have to say about this pattern!
If you want to leave a question, please make sure you select the correct category in the form below, to speed up the answering process. Required fields are marked *.