
Popular categories
Looking for a yarn?


Comments / Questions (116)
![]() Laurence wrote:
Laurence wrote:
Que signifie cette phrase concernant l’encolure : tricoter comme avant jusqu'à ce qu'il reste 3 mailles avant le marqueur, tricoter 2 mailles ensemble à l'endroit et tricoter 1 maille lisière au point mousse. ?
30.10.2025 - 21:11DROPS Design answered:
Bonjour Laurence, vous tricotez là le rang qui va séparer le devant en 2 parties: sur l'endroit, tricotez les mailles comme avant jusqu'à ce qu'il reste 3 mailles avant votre marqueur (- milieu du devant), puis tricotez 2 mailles ensemble à l'endroit (1ère diminution pour l'encolure), 1 maille point mousse (à tricoter à l'endroit sur l'endroit et à l'endroit sur l'envers) = côté gauche du devant; placez les mailles restantes sur l'aiguille gauche en atteste sur le devant droit, vous les tricoterez plus tard; puis continuez à tricoter comme indiqué sous ÉPAULE GAUCHE (devant):. Bon tricot!
31.10.2025 - 07:17
![]() Alice wrote:
Alice wrote:
If I have a bust of 105cm (largest part), which size should I choose? Thank you
26.10.2025 - 18:04DROPS Design answered:
Hi Alice, There is a size chart at the bottom of the pattern, with all the measurements for the different sizes. Regards, Drops Team.
27.10.2025 - 07:01
![]() Alison wrote:
Alison wrote:
Hi, just wondering if this pattern has to be knitted using circular needles or if normal needles can be used. Thank you
25.10.2025 - 15:30DROPS Design answered:
Dear Alison, yes, you can knit this pattern with straight needles if you prefer. Only the neckline and armhole edges need to be worked with circular needles. That said, circular needles are often more comfortable to use, as they hold all the stitches easily. Happy knitting!
25.10.2025 - 17:44
![]() Laure Léger wrote:
Laure Léger wrote:
Bonjour Avez vous les instructions pour ce modèle mais avec deux aiguilles ? Je vous remercie Laure Léger
23.08.2025 - 12:15DROPS Design answered:
Bonjour Mme Léger, vous pouvez tout à fait tricoter ce modèle sur aiguilles droites, on utilise ici une aiguille circulaire pour avoir suffisamment de place pour y loger toutes les mailles. Retrouvez plus d'infos ici. Pour le col, relevez les mailles après avoir fait la couture de l'une des épaules seulement puis terminez la couture. Pour la bordure des emmanchures, relevez les mailles puis faites la couture côté. Bon tricot!
25.08.2025 - 09:27
![]() Karen wrote:
Karen wrote:
Is there a yarn replacement iì
03.08.2025 - 19:06DROPS Design answered:
Dear Karen, you can use another group B yarn, such as DROPS Merino Extra Fine. However, this thread is quite light and hollow, even for its yarn group, so the texture of the finished garment will be quite different and the difference in meterage will result in around double the amount of yarn from other group B yarns. Happy knitting!
03.08.2025 - 19:33
![]() Karen Decker wrote:
Karen Decker wrote:
I love knitting and crocheting and your patterns are very good. Would enjoy being on your list for updates etc.
30.07.2025 - 19:11
![]() Cecilia wrote:
Cecilia wrote:
Hi, I am not sure what I'm supposed to be doing with the edge stitches when starting the back and front pieces. Am I supposed to knit the first and last two stitches, as indicated in the video, on the right side? And what am I supposed to do on the wrong side? Thank you very much!
27.07.2025 - 19:01DROPS Design answered:
Dear Cecilia, the 2 edge stitches are the very first 2 and last 2 stitches of every row, which are always knitted so as to have a neat edge in back and forth pieces, for the seams. They are worked in garter stitch, so they are knitted both from the right side and the wrong side. Happy knitting!
27.07.2025 - 19:29
![]() Alida wrote:
Alida wrote:
Hi! I cannot find the place where I can see how many balls of yarn I should buy...Perhaps I just do not know where to look?
25.06.2025 - 10:18DROPS Design answered:
Dear Alida, you will find the total amount of yarn required for each size at the top of the page, under tab "Pattern"; so that you need for example in S: 150 g DROPS Sky/50 g a ball = 3 balls DROPS Sky in size S. Happy knitting!
25.06.2025 - 15:48
![]() Cheryl Ierardi wrote:
Cheryl Ierardi wrote:
Thank you!
05.05.2025 - 01:50
![]() Cheryl Newman-Ierardi wrote:
Cheryl Newman-Ierardi wrote:
Hello. I’m making XL working on front v neck. “Then decrease inside 2 stitches, decreasing 1 stitch on each side 8-11-14-16-21-27 times = 70-stitches. V-NECK: At the same time when the piece measures 36-start to decrease for the V-neck” I’ve reached 36 cm but not the 70 stitches Should I continue decreasing until 70 stitches even though the length will increase? Thank you
04.05.2025 - 18:44DROPS Design answered:
Dear Cheryl, the V-neck is worked "at the same time" as we decrease. So we will start working the V-neck before we finish the decreases. That means that yes, you will continue with the decreases as you continue working the V-neck. You will still decrease for the armholes as neccessary while you work each shoulder. Happy knitting!
04.05.2025 - 22:25
|
|
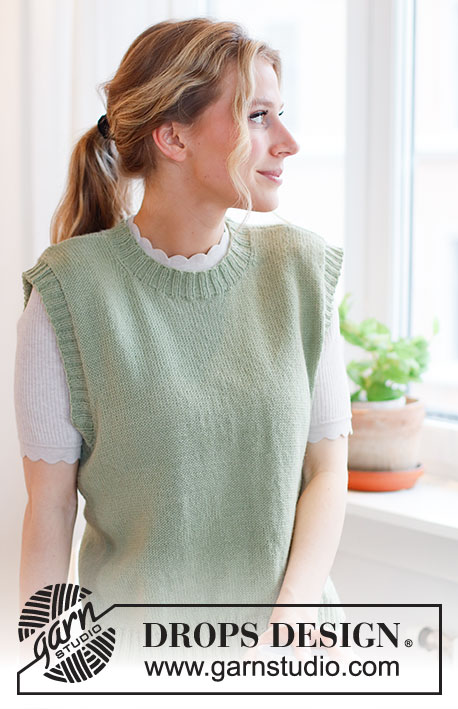
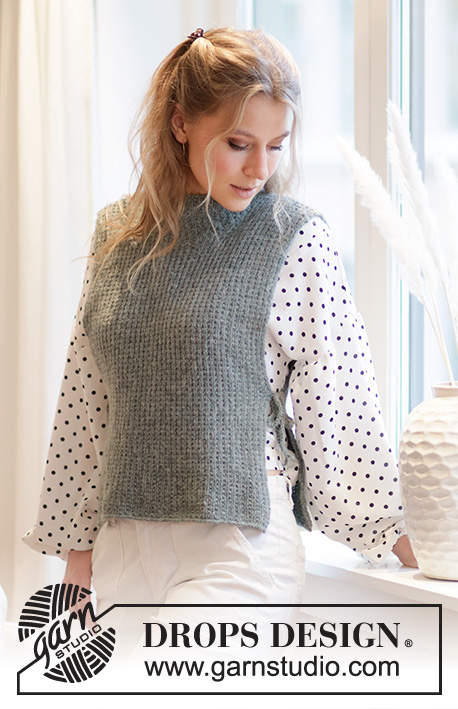
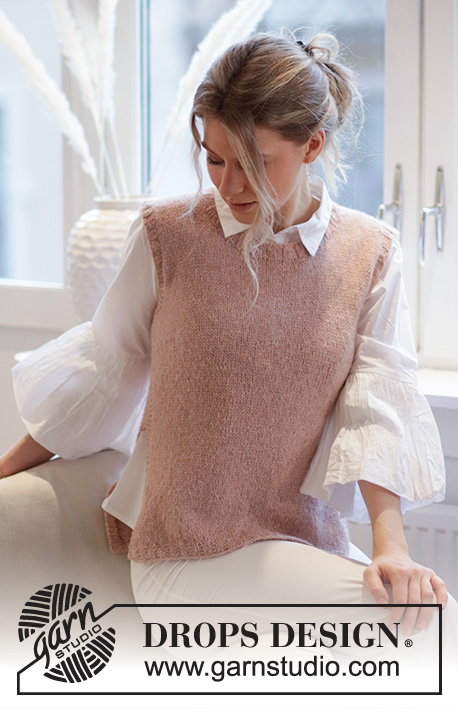
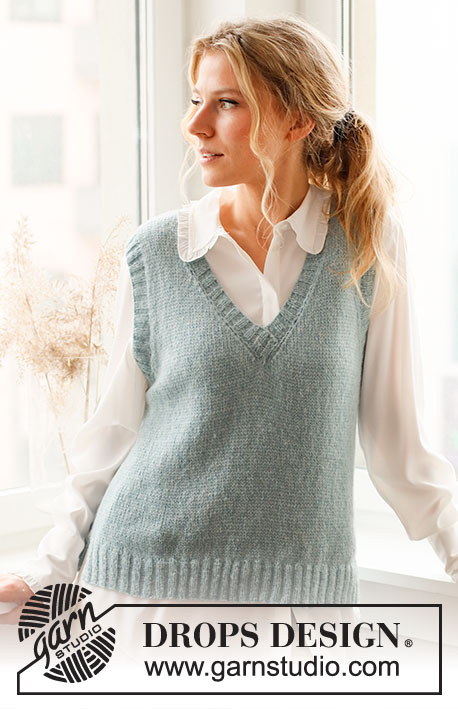
Audrey Vest#audreyvest |
|
 |
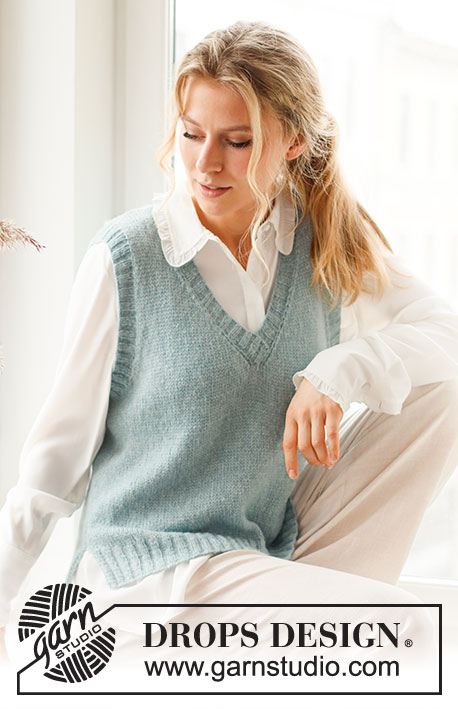 |
Knitted vest / slipover in DROPS Sky. The piece is worked in stocking stitch with ribbed edges, V-neck and split in the sides. Sizes S - XXXL.
DROPS 220-43 |
|
|
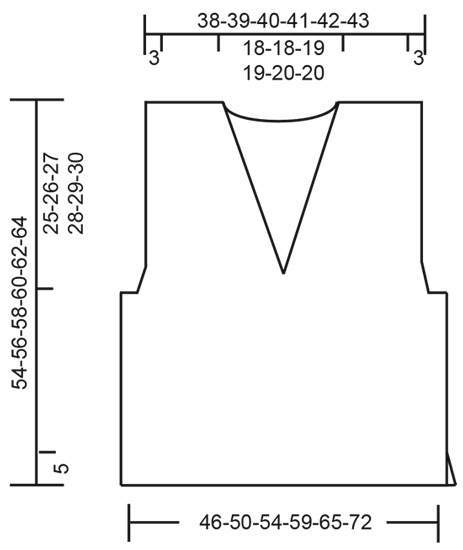
------------------------------------------------------- EXPLANATIONS FOR THE PATTERN: ------------------------------------------------------- RIDGE/GARTER STITCH (worked back and forth): Knit all rows. 1 ridge in height = Knit 2 rows. DECREASE TIP (evenly spaced): To work out how to decrease evenly, count the total number of stitches on the needle (e.g. 118 stitches) and divide by the number of decreases to be made (e.g. 24) = 4.9. In this example, decrease by knitting together approx. each 4th and 5th stitch. DECREASE TIP-2 (for armholes): Decrease on the inside of 2 stitches. All decreases are worked from the right side. Decrease as follows at the beginning of the row: Knit 2, slip 1 stitch as if to knit, knit 1 and pass the slipped stitch over the knitted stitch. Decrease as follows at the end of the row: Work until there are 4 stitches left, knit 2 together and knit the last 2 stitches. ------------------------------------------------------- START THE PIECE HERE: ------------------------------------------------------- VEST – SHORT OVERVIEW OF THE PIECE: The piece is worked back and forth, in sections and sewn together to finish. The V-neck and armhole edges are worked in the round to finish. BACK PIECE: Cast on 118-130-138-150-166-182 stitches with circular needle size 3.5 mm and Sky. Purl 1 row (= wrong side). Then work the next row from the right side as follows: 2 edge stitches in GARTER STITCH – read description above, * knit 2, purl 2 *, work from *-* until there are 4 stitches left, knit 2 and finish with 2 edge stitches in garter stitch. Continue this rib for 6 cm. Knit 1 row from the wrong side then knit 1 row from the right side where you decrease 24-28-28-30-34-36 stitches evenly spaced – read DECREASE TIP = 94-102-110-120-132-146 stitches. Change to circular needle size 4.5 mm. Work stocking stitch back and forth, with 1 edge stitch in garter stitch on each side. REMEMBER THE KNITTING TENSION! When the piece measures 29-30-31-32-33-34 cm, cast off for the armholes at the beginning of each row as follows: Cast off 3 stitches 1 time, then 2 stitches 2-2-2-3-3-3 times on each side. Then decrease inside 2 stitches, decreasing 1 stitch on each side 8-11-14-16-21-27 times – read DECREASE TIP-2 = 64-66-68-70-72-74 stitches. Continue with stocking stitch. When the piece measures 52-54-56-58-60-62 cm, cast off the middle 34-34-36-36-38-38 stitches for the neck and each shoulder is finished separately. Cast off 1 stitch on the next row from the neck = 14-15-15-16-16-17 stitches on the shoulder. Continue working stocking stitch until the piece measures 54-56-58-60-62-64 cm (25-26-27-28-29-30 cm from the bottom of the armhole). Cast off with knit from the right side (making sure the cast-off edge is not tight). Work the other shoulder in the same way. FRONT PIECE: Cast on 118-130-138-150-166-182 stitches with circular needle size 3.5 mm and Sky. Purl 1 row (= wrong side). Then work the next row from the right side as follows: 2 edge stitches in garter stitch, * knit 2, purl 2 *, work from *-* until there are 4 stitches left, knit 2 and finish with 2 edge stitches in garter stitch. Continue this rib for 6 cm. Knit 1 row from the wrong side then knit 1 row from the right side where you decrease 24-28-28-30-34-36 stitches evenly spaced = 94-102-110-120-132-146 stitches. Change to circular needle size 4.5 mm. Work stocking stitch back and forth with 1 edge stitch in garter stitch on each side until the piece measures 29-30-31-32-33-34 cm. Insert 1 marker in the middle of the row, with 47-51-55-60-66-73 stitches on each side (this marker is used when working the V-neck). READ THE WHOLE OF THE NEXT SECTION BEFORE CONTINUING! Continue with stocking stitch and cast off for the armholes at the beginning of each row as follows: 3 stitches 1 time, then 2 stitches 2-2-2-3-3-3 times on each side. Then decrease inside 2 stitches, decreasing 1 stitch on each side 8-11-14-16-21-27 times = 64-66-68-70-72-74 stitches. V-NECK: At the same time when the piece measures 31-33-34-36-37-39 cm start to decrease for the V-neck. Start from the right side and work as before until there are 3 stitches left before the marker, knit 2 together and work 1 edge stitch in garter stitch. Place the remaining stitches on a thread without working them. Each shoulder is finished separately; do not cut the strand. The left shoulder is continued from here, working back from the wrong side. LEFT SHOULDER (front piece): Continue with stocking stitch and 1 edge stitch in garter stitch towards the neck, decreasing inside this edge stitch at the end of each row from the right side. Decrease every 2nd row 17-17-18-18-19-19 more times (a total of 18-18-19-19-20-20 decreases, decrease by knitting 2 together, the first decrease was made when the front piece was divided) = 14-15-15-16-16-17 stitches on the shoulder. Continue with stocking stitch and 1 edge stitch in garter stitch towards the neck until the piece measures a total of 54-56-58-60-62-64 cm. Cast off with knit from the right side. RIGHT SHOULDER (front piece): Place the stitches from the thread back on the needle. Continue with stocking stitch and 1 edge stitch in garter stitch towards the neck (the first row is worked from the right side), decreasing for the neck inside the edge stitch at the beginning of each row from the right side. Decrease every 2nd row (slipping 1 stitch, knitting 1 and passing the slipped stitch over the knitted stitch) a total of 18-18-19-19-20-20 times = 14-15-15-16-16-17 stitches left on the shoulder. NOTE! The first decrease is on the first row worked). Continue with stocking stitch and 1 edge stitch in garter stitch towards the neck until the piece measures a total of 54-56-58-60-62-64 cm. Cast off with knit from the right side. ASSEMBLY: Sew the shoulder seams with grafting stitches, inside the cast-off edges. Start under the armholes and sew the side seams inside the 1 edge stitch – leave approx. 6 cm open for the split on each side. NECK: Start from the right side, at the bottom of the V-neck using short circular needle size 3.5 mm and knit up 168 to 184 stitches (number of stitches must be divisible by 4 and the stitches are knitted up inside the 1 edge stitch), first along the right side, then around the back of the neck and down the left side. Work the first row from the wrong side as follows; 1 edge stitch in garter stitch, * purl 2, knit 2 *, work from *-* until there are 3 stitches left, purl 2 and finish with 1 edge stitch in garter stitch. Work this rib back and forth for 3 cm. Cast off with knit over knit and purl over purl. At the bottom of the V-neck, mid-front, lay the right side over the left side and sew down neatly in the outermost stitch on the neck-edge. Repeat in the same way on the inside of the neck, so the left side is sewn onto the right side. ARMHOLE-EDGE: Start from the right side by the side seam under the armhole. Using short circular needle size 3.5 mm, knit up 124 to 152 stitches around the armhole (number of stitches must be divisible by 4). Work rib in the round (knit 2, purl 2) for 3 cm. Cast off with knit over knit and purl over purl. Work the other armhole in the same way. |
|
 |
|
Have you finished this pattern?Tag your pictures with #dropspattern #audreyvest or submit them to the #dropsfan gallery. Do you need help with this pattern?You'll find 27 tutorial videos, a Comments/Questions area and more by visiting the pattern on garnstudio.com. © 1982-2026 DROPS Design A/S. We reserve all rights. This document, including all its sub-sections, has copyrights. Read more about what you can do with our patterns at the bottom of each pattern on our site. |
|


With over 40 years in knitting and crochet design, DROPS Design offers one of the most extensive collections of free patterns on the internet - translated to 17 languages. As of today we count 324 catalogues and 12290 patterns translated into English (UK/cm). 12290
We work hard to bring you the best knitting and crochet have to offer, inspiration and advice as well as great quality yarns at incredible prices! Would you like to use our patterns for other than personal use? You can read what you are allowed to do in the Copyright text at the bottom of all our patterns. Happy crafting!
Post a comment to pattern DROPS 220-43
We would love to hear what you have to say about this pattern!
If you want to leave a question, please make sure you select the correct category in the form below, to speed up the answering process. Required fields are marked *.