
Popular categories
Looking for a yarn?


Comments / Questions (59)
![]() Kayla wrote:
Kayla wrote:
It looks like there's a typo in the dimensions. Instead of 16 1/2", should it not say 46 1/2"?
04.04.2014 - 22:42DROPS Design answered:
Dear Kayla, you are correct, this will be updated asap. Thank you. Happy knitting!
05.04.2014 - 10:08
![]() Melanie wrote:
Melanie wrote:
I'm starting row 34, a WS row, in M.1 and I am confused about moving the thread forward and back as directed. Since it's a WS row I should be purling and slipping every other stitch but the part about placing thread towards me, it's already there because I'm purling the stitch before and then place it away from me after I slip the stitch, but the next stitch is a purl so it needs to be in front again and nothing is accomplished? Also, should the stitches be slipped knitwise or purlwise?
05.09.2013 - 15:41DROPS Design answered:
Dear Melanie, text to this last symbol has been edited so that you should slip 1 st as if to P. Thank you, happy knitting!
06.09.2013 - 09:45Nashwaahmed wrote:
Sorry again but the video u posted is for sleeves knitted back and forth in a needle, this pattern calls for sleeves knitted in the round so when i do what u shown in the video those bounded off stitches "in the round" kinda tighten the work while knitting and they are not smooth in that specific part of the jacket so kindly i need a way to make the knitting smoother at this area thanks :)
26.08.2013 - 19:46DROPS Design answered:
Dear Mrs Nashwaahmed, sorry for bad video in last answer, the correct one has been added under the tab "videos" on the right side of the picture. To help you on the first rows, you may like to let sts for sleeves on another circular needle or dpn and let them then take all on the same after some more rows. Happy knitting!
28.08.2013 - 10:43
![]() Sara wrote:
Sara wrote:
This would be easier as a seamless top-down construction.
10.08.2013 - 05:32Nashwaahmed wrote:
I want to ask a question about the M.1 pattern there is a symbol for p2tog which is an X over two squares if i worked on the right side does this mean if i worked on the wrong side it will be K2tog?
08.08.2013 - 22:51DROPS Design answered:
Dear Mrs Nashwaahmed, you are correct, from WS it should be K2 tog, diagram text has been edited, thank you. Happy knitting!
09.08.2013 - 11:04Nashwaahmed wrote:
In the body piece, when i cast off for the arm hole for the small size, 34 sts left for the left front part, and 36 sts were left for the right front part is that ok or there is something wrong and i didn't cast off right ?
04.08.2013 - 23:33DROPS Design answered:
Dear Mrs Nashwaahmed, in the small size you should have before binding off for armhole : 39 sts for each front piece + 69 sts for back piece (=147 sts), and after binding off for armhole : 35 sts for each front piece + 61 sts for back piece = a total of 131 sts. Happy knitting !
05.08.2013 - 09:27
![]() Debbie Russell wrote:
Debbie Russell wrote:
In the key for pattern #113-17 there is a symbol that means "work 2 stitches in 1 stich." Is this a knit front and back? Or a make 1? And if not, can anyone tell me how you're supposed to work it? Thanks!
07.01.2013 - 21:26DROPS Design answered:
Dear Mrs Russel, you are correct, it means to work st first in front loop then in back loop. Happy knitting!
08.01.2013 - 08:43
![]() Vicki wrote:
Vicki wrote:
In drops pattern 113-17 does 'wk 2sts in one' mean the same as increase 1st? Thanks
11.09.2012 - 01:48
![]() Nancy Beamer wrote:
Nancy Beamer wrote:
I have just completed the sleeves and I'm not sure how the bind off is done. I am doing the magic loop.
22.08.2012 - 23:46
![]() Ballardtoad wrote:
Ballardtoad wrote:
Oh! Thank you so much for the help and for responding so quickly!! Best wishes -
14.07.2012 - 17:36
|
||||||||||||||||||||||||||||||||||
Avery#averycardigan |
||||||||||||||||||||||||||||||||||
|
|
||||||||||||||||||||||||||||||||||
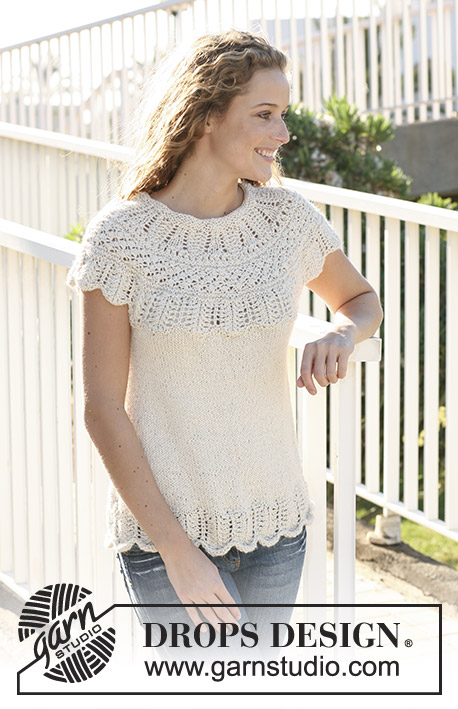
DROPS jacket with round yoke and pattern on yoke in ”Silke Alpaca”. Size S - XXXL.
DROPS 113-17 |
||||||||||||||||||||||||||||||||||
|
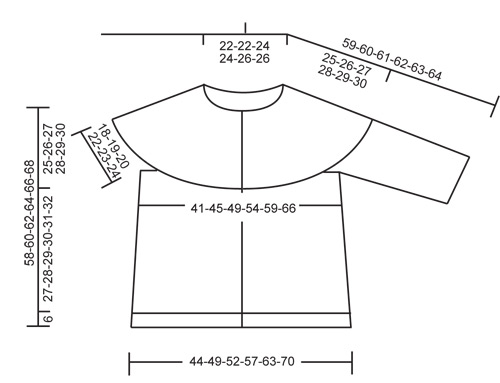
MOSS ST: Row 1: * P1, K1 *, repeat from *-* and finish with P1. Row 2: K over P and P over K Repeat row 2. GARTER ST (back and forth on needle): K all rows. GARTER ST (in the round): K 1 round, P 1 round. MEASUREMENT TIP: Because of the weight of the yarn all measurements should be made while the garment is hanging. BUTTONHOLES: Make buttonholes on right front band. 1 buttonhole = cast off 3rd st from mid front and cast on 1 new st on return row. Make buttonholes when piece measures: SIZE S: 7, 16, 26, 36, 46 and 56 cm. SIZE M: 7, 15, 23, 31, 40, 49, and 58 cm. SIZE L: 7, 15, 24, 33, 42, 51 and 60 cm. SIZE XL: 7, 16, 25, 34, 43, 52 and 62 cm. SIZE XXL: 7, 15, 23, 31, 39, 47, 55 and 64 cm. SIZE XXXL: 7, 15, 23, 31, 39, 47, 55 and 64 cm. PATTERN: See diagram M.1 The diagram shows the pattern from the RS. See diagram for your size. ---------------------------------------------------------- BODY PIECE: Worked back and forth on circular needle. Cast on 159-173-187-203-223-245 sts (includes 5 front band sts each side towards mid front) on circular needle size 4.5 mm with Silke Alpaca. P 1 row from WS and continue in MOSS ST – see above – with 5 front band sts each side in GARTER ST – see above. Front bands are worked in garter st throughout. When piece measures 6 cm continue in stocking st with front band sts as before. Insert 2 markers in piece, 42-45-49-53-58-63 sts in from each side (back piece = 75-83-89-97-107-119 sts.) Remember BUTTONHOLES on right front band – see above. When piece measures 10 cm dec 1 st on each side of both markers (= 4 dec per row) and repeat the dec on every 9-9.5-10-10.5-11-11.5 cm a total of 3 times = 147-161-175-191-211-233 sts. Dec by K2 tog. Continue until piece measures 33-34-35-36-37-38 cm – SEE MEASUREMENT TIP! Now cast off 8 sts each side (= 4 sts on each side of marker) = 131-145-159-175-195-217 sts left on needle. Put piece aside and knit the sleeves. SLEEVE: Worked in the round on double pointed needles. Cast on 49-51-51-55-57-59 sts on double pointed needles size 4.5 mm with Silke Alpaca. Work 6 rounds garter st – see above. Insert a marker at beg of round (= mid under arm). When piece measures 10 cm inc 1 st on each side of marker and repeat the inc on every 9-4.5-2-1.5-1.5-1 cm a total of 2-3-5-6-7-8 times = 53-57-61-67-71-75 sts. When piece measures 23-23-22-22-21-21 cm (less for the larger sizes because of wider shoulder) cast off 4 sts on each side of marker for armhole = 45-49-53-59-63-67 sts. Put piece aside and knit the other sleeve YOKE: Slip sleeves on the same circular needle size 4.5 mm as body piece where cast off for armholes = 221-243-265-293-321-351 sts. K 1 row from RS (with front bands as before), AT THE SAME TIME dec 11-13-15-3-11-21 sts evenly = 210-230-250-290-310-330 sts. K 1 row from WS and now continue in M.1 from RS (see diagram for your size) with 5 garter sts each side. After 1 vertical repeat of M.1 there are 100-109-118-122-130-138 sts on row. K 1 row from RS, AT THE SAME TIME dec 8-17-20-24-24-32 sts evenly = 92-92-98-98-106-106 sts. K 5 rows on all sts and cast off loosely. ASSEMBLY: Sew openings under arms. Sew on buttons. |
||||||||||||||||||||||||||||||||||
Diagram explanations |
||||||||||||||||||||||||||||||||||
|
||||||||||||||||||||||||||||||||||
 |
||||||||||||||||||||||||||||||||||
 |
||||||||||||||||||||||||||||||||||
Have you finished this pattern?Tag your pictures with #dropspattern #averycardigan or submit them to the #dropsfan gallery. Do you need help with this pattern?You'll find 25 tutorial videos, a Comments/Questions area and more by visiting the pattern on garnstudio.com. © 1982-2026 DROPS Design A/S. We reserve all rights. This document, including all its sub-sections, has copyrights. Read more about what you can do with our patterns at the bottom of each pattern on our site. |
||||||||||||||||||||||||||||||||||


With over 40 years in knitting and crochet design, DROPS Design offers one of the most extensive collections of free patterns on the internet - translated to 17 languages. As of today we count 324 catalogues and 12290 patterns translated into English (UK/cm). 12290
We work hard to bring you the best knitting and crochet have to offer, inspiration and advice as well as great quality yarns at incredible prices! Would you like to use our patterns for other than personal use? You can read what you are allowed to do in the Copyright text at the bottom of all our patterns. Happy crafting!
Post a comment to pattern DROPS 113-17
We would love to hear what you have to say about this pattern!
If you want to leave a question, please make sure you select the correct category in the form below, to speed up the answering process. Required fields are marked *.