Comments / Questions (66)
![]() Mauricette Mouton wrote:
Mauricette Mouton wrote:
Vous dites 29 augmentations mais il y a aussi 8 augmentations double.
15.01.2025 - 18:13
![]() Mauricette Mouton wrote:
Mauricette Mouton wrote:
Bonjour j'arrive au moment de la séparation du corps et des manches, je fais la taille M et mes manches font 80 mailles et non pas 72 comme indiqué dans les explications ? Est-ce normal ? Merci
15.01.2025 - 15:09DROPS Design answered:
Bonjour Mme Mouton, vous devez augmenter 29 fois tous les 2 rangs pour les manches, vous devez ainsi avoir 72 mailles en taille M: 29 augmentations, 14 m de la manche réparties au début avec 4 m de A.4, 6 m de A.1 et A.4 de A.5) et 29 augmentations soit 29+14+29=72 mailles. Bon tricot!
15.01.2025 - 16:19
![]() Solange Cazorla wrote:
Solange Cazorla wrote:
Bonjour puis je tricoter ce modèle avec des aiguilles droites je parle des manches mer
13.01.2025 - 19:16
![]() Mauricette Mouton wrote:
Mauricette Mouton wrote:
Bonjour je suis arrivée au rang 5 du diagramme A3b et je suis perdue je ne sais pas à quel moment je mets A. 3a. Si quelqu'un peut m'aider. Merci d'avance.
12.01.2025 - 18:54DROPS Design answered:
Bonjour Mme Mouton, lorsque vous avez terminé A.3a en hauteur, tricotez A.3x sur les premières mailles de A.3a et tricotez A.3b sur les mailles restantes = autrement dit, vous continuez les torsades exactement comme avant (A.3x) et tricotez maintenant A.3b sur les mailles restantes = vous continuez à augmenter à la fin de A.3b tous les rangs sur l'endroit. Vous ne tricotez maintenant plus A.3a. Bon tricot!
13.01.2025 - 10:07
![]() Micheline Dax wrote:
Micheline Dax wrote:
Coucou, je ne comprends pas le premier rang de l'empiecement. Où exactement dois-je augmenter les 6 mailles de A.2 ? (19+6 mailles) A2 à déjà 25 mailles. Merci pour votre aide
09.01.2025 - 18:46DROPS Design answered:
Bonjour Mme Dax, vous devez augmenter 6 mailles dans les 19 mailles suivantes, ainsi, vous avez 25 mailles pour tricoter A.2; ces augmentations viennent compenser en largeur les torsades du diagramme. Bon tricot!
10.01.2025 - 08:12
![]() Nicole BURAC wrote:
Nicole BURAC wrote:
Bonjour, Merci à vous ça y es c bon pour mes mailles Bonne journée
08.01.2025 - 14:29
![]() Laëtitia wrote:
Laëtitia wrote:
Bonjour, Pouvez-vous me dire si les A3 et A7 se démarrent en haut ou en bas. Il n'y a pas de flèche 😊 Merci !!
08.01.2025 - 08:57DROPS Design answered:
Bonjour Laëtitia, tous les diagramme se lisent de bas en haut, soit dès le 1er rang, soit à partir de la flèche indiquée pour la taille tricotée. (Sur l'envers, lisez les diagrammes de gauche à droite). Bon tricot!
08.01.2025 - 15:57
![]() Nicole BURAC wrote:
Nicole BURAC wrote:
Bonjour, Je suis au niveau du repli du col mais je ne trouve pas 129 mailles je l ai refait 2 fois impossible et mon nombre de mailles correspond pour le col. Pourriez vous m aidez svp
08.01.2025 - 01:40DROPS Design answered:
Bonjour Mme Burac, avez-vous pris en compte le fait que A.1 se tricote sur 6 mailles mais qu'au 1er, vous faites 1 jeté dans chaque A.1 et que vous avez du coup 7 mailles pour chaque A1? Quand on compte les mailles, on compte toujours 6 mailles pour A.1. Vous devriez alors avoir le compte ainsi: 1 m lis, 25 m côtes 1/1, 6 m A.1, 51 m côtes, 6 m A.1, 25 m côtes 1/1 et 1 m lis = 115 m + 7 m montées à la fin des 2 rangs indiqués=129 mailles. Bon tricot!
08.01.2025 - 07:33
![]() Grundig Laëtitia wrote:
Grundig Laëtitia wrote:
Bonjour, Je ne comprends pas comment tricoter un jeté torse sur un rang envers. Ça fait un trou 😊
07.01.2025 - 15:49DROPS Design answered:
Bonjour Mme Grundig, veillez à ce que votre jeté ne soit pas trop lâche, dans cette vidéo, nous montrons comment tricoter 1 jeté à l'envers/torse à l'envers. Bon tricot!
07.01.2025 - 17:14
![]() Sylvie Augendre wrote:
Sylvie Augendre wrote:
Bonjour je me permet de vous contacter car je ne comprends pas comment placer mes mailles pour chaque diagramme je n'arrive donc pas à commencer mon ouvrage j'aimerais si c'est possible avoir des explications plus concrètes merci pour votre aide je fais la taille S
06.01.2025 - 15:41DROPS Design answered:
Bonjour Mme Augendre, en taille S, tricotez le 1er rang ainsi: 8 m bordure devant, A.2 sur 19+6 augm. = les 25 m du diagramme, A.3a = 1 maille, 1 augm (raglan) (=devant = 8+19+1=28 m + les augm.) et 1 m end (raglan), A.4 (4 m+ 1jeté), A.1 = 6 m et A.5 (4 m+ 1 jeté) (= manche, 14 m + les augm), 1 m end (raglan), 1 augm, A.4 (4 m + 1 jeté), 33 m de A.6 (= 8 fois les 4 m du diagramme + la 1ère maille), 1 augm (raglan) 1 m end (= dos, 4+33=37 m + 2 m raglan), A.4 (4 m+ 1jeté), A.1 = 6 m et A.5 (4 m+ 1 jeté) (= manche, 14 m + les augm), 1 m end (raglan), A.7a (1 m), A.8 (=19 m + 6 augm = 25 m du diagramme), 8 m de bordure (devant, 28 m + 1 m raglan). Bon tricot!
07.01.2025 - 10:20
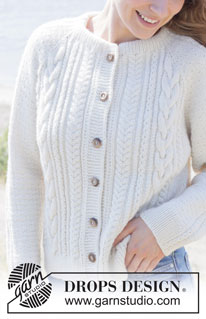
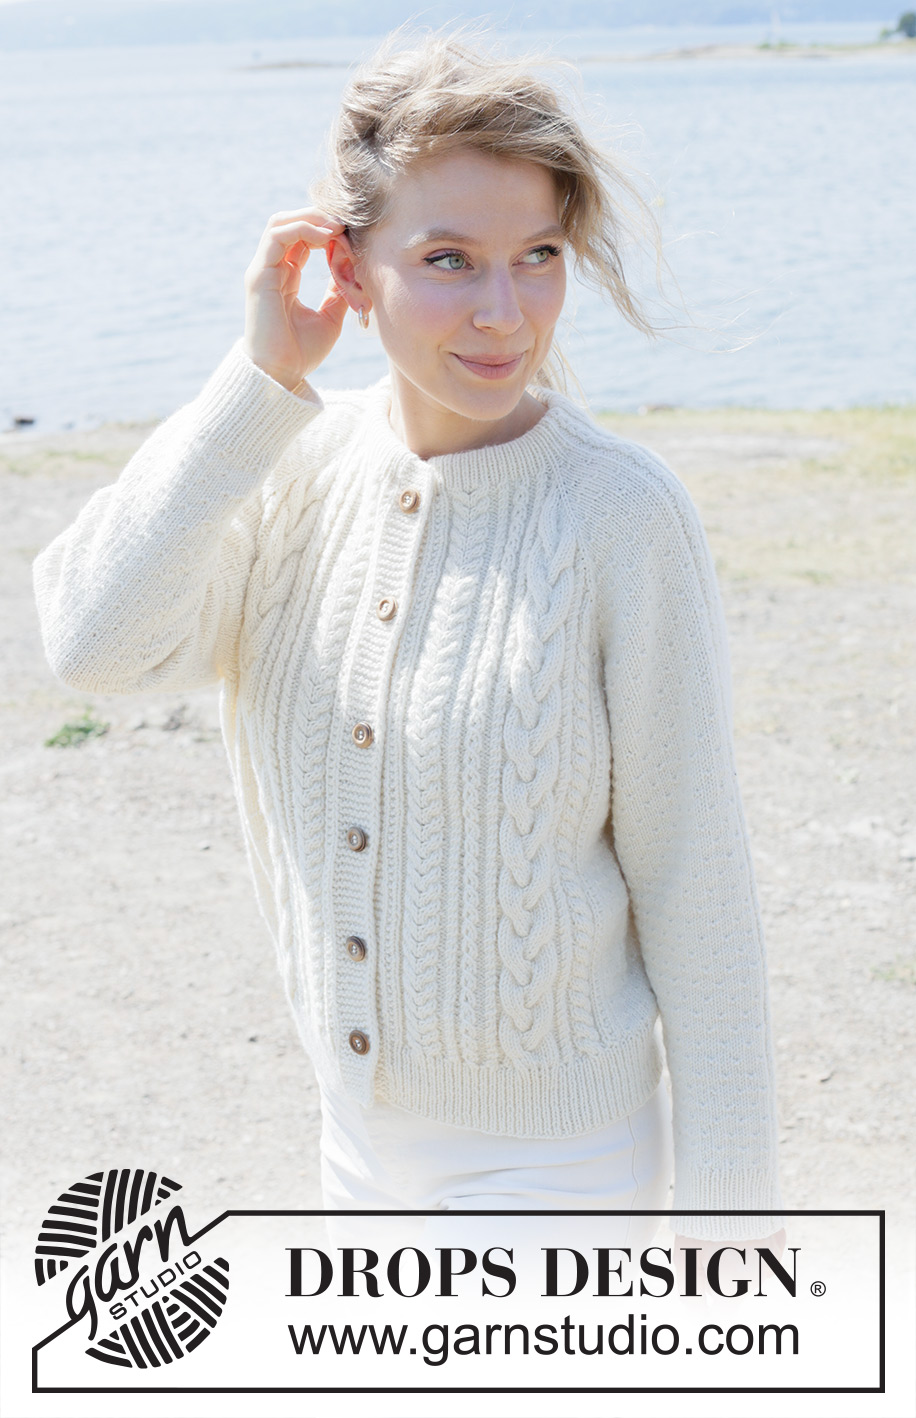
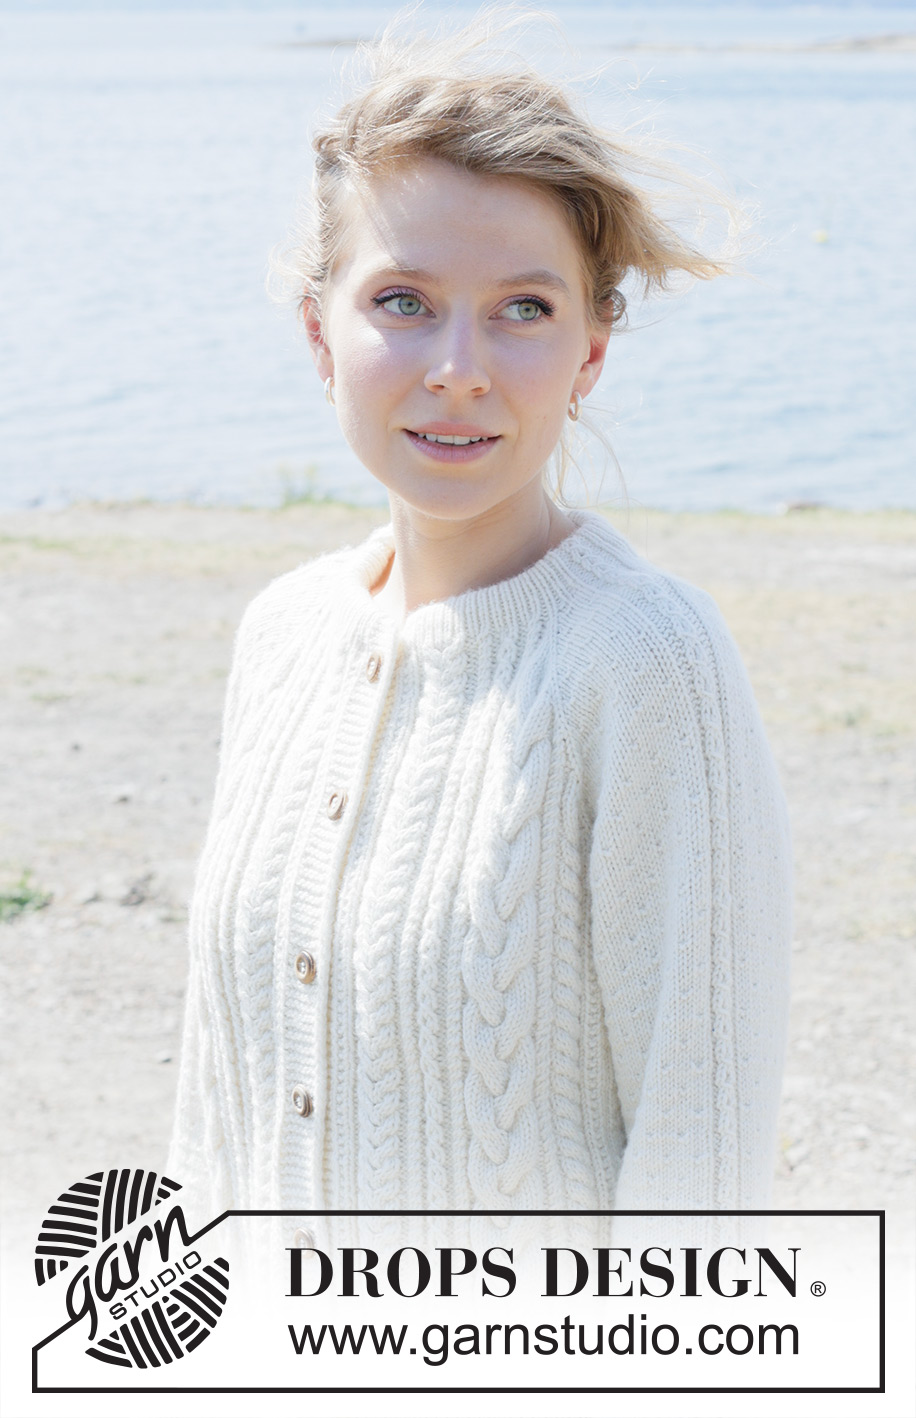
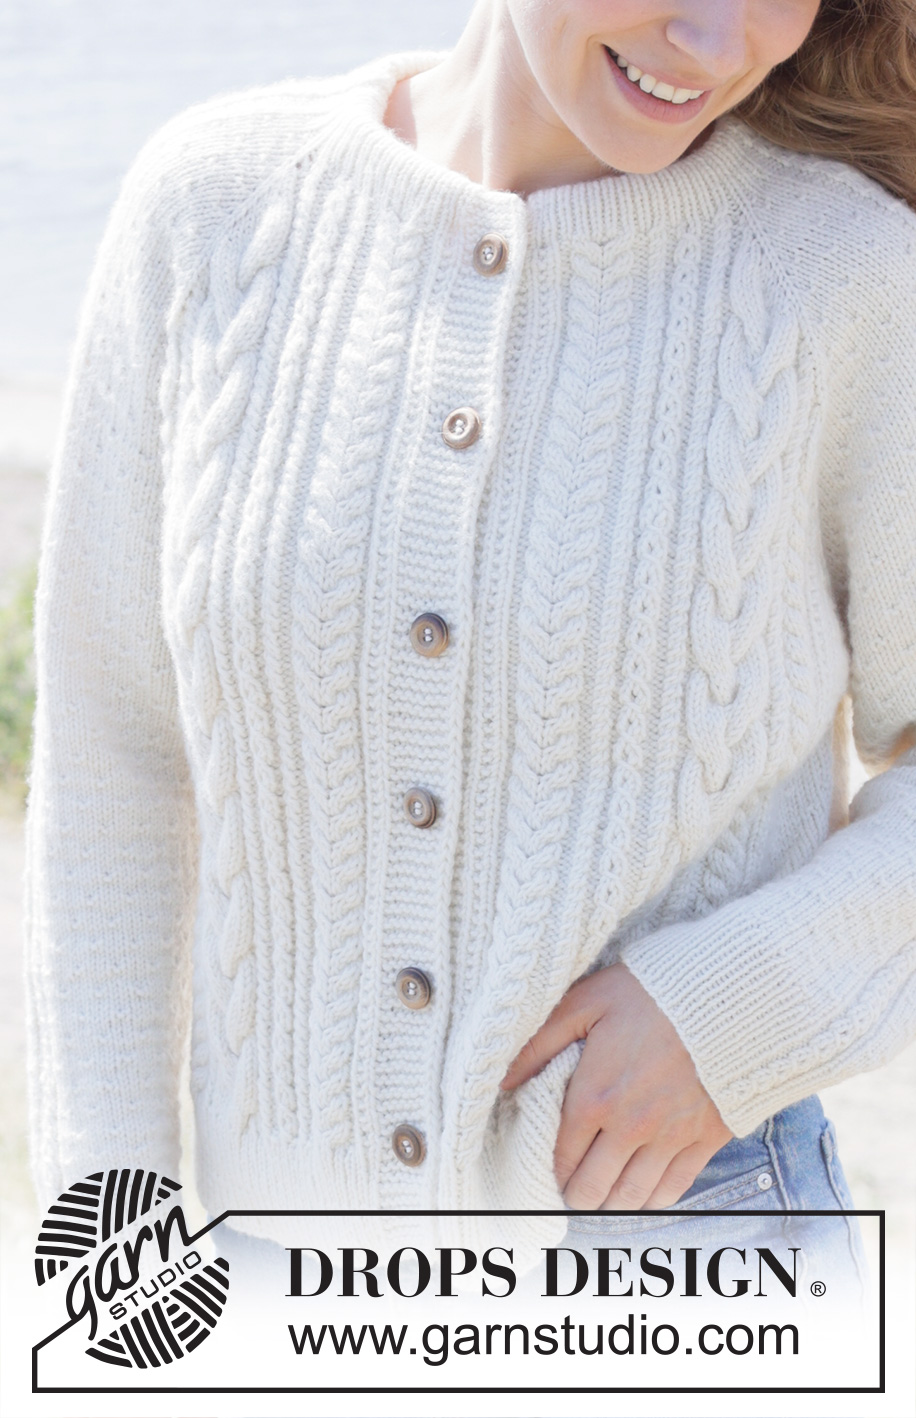
Winter Rain Cardigan#winterraincardigan |
||||||||||||||||||||||||||||||||||||||||||||||
 |
 |
|||||||||||||||||||||||||||||||||||||||||||||
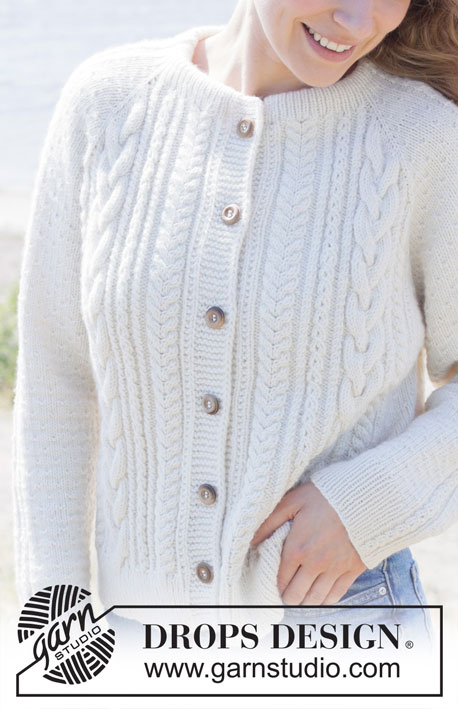
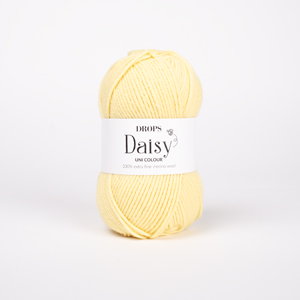
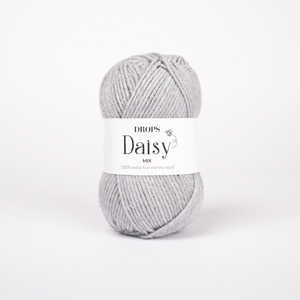
Knitted jacket in DROPS Daisy or DROPS Karisma. Piece is knitted top down with raglan, cables, relief pattern and double neck edge. Size: S - XXXL
DROPS 252-4 |
||||||||||||||||||||||||||||||||||||||||||||||
|
---------------------------------------------------------- EXPLANATION FOR THE PATTERN: ---------------------------------------------------------- GARTER STITCH: Knit on all rows, i.e. knit from right side and knit from wrong side. 1 ridge vertically = knit 2 rows. BAND WITH I-CORD: BEGINNING OF ROW: Work band as follows: Slip 1 stitch purlwise with strand in front of piece, knit 1 and work 6 stitches in garter stitch. END OF ROW: Work band as follows: Work until 8 stitches remain on row, work 6 stitches in garter stitch, slip 1 stitch purlwise with strand in front of piece, knit 1. Work the same way both from right side and wrong side. PATTERN: See diagrams A.1 to A.8. Number of stitches in A.1, A.2, A.3x, A.7x and A.8 will vary but is always counted without the yarn over that forms the lace in the cable. Find your size and begin at the specified arrow. RAGLAN: Increase 1 stitch by making 1 yarn over, on next row work yarns over as explained below: BEFORE RAGLAN STITCH: Purl yarn overs in back loop of stitches to avoid holes. Then work the new stitches in pattern. AFTER RAGLAN STITCH: Slip stitch off left needle and put it back on left needle but the opposite way (insert left needle in from behind when slipping it back on needle). Purl yarn overs in front loop of stitches to avoid holes. Then work the new stitches in pattern BUTTONHOLES: Decrease for buttonholes on right band (when garment is worn). Decrease from right side when 6 stitches remain on row as follows: ROW 1 (= right side): Make 1 yarn over, knit 2 together, knit 2, slip 1 stitch purlwise with strand in front of piece, knit 1. ROW 2 (= wrong side): Work band as before and knit yarn over to make a buttonhole. Decrease for first buttonhole on first row from right side after neck edge has been worked. Then decrease the next 5-5-5-6-6-6 buttonholes, approx. 9-9½-9½-8½-8½-9 cm apart. Place bottom buttonhole in the transition between stocking stitch and rib. DECREASE TIP: Decrease 1 stitch on each side of stitch with marker as follows: Work until 2 stitches remain before stitch with marker, knit 2 together, knit 1 (marker is in this stitch) slip 1 stitch knitwise, knit 1, pass slipped stitch over stitch worked (= 2 stitches decreased). ---------------------------------------------------------- START THE PIECE HERE: ---------------------------------------------------------- JACKET - SHORT OVERVIEW OF THE PIECE: In this pattern needles of different length have been used, begin with fitting length for number of stitches and switch as needed. Work neck edge and yoke back and forth on circular needle from mid front, work top down. When yoke is done, divide piece for body and sleeves. Work body downwards back and forth on circular needle while putting the sleeves aside. Then work sleeves downwards in the round on needle. Fold the neck edge double against the wrong side and fasten. If 0 is given for the chosen size, it means that you skip the information until next information. NECK EDGE: Cast on 111-115-123-127-135-139 stitches on circular needle size 4 mm with DROPS Daisy or DROPS Karisma. Switch to circular needle size 3 mm (cast on on a larger needle to get an elastic cast-on edge). Purl 1 row from wrong side. Work next row from right side as follows: Work 1 stitch in GARTER STITCH - read explanation above over, work rib (= knit 1/purl 1) over the first 25-25-27-27-31-31 stitches, work A.1, work rib (= knit 1/purl 1) over the next 47-51-55-59-59-63 stitches, work A.1, work rib (= knit 1/purl 1) over the next 25-25-27-27-31- 31 stitches, finish with 1 stitch in garter stitch. Continue rib like this until neck edge measures 3½-3½-3½-4-4-4 cm (= approx. height of neck edge when it is folded double). At the end of each of the next 2 rows cast on 7 stitches for band = 125-129-137-141-149-153 stitches on needle, work band stitches as BAND WITH I-CORD - read explanation above. Then work until neck edge measures 7-7-7-8-8-8 cm– adjust so that last row is last row in A.1. Insert 1 marker on the inside of band in one side of piece, measure piece from this marker. YOKE: Continue with circular needle size 4 mm. Insert 4 markers in piece without working the stitches, markers are inserted in 1 stitch and these are called raglan stitches and worked in stocking stitch. Count 28-28-28-28-32-32 stitches (= left front piece), insert 1 marker in next stitch, count 14-14-18-18-18-18 stitches - A.1 is in the middle of these stitches (= sleeve), insert 1 marker in next stitch, count 37-41-41-45-45-49 stitches (= back piece), insert 1 marker in next stitch, count 14-14-18-18-18-18 stitches - A.1 is in the middle of these stitches (= sleeve), insert 1 marker in next stitch. 28-28-28-28-32-32 stitches remain on row after last marker (= right front piece). Work PATTERN – read explanation above, with band as before, back and forth and increase for RAGLAN on each side of the 4 raglan stitches - read explanation above. Work first row as follows from right side: FRONT PIECE: Work band as before (= 8 stitches band), work A.2 over the next 19 stitches AT THE SAME TIME increase 6 stitches evenly over these, work A.3a over the next 1-1-1-1-5-5 stitches AT THE SAME TIME as increasing 0-0-0-0-1-1 stitch over these (= 34-34-34-34-39-39 stitches for front piece - not included yarn over), knit the raglan stitch. SLEEVE: Work A.4, work A.6 over the next 0-0-2-2-2-2 stitches, work A.1, work A.5 – begin at specified arrow (= 14-14-18-18-18-18 stitches for sleeve – not included yarn over). BACK PIECE: Knit the raglan stitch, work A.4, work A.6 over the next 33-37-37-41-41-45 stitches (pattern will not fit 4, but back piece will be symmetrical) (= 37-41-41-45-45-49 stitches for back piece), increase 1 stitch for raglan, knit the raglan stitch. SLEEVE: Work A.4, work A.6 over the next 0-0-2-2-2-2 stitches, work A.1, work A.5 – begin at specified arrow (= 14-14-18-18-18-18 stitches for sleeve – not included yarn over). FRONT PIECE: Knit the raglan stitch, work A.7a over the next 1-1-1-1-5-5 stitches AT THE SAME TIME increase 0-0-0-0-1-1 stitch over these, work A.8 over the next 19 stitches AT THE SAME TIME increase 6 stitches evenly over these, finish with band as before (= 8 stitches band), (= 34-34-34-34-39-39 stitches for front piece - not included yarn over) – remember BUTTONHOLE. Continue back and forth like this - remember to work the yarn overs in raglan increase as explained above. When A.4 and A.5 have been worked vertically, continue moss stitch and increases in the established pattern on sleeves and back piece, work the new stitch in pattern. When A.3a and A.7a (= 19-19-19-19-21-21 increase rows) have been worked vertically in the selected size, work A.3x over A.3a and A.7x over A.7a, AT THE SAME TIME increase with A.3b and A.7b until finish number of raglan increases vertically. Remember to follow the knitting tension! Increase for raglan on every other row 29 times in total = 72-72-76-76-76-76 stitches between raglan stitches for each sleeve, 71-71-71-71-77-77 stitches for front piece (not included yarn over), and 95-99-99-103-103-107 stitches for back piece + 4 raglan stitches = 385-389-397-401-413-417 stitches. Increases for sleeve are now done, but continue to increase for raglan on front piece and back piece on every other row 2-4-4-6-8-12 more times (i.e. 31-33-33-35-37-41 times vertically for front/back piece) = 393-405-413-425-445-465 stitches on needle(not included yarn overs). When correct number of increases has been achieved on front pieces and back pieces, continue with A.3y over A.3b and A.7y over A.7b - make sure that the pattern fits over the established pattern. Work pattern and band as before without increasing until piece measures 23-24-25-26-28-30 cm from marker mid front – adjust so that last row is last row in A.1. Now divide yoke for body and sleeves. DIVIDING FOR BODY AND SLEEVES: AT THE SAME TIME as next row is worked divide yoke for body and sleeves at raglan stitches as follows: Work 74-76-76-78-86-90 stitches as before - to and with raglan stitches (= front piece), slip the next 72-72-76-76-76-76 stitches on a stitch holder for sleeve, cast on 3-7-15-19-23-23 new stitches on row (= in the side mid under sleeve), work 101-109-109-117-121-133 stitches as before (= back piece), slip the next 72-72-76-76-76-76 stitches on a stitch holder for sleeve, cast on 3-7-15-19-23-23 new stitches on row (= in the side mid under sleeve) and work the last 74-76-76-78-86-90 stitches as before (= front piece). Finish body and sleeves separately. BODY: = 255-275-291-311-339-359 stitches (not included yarn overs). Work pattern and band as follows: Work band, work A.2, A.3x, A.3y, continue with moss stitch / A.6 from A.3y over raglan stitches and the new stitches under sleeve (pattern fits between front piece and back piece), work moss stitch until and with last raglan stitch, (moss stitch continues into A.7y), work A.7y, A.7x, A.8, finish with band. Work pattern and band as before until piece measures 46-48-49-50-52-54 cm from marker mid front. On next row from right side begin rib while AT THE SAME TIME increasing 10-14-18-24-30-32 stitches evenly over back piece = 265-289-309-335-365-391 stitches, work as follows: Switch to circular needle size 3 mm, work band as before, work rib (= knit 1/purl 1 - remember increase) until 9 stitches remain, knit 1 and band as before. When rib measures 5-5-5-6-6-6 cm, cast off with knit over knit and purl over purl. Jacket measures 51-53-54-56-58-60 cm from marker mid front and approx. 54-56-58-60-62-64 cm from the top of shoulder. SLEEVES: Slip 72-72-76-76-76-76 sleeve stitches from one thread on to circular needle size 4 mm and pick in addition up 1 stitch in each of the 3-7-15-19-23-23 stitches cast on under sleeve = 75-79-91-95-99-99 stitches. Insert 1 marker in the middle of the 3-7-15-19-23-23 new stitches under sleeve - round begins in this stitch and this stitch is always worked in stocking stitch. Adjust so that pattern A.6 and A.1 continue as before from yoke over sleeve - the pattern will not fit under sleeve but it is important that the pattern is symmetrical on each side of A.1. Work in the round with pattern as before on needle - AT THE SAME TIME when sleeve measures 2-2-4-2-2-2 cm from division, decrease mid under sleeve – read DECREASE TIP and decrease as follows: Decrease 2 stitches every 3-2½-1½-1½-1½-1½ cm 11-12-17-18-18-18 times in total = 53-55-57-59-63-63 stitches. Work until sleeve measures 35-35-35-33-32-30 cm from division. Work next round as follows: Knit 24-25-26-27-29-29 stitches while AT THE SAME TIME increasing 5-4-5-6-6-6 stitches evenly over these (= 29-29-31-33-35-35 stitches), work A.1 as before, knit 23-24-25-26-28-28 stitches while AT THE SAME TIME increasing 5-6-7-6-6-6 stitches evenly over these (= 28-30-32-32-34-34 stitches) = 63-65-69-71-75-75 stitches. Switch to double pointed needles size 3 mm and work rib (= knit 1/purl 1) over de first 29-29-31-33-35-35 stitches, work A.1, work rib (= knit 1/purl 1) over the last 28-30-32-32-34-34 stitches. Continue rib in the round like this until rib measures 5-5-5-6-6-6 cm– adjust so that last round is last round in A.1. Cast off stitches with knit over knit and purl over purl. Sleeve measures approx. 40-40-40-39-38-36 cm from division. ASSEMBLY: Fold rib at the top of neck down on inside of garment. Fasten rib to get a double neck edge. To avoid a tight neck edge that sticks out it is important to keep the seam elastic. Sew opening towards mid front together on bands with neat little stitches. Sew the buttons on to the left band. |
||||||||||||||||||||||||||||||||||||||||||||||
Diagram explanations |
||||||||||||||||||||||||||||||||||||||||||||||
|
||||||||||||||||||||||||||||||||||||||||||||||
 |
||||||||||||||||||||||||||||||||||||||||||||||
 |
||||||||||||||||||||||||||||||||||||||||||||||
 |
||||||||||||||||||||||||||||||||||||||||||||||
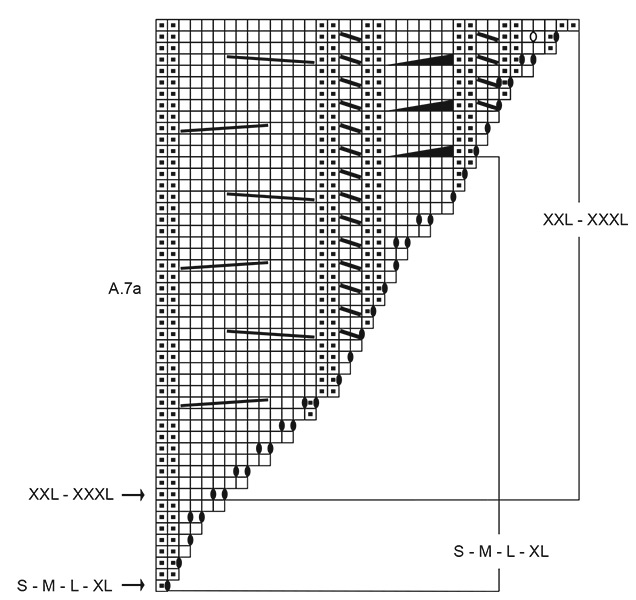 |
||||||||||||||||||||||||||||||||||||||||||||||
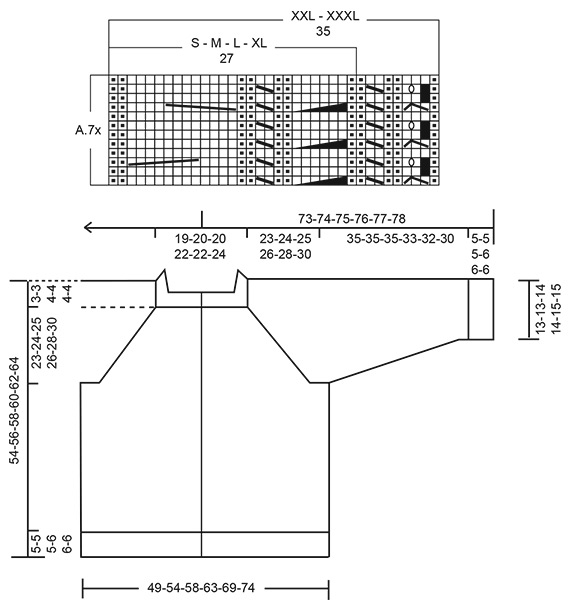 |
||||||||||||||||||||||||||||||||||||||||||||||
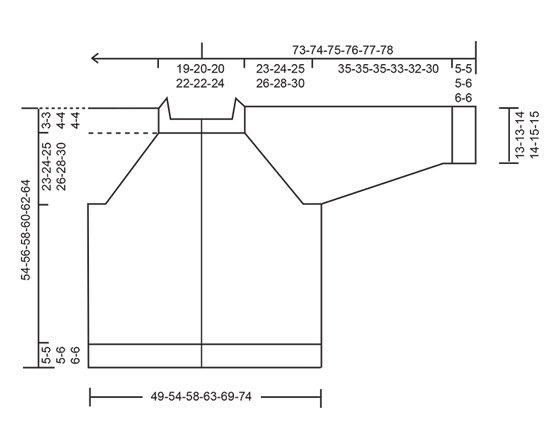 |
||||||||||||||||||||||||||||||||||||||||||||||
Have you finished this pattern?Tag your pictures with #dropspattern #winterraincardigan or submit them to the #dropsfan gallery. Do you need help with this pattern?You'll find 38 tutorial videos, a Comments/Questions area and more by visiting the pattern on garnstudio.com. © 1982-2025 DROPS Design A/S. We reserve all rights. This document, including all its sub-sections, has copyrights. Read more about what you can do with our patterns at the bottom of each pattern on our site. |
||||||||||||||||||||||||||||||||||||||||||||||










Post a comment to pattern DROPS 252-4
We would love to hear what you have to say about this pattern!
If you want to leave a question, please make sure you select the correct category in the form below, to speed up the answering process. Required fields are marked *.