
Popular categories
Looking for a yarn?


Comments / Questions (22)
![]() Helen wrote:
Helen wrote:
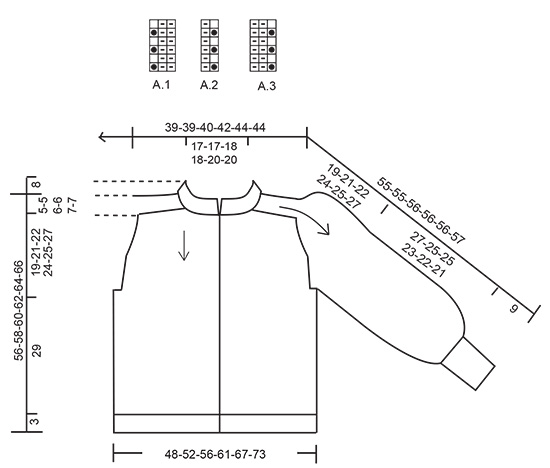
Can’t gente correctly the mathbof cast on: 1+24+12+36+12+24+1 =110 - size M The pattern says = 114
21.03.2026 - 20:08DROPS Design answered:
Dear Helen, note that when you work A.2 you finis with the first stitch A.2, this means: 12 sts A.2 + 1 stitch A.2 = 13 sts A.2 in total; same for A.1 over 36 sts you finish with the first 2 sts A.1 = 38 sts A.1, this means: 1+24+13+38+13+24+1=114 sts. Happy knitting!
23.03.2026 - 08:41
![]() Ewa wrote:
Ewa wrote:
Vilket färgnummer har den beiga som visas på bild i galleriet under mönstret Falling Water stickad av Inger Gamme?
03.03.2026 - 22:25DROPS Design answered:
Hej Ewa. På instagram ser jag att hon skriver att hon stickat sin kofta i DROPS Flora (färg nr 08) och DROPS Kidsilk (färg nr 12). Mvh DROPS Design
04.03.2026 - 12:22
![]() Sanne wrote:
Sanne wrote:
Beste drops, ik snap het patroon niet helemaal. Bij een echte Fisherman's Rib zou je de andere rij OF helemaal recht breien OF de steken die in de vorige rij die niet in Fisherman's Rib zijn gebreid, wel in Fisherman's Rib breien. Met dit patroon wordt de rib toch niet hetzelfde aan beide kanten? Is er een video beschikbaar van hoe beide rijen zijn gebreid?
23.02.2026 - 12:10DROPS Design answered:
Dag Sanne,
Dit is een variant op de boordsteek/patensteek. De steek die je recht breit in de naald eronder brei je op de volgende naald ook recht aan de goede kant (en averecht aan de verkeerde kant). De andere steken brei je steeds averecht aan de goede kant en recht aan de verkeerde kant.
25.02.2026 - 18:34
![]() Renvillard wrote:
Renvillard wrote:
Bonjour, je viens de terminer le col et les épaules. Je dois maintenant prendre aiguille 5 et commencer par le devant gauche sur l'endroit. Quand je place mon col en haut ( et les 8 cm d' épaules qui descendent) en le regardant sur l'endroit, est-ce bien le devant placé du côté gauche par lequel je dois commencer? Le devant du col, c'est celui où on a 1 côte anglaise ou 2 côtes anglaises? Merci pour votre réponse
08.01.2026 - 23:59DROPS Design answered:
Bonjour Mme Renvillard, on tricote le gilet de haut en bas, donc les premières mailles sur l'aiguille doivent être celles du devant gauche: placez le rang de montage face à vous, les mailles en attente en haut = devant gauche, et vous terminez par le devant droit = les mailles à la fin du rang sur l'endroit. Vous commencez donc par les mailles du devant gauche (les mêmes que pour le col, en début de rang sur l'endroit), vous relevez les mailles le long de l'épaule, tricotez les mailles de l''épaule, etc.. en terminant par le devant droit. Bon tricot!
09.01.2026 - 11:01
![]() Marion Hirn wrote:
Marion Hirn wrote:
Hallöchen Ich benötige eure Hilfe…. Ich würde diese Jacke gerne in der Baby Merino stricken, statt in zwei Fäden Kids Silk. Geht das und wie viel Wolle bräuchte ich dann? Muss ich dann auch zwei Fäden in Baby Merino nehmen?
31.12.2025 - 21:01DROPS Design answered:
Liebe Marion, Sie brauchen dann auch 2 Fäden. Für die Berechnung der Garnmenge müssten Sie Ihre Größe angeben. Sie können aber auch selbst rechnen: Die Garnmenge durch die g pro Knäuel von Kid-Silk teilen (also z.B. Gr. S 275 g durch 25 g = 11 Knäuel), dann die Lauflänge pro Knäuel = 210 Meter, 210 Meter mal 10 = 2310 Meter, diese Anzahl an Metern brauchen Sie auch, wenn Sie mit 2 Fäden Baby Merino stricken, 50 g Baby Merino = 175 m, 2310 durch 175 = 13,2, also 14 Knäuel Baby Merino. Beachten Sie, dass das Garngewicht schwerer ist und die Puffärmel dadurch anders fallen können. Sie könnten auch 1 Faden Baby Merino und 1 Faden Kid-Silk nehmen. Viel Spaß beim Stricken!
24.02.2026 - 18:16
![]() Gjh wrote:
Gjh wrote:
Ik heb van Kids silk 10 bollen liggen hoeveel bollen heb ik nodig voor de trui ?
27.09.2025 - 19:47DROPS Design answered:
Dag Gjh,
Bovenaan bij de materialenlijst staat per maat aangegeven hoeveel gram je nodig hebt. (Het eerste getal geldt voor maat S, het tweede getal voor maat M, enzovoort). 1 bol Kid-Silk weegt 25 gram.
27.09.2025 - 19:53
![]() Loes wrote:
Loes wrote:
Hoe moeilijk is het om dit vest te breien voor een beginner?
01.11.2024 - 19:14
![]() Mies Romeijn wrote:
Mies Romeijn wrote:
Waarom moet je boven het boord 38 steken meerderen bij patroon 227-40 .wordt het boord dan niet tewijt dat moet toch sluited zijn?
04.09.2024 - 18:56DROPS Design answered:
Dag Mies,
In dit geval wordt er juist met opzet gemeerderd om te voorkomen dat de boordsteek het werk bij elkaar trekt.
12.09.2024 - 20:52
![]() Sanne wrote:
Sanne wrote:
Ik vraag me hetzelfde af als Peters op 13-01-2024. Hoe kan je met A3 beginnen rechtsonder, als er nog geen rij gebreid is? Of moet ik het patroon anders lezen? Daarnaast snap ik niet hoe ik de witte bolletjes in de telpatronen aan de verkeerde kant averecht moet breien, terwijl in het telpatroon ook staat aangegeven dat deze steken aan de verkeerde kant patent gebreid moeten worden. Kunnen jullie uitleggen hoe de telpatronen gelezen moeten worden? Alvast bedankt!
01.08.2024 - 19:23
![]() Sanne wrote:
Sanne wrote:
In welke maat is het vest op de foto gebreid?
30.07.2024 - 13:40DROPS Design answered:
Dag Sanne,
Het vest op de foto is in maat S gebreid.
30.07.2024 - 21:46
|
||||||||||
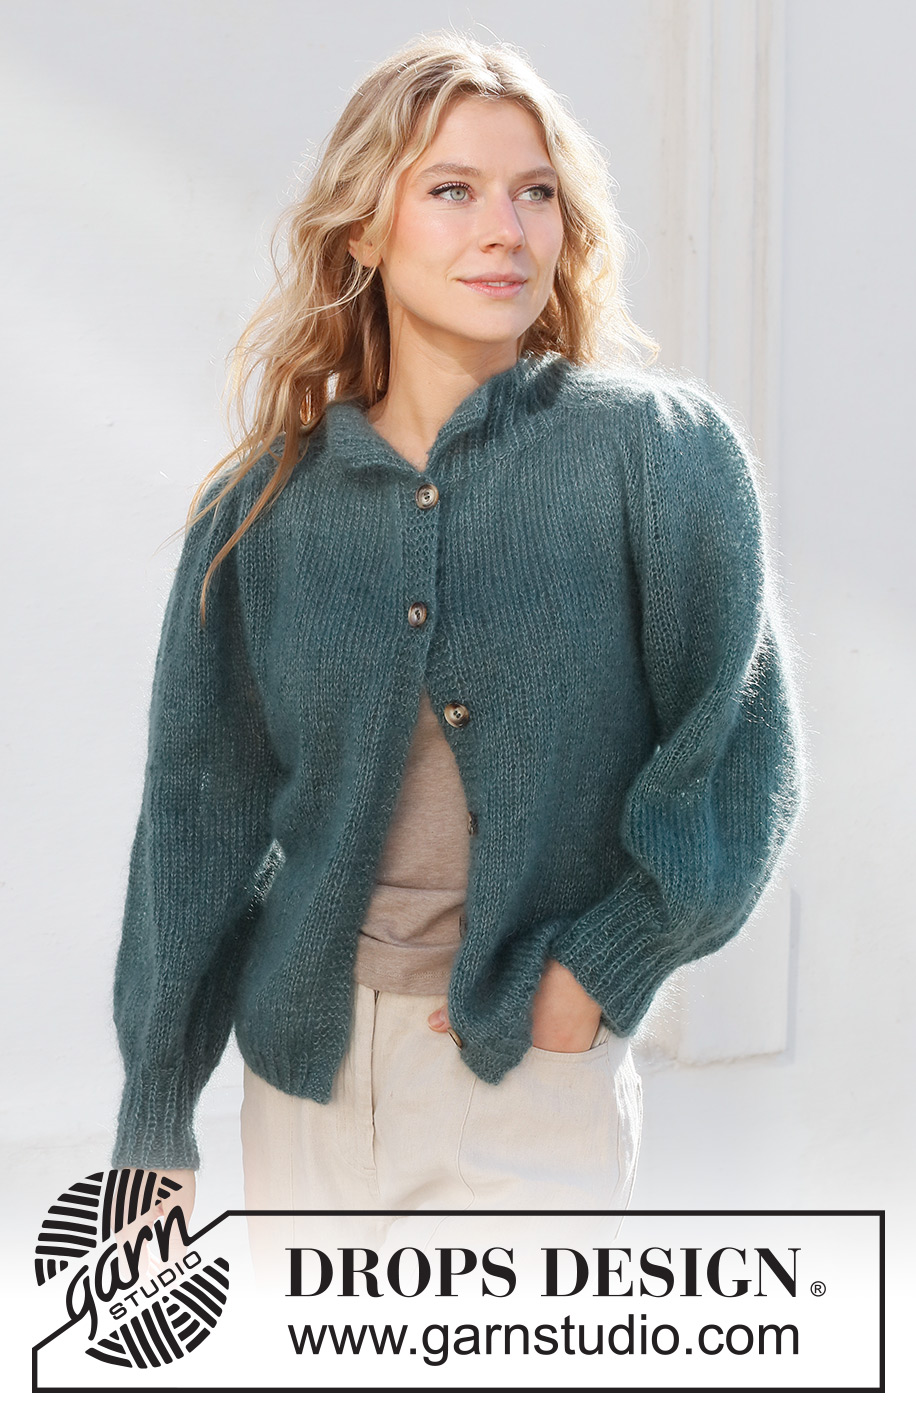
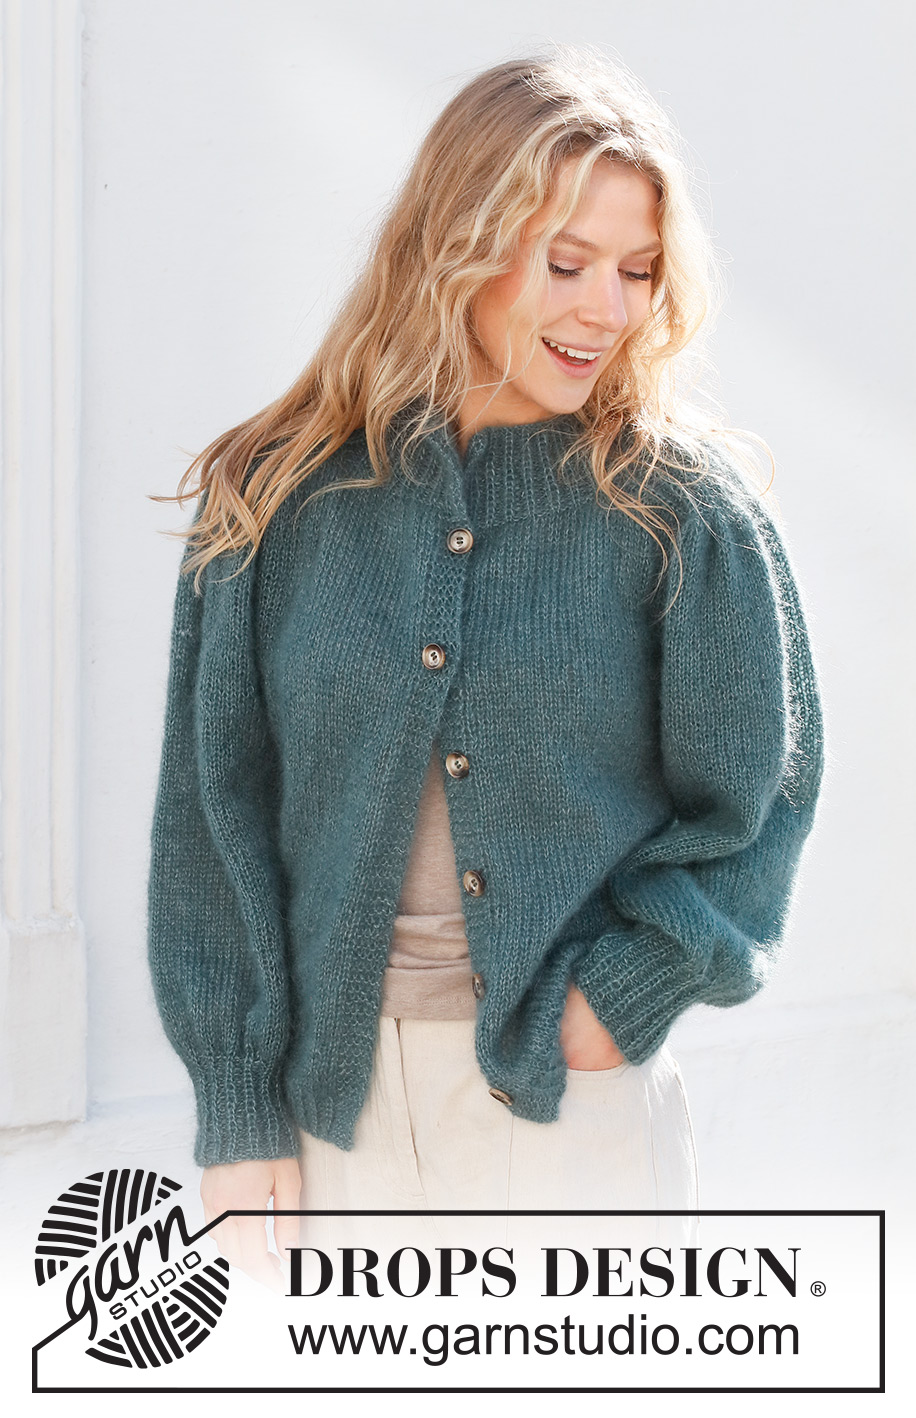
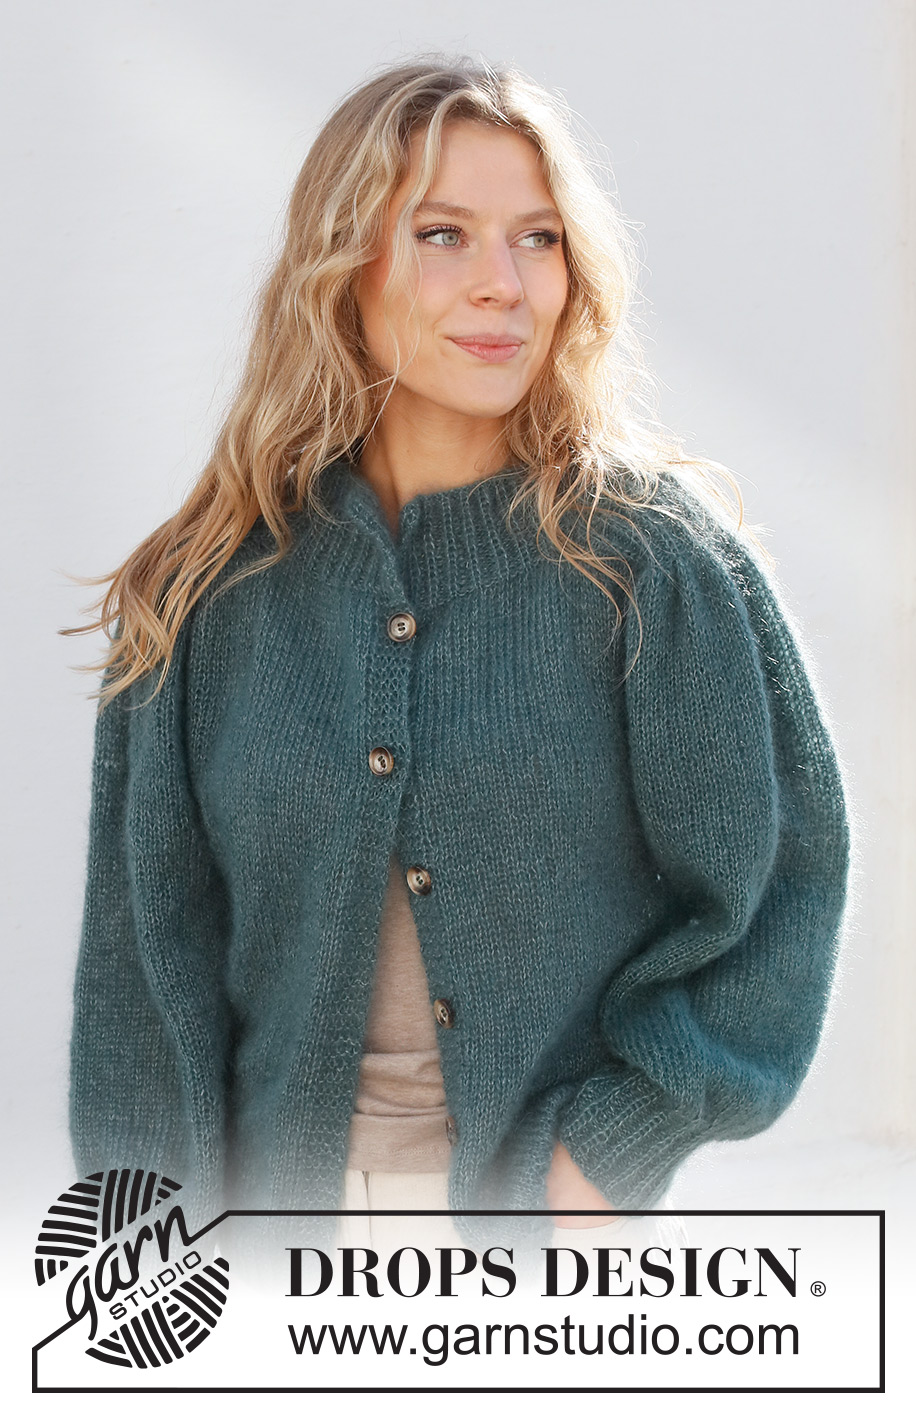
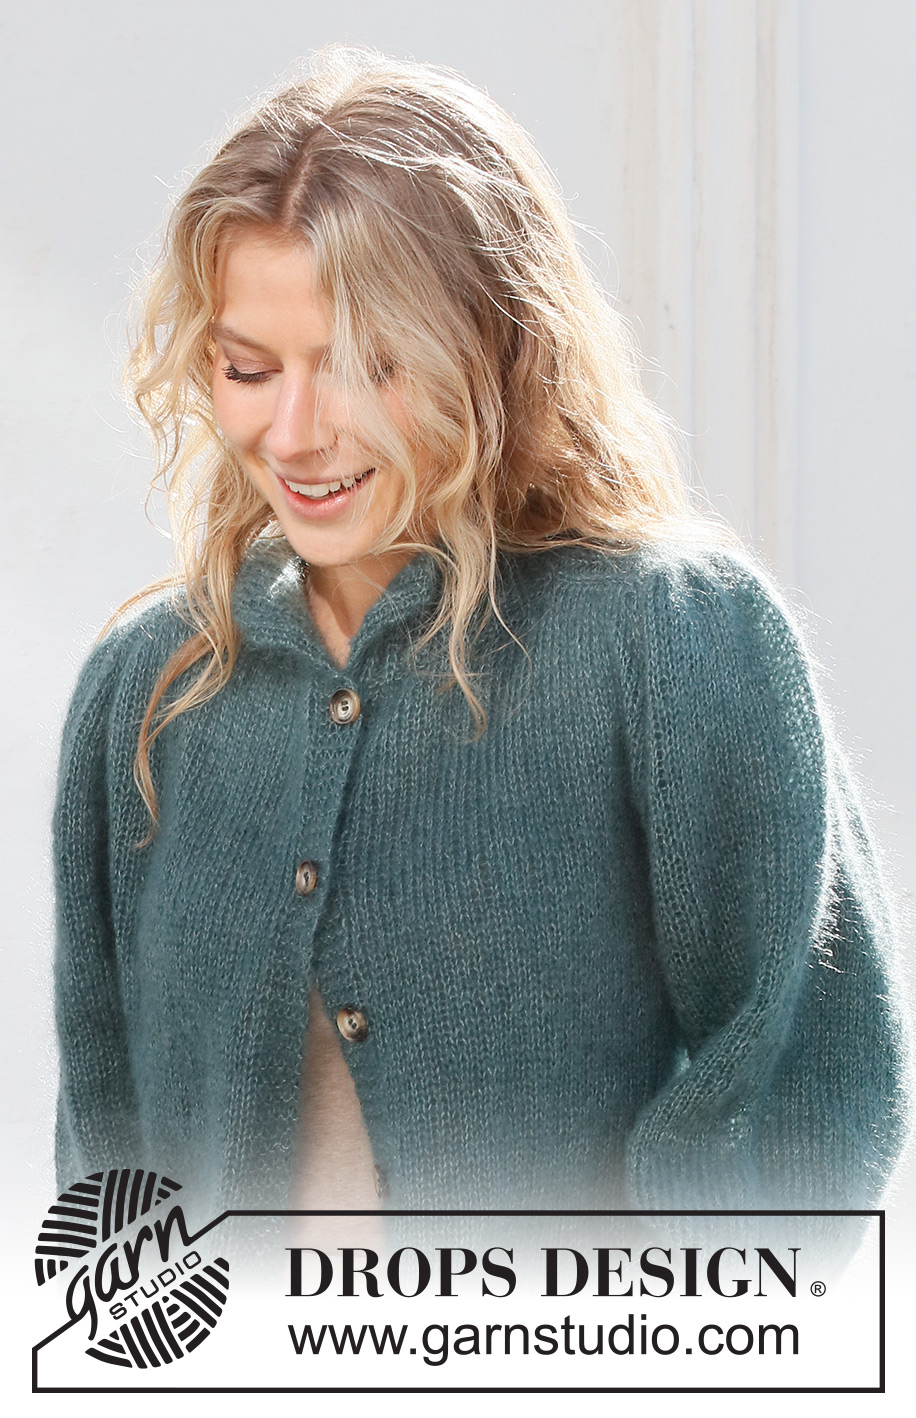
Falling Water#fallingwaterjacket |
||||||||||
 |
 |
|||||||||
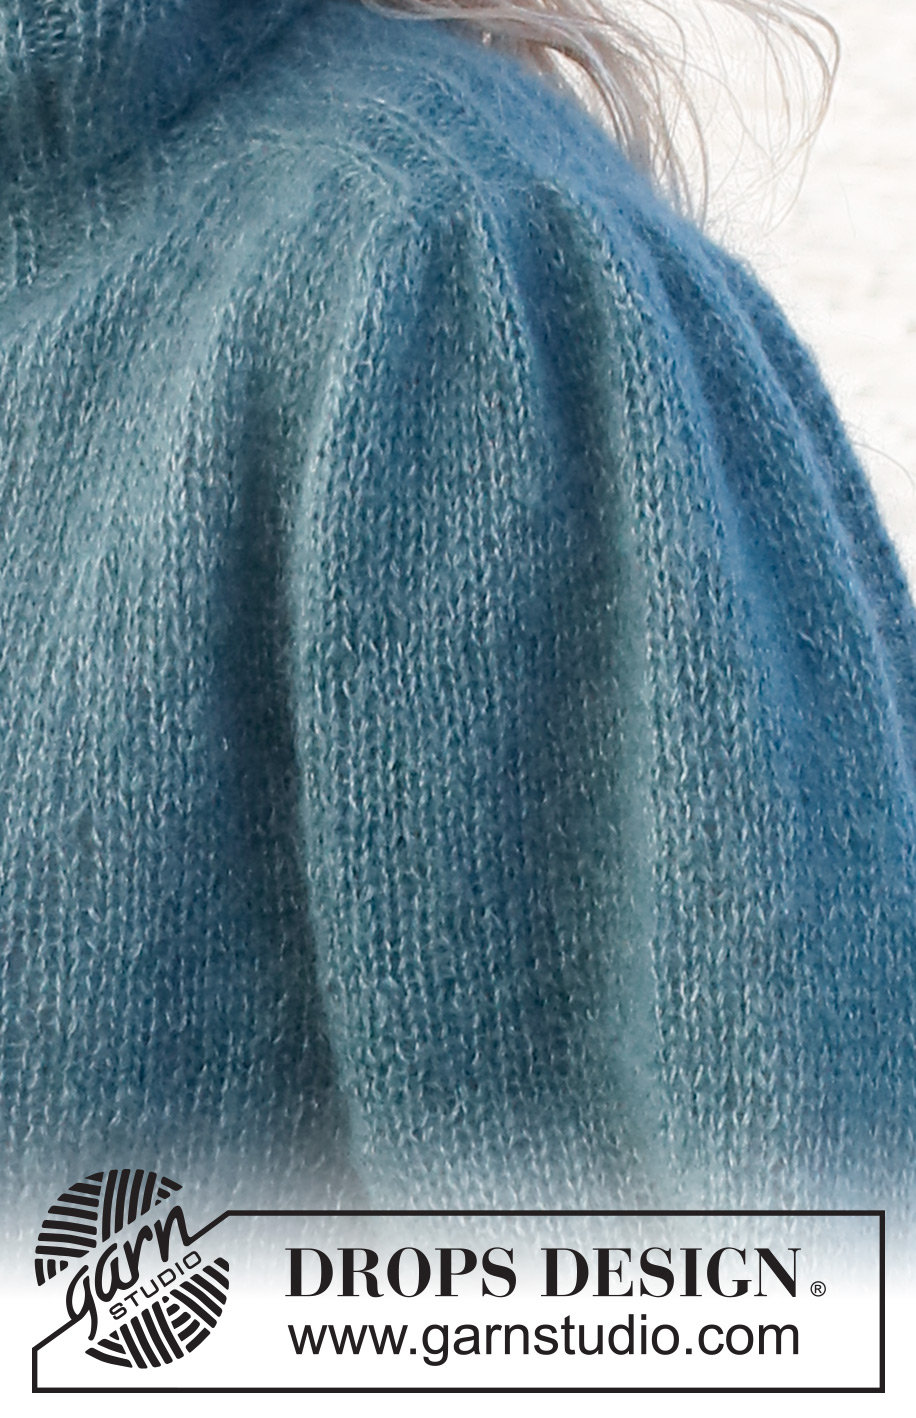
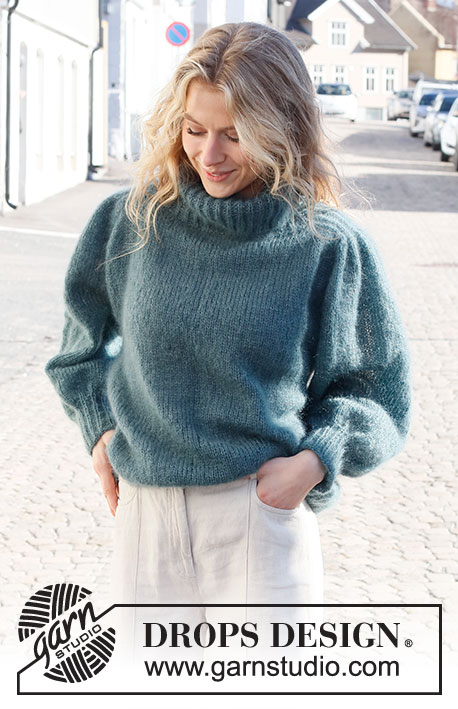
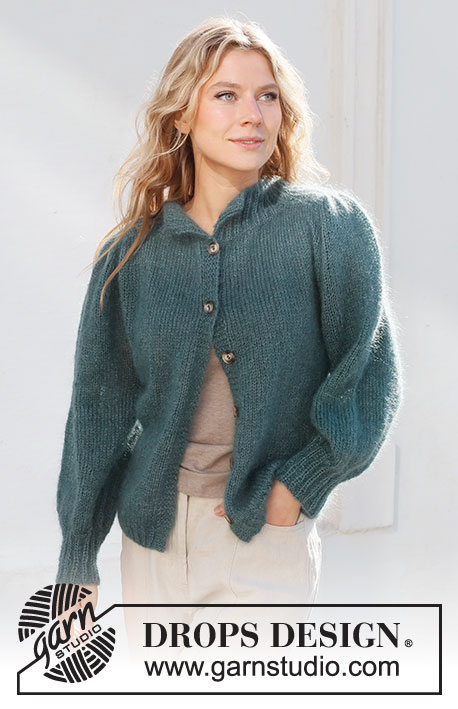
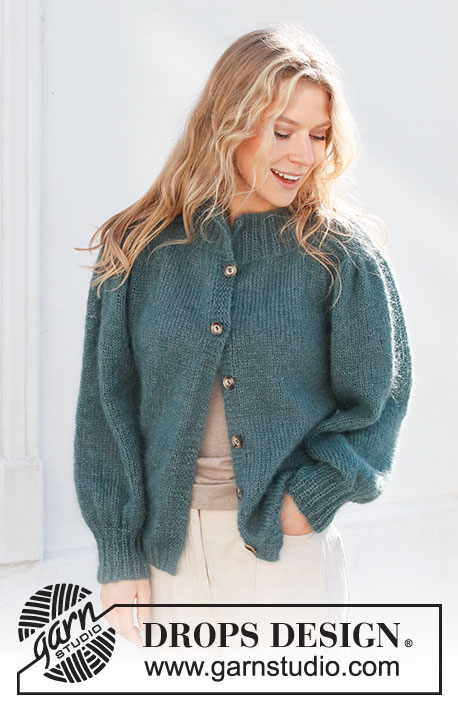
Knitted jacket in 2 strands DROPS Kid-Silk. The piece is worked top down with saddle shoulders, puffed sleeves and high neck. Sizes S - XXXL.
DROPS 227-40 |
||||||||||
|
------------------------------------------------------- EXPLANATIONS FOR THE PATTERN: ------------------------------------------------------- RIDGE/GARTER STITCH (worked back and forth): Knit all rows. 1 ridge = knit 2 rows. PATTERN: See diagrams A.1 to A.3. The diagrams show all rows in the pattern from the right side. INCREASE/DECREASE TIP (evenly spaced): To work out how to increase/decrease evenly, count the number of stitches on to be increased/decreased over (e.g. 7 stitches) and divide by the number of increases/decreases to be made (e.g. 2) = 3.5. In this example, increase by making 1 yarn over after alternately each 3rd and 4th stitch. On the next row work the yarn overs twisted to avoid holes. When decreasing, knit together alternately each 2nd and 3rd stitch and each 3rd and 4th stitch. INCREASE TIP-1: All increases are worked from the right side! Increase 1 stitch by making 1 yarn over. On the next row (wrong side) knit the yarn over twisted to avoid a hole. INCREASE TIP-2: All increases are worked from the right side! BEFORE MARKER-STITCH: The new stitch twists to the right. Use the left needle to pick up the strand between 2 stitches from the previous round, pick up the back strand and knit in the front loop. AFTER MARKER-STITCH: The new stitch twists to the left. Use the left needle to pick up the strand between 2 stitches from the previous round, pick up the front strand and knit in the back loop. DECREASE TIP (for sleeves): Decrease 1 stitch on either side of the marker thread as follows: Work until there are 3 stitches left before the marker thread, knit 2 together, knit 2 (marker thread sits between these 2 stitches), slip 1 stitch as if to knit, knit 1 and pass the slipped stitch over the knitted stitch (2 stitches decreased). BUTTONHOLES: Work buttonholes on the right band (when the garment is worn). Work from the right side when there are 3 stitches left on the row as follows: Make 1 yarn over, knit 2 together and knit 1. On the next row (wrong side), knit the yarn over to leave a hole. The first buttonhole is worked from the right side when the front/back pieces and shoulders are worked onto the same needle. The other 5-5-5-6-6-6 buttonholes are worked with 9½-9½-10-10-8½-9 cm between each one. CASTING-OFF TIP: To avoid the cast-off edge being tight you can cast off with a larger size needle. If the edge is still tight, make 1 yarn over after approx. each 4th stitch at the same time as casting off; the yarn overs are cast off as normal stitches. ------------------------------------------------------- START THE PIECE HERE: ------------------------------------------------------- JACKET – SHORT OVERVIEW OF THE PIECE: The jacket is worked from top down with 2 strands. The neck is worked back and forth, then divided for the front and back pieces and the shoulders. The shoulders are continued back and forth, before replacing the front and back pieces on the needle; stitches are picked up along the sides of the shoulders. The yoke is continued back and forth from mid-front, then divided for the body and sleeves. The body is continued back and forth. The sleeves are worked in the round with short circular needle/double pointed needles. NECK: Cast on 114-114-127-127-143-143 stitches with circular needle size 3 mm and 2 strands DROPS Kid-Silk. Work pattern as follows: 1 edge stitch in GARTER STITCH – read description above, A.3 over the next 24-24-27-27-30-30 stitches, A.2 over the next 12-12-14-14-16-16 stitches, work the first stitch in A.2, A.1 over the next 36-36-39-39-45-45 stitches, work the first 2 stitches in A.1, A.2 over the next 12-12-14-14-16-16 stitches, work the first stitch in A.2, A.1 over the next 24-24-27-27-30-30 stitches, 1 edge stitch in garter stitch. Continue this pattern back and forth for 8 cm – adjust so the next row is from the right side and work as follows: Knit 7 and decrease 2 stitches over these stitches – read INCREASE/DECREASE TIP (= the 7 band stitches are now 5), knit 18-18-21-21-24-24 and decrease 1-0-2-1-3-3 stitches over these stitches (= front piece), work pattern as before over the next 13-13-15-15-17-17 stitches (= shoulder), knit 38-38-41-41-47-47 and decrease 4-2-3-1-5-5 stitches over these stitches (= back piece), work pattern as before over the next 13-13-15-15-17-17 stitches (= shoulder), knit 18-18-21-21-24-24 and decrease 1-0-2-1-3-3 stitches over these stitches (= front piece), knit the last 7 stitches and decrease 2 stitches over these stitches (= the 7 band stitches are now 5). There are 104-108-116-120-128-128 stitches on the needle (17-18-19-20-21-21 stitches on each front piece, 34-36-38-40-42-42 stitches on the back piece and 13-13-15-15-17-17 stitches on each shoulder. Purl 1 row from the wrong side, with the first and last 5 stitches knitted (bands) and pattern worked over the 13-13-15-15-17-17 shoulder stitches on each side. Now work the shoulders; leave the other stitches on the needle or place them on a thread. SADDLE SHOULDERS: Starting from the right side with circular needle size 3 mm and 2 strands DROPS Kid-Silk work as follows: Cast on 1 stitch (= edge stitch), work the 13-13-15-15-17-17 stitches in pattern A.2 as before, at the same time as each purl-1 is increased to purl-2 – read INCREASE TIP-1 (= 6-6-7-7-8-8 stitches increased), cast on 1 stitch at the end of the row (= edge stitch) = 21-21-24-24-27-27 stitches. Work 1 row from the wrong side then work the next row from the right side as follows: 1 edge stitch in garter stitch, A.3 until there are 2 stitches left, work the first stitch in A.3 (so the pattern is symmetrical), 1 edge stitch in garter stitch. Continue this pattern back and forth until the piece measures 8-8-9-9-10-10 cm from the purl-increases – adjust so the next row is from the right side. Place these stitches on a thread and work the other shoulder in the same way. Now work the front and back pieces and the shoulders onto the same circular needle size 5 mm, at the same time as stitches are knitted up along the sides of the shoulders. Start on the left front piece, from the right side as follows: LEFT FRONT PIECE: 5 band stitches in garter stitch, work stocking stitch over the next 17-18-19-20-21-21 stitches (left front piece), knit up 14-14-14-15-15-15 stitches inside the edge stitch along the side of the shoulder. SHOULDER: Knit 1, * knit 1 in both the front and back loops of the next stitch, make 1 yarn over *, work from *-* a total of 18-18-21-21-24-24 times, knit 1 in both the front and back loops of the next stitch, knit 1 (= 37-37-43-43-49-49 stitches increased and 58-58-67-67-76-76 stitches on the shoulder). BACK PIECE: Knit up 14-14-14-15-15-15 stitches, inside the edge stitch along the other side of the shoulder, work stocking stitch over the next 34-36-38-40-42-42 stitches (back piece), knit up 14-14-14-15-15-15 stitches inside the edge stitch along the side of the other shoulder. SHOULDER: Knit 1, * knit 1 in both the front and back loops of the next stitch, make 1 yarn over *, work from *-* a total of 18-18-21-21-24-24 times, knit 1 in both the front and back loops of the next stitch, knit 1 (= 37-37-43-43-49-49 stitches increased and 58-58-67-67-76-76 stitches on the shoulder). RIGHT FRONT PIECE: Knit up 14-14-14-15-15-15 stitches, inside the edge stitch along the other side of the shoulder, knit 17-18-19-20-21-21, 5 band stitches in garter stitch (right front piece) – remember the BUTTONHOLES on the right band – read description above. There are 250-254-276-284-306-306 stitches on the needle. YOKE: Insert a marker thread after the band. THE PIECE IS NOW MEASURED FROM HERE! Insert 4 markers as follows: Marker 1: Work 5 band stitches in garter stitch, stocking stitch over the next 31-32-33-35-36-36 stitches, insert the marker in the next stitch (= front piece). Marker 2: Work stocking stitch over the next 56-56-65-65-74-74 stitches, insert the marker in the next stitch (= sleeve). Marker 3: Work stocking stitch over the next 62-64-66-70-72-72, stitches, insert the marker in the next stitch (= back piece). Marker 4: Work stocking stitch over the next 56-56-65-65-74-74 stitches, insert the marker in the next stitch (= sleeve). Work stocking stitch over the next 31-32-33-35-36-36 stitches, 5 stitches in garter stitch (band stitches) (= front piece). Allow the 4 markers to follow your work onwards; they are used when increasing. Continue back and forth with stocking stitch and 5 band stitches in garter stitch on each side. AT THE SAME TIME, on the next from the right side, start to increase for the sleeves and yoke: Increases are worked at the same time, but in size L, XL, XXL and XXXL, the increases on yoke continue after the increases on sleeves are done. Increase as explained below: On the first row from the right side, increase 4 stitches for the sleeves and 4 stitches for the yoke. Increase 1 stitch on each side of the 4 markers – read INCREASE TIP-2 (= 8 increases on the row), as follows: SLEEVE INCREASES: Increase AFTER markers 1 and 3 and BEFORE markers 2 and 4. Increase like this every 2nd row a total of 7-9-6-9-6-8 times = 72-76-79-85-88-92 stitches on the sleeves (including the marker-stitches on each side) YOKE INCREASES: Increase BEFORE markers 1 and 3 and AFTER markers 2 and 4. Increase like this every 2nd row a total of 7-9-11-12-16-21 times = 38-41-44-47-52-57 stitches (+ 5 band stitches) on the front pieces and 76-82-88-94-104-114 stitches on the back piece. When all the increases are finished there are 306-326-344-368-394-422 stitches. Continue with stocking stitch until the piece measures 19-21-22-24-25-27 cm from the marker thread after the neck. Now divide for the body and sleeves on the next row as follows: Work the first 43-46-49-52-57-62 stitches (front piece), place the next 72-76-79-85-88-92 stitches on a thread for the sleeve, cast on 6-6-8-10-10-10 stitches (= in side under sleeve), work the next 76-82-88-94-104-114 stitches (= back piece), place the next 72-76-79-85-88-92 stitches on a thread for the sleeve, cast on 6-6-8-10-10-10 stitches (= in side under sleeve), work the last 43-46-49-52-57-62 stitches (= front piece). The body and sleeves are finished separately. THE PIECE IS NOW MEASURED FROM HERE. BODY: = 174-186-202-218-238-258 stitches. Continue back and forth with stocking stitch and 5 band stitches in garter stitch on each side for 29 cm. Try the jacket on and work to desired length (3 cm left to finished length). On the next row from the wrong side increase 38-41-43-48-52-56 stitches evenly spaced = 212-227-245-266-290-314 stitches. Change to circular needle size 3 mm. Work from the right side as follows: 5 band stitches in garter stitch, A.3 until there are 6 stitches left, work the first stitch in A.3 (so the pattern is symmetrical), 5 band stitches in garter stitch. Continue this pattern for 3 cm. Cast off with knit over Fisherman’s rib and purl over purl – read CASTING-OFF TIP. The jacket measures approx. 56-58-60-62-64-66 cm from the shoulder down. SLEEVES: Place the 72-76-79-85-88-92 stitches from the thread on the one side of the piece on double pointed needles/short circular needle size 5 mm and knit up 1 stitch in each of the 6-6-8-10-10-10 stitches cast on under the sleeve = 78-82-87-95-98-102 stitches. Insert a marker thread in the middle of the new stitches under the sleeve. Start at the marker thread and work stocking stitch in the round for 4 cm. Now decrease 1 stitch on either side of the marker thread – read DECREASE TIP. The decreases in sizes S and M are finished (= a total of 1-1 time). In sizes L, XL, XXL and XXXL repeat the decrease every 8-2½-2-2 cm 1-3-4-4 more time(s) (= a total of 2-4-5-5 times). When all decreases are worked, there are 76-80-83-87-88-92 stitches on the round. Continue working until the sleeve measures 27-25-25-23-22-21 cm from the division. Try the jacket on and work to desired length (9 cm left to finished length). Knit 1 round where you decrease 34-38-38-42-40-41 stitches evenly spaced = 42-42-45-45-48-51 stitches. Change to double pointed needles size 3 mm and work A.1 for 9 cm. Cast off with knit over Fisherman’s rib and purl over purl – remember CASTING-OFF TIP. The sleeve measures approx. 36-34-34-32-31-30 cm from the division. Work the other sleeve in the same way. ASSEMBLY: Sew the buttons onto the left band. |
||||||||||
Diagram explanations |
||||||||||
|
||||||||||
 |
||||||||||
Have you finished this pattern?Tag your pictures with #dropspattern #fallingwaterjacket or submit them to the #dropsfan gallery. Do you need help with this pattern?You'll find 36 tutorial videos, a Comments/Questions area and more by visiting the pattern on garnstudio.com. © 1982-2026 DROPS Design A/S. We reserve all rights. This document, including all its sub-sections, has copyrights. Read more about what you can do with our patterns at the bottom of each pattern on our site. |
||||||||||


With over 40 years in knitting and crochet design, DROPS Design offers one of the most extensive collections of free patterns on the internet - translated to 17 languages. As of today we count 324 catalogues and 12290 patterns translated into English (UK/cm). 12290
We work hard to bring you the best knitting and crochet have to offer, inspiration and advice as well as great quality yarns at incredible prices! Would you like to use our patterns for other than personal use? You can read what you are allowed to do in the Copyright text at the bottom of all our patterns. Happy crafting!
Post a comment to pattern DROPS 227-40
We would love to hear what you have to say about this pattern!
If you want to leave a question, please make sure you select the correct category in the form below, to speed up the answering process. Required fields are marked *.