
Popular categories
Looking for a yarn?



































Comments / Questions (40)
 Anna N wrote:
Regarding the v-neck decrease: Decrease like this every 4th row 1 time (= the first decrease is explained above), every 2nd row 12-12-13-13-14-14 times, then every 4th row 3 times = 16-16-17-17-18-18 stitches decreased What do you mean every 4th row/2nd row? After finishing 28cm of pattern I need to work on a decrease? And then after 4 rows I need to decrease again? And then after 2 rows? Is this right? Also for the row count 2 rows = 1 right side + wrong side rows, right?
22.09.2026 - 09:09DROPS Design answered:
Dear Anna, when piece measures 28 cm (first size), work the first decrease for V-neck, then work 3 rows without decreasing for V-neck and then decrease 12 times every other row (every row from RS = 1 row from RS with decrease, 1 row from WS without), then decrease 3 times on every 4th row (1 row with decrease, 3 rows without decrease). Happy knitting!
23.09.2026 - 07:31
Anna N wrote:
Hello! For the back piece cast off: "At the beginning of the next 2 rows cast off 2-4-4-4-7-11 stitches for the armholes" Is it cast off 1 stitch in the beginning and end of each row? Then we would reduce 4 stitches which matches with the stitch count mentioned above.
09.09.2026 - 01:08DROPS Design answered:
Hi Anna, In the smallest size, you cast off 2 stitches at the beginning of the first row, turn and cast off 2 stitches at the beginning of the 2nd row. In the next three sizes you cast off 4 stitches at the beginning of the 2 rows. Regards, Drops Team.
09.09.2026 - 06:14
 Anja wrote:
Hallo, wie stricke ich bei Größe S nach Abnahme für den Ärmel das Muster weiter? Die zwei Maschen die ich zusammenstricken sind ja die Rand-Maschen und 1. Masche. Oder stricke ich das 1. Muster nur halb oder lasse ich es ganz weg? Danke
06.09.2026 - 17:38DROPS Design answered:
Liebe Anja, nach 1 cm wird man in der Runde stricken, so keine Randmaschen mehr - eine Markierung setzen Sie in der Mitte unten und dann nehmen Sie für den Ärmel wie unter ABNAHMETIPP (gilt für die untere Ärmelmitte): beschrieben wird; wenn Sie die Ärmel in Reihen stricken, dann nehmen Sie innerhalb die Randmaschen beidseitig ab. Viel Spaß beim Stricken!
07.09.2026 - 08:51
Britta wrote:
Was ist bei den Abnahmen für den V-Ausschnitt jeden 2. Reihe gemeint mit jede 2. Reihe? Also tatsächlich jede 2. Reihe. Also jede Hinreihe? Oder jede 2.Hinreihe?
17.05.2026 - 21:22DROPS Design answered:
Liebe Britta, wenn man in jeder 2. Reihe abnimmt, soll man in jeder Hinreihe abnehmen, dh 1 Hinreihe mit Abnahme, 1 Rückreihe ohne. Spâter wenn Sie dann in jeder 4. Reihe abnehmen sollen, nehmen Sie in jeder 2. Hinreihe ab = 1 Hinreihe mit Abnahmen, 3 Reihen (= 1 Rückreihe + 1 Hinreihe + 1 Rückreihe) ohne. Viel Spaß beim Stricken!
18.05.2026 - 12:15
 Suzy wrote:
I meant without the button opening.
28.10.2025 - 02:36DROPS Design answered:
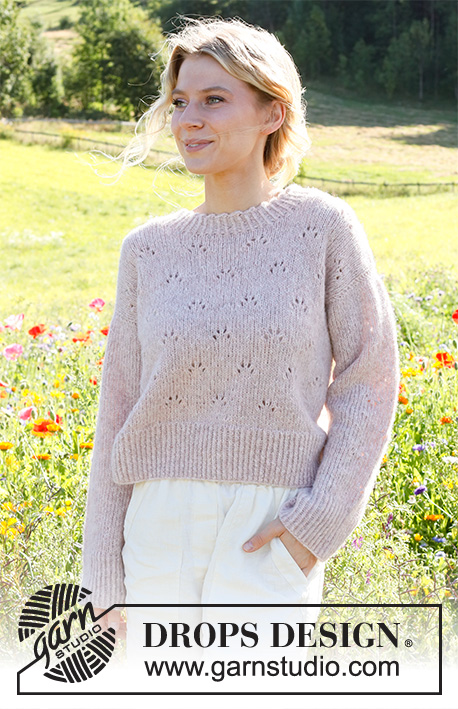
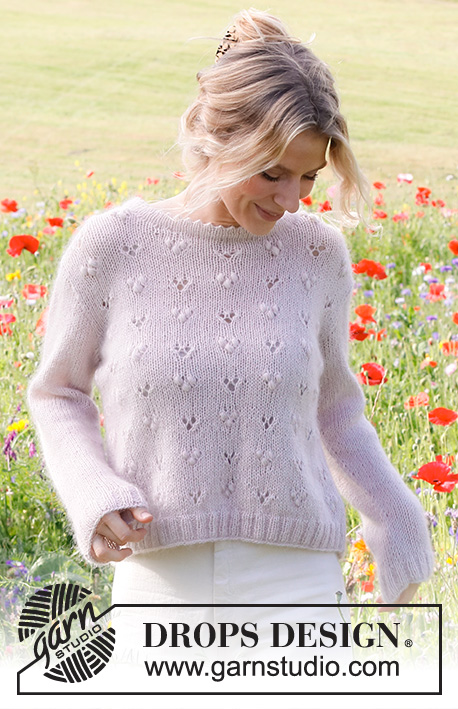
Hi Suzy, Here is a link to our Dropsfan gallery, with a neat way of sewing the bands together to give you a V-neck jumper: https://www.garnstudio.com/dropsfan-gallery.php?patternid=10755&cid=1# We also have a round neck jumper with the same lace pattern: https://www.garnstudio.com/pattern.php?id=10756&cid=19 Hope this is of help. Regards, Drops Team.
28.10.2025 - 06:45
Suzy wrote:
This would be lovely as a V-neck sweater too. I would like to put in a request for instructions for just that - the same sweater but without the buttons. Thank you.
21.10.2025 - 17:25
 Astrid Scholten wrote:
Nog een vraag: hoe pak ik het aan als ik in een voorpand een zak wil inbreien? Alvast bedankt.
17.08.2025 - 21:32DROPS Design answered:
Dag Astrid,
Het is voor ons helaas niet mogelijk om patronen aan te passen naar persoonlijke wensen, maar er is wel een video waarin is uitgelegd hoe je een ingebreide zak kunt maken. Deze vind je hier.
28.09.2025 - 09:33
Astrid Scholten wrote:
Dag, Ik brei met naalden 5 mm. st. 17 st. 10 cm en 22 nld. 9 cm. Eigenlijk moet ik voor het patroon voor de hoeveelheid in de hoogte 10 cm. hebben. Hoe kan ik dat aanpakken?
28.07.2025 - 21:23DROPS Design answered:
Dag Astrid,
Voor dit patroon is het belangrijk dat de stekenverhouding in de breedte klopt. Voor de hoogte is het minder erg dat het niet helemaal klopt, want je kunt de aangegeven centimeters in de hoogte aanhouden en niet het aantal naalden.
28.07.2025 - 21:36
Larysa wrote:
For the V-Neck decrease, I know you have to decrease on every 2nd and 4th row a specified number of times. My question is would you decrease twice on row 4, as 2 is a multiple of 4. That would mean row 4, 8 and 12 would have 2 decreases. Is that correct? Thank you!
26.01.2025 - 20:55DROPS Design answered:
Hi Larysa, No, you decrease 1 stitch for the V-neck first every 4th row one time, then decrease 1 stitch every 2nd row the correct number of times and finally every 4th row again the correct number of times. So always 1 stitch decreased on a decrease row. Happy knitting!
27.01.2025 - 07:20
 Aurélie wrote:
Bonjour, Je ne comprends pas les explications pour la bordure droite. Où doit s'arrêter la bordure? Je n'ai pas d'anneau marqueur dans le dos selon les explications. La bordure n'est pas en une seule partie? Est-ce qu'il faut relever les mailles jusqu'à l'épaule opposée?
22.01.2025 - 23:50DROPS Design answered:
Bonjour Aurélie, le marqueur au milieu de l'encolure dos est indiqué à la fin du paragraphe ASSEMBLAGE; effectivement, la bordure des devants se tricote en 2 parties, pour le devant droit, on commence sur l'endroit en bas du devant et on termine au milieu de l'encolure dos = au marqueur; pour le devant gauche, on commence au marqueur et on termine en bas du devant gauche. Bon tricot!
23.01.2025 - 10:19
|
||||||||||||||||||||||
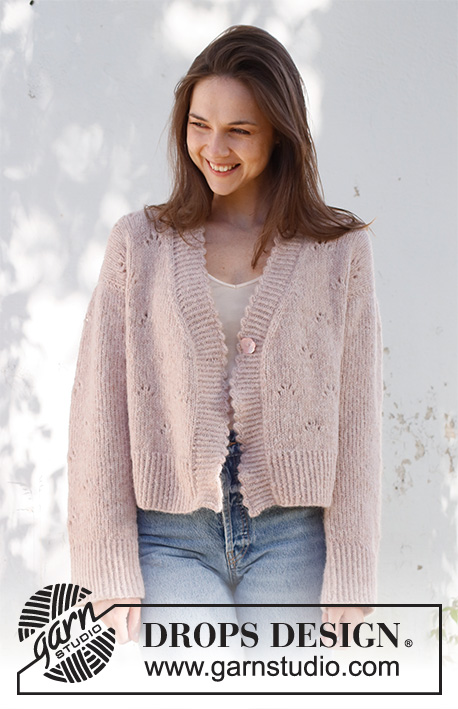
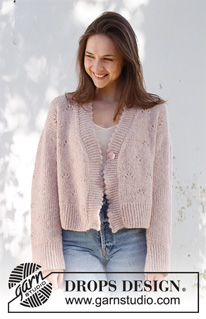
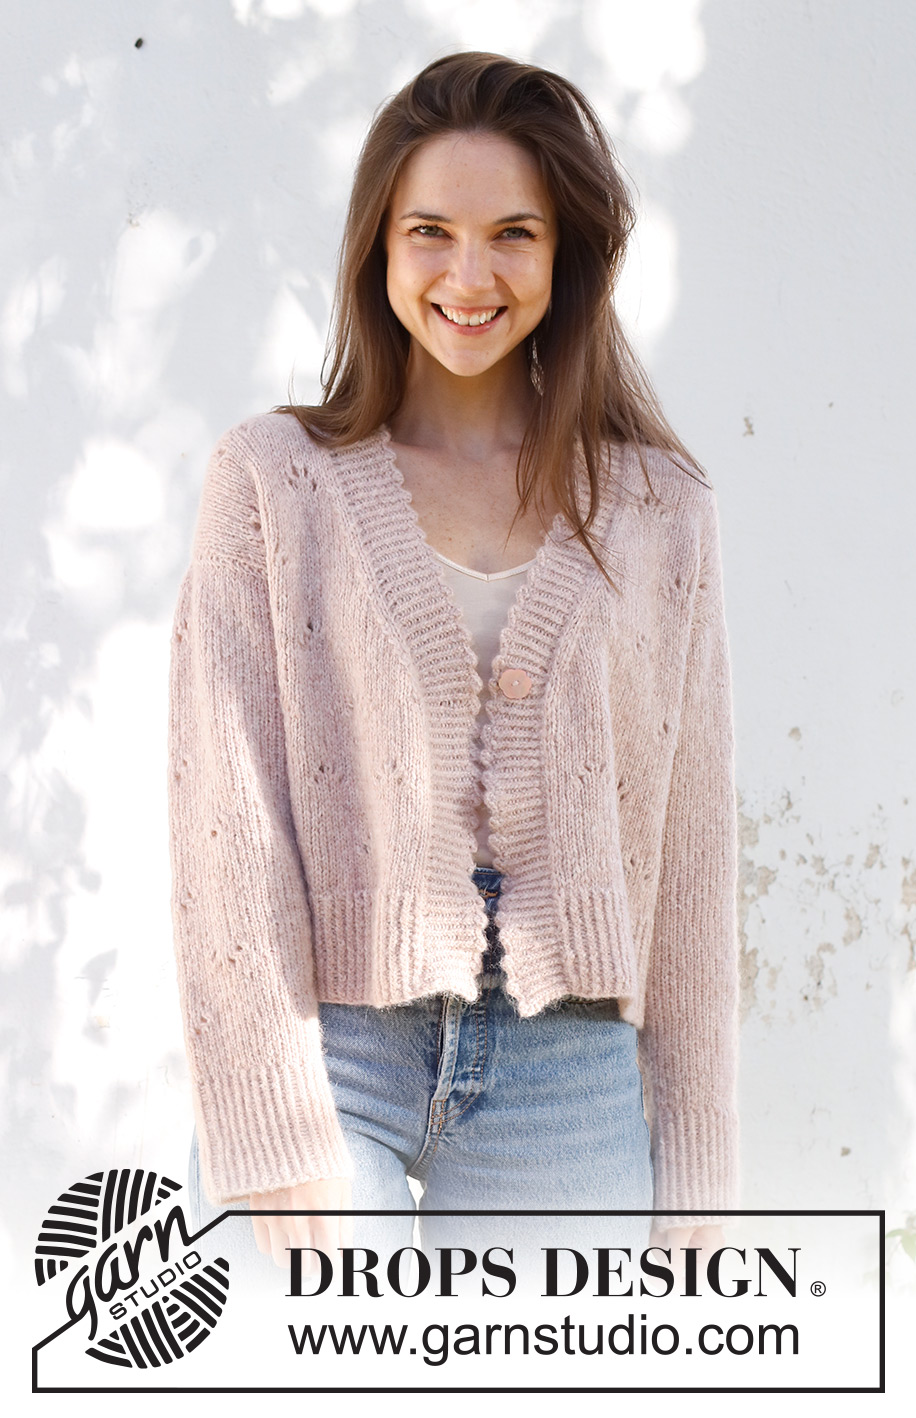
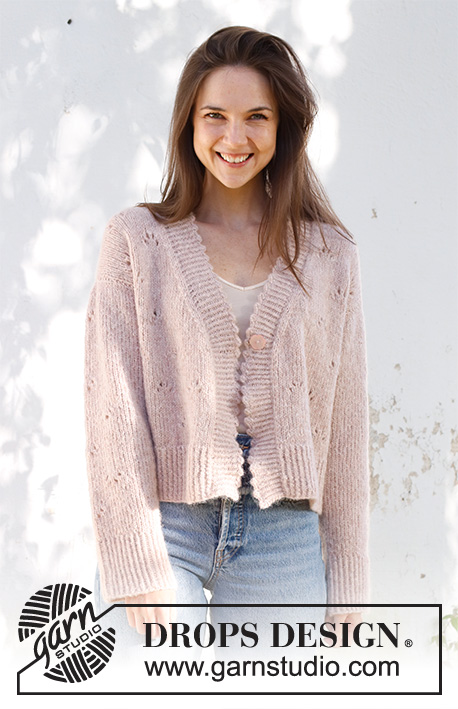
Sweetness Imprint#sweetnessimprintcardi |
||||||||||||||||||||||
 |
 |
|||||||||||||||||||||
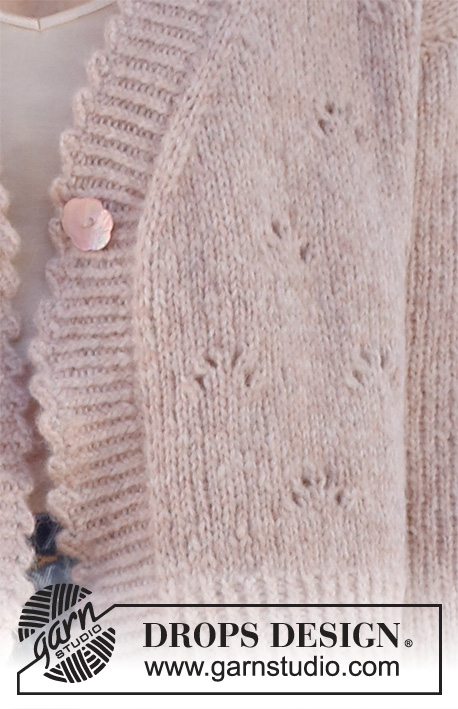
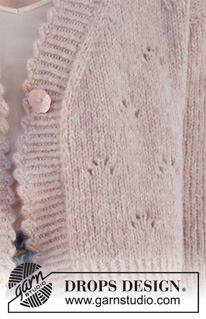
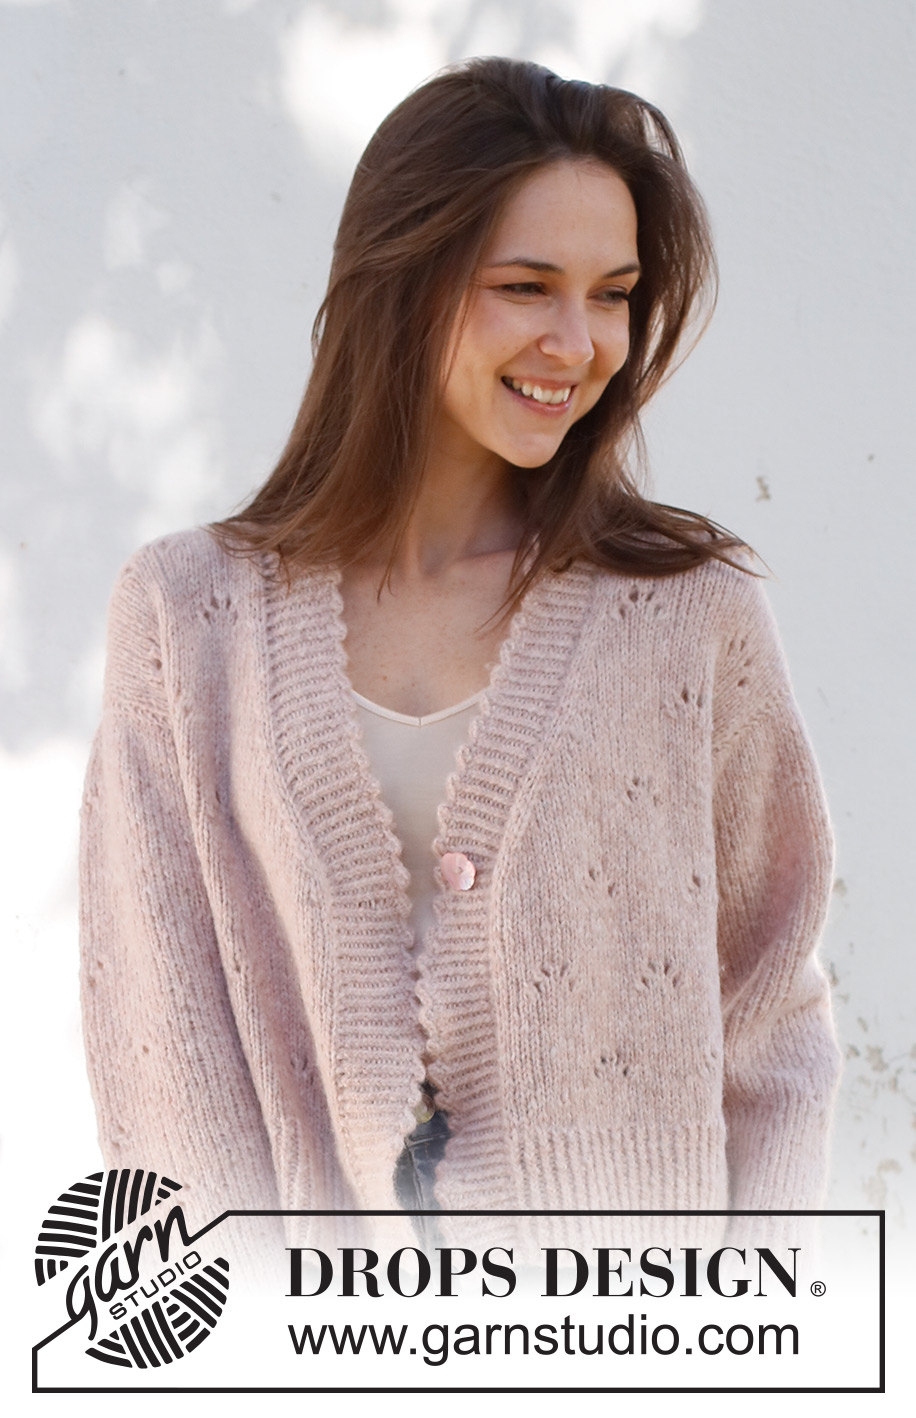
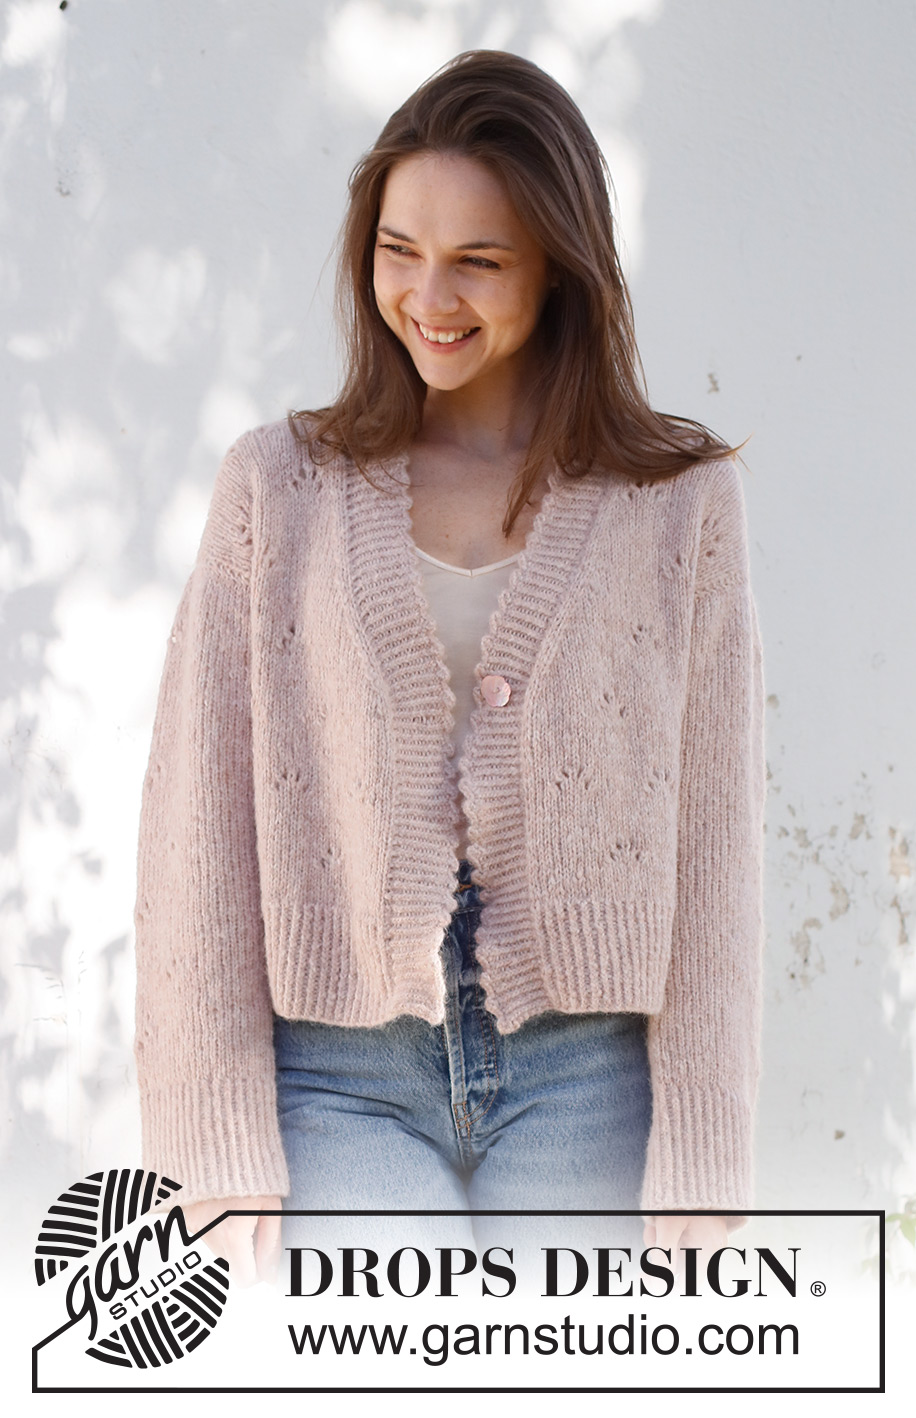
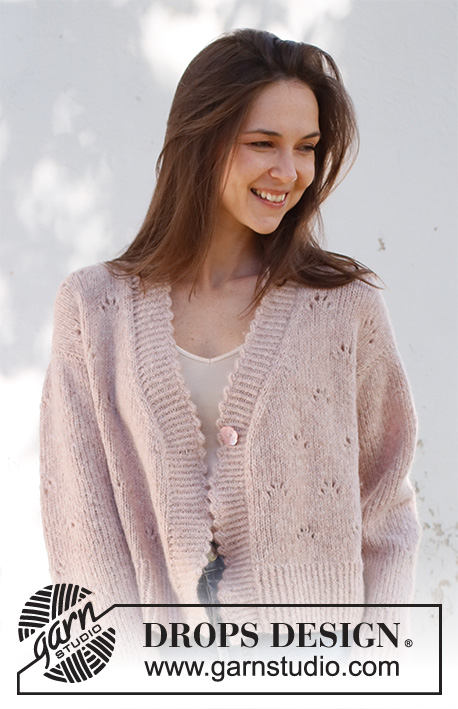
Knitted jacket in DROPS Air. The piece is worked bottom up, with lace pattern and picot-edges. Sizes S - XXXL.
DROPS 231-27 |
||||||||||||||||||||||
|
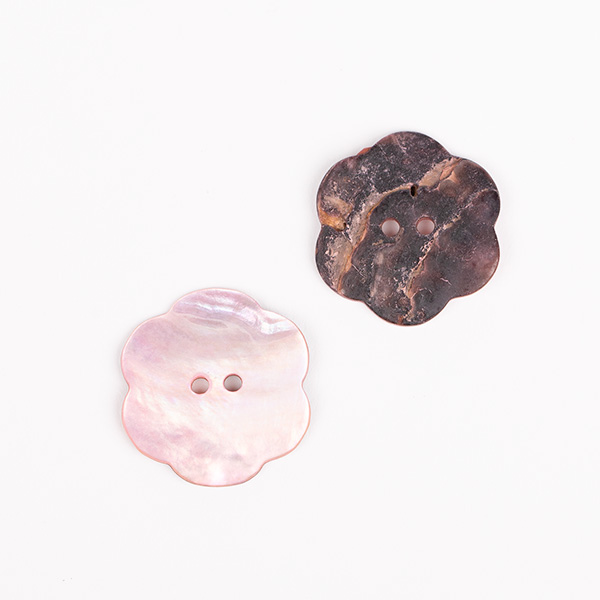
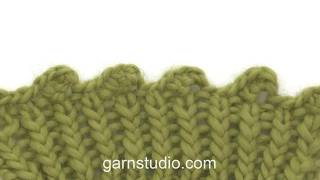
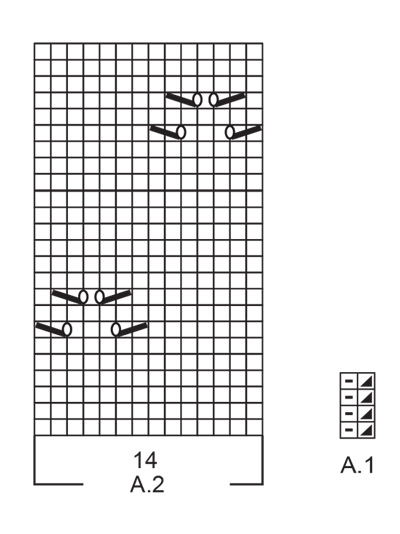
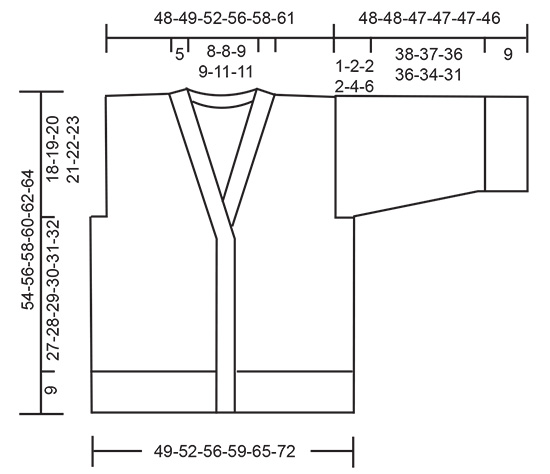
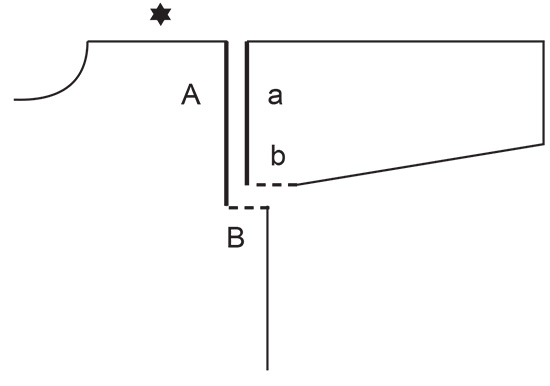
------------------------------------------------------- EXPLANATIONS FOR THE PATTERN: ------------------------------------------------------- RIDGE/GARTER STITCH (worked back and forth): Knit all rows. 1 ridge = knit 2 rows. PATTERN: See diagrams A.1 and A.2. The diagrams show all rows in the pattern from the right side. DECREASE/INCREASE TIP (evenly spaced): To work out how to decrease/increase evenly, count the total number of stitches on needle (e.g. 105 stitches), minus the edge stitches (e.g. 2 stitches) and divide the remaining 103 stitches by the number of decreases/increases to be made (e.g. 20) = 5.1. In this example, decrease by knitting together approx. each 4th and 5th stitch; do not decrease the edge stitches. When increasing, make 1 yarn over after approx. each 5th stitch. On the next row purl the yarn overs twisted to avoid holes. DECREASE TIP (for sleeves): Decrease 1 stitch on either side of the marker as follows: Work until there are 3 stitches left before the marker, knit 2 together, knit 2 (marker sits between these 2 stitches), slip 1 stitch as if to knit, knit 1 and pass the slipped stitch over the knitted stitch (2 stitches decreased). PICOT: Knit 1, * insert right needle between the next 2 stitches (not through the stitches), make 1 yarn over, pull the yarn over between the stitches and place on left needle *, work from *-* 2 more times (= 3 yarn overs on left needle), knit and cast off 7 stitches (= 1 stitch + 3 yarn overs + 3 stitches). Work from *-* and cast off 7 stitches in the same way along the whole edge. When there are not enough stitches to work another picot, cast off the remaining stitches as usual. Cut the strand and pull it through the last stitch. Fasten. CASTING-OFF TIP: To avoid the cast-off edge being tight you can cast off with a larger size needle. If the edge is still tight, make 1 yarn over after approx. each 4th stitch at the same time as casting off; the yarn overs are cast off as normal stitches. ------------------------------------------------------- START THE PIECE HERE: ------------------------------------------------------- JACKET – SHORT OVERVIEW OF THE PIECE: The back and front pieces are worked separately, back and forth on circular needle and bottom up. The sleeves are worked top down, first back and forth on circular needle then in the round with double pointed needles. The piece is sewn together and the bands worked with picot-edges. BACK PIECE: Cast on 104-112-120-126-140-154 stitches (including 1 edge stitch on each side) with circular needle size 4 mm and DROPS Air. Work rib as follows: 1 edge stitch in GARTER STITCH – read description above, A.1 until there is 1 stitch left and 1 edge stitch in garter stitch. Continue this rib back and forth for 9 cm – adjust so the next row is from the right side. Knit 1 row where you decrease 19-21-23-23-27-29 stitches evenly spaced – read DECREASE/INCREASE TIP = 85-91-97-103-113-125 stitches. Change to circular needle size 5 mm. Purl 1 row with 1 edge stitch in garter stitch on each side. Now work pattern as follows: 1 edge stitch in garter stitch, 3-6-9-5-10-16 stitches in stocking stitch, A.2 over the next 70-70-70-84-84-84 stitches (= 5-5-5-6-6-6 repeats of 14 stitches), work the first 7 stitches in A.2, 3-6-9-5-10-16 stitches in stocking stitch and 1 edge stitch in garter stitch. Continue this pattern until the piece measures 36-37-38-39-40-41 cm. REMEMBER THE KNITTING TENSION! At the beginning of the next 2 rows cast off 2-4-4-4-7-11 stitches for the armholes = 81-83-89-95-99-103 stitches. Continue with pattern over the middle 77-77-77-91-91-91 stitches, 1 edge stitch in garter stitch on each side and stocking stitch over the other 1-2-5-1-3-5 stitches until the piece measures 51-53-55-57-59-61 cm – adjust so you have at least 2 rows of stocking stitch after a lace pattern. Continue with stocking stitch and 1 edge stitch in garter stitch on each side and cast off the middle 29-29-31-31-33-33 stitches for the neck. Each shoulder is finished separately. Cast off 1 stitch on the next row from the neck = 25-26-28-31-32-34 stitches on the shoulder. Continue working until the piece measures 54-56-58-60-62-64 cm. Cast off. Work the other shoulder in the same way. RIGHT FRONT PIECE: Cast on 52-56-60-64-72-78 stitches (including 1 edge stitch on each side) with circular needle size 4 mm and DROPS Air. Work rib as follows: 1 edge stitch in garter stitch, A.1 until there is 1 stitch left and 1 edge stitch in garter stitch. Continue this rib back and forth for 9 cm – adjust so the next row is from the right side. Knit 1 row where you decrease 9-10-10-11-13-13 stitches evenly spaced = 43-46-50-53-59-65 stitches. Change to circular needle size 5 mm. Purl 1 row with 1 edge stitch in garter stitch on each side. Now work pattern as follows: 1 edge stitch in garter stitch, 3-3-4-4-5-5 stitches in stocking stitch, A.2 over the next 28-28-28-42-42-42 stitches (= 2-2-2-3-3-3 repeats of 14 stitches), work the first 7-7-7-0-0-0 stitches in A.2 (only applies to sizes S, M, and L; in the other sizes there are no more stitches in A.2), 3-6-9-5-10-16 stitches in stocking stitch and 1 edge stitch in garter stitch. Continue this pattern. OVERVIEW OF THE NEXT SECTION: Now both the V-neck and armholes are worked at the same time – read the next section before continuing. V-NECK: When the piece measures 28-29-30-31-32-33 cm, start to decrease for the V-neck on the next row from the right side as follows: 1 edge stitch in garter stitch, knit 1, slip 1 stitch as if to knit, knit 1 and pass the slipped stitch over the knitted stitch (= 1 stitch decreased), work to end of row. Turn and purl back with 1 edge stitch in garter stitch on each side. Decrease like this every 4th row 1 time (= the first decrease is explained above), every 2nd row 12-12-13-13-14-14 times, then every 4th row 3 times = 16-16-17-17-18-18 stitches decreased – if the decreases occur in the middle of a lace pattern, work stocking stitch instead of pattern. ARMHOLE: When the piece measures 36-37-38-39-40-41 cm, cast off 2-4-4-4-7-11 stitches for the armhole on the next row from the wrong side. When the decreases for the neck and armhole are finished there are 25-26-28-31-32-34 stitches on the shoulder. Continue with stocking stitch and 1 edge stitch on garter stitch on each side until the piece measures 54-56-58-60-62-64 cm. Cast off. LEFT FRONT PIECE: Cast on 52-56-60-64-72-78 stitches (including 1 edge stitch on each side) with circular needle size 4 mm and DROPS Air. Work rib as follows: 1 edge stitch in garter stitch, A.1 until there is 1 stitch left (adjust so you begin and end with 1 purl (from the right side) so the rib matches when the piece is sewn together, and 1 edge stitch in garter stitch. Continue this rib back and forth for 9 cm – adjust so the next row is from the right side. Knit 1 row where you decrease 9-10-10-11-13-13 stitches evenly spaced = 43-46-50-53-59-65 stitches. Change to circular needle size 5 mm. Purl 1 row with 1 edge stitch in garter stitch on each side. Now work pattern as follows: 1 edge stitch in garter stitch, 3-6-9-5-10-16 stitches in stocking stitch, start on stitch 1-1-1-7-7-7 in A.2 and continue A.2 over the next 28-28-28-35-35-35 stitches (= 2-2-2-2½-2½-2½ repeats of 14 stitches), work the first 7 stitches in A.2, 3-3-4-4-5-5 stitches in stocking stitch and 1 edge stitch in garter stitch. Continue this pattern. OVERVIEW OF THE NEXT SECTION: Now both the V-neck and armholes are worked at the same time – read the whole section before continuing. V-NECK: When the piece measures 28-29-30-31-32-33 cm, start to decrease for the V-neck on the next row from the right side as follows: 1 edge stitch in garter stitch, pattern as before until there are 4 stitches left, knit 2 together (1 stitch decreased), knit 1 and 1 edge stitch in garter stitch. Purl 1 row with 1 edge stitch in garter stitch on each side. Decrease like this every 4th row 1 time (= the first decrease is explained above), every 2nd row 12-12-13-13-14-14 times, then every 4th row 3 times = 16-16-17-17-18-18 stitches decreased – if the decreases occur in the middle of a lace pattern, work stocking stitch instead of pattern. ARMHOLE: When the piece measures 36-37-38-39-40-41 cm, cast off 2-4-4-4-7-11 stitches for the armhole on the next row from the right side. When the decreases for the neck and armhole are finished there are 25-26-28-31-32-34 stitches on the shoulder. Continue with stocking stitch and 1 edge stitch on garter stitch on each side until the piece measures 54-56-58-60-62-64 cm. Cast off. SLEEVES: The sleeves are worked top down. Cast on 61-65-69-71-75-79 stitches with circular needle size 5 mm and DROPS Air. Work stocking stitch back and forth for 1-2-2-2-4-6 cm. Then continue in the round as follows: Insert 1 marker at the beginning of the round; allow the marker to follow your work – it is used when decreasing under the sleeve. Change to double pointed needles size 5 mm. Work pattern in the round as follows: 20-22-24-25-27-29 stitches in stocking stitch, A.2 over the next 14 stitches, work the first 7 stitches in A.2 (so the pattern is symmetrical) and 20-22-24-25-27-29 stitches in stocking stitch. When the sleeve measures 3-4-4-4-6-8 cm from the cast-on edge, decrease 1 stitch on each side of the marker – read DECREASE TIP. Decrease like this every 5½-4-3½-3½-3-2 cm a total of 6-7-8-8-9-11 times = 49-51-53-55-57-57 stitches. Continue working until the sleeve measures 39-39-38-38-38-37 cm – adjust so you have worked at least 2 rows of stocking stitch after a lace pattern. There is approx. 9 cm left. Knit 1 round where you increase 11-13-13-13-13-13 stitches evenly spaced = 60-64-66-68-70-70 stitches. Change to double pointed needles size 4 mm and work A.1 for 9 cm. Cast off with knit over twisted-knit and purl over purl – read CASTING-OFF TIP. The sleeve measures approx. 48-48-47-47-47-46 cm. Work the other sleeve in the same way. ASSEMBLY: Sew the shoulder seams – start outermost and work in towards the neck. Sew the sleeve cap to the armhole and sew the split to the bottom of the armhole – see sketch. Sew the side seams from the armhole down, inside the 1 edge stitch. Insert 1 marker mid-back of neck; it is used when working the bands. RIGHT BAND: Start at the bottom of the right front piece, with circular needle size 4 mm and DROPS Air. Knit up 139 to 163 stitches from the right side inside the 1 edge stitch as far as the marker at the back of the neck. The number of stitches should be divisible by 4 + 3. Turn and work rib (from the wrong side) as follows: 1 edge stitch in garter stitch, A.1 until there are 2 stitches left, AT THE SAME TIME as you increase at the beginning of the V-neck as follows (adjust so that the next stitch is a knitted stitch): * Knit 1, 1 yarn over *, work from *-* 4 times (= 4 stitches increased), work the first stitch in A.1 and 1 edge stitch in garter stitch = 143 to 167 stitches. On the next row work the yarn overs twisted to avoid holes, then work the new stitches into A.1. Continue this rib for 2 cm. Now work 1 buttonhole at the bottom of the V-neck. BUTTONHOLE: Make 1 yarn over (after 1 knit-twisted stitch), knit 2 together. On the next row knit the yarn over to leave a hole. Continue the rib until the band measures 4½ cm. Cast off with PICOT – read description above. LEFT BAND: Start at the marker on the neck and knit up the same number of stitches as on the right front piece with circular needle size 4 mm and DROPS Air. Turn and work rib (from the wrong side) as follows: 1 edge stitch in garter stitch, A.1 until there are 2 stitches left, AT THE SAME TIME as you increase at the beginning of the V-neck as follows (adjust so that the next stitch a knitted stitch): * Knit 1, 1 yarn over *, work from *-* 4 times (= 4 stitches increased), work the first stitch in A.1 and 1 edge stitch in garter stitch = 143 to 167 stitches. On the next row work the yarn overs twisted to avoid holes, then work the new stitches into A.1. Continue this rib for 4½ cm. Cast off with picot. Sew the button onto the left band and sew the bands together at the back of the neck. |
||||||||||||||||||||||
Diagram explanations |
||||||||||||||||||||||
|
||||||||||||||||||||||
 |
||||||||||||||||||||||
 |
||||||||||||||||||||||
 |
||||||||||||||||||||||
Have you finished this pattern?Tag your pictures with #dropspattern #sweetnessimprintcardi or submit them to the #dropsfan gallery. Do you need help with this pattern?You'll find 24 tutorial videos, a Comments/Questions area and more by visiting the pattern on garnstudio.com. © 1982-2026 DROPS Design A/S. We reserve all rights. This document, including all its sub-sections, has copyrights. Read more about what you can do with our patterns at the bottom of each pattern on our site. |
||||||||||||||||||||||






With over 40 years in knitting and crochet design, DROPS Design offers one of the most extensive collections of free patterns on the internet - translated to 17 languages. As of today we count 333 catalogues and 12532 patterns translated into English (UK/cm). 12532
We work hard to bring you the best knitting and crochet have to offer, inspiration and advice as well as great quality yarns at incredible prices! Would you like to use our patterns for other than personal use? You can read what you are allowed to do in the Copyright text at the bottom of all our patterns. Happy crafting!
Post a comment to pattern DROPS 231-27
We would love to hear what you have to say about this pattern!
If you want to leave a question, please make sure you select the correct category in the form below, to speed up the answering process. Required fields are marked *.