
Popular categories
Looking for a yarn?


Comments / Questions (41)
![]() Wilma wrote:
Wilma wrote:
Waarom wordt alleen langs het boord de voorbies aangebreid? Kan deze niet over de gehele lengte van de voorpanden aangebreid worden? Dit lijkt zo omslachtig.
08.11.2022 - 11:51DROPS Design answered:
Dag Wilma,
Het eerste stuk van de bies heb je, als het goed is al gebreid aan het begin van de voorpanden. Deze heb je op een hulpnaald gezet, waarna je de rest van het voorpand hebt gebreid. Op het eind wordt de rest van de bies gebreid, waarbij je de 7 steken weer opneemt. De reden dat deze apart wordt gebreid is dat deze met naald 3 mm wordt gebreid. (De panden met naald 4 mm).
08.11.2022 - 19:35
![]() Wilma wrote:
Wilma wrote:
Waarom wordt de voorbies onderaan aan het pand vast gebreid en na het boord apart gebreid en later vast genaaid? Kan de bies niet van onder tot boven aan het pand mee gebreid worden?
07.11.2022 - 16:10DROPS Design answered:
Dag Wilma,
Zie mijn antwoord op je andere vraag: Dit is omdat de bies in een andere naalddikte wordt gebreid.
08.11.2022 - 19:42
![]() Hella wrote:
Hella wrote:
Hallo, vraag over de afwerking. Er staat dat je de voorbies moet doorbreien tot bijna middenachter. Daarna staat, dat je de voorbies lang het middenvoor van het voorpand vastnaait. Vervolgens schoudernaden sluiten en steken opnemen incl. de biessteken. Bij mij hangt er dan nog een stuk van de voorbies los (alleen vastgenaaid langs middenvoor, maar gebreid tot middenachter. Ik lees het waarschijnlijk niet goed, maar vraag toch graag verheldering over dit stukje. Dank voor het antwoord.
09.07.2022 - 15:34DROPS Design answered:
Dag Hella,
Er staat een fout in de beschrijving, zie ik. Je breit de bies niet tot midden achter, maar tot de bies bijna dezelfde lengte heeft als het voorpand. Het is nu gecorrigeerd. Hopelijk kun je zo verder.
24.07.2022 - 12:19
![]() Piana Anne wrote:
Piana Anne wrote:
Le diagramme M1 pour moi c est du point jersey …ne faut il pas intervertir les rangs et commencer avec envers sur l endroit?ceci pou le dos? Merci
28.07.2021 - 11:21DROPS Design answered:
Bonjour Mme Piana, le diagramme M.1 correspond en fait au point mousse autrement dit, on tricote d'abord 1 rang endroit sur l'endroit, puis 1 rang endroit sur l'envers (les mailles se présentent à l'envers, vu sur l'endroit) - la légende des symboles a été complétée pour simplifier). Bon tricot!
28.07.2021 - 13:40
![]() Majbritt Rasmussen wrote:
Majbritt Rasmussen wrote:
Hvor meget garn til hatten?
28.05.2021 - 08:06DROPS Design answered:
Hej Majbritt, 100 gr DROPS Muskat til sommerhatten :)
28.05.2021 - 13:36
![]() Santier wrote:
Santier wrote:
Bonjour, pour ce modèle je ne trouve pas les boutons "smileys",combien mesurent-ils et par quels boutons puis-je éventuellement les remplacer ? MERCI
21.04.2021 - 10:17DROPS Design answered:
Bonjour Mme Santier, ces boutons ne font effectivement plus partie de notre gamme, vous trouverez tous ceux que nous avons actuellement ici, vous pouvez vous orienter sur des boutons de 15 mm. Bon tricot!
21.04.2021 - 13:27
![]() Andrea wrote:
Andrea wrote:
Warum soll die Blende nachher angenäht werden? Die Frage ist öben zwar gestellt, aber nicht richtig beantwortet worden. Vielen Dank schon mal!
13.10.2020 - 17:44DROPS Design answered:
Liebe Andrea, Vorderteile werden mit Nadeln 4 gestrickt, die Blenden werden mit Nadeln 3 gestrickt, deshalb werden sie separat gestrickt und angenäht. Viel Spaß beim stricken!
14.10.2020 - 07:38
![]() Jo wrote:
Jo wrote:
This is a knotting pattern not crochet as labelled
01.05.2020 - 20:16
![]() Rosi wrote:
Rosi wrote:
Was ist der Vorteil, die Blende an der Jacke paddington extra zu stricken um sie dann an zu nähen?
01.04.2020 - 16:48DROPS Design answered:
Liebe Rosi, die Blendemaschen gehören zur Maschenanzahl, die für den Vorderteil angeschlagen ist, diese 7 Maschen stricken Sie im Bündchen 1 M re/1 M li + 1 Randmasche krausrechts (siehe 7Blendemaschen in der Anleitung). Viel Spaß beim stricken!
02.04.2020 - 07:35
![]() Marie-Christine De Bruin wrote:
Marie-Christine De Bruin wrote:
Je ne comprend pas si la bordure verticale est faite en point mousse, en point de riz ou en cotes 1/1. D'autre part le bas du dos est fait de 4 rangées de point mousse puis de 4 rangées de côtes 1/1 ( très mignon) mais pour le bas du devant on nous indique de faire 4 rangées de point jersey ce qui ne me parait pas logique. Qu'en pensez-vous?
24.03.2020 - 14:19DROPS Design answered:
Bonjour Mme De Bruin, je suis désolée, l'erreur était sous le dos, on doit bien avoir d'abord 4 rangs jersey puis 4 rangs de côtes en bas. On termine la bordure des devants (= 7 mailles) tout à la fin (cf Assemblage) en côtes 1/1, avec 1 m lis au point mousse sur le côté. On les coudra ensuite le long des devants. Bon tricot!
24.03.2020 - 14:26
|
|||||||
Paddington#paddingtonjacket |
|||||||
 |
 |
||||||
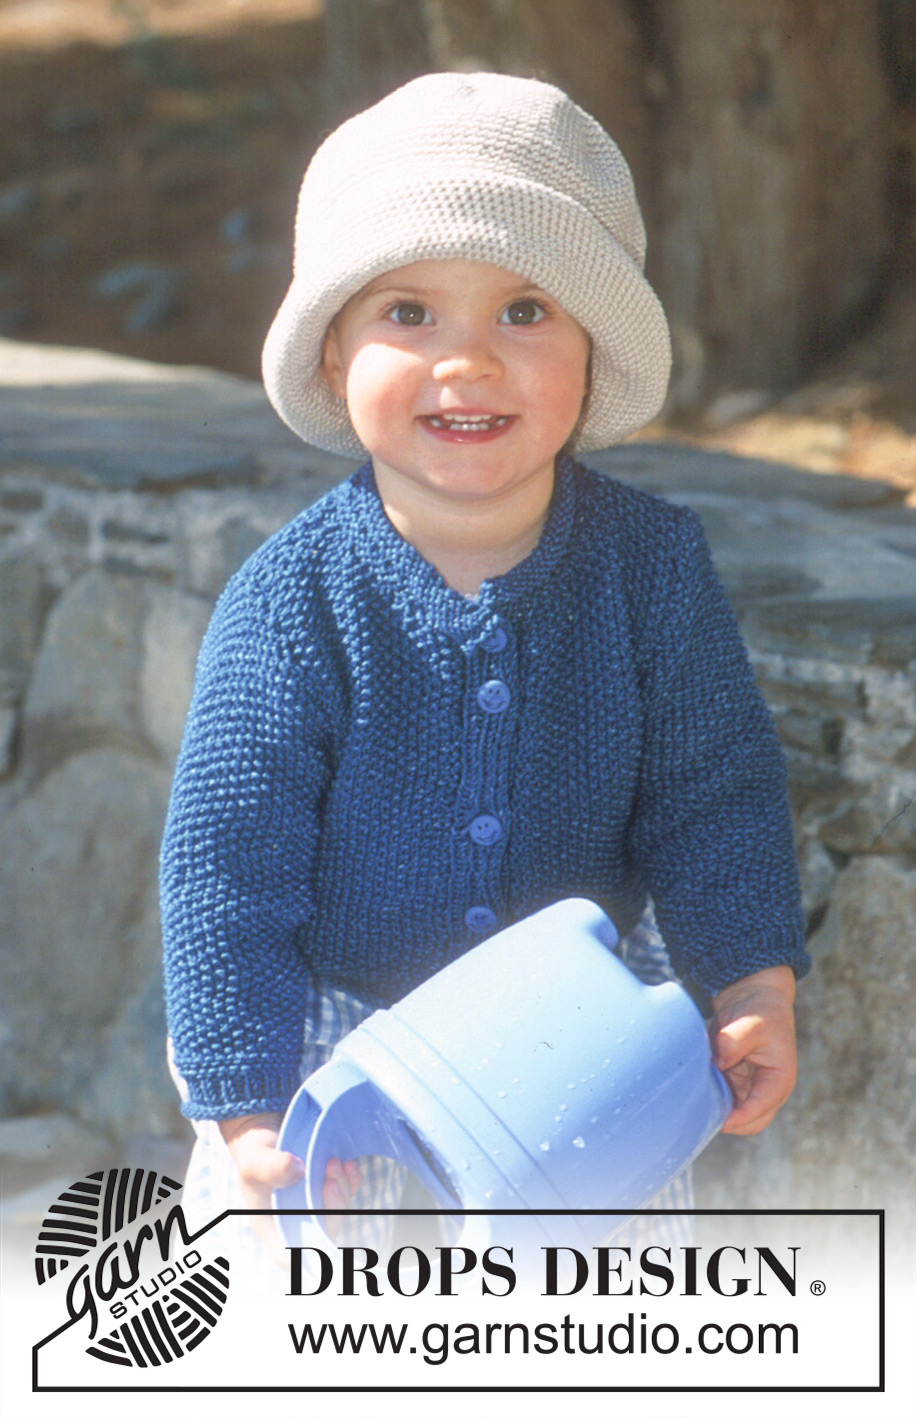
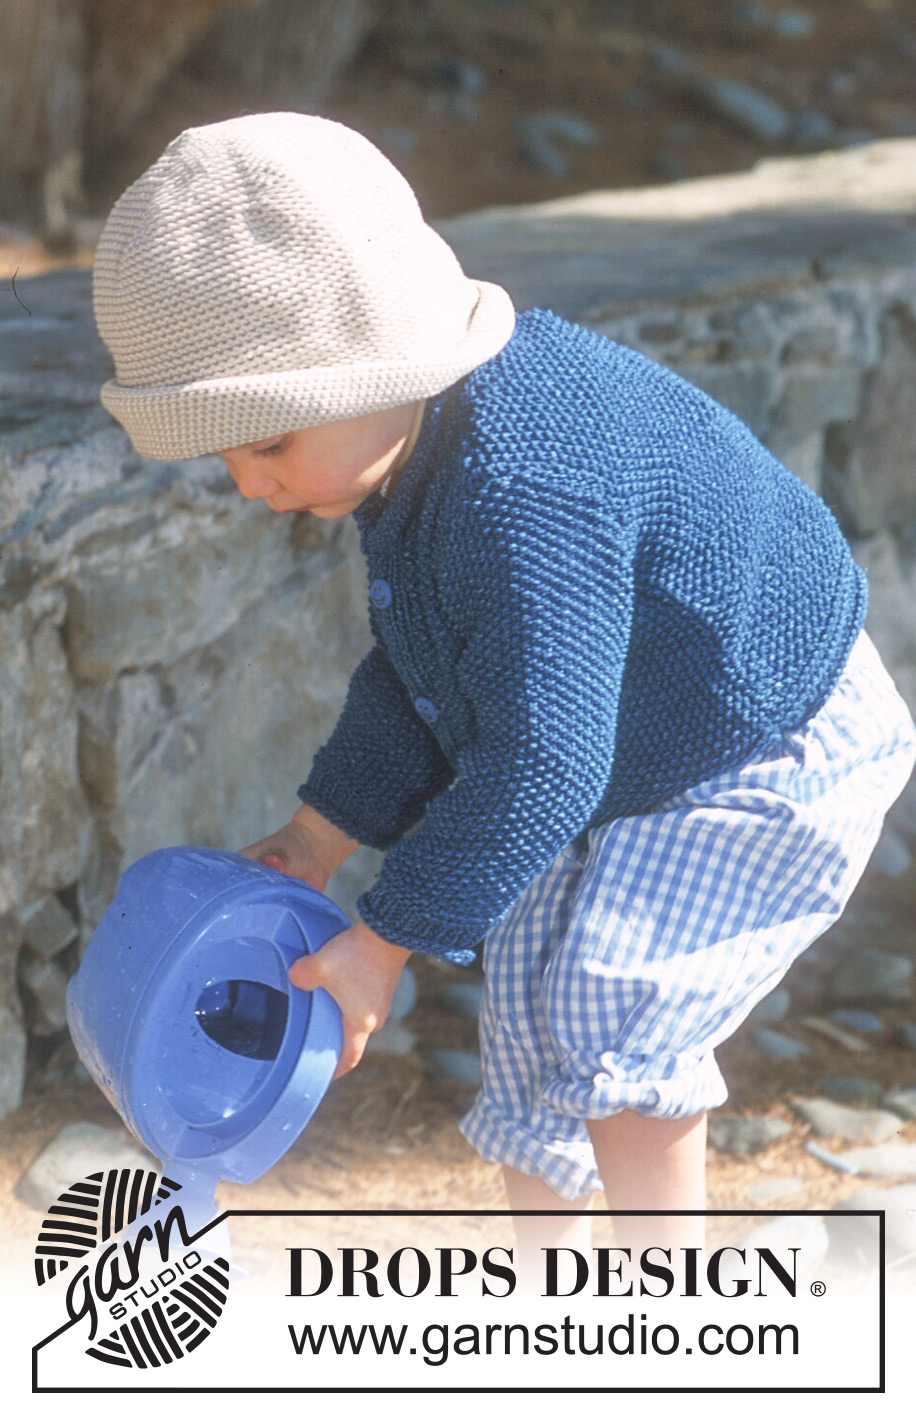
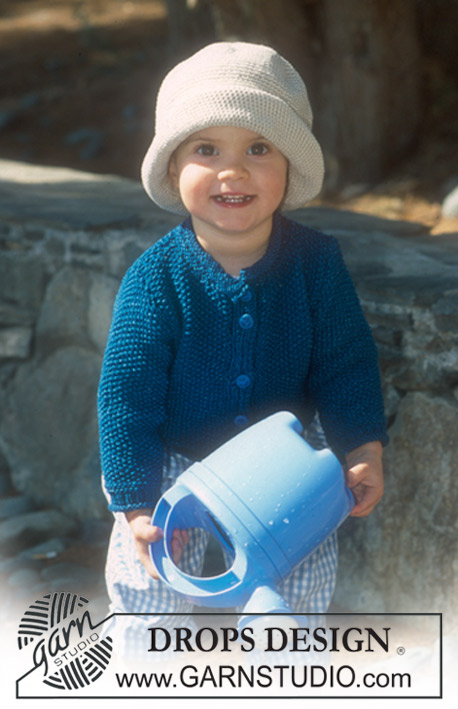
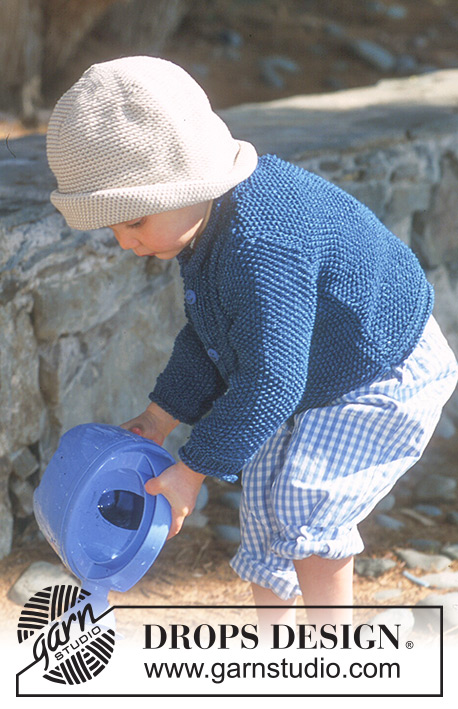
DROPS Jacket in moss st and crochet hat in Muskat
DROPS Baby 10-5 |
|||||||
|
Knitting tension: 21 sts x 42 rows on needle size 4 mm in moss sts = 10 x 10 cm. Garter sts (back and forth on needle): Knit all rows. Rib: *K1/P1*, repeat from *-*. Pattern: See diagrams M.1 and M.2. The diagram shows the pattern from the right side. Buttonhole, jacket: Make buttonholes on right front edge from the RS: cast off 5th st from the edge and cast on 1 new st on the return row. Make buttonholes as follows: Size 1/3 months: 2, 7, 12, 17 and 22 cm Size 6/9 months: 2, 8, 13, 19 and 24 cm Size 12/18 months: 3, 9, 15, 21 and 27 cm Size 2 years: 3, 10, 17, 24 and 31 cm Size 3/4 years: 4, 12, 19, 26 and 34 cm Back piece: Cast on 56-62-68-78-82 sts (incl 1 edge st each side) on needle size 3 mm. Knit 4 rows stocking sts and 4 rows Rib. Change to needle size 4 mm and knit M.1. After M.1 finish the piece in M.2. Remember the knitting tension. When piece measures 17-18-21-24-25 cm cast off for armhole each side on every other row: 3 sts 1 time, 2 sts 2 times and 1 st 3-3-3-5-4 times = 36-42-48-54-60 sts. When piece measures 25-27-32-35-38 cm cast off the middle 16-18-20-20-22 sts for neck and dec 1 st towards neckline on next row = 9-11-13-16-18 sts left on each shoulder. Cast off remaining sts when piece measures 27-29-33-37-40 cm. Left front: Cast on 36-38-41-46-48 sts (incl 1 edge st at side + 7 front band sts) on needle size 3 mm. Knit as follows from mid front (as seen from the RS): 1 garter st, K1, P1, K1, P1, K1, P1 (= 7 front band sts) and stocking st over remaining sts. Repeat over 4 rows. Now knit Rib over all sts in stocking st and continue over 7 front band sts as described above over 4 rows. Now put the 7 front band sts on a thread (completed afterwards and sewn to front edge). Change to needle size 4 mm and knit M.1. After M.1 finish the piece in M.2. When piece measures 17-18-21-24-25 cm cast off for armhole at side as described for back piece = 19-21-24-27-30 sts. When piece measures 23-25-28-32-35 cm cast off 5 sts towards mid front for neck and dec to shape the neckline on every other row: 2 sts 1-1-1-1-2 times and 1 st 3-3-4-4-3 times = 9-11-13-16-18 sts left on shoulder. Cast off remaining sts when piece measures 27-29-33-37-40 cm. Right front: Cast on and knit as left front, but reversed. Sleeve: Cast on 36-38-40-42-44 sts (incl 1 edge st each side) on needle size 3 mm. Knit 4 rows stocking sts and 4 rows Rib. Change to needle size 4 mm and knit M.1. After M.1 finish the piece in M.2. Remember the knitting tension. At the same time when piece measures 4 cm inc 1 st each side a total of 2-3-5-6-8 times on every 8-6-3.5-3-3 cm = 40-44-50-54-60 sts. When piece measures approx 18-20-22-24-28 cm cast off for sleeve cap each side on every other row: 3 sts 1 time, 2 sts 1 time, 1 st until piece measures 23-25-27-30-34 cm and then 2 sts until piece measures 24-26-28-31-35 cm. Cast off remaining sts. Assembly: Put the 7 front band sts from left front piece back on needle size 3 mm and knit Rib as described for front piece (K first st towards mid front). Continue until front band is nearly the same length as front piece – the band is stretched approx 2 cm when sewn on. Put sts on a thread. Repeat on right front piece and remember buttonholes as described above. Sew shoulder seams. Pick up approx 50 to 60 sts (divisible by 2 and incl sts on threads) round the neck on needle size 3 mm. Knit 4 rows Rib with K1 each side towards mid front, 4 rows stocking st and cast off. Set in sleeves and sew sleeve and side seams inside 1 edge st. Sew on buttons. HAT: Size: 1/6 months –1/2 – 3/4 years To fit head circumference: 44-47-50 cm Materials: Garnstudio’s Muskat 100-100-100 g colour no 61, light beige DROPS crochet hook size 3 mm Crochet tension: 21 dc x 24 rows on crochet hook size 3 mm = 10 x 10 cm Crochet 4 ch and form a ring with a sl st. Crochet 1 ch, 6 dc in ring and finish with 1 ch. 1st round: 2 dc in each dc = 12 dc (insert a marking thread at the beg of round) 2nd round: *1 dc in first dc, 2 dc in next dc*, repeat from *-* = 18 dc 3rd round: *1 dc in the first 2 dc, 2 dc in next dc*, repeat from *-* = 24 dc 4th round: *1 dc in the first 3 dc, 2 dc in next dc*, repeat from *-* = 30 dc 5th round: *1 dc in the first 4 dc, 2 dc in next dc*, repeat from *-* = 36 dc Repeat this inc of 6 dc per round (i.e. with one more dc between each inc) until piece measures approx 7-8-9 cm from the middle (the circumference inc by approx 2 cm for each round with inc – continue until circumference = approx 44-47-50 cm). Continue with 1 dc in each dc until piece measures approx 16-17-18 cm from the middle. Crochet next round as follows: *2 dc, 2 dc in next dc*, repeat from *-*. Now crochet 15 rounds with 1 dc in each dc (= rolling edge). Cut the thread and sew. |
|||||||
Diagram explanations |
|||||||
|
|||||||
 |
|||||||
Have you finished this pattern?Tag your pictures with #dropspattern #paddingtonjacket or submit them to the #dropsfan gallery. Do you need help with this pattern?You'll find 27 tutorial videos, a Comments/Questions area and more by visiting the pattern on garnstudio.com. © 1982-2026 DROPS Design A/S. We reserve all rights. This document, including all its sub-sections, has copyrights. Read more about what you can do with our patterns at the bottom of each pattern on our site. |
|||||||


With over 40 years in knitting and crochet design, DROPS Design offers one of the most extensive collections of free patterns on the internet - translated to 17 languages. As of today we count 324 catalogues and 12290 patterns translated into English (UK/cm). 12290
We work hard to bring you the best knitting and crochet have to offer, inspiration and advice as well as great quality yarns at incredible prices! Would you like to use our patterns for other than personal use? You can read what you are allowed to do in the Copyright text at the bottom of all our patterns. Happy crafting!
Post a comment to pattern DROPS Baby 10-5
We would love to hear what you have to say about this pattern!
If you want to leave a question, please make sure you select the correct category in the form below, to speed up the answering process. Required fields are marked *.