Comments / Questions (16)
![]() Anna wrote:
Anna wrote:
Hello, Can you please provide additional information for how the armhole is sewn? Are the 8 new horizontal stitches from the body sewn to the vertical garter stitches from the first 3cm? Is there a name for this type of armpit connection? Thank you.
19.10.2024 - 22:04DROPS Design answered:
Dear Anna, when you join the sleeve in the round you will have 3cm that are open; these are the 3cm sewn together with the stitches in the body. You can sew it neatly with small stitches. Happy knitting!
20.10.2024 - 22:31
![]() Florence wrote:
Florence wrote:
Bonjour, je crois qu'il y a des erreurs dans les explications en français. 1) pour les explications des augmentations sur l'envers, c'est inversé. 2) pour le dos, au début des explications sur l'envers, je pense qu'il faut plutôt faire: 3 m env Augm incl g 3 m env Les 5 premières mailles de A1 Puis A1 3 m env Augm dr 3 m env. Est ce cela? Metci pour votre aide et bonne année à vous !
05.01.2024 - 11:23DROPS Design answered:
Bonjour Florence, les augmentations sont justes ainsi, retrouvez-les dans cette vidéo. Bon tricot!
11.01.2024 - 09:05
![]() Emanuela Monaci wrote:
Emanuela Monaci wrote:
Buongiorno, volevo segnalare un errore di traduzione: nella spiegazione del DAVANTI nella spalla destra, dove iniziano gli aumenti per il collo è "alla fine di ogni ferro" e non all'inizio come indicato. Buon lavoro e buona anno Emanuela
31.12.2023 - 14:30DROPS Design answered:
Buonasera Emanuela, grazie per la segnalazione, abbiamo corretto il testo. Buon lavoro!
31.12.2023 - 17:48
![]() Odile Musslin wrote:
Odile Musslin wrote:
Bonjour, il y a une erreur dans les explications du diagramme, le symbole qui correspond à la torsade a reçu l'explication de la maille double. Merci à vous de rectifier.
03.11.2023 - 14:36DROPS Design answered:
Merci Mme Musslin, la légende a été corrigée, merci pour l'info! Bon tricot!
03.11.2023 - 15:56
![]() Alexandra wrote:
Alexandra wrote:
Bonjour Le 3e symbole de la légende du diagramme n'est pas traduit. D'avance merci d'effectuer rapidement la modification. Ce modèle est très élégant.
02.11.2023 - 06:17DROPS Design answered:
Bonjour Alexandra, fait! Merci pour l'info. Bon tricot!
02.11.2023 - 18:10
![]() Emanuela Monaci wrote:
Emanuela Monaci wrote:
Buongiorno, ella spiegazione del DAVANTI del modello in ITALIANO c'è un errore: il secondo paragrafo è in più....Potete verificare?
18.10.2023 - 16:24DROPS Design answered:
Buonasera Emanuela, grazie per la segnalazione: abbiamo corretto il modello. Buon lavoro!
18.10.2023 - 17:03
![]() Lenny wrote:
Lenny wrote:
Super
06.08.2023 - 16:18
![]() Valentina Zanchin wrote:
Valentina Zanchin wrote:
Sweet toffee
06.08.2023 - 14:24
![]() Renske wrote:
Renske wrote:
SandyWaves
05.08.2023 - 19:34
![]() Rosemeire De Andrade Abrantes wrote:
Rosemeire De Andrade Abrantes wrote:
Dreams Cables
05.08.2023 - 04:31
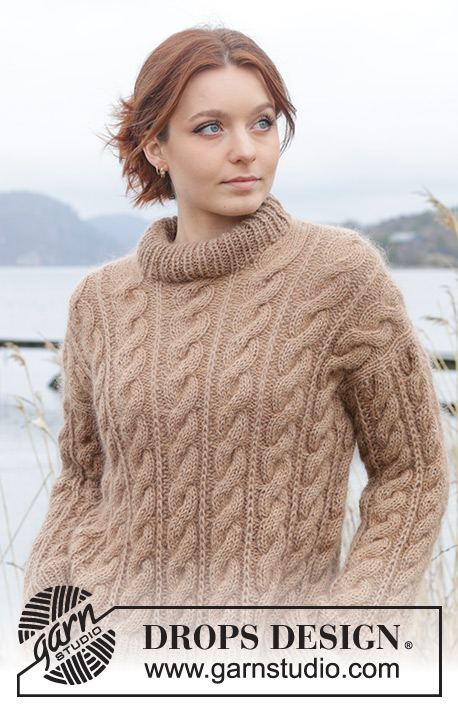
Cinnamon Swirls#cinnamonswirlssweater |
||||||||||||||||||||||
 |
 |
|||||||||||||||||||||
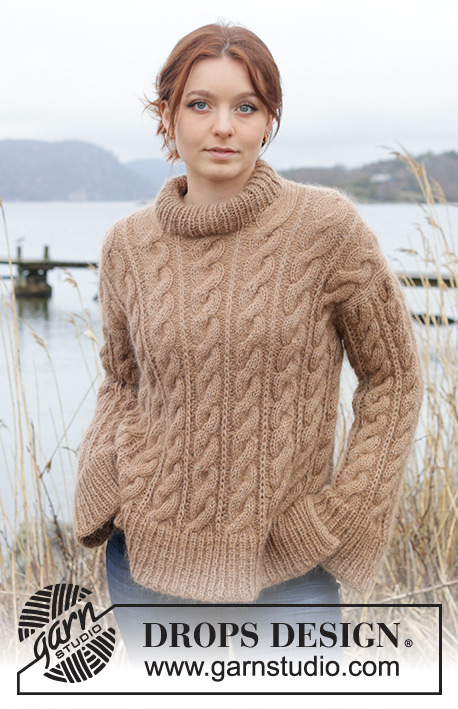
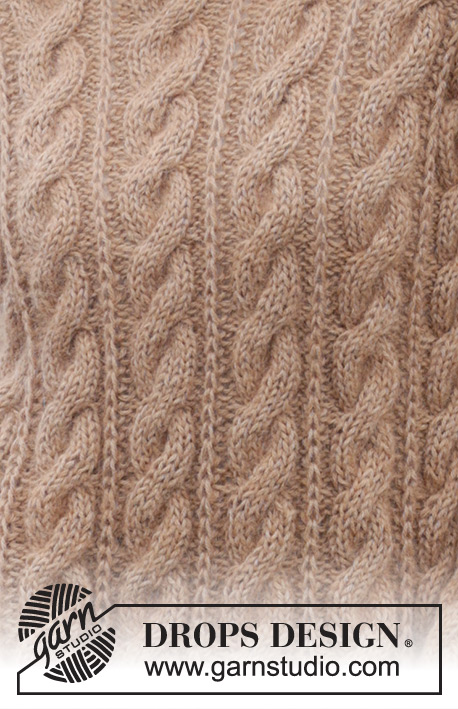
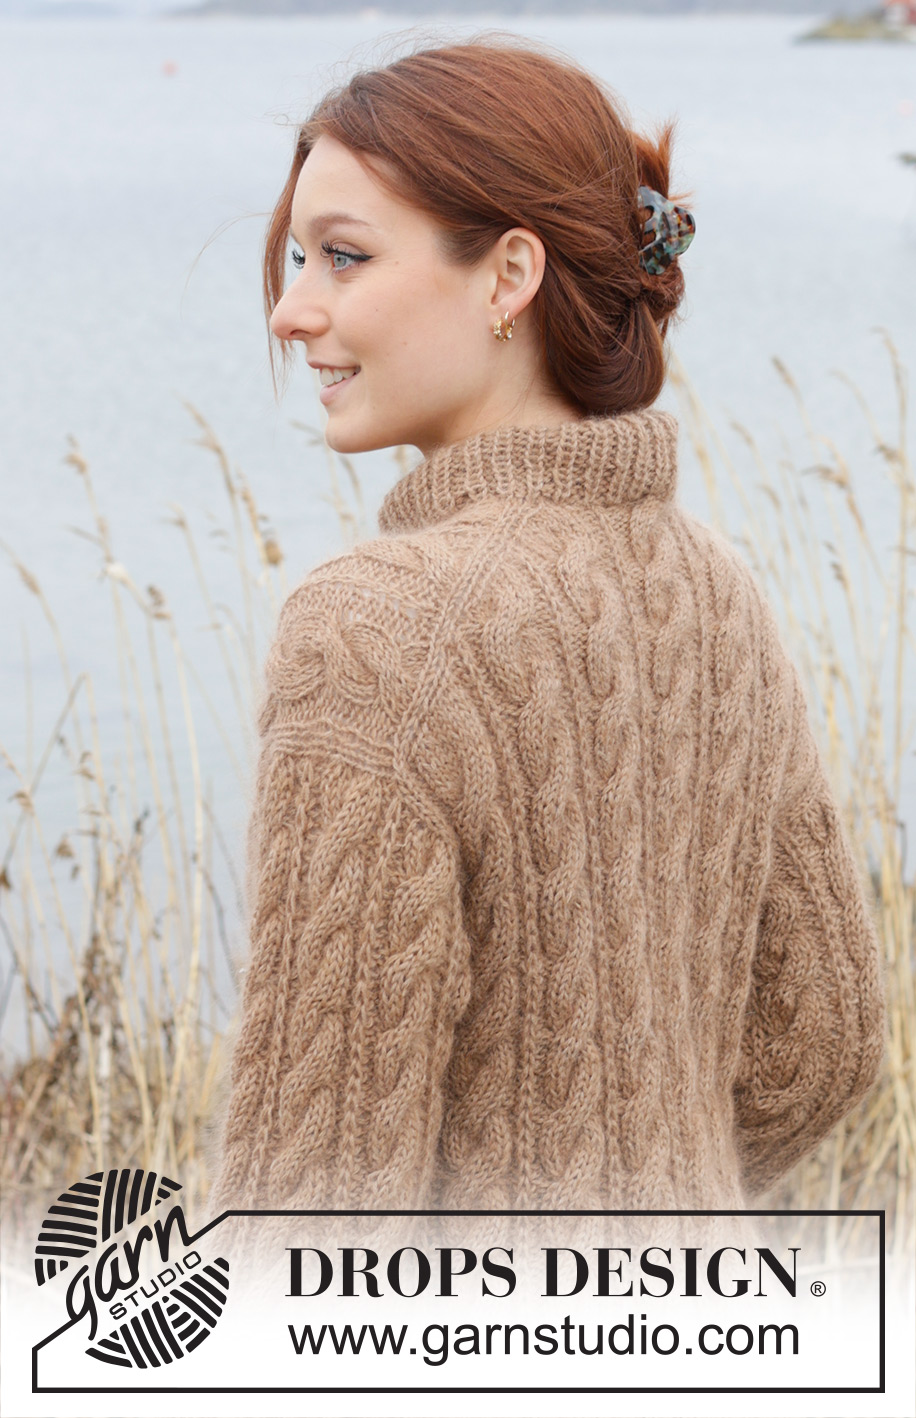
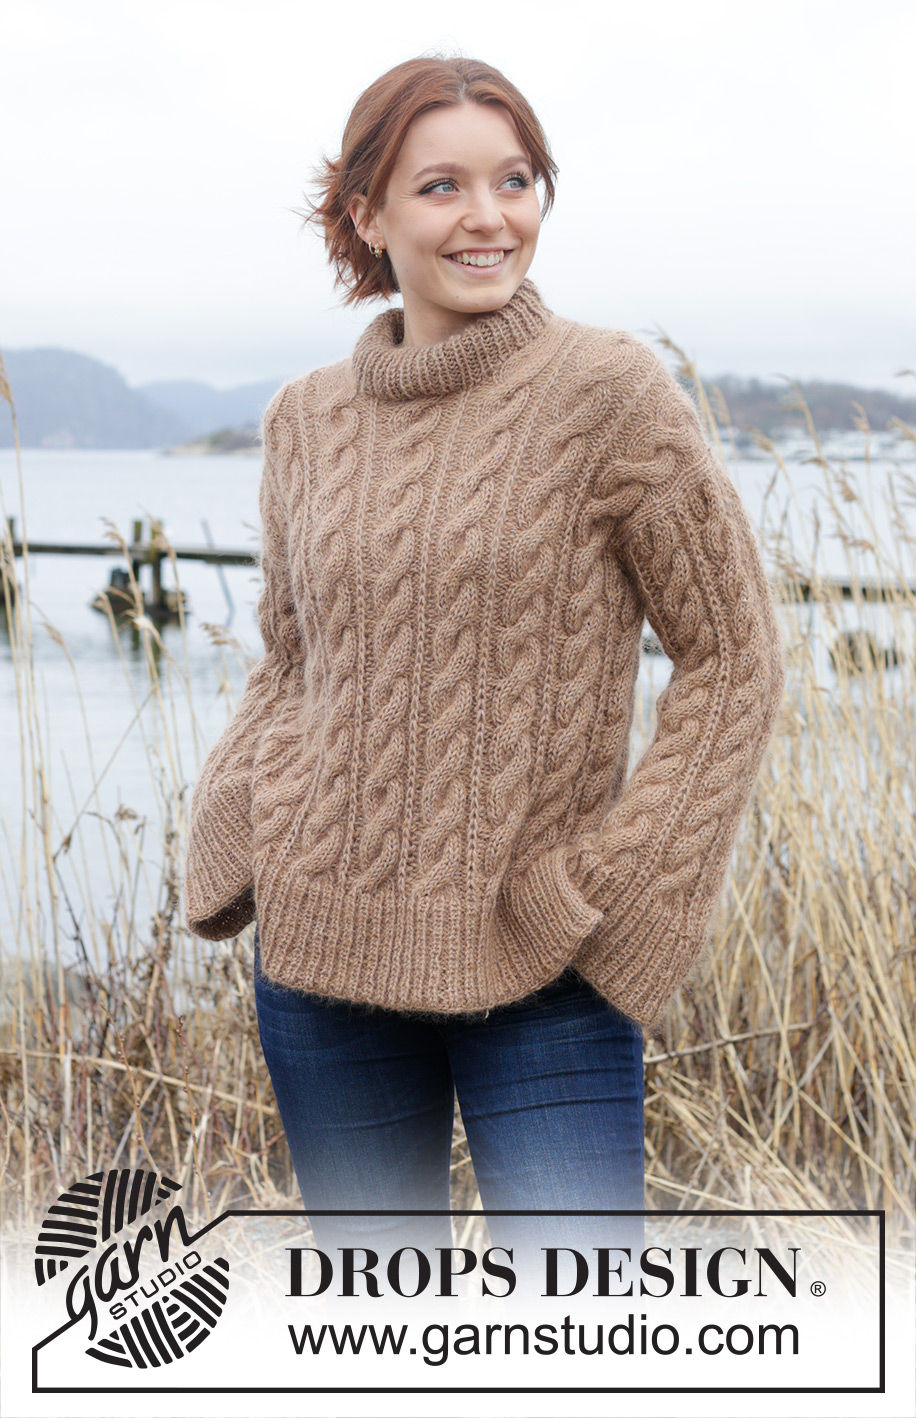
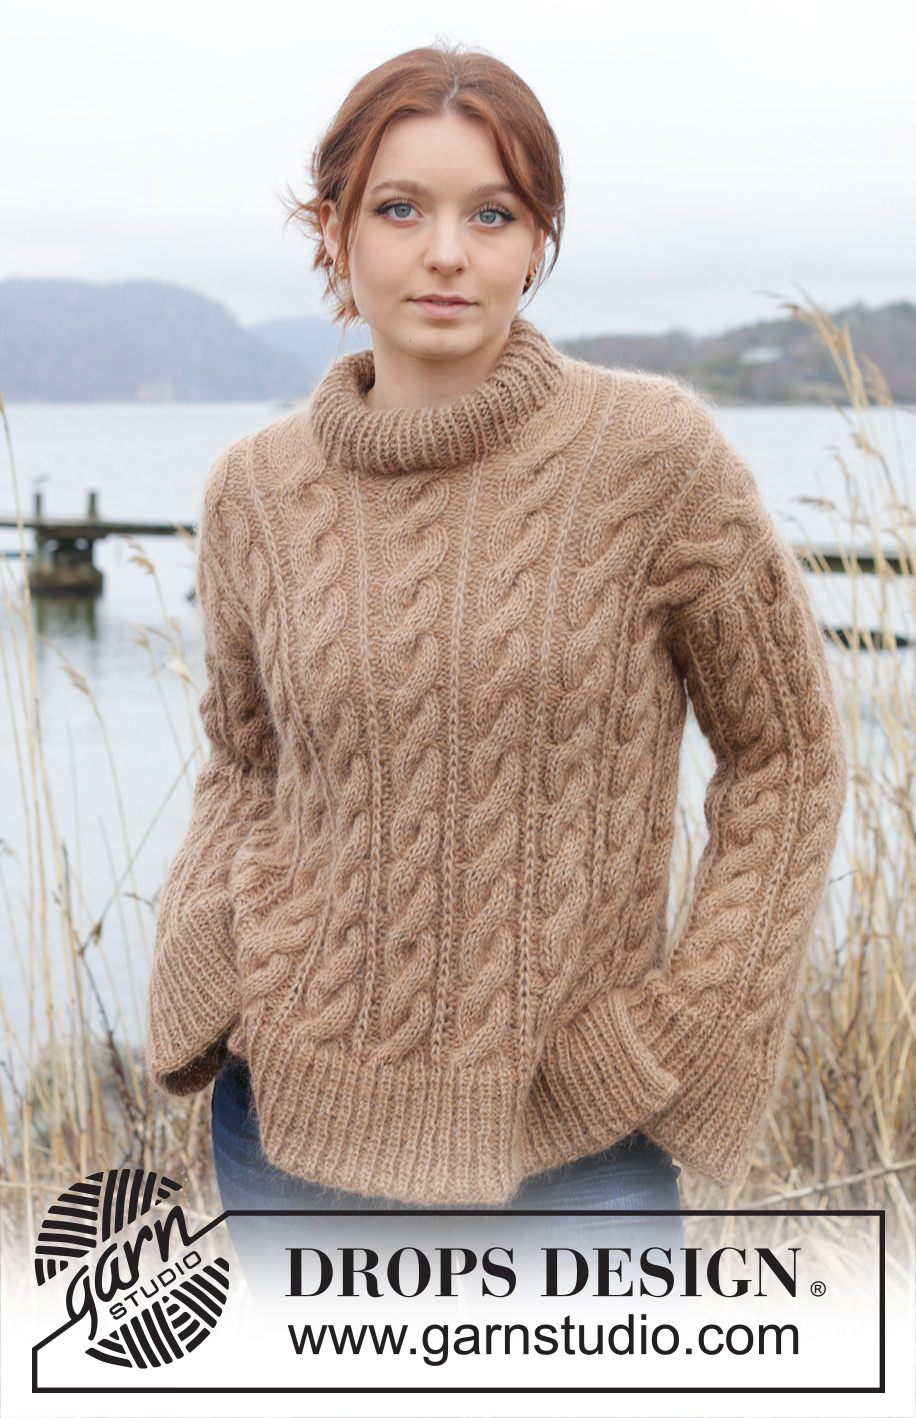
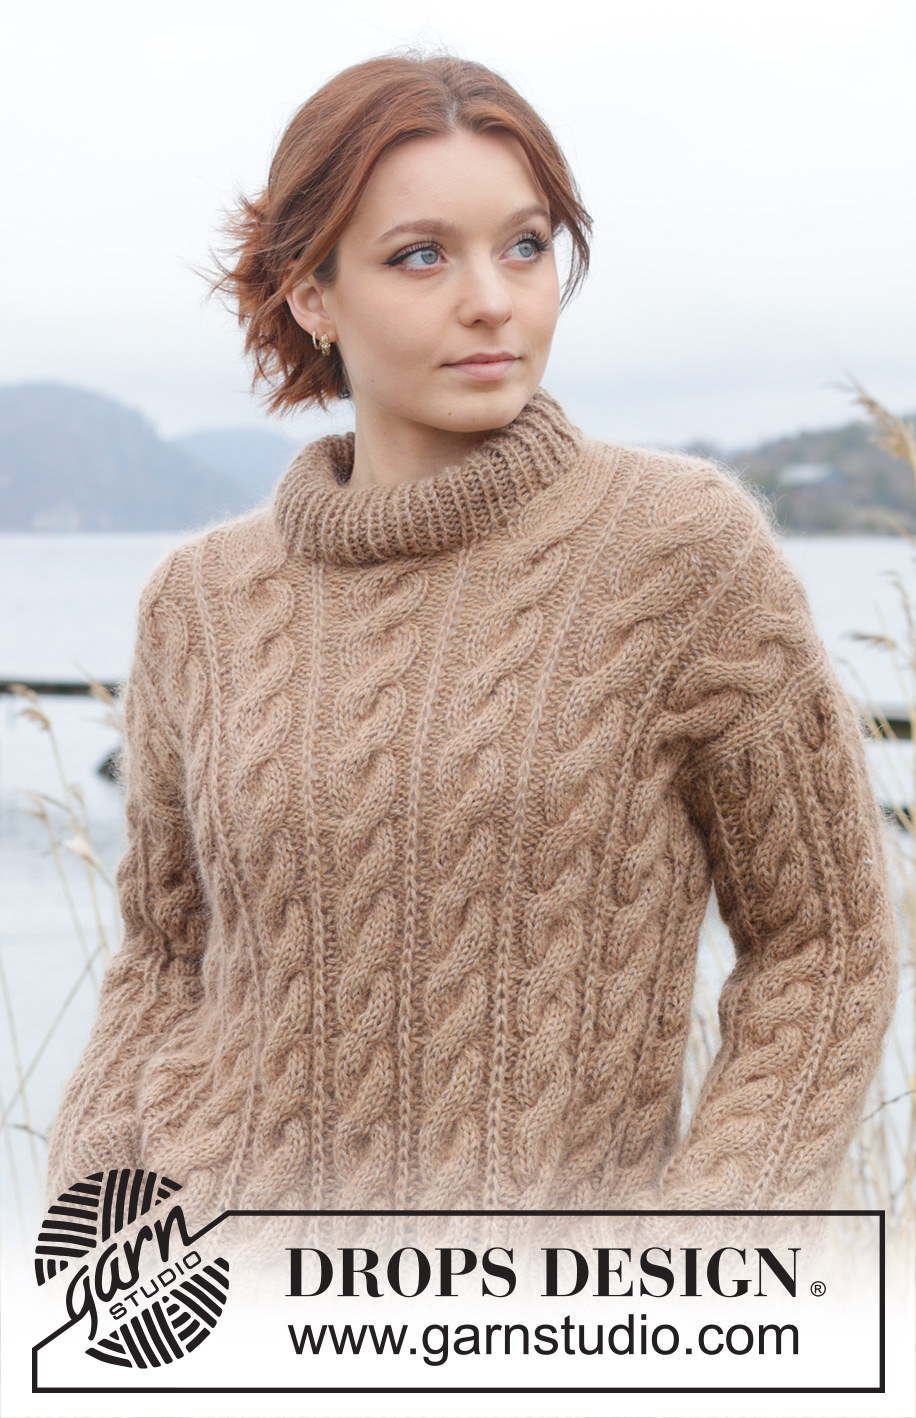
Knitted jumper in DROPS Puna and DROPS Kid-Silk. The piece is worked top down with European/diagonal shoulders, cables, double neck and split in sides. Sizes S - XXXL.
DROPS 245-20 |
||||||||||||||||||||||
|
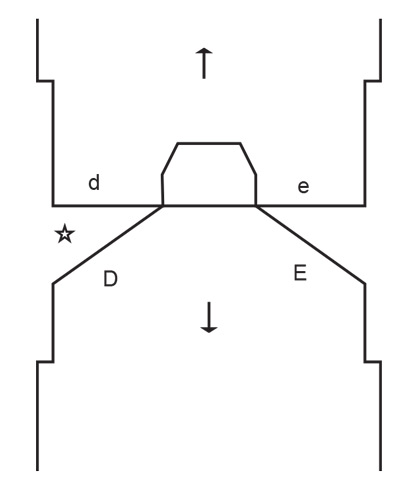
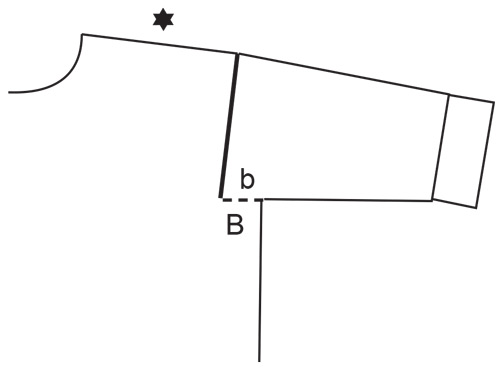
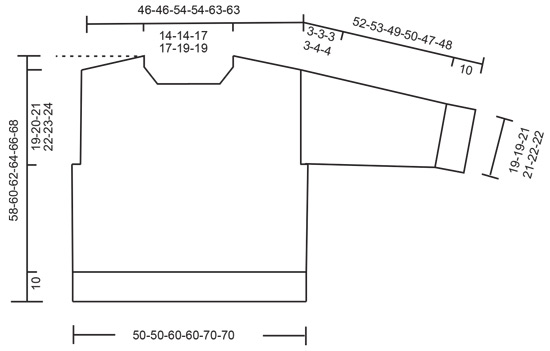
------------------------------------------------------- EXPLANATIONS FOR THE PATTERN: ------------------------------------------------------- GARTER STITCH (worked back and forth): Knit all rows. 1 ridge = knit 2 rows. PATTERN: See diagrams A.1 to A.3. The diagrams show all rows in the pattern from the right side. INCREASE TIP FROM THE RIGHT SIDE: Increase towards the left AFTER MARKER/3 STITCHES: Use left needle to pick up yarn between 2 stitches from row below, pick up yarn from the front and knit in the stitch loop that is on the back of the needle. Increase towards the right BEFORE MARKER/3 STITCHES: Use left needle to pick up yarn between 2 stitches from row below, pick up yarn from the back and knit in the stitch loop that is on the front side of the needle. INCREASE TIP FROM THE WRONG SIDE: Increase towards the right AFTER MARKER: Use left needle to pick up yarn between 2 stitches from row below, pick up yarn from the back and purl in the stitch loop that is on the front side of the needle. Increase towards the left BEFORE MARKER: Use left needle to pick up yarn between 2 stitches from row below, pick up yarn from the front and purl in the stitch loop that is on the back side of the needle. DECREASE TIP (for sleeves): Decrease 1 stitch on each side of the marker as follows: Work until there are 2 stitches left before the marker-stitch, knit/purl 2 together (depending on the pattern), work 1 Fisherman’s rib stitch as before (marker-stitch), knit/purl 2 twisted together. When decreasing under the sleeve, the stitches are either knitted or purled as it fits with A.1 – if there are too few stitches to cable, knit these stitches. ------------------------------------------------------- START THE PIECE HERE: ------------------------------------------------------- JUMPER – SHORT OVERVIEW OF THE PIECE: The top of the back piece is worked back and forth with circular needle until the armholes are finished. Stitches are knitted up along each back shoulder for the front piece, stitches are increased for the neck and the front piece is worked back and forth with circular needle until the armholes are finished. The 2 pieces are joined and the body worked in the round with circular needle as far as the split in each side then front and back pieces are worked separately back and forth. Stitches are knitted up around the armholes and the sleeves worked first back and forth for the sleeve cap, then in the round with short circular needle/double pointed needles. The neck is worked in the round to finish. BACK PIECE: Cast on 28-28-32-32-36-36 stitches with circular needle size 5 mm and 1 strand of each quality (2 strands). Purl 1 row from the wrong side. Insert 1 marker inside the 3 outermost stitches on each side. Keep the markers in this position as you work onwards. Read INCREASE TIP FROM RIGHT SIDE and work as follows from the right side: Knit 3, INCREASE towards the left, knit 2, work A.1, then the first 5-5-7-7-9-9 stitches in A.1, knit 2, INCREASE towards the right, knit 3. Read INCREASE TIP FROM WRONG SIDE and work as follows from the wrong side: Purl 3, increase towards the left, purl 3, work A.1, then the first 5-5-7-7-9-9 stitches in A.1, purl 3, increase towards the right, purl 3. Continue increasing like this, from both the right and wrong side, a total of 34-34-39-39-44-44 times. Always increase inside the 3 stitches on each side. A.2 shows the beginning of the increases (without the 3 outermost stitches). Work the new stitches into the pattern the same way. A.2 shows sizes S and M; in the larger sizes there are more purled stitches between the cables but the increases are worked in the same way. After the last increase, there are 96-96-110-110-124-124 stitches. Continue with pattern as follows from the right side: Knit 3, purl 2-2-3-3-4-4, work A.3 over the next 86-86-98-98-110-110 stitches (the pattern starts and ends with a cable and there are 7 cables in width), purl 2-2-3-3-4-4, knit 3. Work 4 rows of this pattern. Move the markers to the edge of the piece; further measurements are from here. Continue the pattern until the piece measures 13-14-14-15-15-16 cm from the markers. NOTE! Finish after a row from the wrong side; make a note of this row. Place the stitches on a stitch holder, cut the strand and put aside. Work the front piece as explained below. FRONT PIECE: Start with left shoulder (when garment is worn). Knit up 37-37-42-42-47-47 stitches along the left shoulder on the back piece (when the garment is worn), inside 1 stitch (i.e., knit up 1 stitch in each row between the marker and the neck). Purl 1 row from the wrong side, then work as follows from the right side: Knit 6, work A.1, 2 times, purl 2-2-3-3-4-4, knit 3. When A.1 has been worked 1 time in height, start to increase for the neckline at the beginning of each row from the right side as described above (after the 3 stitches and only work increases from the right side). Increase 1 stitch 3 times = 40-40-45-45-50-50 stitches. The new stitches are worked in stocking stitch. Work back from the wrong side, cut the strand and put aside. Work the right shoulder as explained below. Knit up 37-37-42-42-47-47 stitches along the right shoulder on the back piece, inside 1 stitch (i.e., knit up 1 stitch in each row between the marker and the neck). Purl 1 row from the wrong side, then work as follows from the right side: Knit 3, purl 2-2-3-3-4-4, work A.3 2 times, knit 6. When A.3 has been worked 1 time in height, start to increase for the neckline at the end of each row from the right side as described above (before the 3 stitches and only work increases from the right side). Increase 1 stitch 3 times = 40-40-45-45-50-50 stitches. The new stitches are worked in stocking stitch. Work back from the wrong side Work as follows from the right side: Work the 40-40-45-45-50-50 stitches from the right front shoulder as before, cast on 16-16-20-20-24-24 stitches, work the 40-40-45-45-50-50 stitches over the left front shoulder as before = 96-96-110-110-124-124 stitches. Now work pattern as follows – starting from the wrong side: Purl 3, knit 2-2-3-3-4-4, continue A.3 over the next 86-86-98-98-110 stitches (the pattern starts and ends with a cable and there are 7 cables in width), knit 2-2-3-3-4-4, purl 3. Continue until the piece measures 25-26-28-29-31-32 cm, finishing on the same row as the back piece. NOTE! The armholes on the front piece are longer than on the back piece. The front and back pieces are now joined for the body. BODY: Work as before over the 96-96-110-110-124-124 stitches on the front piece, cast on 8-8-10-10-12-12 stitches (side), work the 96-96-110-110-124-124 stitches on the back piece and cast on 8-8-10-10-12-12 stitches = 208-208-240-240-272-272 stitches. Continue A.3 in the round, over all stitches; the pattern should fit in width all the way round. Work until the jumper measures 48-50-52-54-56-58 cm, from the top of the front shoulder. Knit 1 round and increase 2 stitches over each cable, apart from the cables under the sleeves = 236-236-268-268-300-300 stitches. Now divide for the split in each side. Place the 118-118-134-134-150-150 stitches from the back piece on a stitch holder and work the front piece. FRONT PIECE: Change to circular needle size 4 mm. Work 2 garter stitches, knit 2, ** purl 2-2-3-3-4-4, knit 1, purl 2-2-3-3-4-4, * knit 1, purl 2 *, work from *-* 3 times, knit 1**, repeat from **-** until there are 9-9-11-11-13-13 stitches, purl 2-2-3-3-4-4, knit 1, purl 2-2-3-3-4-4, knit 2 and 2 garter stitches. Continue this rib for 10 cm. Cast off. The jumper measures approx. 58-60-62-64-66-68 cm, from the top of the front shoulder. BACK PIECE: Work in the same way as the front piece. LEFT SLEEVE: Lay the piece flat and insert a marker in the top of both armholes (mid-shoulder). Use circular needle size 5 mm and 1 strand of each quality. Knit up from the right side 80-80-92-92-104-104 stitches, from the bottom of the armhole and up the front piece to the marker, then down the back piece to the bottom of the armhole – with the same number of stitches on each side of the marker. (NOTE! Do not knit up stitches across the 8-8-10-10-12-12 cast-on stitches under the sleeve). Work as follows: 1 edge stitch in garter stitch, start on the 3rd-3rd-4th-4th-5th-5th stitch in A.1 and work A.1 until there are 3-3-4-4-5-5 stitches left, work the first 2-2-3-3-4-4 stitches in A.1 and 1 garter stitch. Work this pattern back and forth for 3-3-3-3-4-4 cm. Cast off the garter stitches in each side and continue in the round with short circular needle/double pointed needles size 5 mm = 78-78-90-90-102-102 stitches. Insert 1 marker in the first stitch on the round (mid-under sleeve). Allow this marker to follow your work onwards. Continue A.1 in the round. When the sleeve measures 5-5-5-5-6-6 cm, decrease 2 stitches under the sleeve – read DECREASE TIP. Decrease like this every 10-10-4½-4½-2½-2½ cm a total of 4-4-8-8-12-12 times = 70-70-74-74-78-78 stitches. Continue working until the sleeve measures 42-43-39-40-37-38 cm from the marker. There is 10 cm left; try the jumper on and work to desired length before the rib. Change to double pointed needles size 4 mm and increase 2 stitches over each cable, then work rib with purl over purl and knit over the Fisherman’s rib stitches, over the cables work *knit 1, purl 2*, work from *-* 3 times, knit 1. Work this rib for 10 cm. Cast off a little loosely. The sleeve measures 52-53-49-50-47-48 cm from the marker. RIGHT SLEEVE: Work in the same way as the left sleeve but knit up stitches in the opposite direction (from the bottom of the armhole, up the back piece, then down the front piece. Sew together the openings under each sleeve – see sketch. NECK: Start on one shoulder and knit up from the right side, inside 1 edge stitch, 69 to 84 stitches on short circular needle size 4 mm. The stitch count should be divisible by 3. Work rib in the round (knit 1, purl 2) for 10 cm. Cast off a little loosely. Fold the neck double to the inside and sew down. To avoid the neck being tight and rolling outwards, it is important that the seam is elastic. |
||||||||||||||||||||||
Diagram explanations |
||||||||||||||||||||||
|
||||||||||||||||||||||
 |
||||||||||||||||||||||
 |
||||||||||||||||||||||
 |
||||||||||||||||||||||
 |
||||||||||||||||||||||
 |
||||||||||||||||||||||
Have you finished this pattern?Tag your pictures with #dropspattern #cinnamonswirlssweater or submit them to the #dropsfan gallery. Do you need help with this pattern?You'll find 33 tutorial videos, a Comments/Questions area and more by visiting the pattern on garnstudio.com. © 1982-2026 DROPS Design A/S. We reserve all rights. This document, including all its sub-sections, has copyrights. Read more about what you can do with our patterns at the bottom of each pattern on our site. |
||||||||||||||||||||||







Post a comment to pattern DROPS 245-20
We would love to hear what you have to say about this pattern!
If you want to leave a question, please make sure you select the correct category in the form below, to speed up the answering process. Required fields are marked *.