
Popular categories
Looking for a yarn?


Comments / Questions (74)
![]() Vannier Yvette wrote:
Vannier Yvette wrote:
Bonjour Que veut dire tricoter 6 m en M3 2 par 2 pour les épaules svp Mme vannier
15.08.2025 - 22:49DROPS Design answered:
Bonjour Mme Vannier, il faut plus de mailles pour les torsades que pour le jersey, ainsi, pour éviter de déformer le haut de l'épaule, on va devoir diminuer les mailles de la torsade M.3, on va tricoter ces 6 mailles ainsi: 2 mailles ensemble à l'endroit, 3 fois au total = il reste 3 mailles pour M.3. Bon tricot!
18.08.2025 - 08:17
![]() Vannier wrote:
Vannier wrote:
Bonjour Est-ce normal que le tricot remonte de chaques côté a part la torsade ?se qui fait que le tricot n est pas droit Mme vannier
12.08.2025 - 09:55DROPS Design answered:
Bonjour Mme Vannier, pensez à bien conserver la bonne tension tout du long de votre ouvrage, en largeur et en hauteur, pour ainsi bien conserver les bonnes mesures finales. En cas de doute, montrez votre ouvrage à votre magasin (même en photo, par mail), on pourra alors vous assister de façon plus personnalisée. Bonne continuation!
12.08.2025 - 15:57
![]() Vannier Yvette wrote:
Vannier Yvette wrote:
Bonjour Est ce que l on tricote les rangs envers comme il se présente ?
05.08.2025 - 22:06DROPS Design answered:
Bonjour Mme Vannier, les rangs sur l'envers figurent également dans le diagramme, lisez alors les diagrammes sur l'envers, dans la plupart des cas dans ce modèle, on va effectivement tricoter les mailles comme elles se présentent, attention à la grande torsade de M.1 de bien tricoter les ailles comme il faut lors du décalage sur l'extérieur puis sur l'intérieur (cf diagramme). Bon tricot!
06.08.2025 - 08:19
![]() Patricia wrote:
Patricia wrote:
Bonjour, la bordure picot doit être être commencé sur l'endroit ou sur l'envers du tricot? merci
25.08.2024 - 21:13
![]() Patricia wrote:
Patricia wrote:
Bonjour, est ce que c'est normal que les différents points resserent le tricot car je n'arrive pas aux mesures finales (largeur) indiquées sur le patron? merci
11.07.2024 - 20:30DROPS Design answered:
Bonjour Patricia, les torsades vont effectivement resserrer l'ouvrage raison pour laquelle on a davantage de mailles que sur la base d'un simple jersey, mais, si votre tension est juste (23 mailles jersey = 10 cm), vous devriez avoir la bonne largeur finale en conservant la même tension. Bon tricot!
02.08.2024 - 15:07
![]() Patricia HYVERNAT wrote:
Patricia HYVERNAT wrote:
Ps je vois une torsade sur le M 3 mais je ne la vois pas sur la photo? s'il faut la faire est ce tous les 3 rangs comme le montre le motif? merci par avance
28.06.2024 - 18:42DROPS Design answered:
Bonjour Mme Hyvernat, la torsade M.3 se fait juste à la transition avec le point de riz/damier M.2, vous devez tricoter une torsade tous les 4 rangs (3 rangs sans torsades entre chaque rang avec). Bon tricot!
01.07.2024 - 13:53
![]() Patricia HYVERNAT wrote:
Patricia HYVERNAT wrote:
Je vous remercie mais étant donné qu e j'ai commencé par un devant pourriez vous me donner l'explications pour celui -ci en taille L si cela ne vous dérange pas Merci+++
28.06.2024 - 17:36
![]() Patricia HYVERNAT wrote:
Patricia HYVERNAT wrote:
Ps je corrige mon message : je tricote le motif M1 sur 32 m et après que faut il faire car lorsque je suis les explications je n'ai pas du tout le même motif que le modèle Pouvez vous me dire ce que je dois faire après le M1? merci par avance
28.06.2024 - 16:34DROPS Design answered:
Bonjour Mme Hyvernat, vous devez tricoter tous les diagrammes indiqués en même temps, sur un même rang, autrement dit pour le dos on tricote: 1 m lis, on répète M.2 sur les 10 à 34 m suivantes, on tricote ensuite les 6 m de M.3, les 4 m de M.2, 2 fois les 32 m de M.1 puis les 4 m de M.2, les 6 m de M.3, M.2 sur 10 à 34 m et on termine par 1 m lis. Retrouvez plus d'infos sur les diagrammes dans cette leçon, plus particulièrement sous Plusieurs diagrammes tricotés consécutivement sur le rang/tour:. Bon tricot!
28.06.2024 - 16:57
![]() Patricia HYVERNAT wrote:
Patricia HYVERNAT wrote:
Bonjour, j'essaie de réaliser ce modèle mais je ne comprends pas tout le diagramme Lorqu'on a réalisé le motif M 1 sur 32 mailles que faut il faire? lorsque je tricote M2 puis 32 et M2 sur 18 m je n'ai pas du tout le même motif que le modèle? pouvez vous m'aider car je suis "coincée " dans mon travail Merci par avance
28.06.2024 - 16:26
![]() Lily wrote:
Lily wrote:
Bij dit patroon (96-2) zijn twee steken niet opgetekend in het telpatroon. Het gaat om de 9e naald (linkerkant van het werk), de 15e en 18e steek moeten rechts gebreid worden. Hier horen dan eigenlijk kruisjes in het telpatroon te staan. Voor de rest is het een prima patroon. Gr. Lily
15.09.2022 - 11:29
|
|||||||||||||||||||
DROPS 96-2 |
|||||||||||||||||||
|
|
|||||||||||||||||||
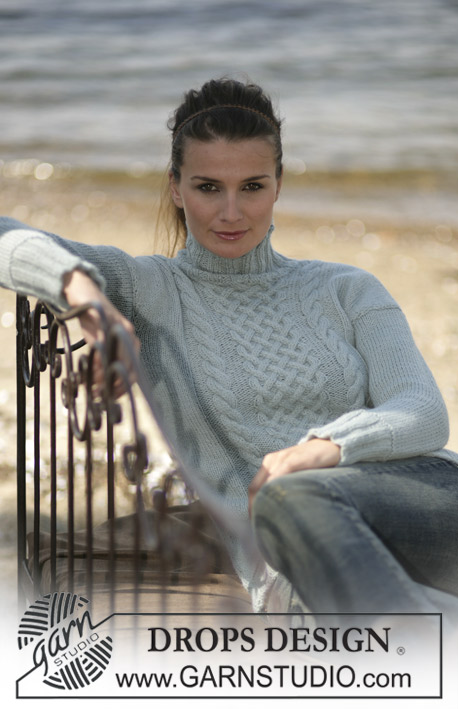
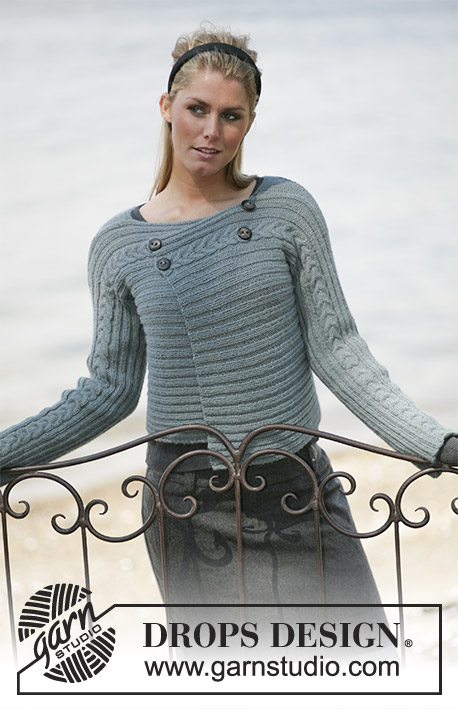
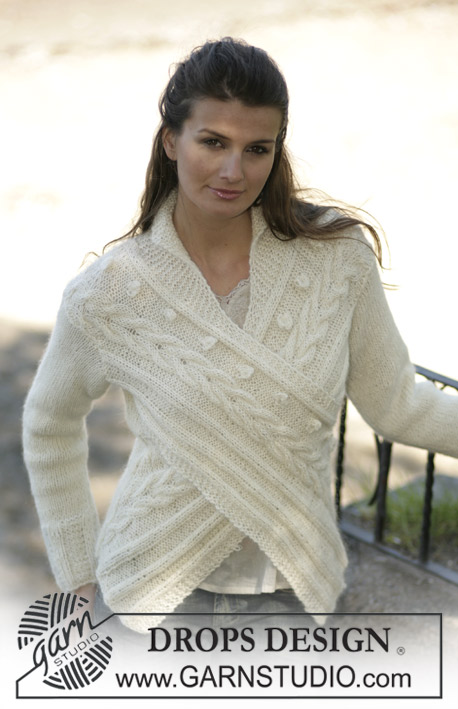
DROPS Jacket with cable pattern in Silke-Tweed. Size XS-XXL
DROPS 96-2 |
|||||||||||||||||||
|
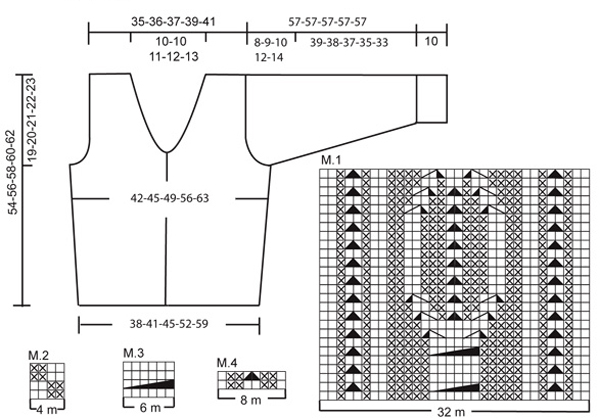
Knitting tension: 23 sts x 30 rows in stocking stitch on needle size 3.5mm = 10 x 10 cm Decreasing tips (applies to neck): Decrease within 1 edge st from the RS. Left front piece: Dec as follows before 1 edge st: slip 1 st as if to knit, K1, psso. Right front piece: Dec as follows after 1 edge st: K2 tog. Back Piece: Cast on 106-114-122-138-154 sts (incl 1 edge st each side, edge sts are knitted in garter sts throughout) on needle size 2.5 mm with Silke-Tweed. Knit M.4 with 1 edge each side (1st row = WS). When piece measures 4 cm change to needle size 3.5 mm and knit next row as follows from the WS: 1 edge st, M.2 over the next 10-14-18-26-34 sts, M.3 (= 6 sts), M.2 (= 4 sts), M.1 (= 32 sts,) - you have now reached mid back - M.1 (= 32 sts), M.2 (= 4 sts), M.3 (= 6 sts), M.2 over the next 10-14-18-26-34 sts and 1 edge st. Continue the pattern like this, at the same time when piece measures 12 cm inc 1 st each side on every 6 cm a total of 4 times = 114-122-130-146-162 sts – incorporate the new sts in M.2 as you go along. When piece measures 35-36-37-38-39 cm dec for armhole each side on every other row as follows: 4 sts 1 time, 3 sts 0-1-1-2-3 times, 2 sts 1-1-2-3-4 times and 1 st 3-3-3-4-5 times = 96-98-102-106-110 sts. When piece measures 52-54-56-58-60 cm cast off the middle 32-32-34-34-36 sts for neck. Dec to shape the neckline 1 st 2 times = 30-31-32-34-35 sts left on each shoulder. When piece measures 53-55-57-59-61 cm knit the 6 sts in M.3 tog 2 by 2 = 27-28-29-31-32 sts left on each shoulder. Cast off all sts on next row. Left Front: Cast on 51-59-59-67-75 sts (incl 1edge st at side) on needle size 2.5 mm with Silke-Tweed. Knit as follows from mid front (1st row = WS): 1 edge st, P1, M.4 over 48-56-56-64-72 sts, 1 edge st. Seen from the RS there are 2 sts in stocking sts before the edge st mid front. When piece measures 4 cm change to needle size 3.5 mm and adjust no of sts to 54-58-62-70-78. Continue in pattern as follows: 1 edge st, M.1 (= 32 sts), M.2 (= 4 sts), M.3 (= 6 sts), M.2 over 10-14-18-26-34 sts and 1 edge st. At the same time when piece measures 12 cm inc at the side as described for back piece = 58-62-66-74-82 sts. Read all of the following section before continuing: Armhole: When piece measures 35-36-37-38-39 cm dec for armhole as described for back piece. Neckline: At the same time when piece measures 36-37-38-39-40 cm dec 1 st within 1 edge st – see Decreasing tips – on every other row 15 times and then on every 4th row 4-4-5-5-6 times. After all dec for armhole and neckline are complete there are 30-31-32-34-35 sts left on shoulder. When piece measures 53-55-57-59-61 cm knit the 6 sts in M.3 tog 2 by 2 = 27-28-29-31-32 sts left on shoulder. Cast off all sts on next row. Right Front: Cast on and knit as left front, but mirrored. Sleeve: Cast 58-58-66-66-74 sts (incl 1 edge st each side) on needle size 2.5 with Silke-Tweed. Knit M.4 with 1 edge st each side (1st row = WS). When sleeve measures 10 cm change to needle size 3.5 mm and continue in M.2 over all sts until finished measurements. When sleeve measures 12 cm inc 1 st each side on every 3-2.5-3-2-2 cm a total of 12-14-12-16-14 times = 82-86-90-98-102 sts – incorporate the new sts in M.2 as you go along. When piece measures 49-48-47-45-43 cm cast off for sleeve cap each side on every other row as follows: 4 sts 1 time, 3 sts 1 time, 2 sts 3 times, 1 st 3-5-6-9-12 times, and then 2 sts each side until piece measures 56 cm. Now dec 3 sts each side and cast off remaining sts on next row, sleeve measures approx 57 cm. Assembly: Sew shoulder seams. Right front edge + neckline: Pick up approx 163-171-179-183-191 sts on needle size 2,5 mm with Silke-Tweed along right front piece, along neckline and up till mid back. Knit as follows (1st row = WS): 1 edge st, P1, *K2, P2*, repeat from *-* and finish with 1 edge st . Knit 1 cm Rib. Now make 6 buttonholes evenly on row – the top buttonhole should be 1 cm from the neckline and the bottom one 1 cm from lower edge -. 1 buttonhole = cast off 2 sts and cast on 2 new sts on next row. Knit another 1 cm Rib and cast off in Rib. Left front + neckline: Knit as right front edge but without the buttonholes. Sew neckline together mid back within 1 edge st. Set in sleeves and sew sleeve and side seams within 1 edge st. Sew on buttons. Crochet border: Crochet along sleeve edges and along both front pieces and the neckline as follows with crochet hook size 3 mm and Cotton Viscose: 1 dc in first st, *1 picot (= 4 ch, 1 tr in first ch), skip 1 cm, 1 dc in next st*, repeat from *-*. |
|||||||||||||||||||
Diagram explanations |
|||||||||||||||||||
|
|||||||||||||||||||
 |
|||||||||||||||||||
Have you finished this pattern?Tag your pictures with #dropspattern or submit them to the #dropsfan gallery. Do you need help with this pattern?You'll find 26 tutorial videos, a Comments/Questions area and more by visiting the pattern on garnstudio.com. © 1982-2026 DROPS Design A/S. We reserve all rights. This document, including all its sub-sections, has copyrights. Read more about what you can do with our patterns at the bottom of each pattern on our site. |
|||||||||||||||||||


With over 40 years in knitting and crochet design, DROPS Design offers one of the most extensive collections of free patterns on the internet - translated to 17 languages. As of today we count 324 catalogues and 12285 patterns translated into English (UK/cm).
We work hard to bring you the best knitting and crochet have to offer, inspiration and advice as well as great quality yarns at incredible prices! Would you like to use our patterns for other than personal use? You can read what you are allowed to do in the Copyright text at the bottom of all our patterns. Happy crafting!
Post a comment to pattern DROPS 96-2
We would love to hear what you have to say about this pattern!
If you want to leave a question, please make sure you select the correct category in the form below, to speed up the answering process. Required fields are marked *.