
Popular categories
Looking for a yarn?


Comments / Questions (22)
![]() Julie wrote:
Julie wrote:
I have been stuck on the sleeve pattern after all the increases & you complete the body the put the sleeves back on the needle, nowhere in the pattern does it say to stop doing A1 & A3 chart to only do A2, thank you Tina’s comment on the sweater of the same design otherwise I would still be stuck. Can the pattern not be updated to reflect this for future knitters. Many thanks, I have bought Drops wool for any patterns used on here so I do appreciate the time & effort that goes into the design
30.04.2026 - 18:54
![]() Lucy wrote:
Lucy wrote:
Dus als ik goed lees Een platte trui bij mijn oksel is 52 cm Een patroon hierboven zegt dan 44-46-52-57-63-69 En 40-44-48-53-59-65 1. Moet ik dan de eerste rij tekening buitenlijn. 52. Kiezen ? Of tweede rij 53 ?? 2. Dit patroon is een vest, is de maat gemeten met vest dicht of biezen tegen elkaar aan. ? Graag uw reactie,
20.04.2026 - 16:39DROPS Design answered:
Dag Lucy,
Helaas kan ik niet helemaal volgen waar je precies bent aan de hand van de reeks getallen en wat je bedoelt met met buitenlijn 52 of tweede rij 53. Op de maattekening is het vest dichtgeknoopt.
21.04.2026 - 09:13
![]() Louise wrote:
Louise wrote:
Que veut dire " s'il y a un 0 dans la taille choisi?
10.01.2026 - 22:49DROPS Design answered:
Bonjour Louise, s'il y a un 0 dans la taille choisie, sauter cette information et passer directement à l'indication suivante. Bon tricot!
12.01.2026 - 11:22
![]() Fabienne wrote:
Fabienne wrote:
Hallo Nach der letzten zunahme: im muster, glatt rechts und mit den blenden wie zuvor weiterstricken, aber nun nicht mehr zunehmen. Hier meine frage. Im muster sind zunahmen, es wird also immer breiter. Also muss ich diese zunahmen dann doch stricken bis zur teilung des rumpfes/ärmel? Eine weitere frage stellt sich mir, wenn ich dann die ärmel vom rumpf geteilt habe, steht: das muster wie zuvor aber in runden weiterstricken. Muss ich dann nur A2 stricken?
24.07.2025 - 10:05DROPS Design answered:
Liebe Fabienne, nach allen Zunahmen, schreiben Sie im Diagram welche Masche ist die 1. in A.1 und die letzte in A.3, dann stricken Sie ab / bis diese Masche - stricken Sie eventuell nur rechts wenn Sie nicht genügend Maschen für 1 Abnahme + 1 Umschlag, damit die Maschenanzahl korrekt bleib. Nach der Aufteilung wird man die Ärmel weiter in A.2 stricken, das Muster passt an der untere Mitte nicht mehr, aber es muss das Muster der Passe forsetzen. Viel Spaß beim Stricken!
25.07.2025 - 10:40
![]() Beth Anderson wrote:
Beth Anderson wrote:
Don't bother responding to my question. I translated the Dutch answer to Micky's question, which was the same as mine.
24.07.2025 - 06:55
![]() Beth Anderson wrote:
Beth Anderson wrote:
Hi, I am confused. The pattern says that it has been corrected for the dividing of the yoke and raglan sleeves, but the number of stitches do not add up. I am making the medium size and have 110 stitches, 12 of which belong to the bands. How do I divide the stitches for the raglan, and does this mean the numbers for the first row of the pattern are different? Thank you, Beth Anderson
22.07.2025 - 19:20DROPS Design answered:
Dear Mrs Anderson, the correction only applies if you edited pattern before that date. In size M you have 110 sts on needle, insert each markers in one stitch (and not between stitches) so that you get: 20+1+ 19+1+28+1+19+1+20=110 sts. Happy knitting!
25.07.2025 - 10:01
![]() Johanne wrote:
Johanne wrote:
Augmentation : Lorsque j'ai terminé une fois le tableau du point fantaisie pour les manches, pour continuer les augmentations, quelle ligne du tableau dois-je répéter?
18.01.2025 - 09:41DROPS Design answered:
Bonjour Johanne, lorsque les diagrammes A.1 à A.3 sont terminés en hauteur, reprenez-les au 1er rang, autrement dit: tricotez les 4 m de A.1, répétez A.2 jusqu'à ce qu'il reste 3 mailles du point fantaisie (vous avez maintenant suffisamment de mailles pour tricoter 2 motifs de A.2 en plus en largeur) et tricotez A.3. Bon tricot!
20.01.2025 - 07:36
![]() Signe Lund wrote:
Signe Lund wrote:
Hej Når I skriver at man skal tage ud på hver og hver anden pind på bærestykket - mener I så hver 2. RETpind? Eller hver 2. Pind dvs hver retpind? Det ligner på billedet at der er taget ud på hver retpind, men så undrer jeg mig over at man også skal tage ud fra vrangsiden på de største størrelser. Hvad er rigtigt?
19.10.2024 - 20:30DROPS Design answered:
Hei Signe. På bærestykket skal det økes på hver pinne (både fra retten og fra vrangen) på de 2 største str., dette skal gjøre 4-6 ganger, deretter økes det til raglan på hver 2. pinne. mvh DROPS Design
23.10.2024 - 10:01
![]() Greta wrote:
Greta wrote:
Aiuto, non capisco...perchè al "Ferro 2 dello sprone" viene detto di "lavorare a dritto sul rovescio del lavoro?" Cosi si crea un giro a legaccio, no? Nelle immagini non mi pare di vedere un giro di legaccio alla base del collo doppio. Inoltre poi non viene chiaramente detto di proseguire a maglia rasata, ma intendo sia così...giusto?
08.10.2024 - 17:24DROPS Design answered:
Buonasera Greta, le spiegazioni dello sprone sono corrette. Buon lavoro!
08.10.2024 - 22:17
![]() Helena wrote:
Helena wrote:
Dobrý den, už jsem návod pochopila, pomohla mi Vaše odpověď na dotaz od Micky, děkuji
15.08.2024 - 09:19
|
|||||||||||||||||||
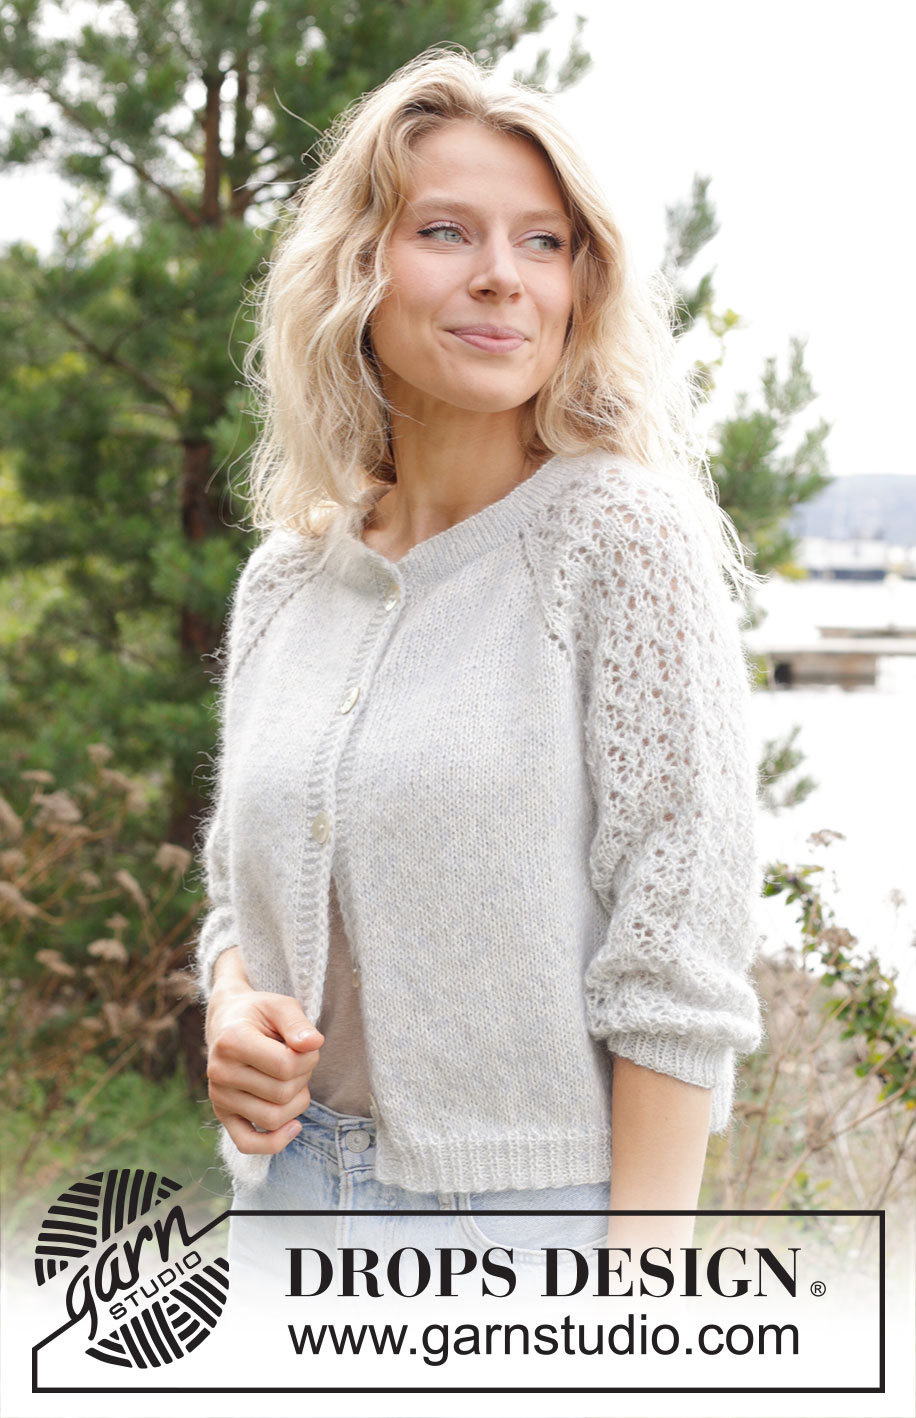
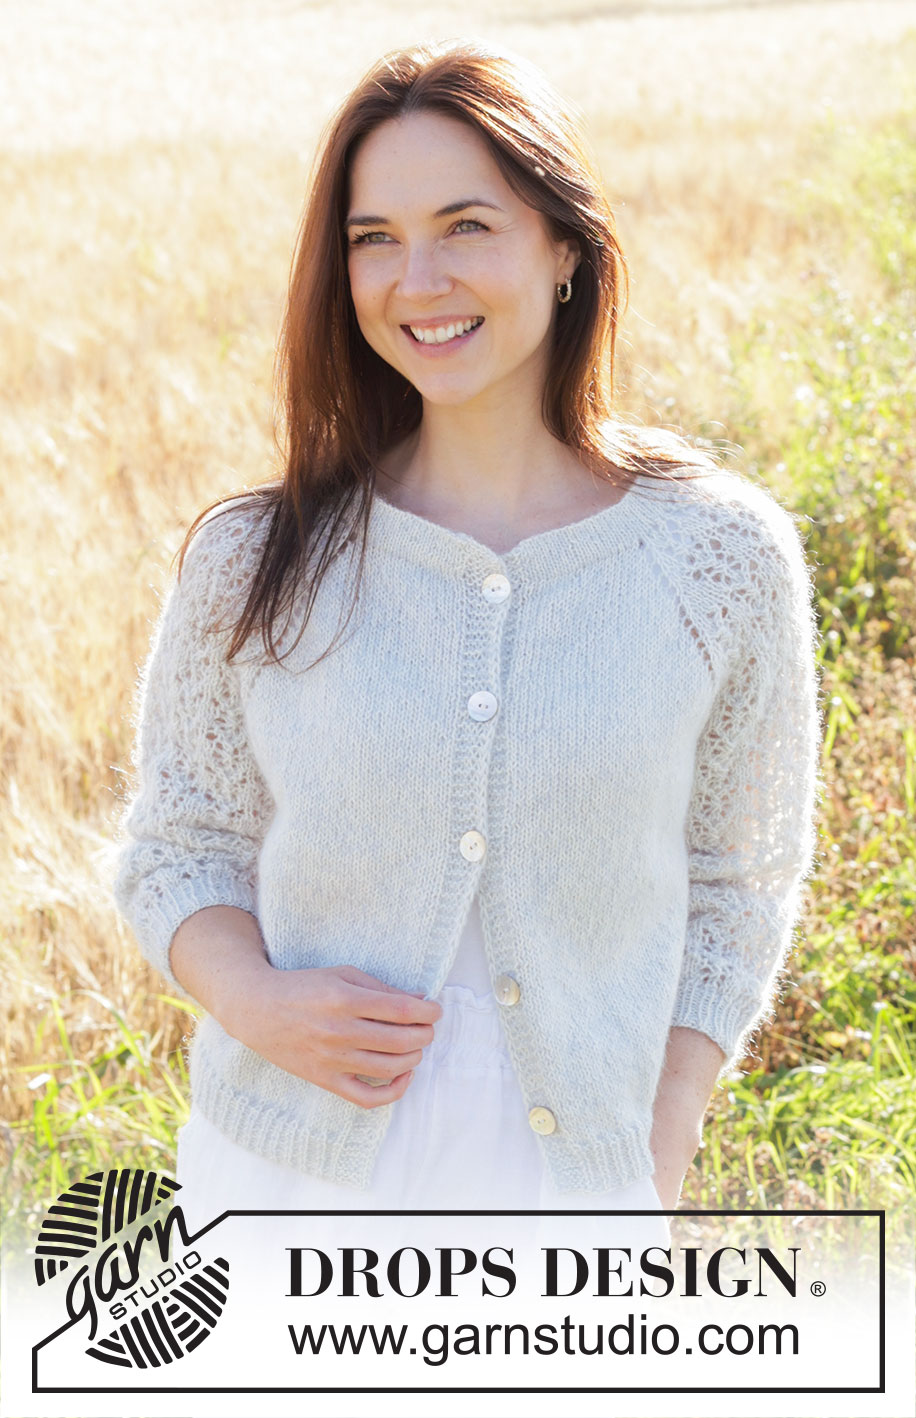
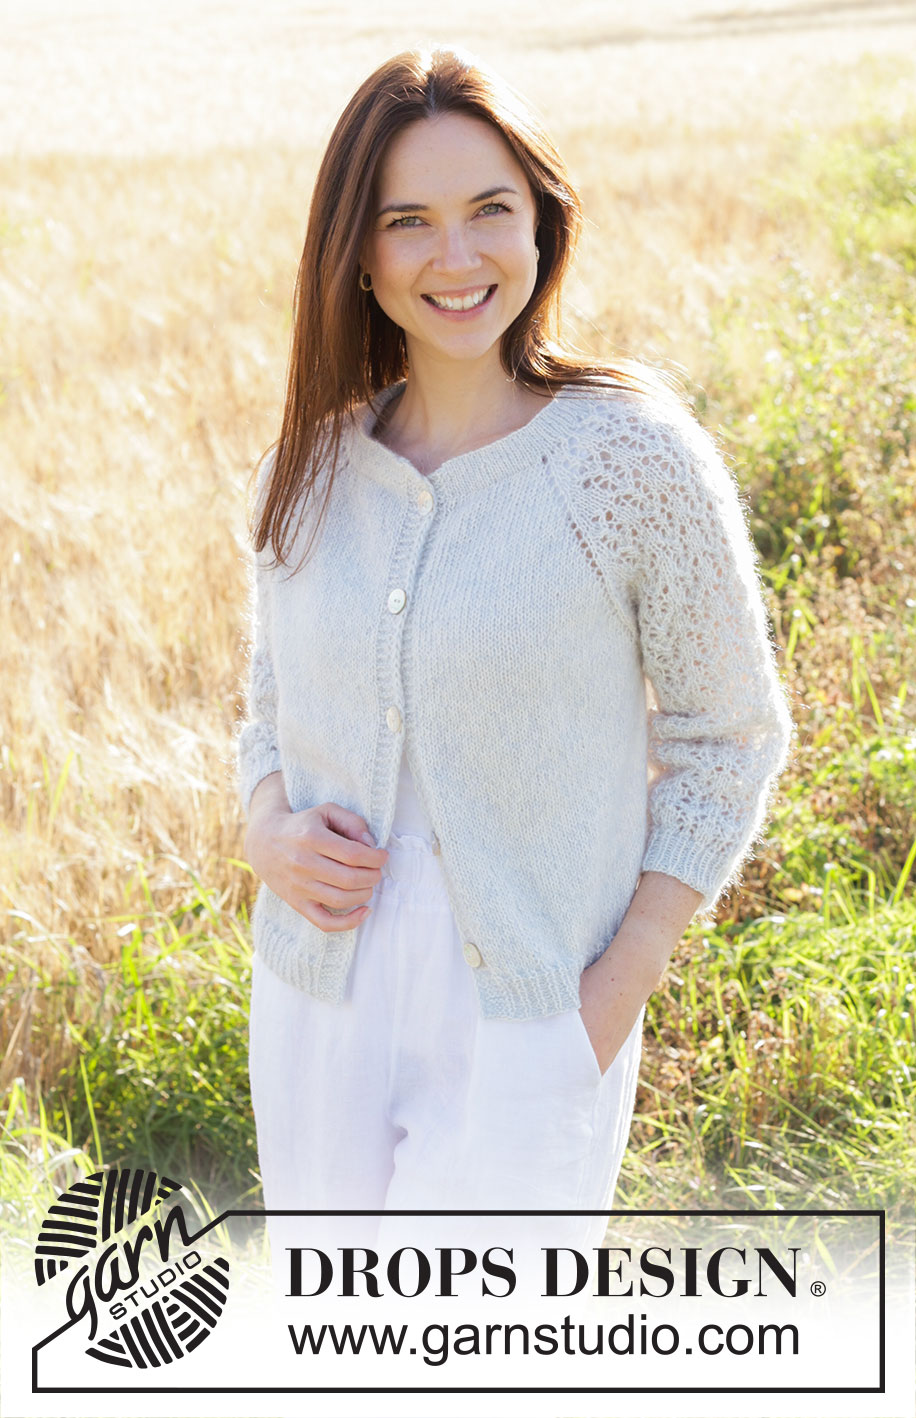
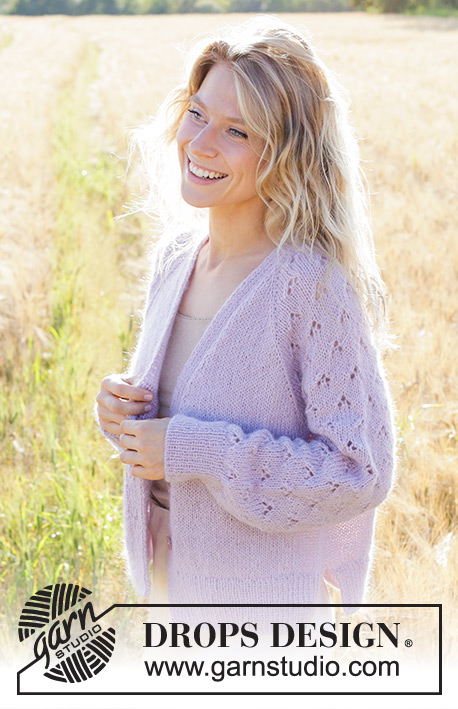
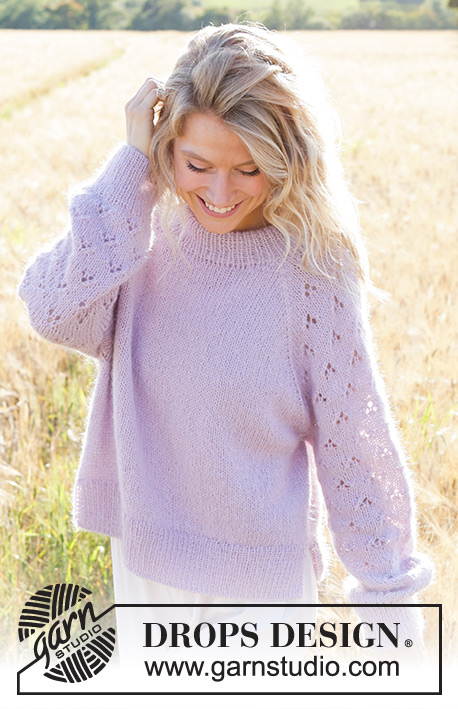
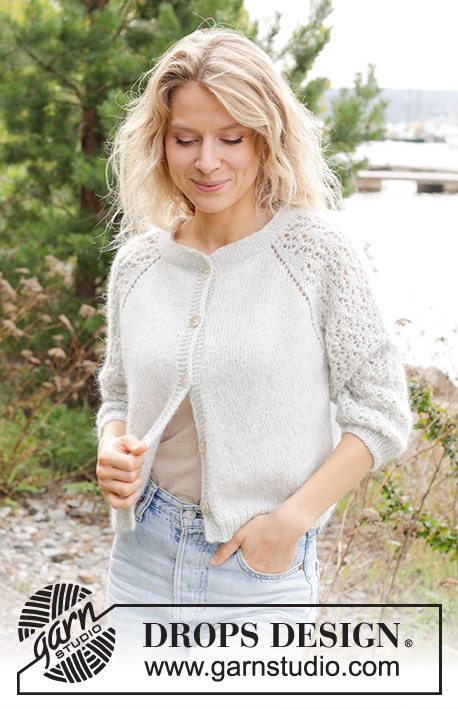
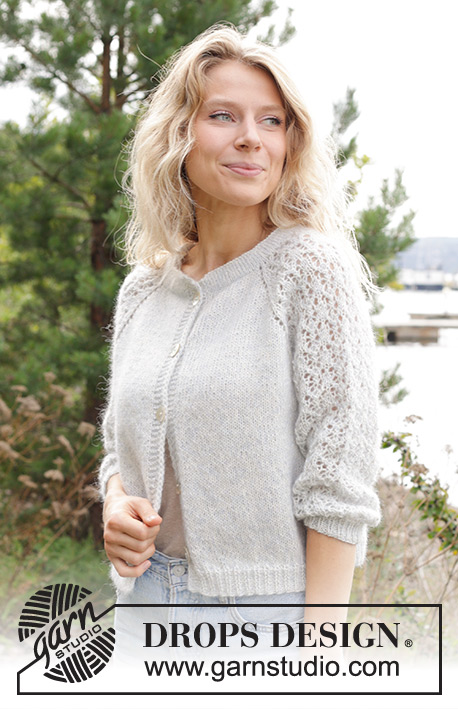
Remembering Spring Cardigan#rememberingspringcardigan |
|||||||||||||||||||
 |
 |
||||||||||||||||||
Knitted jacket in DROPS Alpaca and DROPS Kid-Silk. The piece is worked top down with double neck, raglan, lace pattern and ¾-length sleeves. Sizes S - XXXL.
DROPS 250-2 |
|||||||||||||||||||
|
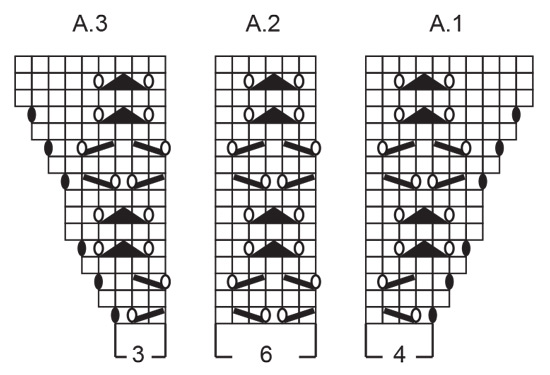
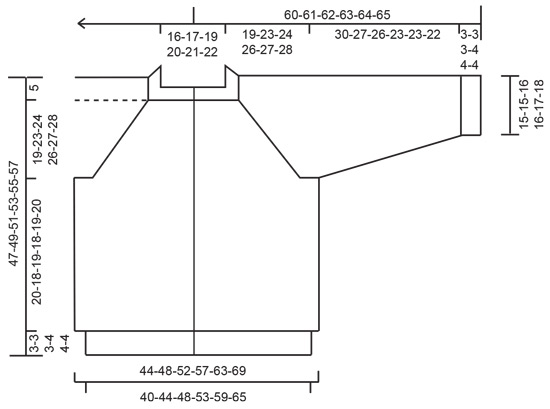
------------------------------------------------------- EXPLANATIONS FOR THE PATTERN: ------------------------------------------------------- GARTER STITCH (worked back and forth): Knit all rows, from both the right and wrong side. 1 ridge in height = knit 2 rows. BANDS WITH I-CORD: START OF ROW: Work the band as follows: Slip 1 stitch purl-wise, with yarn in front, knit 1, work 4 garter stitches. END OF ROW: Work the band as follows: Work until there are 6 stitches left on the row, work 4 garter stitches, slip 1 stitch purl-wise with yarn in front, knit 1. Work like this from both the right and wrong side. PATTERN: See diagrams A.1 to A.3. The diagrams show all the rows in the pattern seen from the right side. RAGLAN: Increase 1 stitch by making 1 yarn over before/after each marker-stitch. On the next row, on the front and back pieces, purl the yarn overs from the wrong side/knit them from the right side – leaving holes. The yarn overs on the sleeves are purled twisted from the wrong side – no holes. Work the new stitches in stocking stitch on the front and back pieces and into the pattern on the sleeves. DECREASE TIP (for sleeves): Decrease 1 stitch on each side of the marker-thread as follows: Work until there are 3 stitches left before the marker-thread, knit 2 together, knit 2 (marker-thread sits between these 2 stitches), slip 1 stitch knit-wise, knit 1 and pass the slipped stitch over the knitted stitch (2 stitches decreased). BUTTONHOLES: Work the buttonholes from the right side and on the right band. ROW 1: Work until there are 4 stitches left on the row, make 1 yarn over, knit 2 together, work the last 2 band stitches as before. ROW 2: Knit the yarn over to leave a hole. The first buttonhole is worked on the first row after the neck, the other buttonholes when the piece measures: S: 9-18-27-36 cm M: 9½-19-28½-38 cm L: 10-20-30-40 cm XL: 8½-17-25½-34-42½ cm XXL: 9-18-27-36-45 cm XXXL: 9½-19-28½-38-47½ cm. ------------------------------------------------------- START THE PIECE HERE: ------------------------------------------------------- JACKET – SHORT OVERVIEW OF THE PIECE. The pattern uses both long and short needles; start with the length which fits the number of stitches and change when necessary. The double neck and yoke are worked back and forth with circular needle, from mid front and top down. When the yoke is finished, it is divided for body and sleeves and the body continued back and forth with circular needle, while the sleeves wait. The sleeves are worked in the round. The neck is folded to the inside and sewn down. If there is a «0» in your chosen size, skip the information and go straight to the next instruction. DOUBLE NECK: Cast on 104-108-114-118-122-126 stitches with circular needle size 4.5 mm, 1 strand DROPS Alpaca and 1 strand DROPS Kid-Silk (= 2 strands). Change to circular needle size 3.5 mm (casting on with a larger needle size gives and elastic cast-on edge). Work stocking stitch back and forth for 2½ cm – with the last row from the wrong side and casting on 6 stitches at the end of this row = 110-114-120-124-128-132 stitches. Then work as follows: ROW 1 (= right side): Work BAND WITH I-CORD – read description above, knit to end of row and cast on 6 stitches = 116-120-126-130-134-138 stitches. ROW 2 (= wrong side): Work BAND WITH I-CORD, purl until there are 6 stitches left, work BAND WITH I-CORD. The neck is later folded along this row. Continue with stocking stitch and bands with I-cord on each side until the neck measures 6 cm. It will be approx. 3 cm when folded double. Insert 1 marker after the band at the beginning of the round, the yoke is measured from here. YOKE: Continue with needle size 4.5 mm. ROW 1 (= right side): Work the band as before, knit 104-108-114-118-122-126, AT THE SAME TIME decrease 10-10-12-12-12-12 stitches evenly spaced, work the band as before. Remember the first BUTTONHOLE – read description above = 106-110-114-118-122-126 stitches. ROW 2 (= wrong side): Work the band as before, knit from the wrong side until there are 6 stitches left, work the band as before. Insert 4 markers without working the stitches (these are used when increasing for raglan) as follows. Count 19-20-21-22-23-24 stitches (= left front piece), insert 1 marker in the next stitch, count 19 stitches (= sleeve), insert 1 marker in the next stitch, count 26-28-30-32-34-36 stitches (= back piece), insert 1 marker in the next stitch, count 19 stitches (= sleeve), insert 1 marker in the next stitch, there are 19-20-21-22-23-24 stitches left after the last marker (= right front piece). On the next row work PATTERN and increase for RAGLAN – read description above, as follows: ROW 1 (= right side): Work the band as before, knit 13-14-15-16-17-18 (= left front piece), increase 1 stitch for raglan, 1 stocking stitch (first marker sits in this stitch), work A.1, A.2 over the next 12 stitches, work A.3, 1 stocking stitch (second marker sits in this stitch = sleeve), increase 1 stitch for raglan, work 26-28-30-32-34-36 stocking stitches, increase 1 stitch for raglan (= back piece), 1 stocking stitch (third marker sits in this stitch), work A.1, A.2 over the next 12 stitches, work A.3, 1 stocking stitch (fourth marker sits in this stitch = sleeve), increase 1 stitch for raglan, work 13-14-15-16-17-18 stocking stitches and band as before (= right front piece). REMEMBER THE KNITTING TENSION! Continue this pattern back and forth but note that the increases are different on the front/back pieces and the sleeves - read INCREASES FOR SLEEVES and INCREASES FOR FRONT/BACK PIECES before continuing! INCREASES FOR SLEEVES: On the sleeves you increase 17-20-21-23-24-25 times on each side (including the first increase described above). The sleeve increases are drawn into diagrams A.1 and A.3. Each time A.1, A.2 and A.3 are finished in height, there is room for 2 more repeats of A.2 between A.1 and A.3. The stitches which do not fit into the pattern on each side of the sleeve are worked in stocking stitch. INCREASES FOR FRONT/BACK PIECES: On the front and back pieces, you increase 22-24-26-29-33-36 times (including the first increase described above), as follows: Increase on each row 0-0-0-0-4-6 times, then every 2nd row 22-24-26-29-29-30 times. AFTER THE LAST INCREASE: When all the increases are finished there are 262-286-302-326-350-370 stitches (41-44-47-51-56-60 stitches on each front piece, 55-61-63-67-69-71 stitches on each sleeve (including the marker-stitches on each side of the sleeves) and 70-76-82-90-100-108 stitches on the back piece. Continue with pattern, stocking stitch and the bands but without further increases. The stitches which do not fit into the pattern on each side of the sleeve are worked in stocking stitch. Work until the yoke measures 19-23-24-26-27-28 cm from the marker. DIVIDE FOR BODY AND SLEEVES: Now divide for the body and sleeves as follows: Work 41-44-47-51-56-60 stitches as before (= front piece), place the next 55-61-63-67-69-71 stitches on a thread for the sleeve, cast on 10-10-12-12-14-16 stitches (in side under sleeve), work 70-76-82-90-100-108 stitches (= back piece), place the next 55-61-63-67-69-71 stitches on a thread for the sleeve, cast on 10-10-12-12-14-16 stitches (in side under sleeve), work the last 41-44-47-51-56-60 stitches as before (= front piece). The body and sleeves are finished separately. The piece is now measured from here! BODY: = 172-184-200-216-240-260 stitches. Continue with stocking stitch and the bands as before, back and forth until the body measures 20-18-19-18-19-20 cm from the division. On the next row from the right side, begin working rib. AT THE SAME TIME increase 1-5-5-9-9-13 stitches evenly on the first row = 173-189-205-225-249-273 stitches, as follows: Change to circular needle size 3.5 mm. Work the band as before, rib (knit 1, purl 1 – remember the increases) until there are 7 stitches left, knit 1 and work the band as before. When the rib measures 3-3-3-4-4-4 cm, cast off a little loosely with rib. The jacket measures approx. 47-49-51-53-55-57 cm from the shoulder. SLEEVES: Place the 55-61-63-67-69-71 stitches from the thread on the one side of the piece on circular needle size 4.5 mm and knit up 1 stitch in each of the 10-10-12-12-14-16 stitches cast on under the sleeve = 65-71-75-79-83-87 stitches. Insert a marker-thread in the middle of the 10-10-12-12-14-16 stitches under the sleeve. Start at the marker-thread and continue the pattern in the round. The stitches which do not fit into the pattern under the sleeve are worked in stocking stitch. AT THE SAME TIME when the sleeve measures 3-3-3-4-4-4 cm from the division, decrease 2 stitches under the sleeve – read DECREASE TIP. Decrease like this every 4-2½-2-1½-1½-1 cm a total of 6-8-9-10-11-12 times = 53-55-57-59-61-63 stitches. Continue working until the sleeve measures 30-27-26-23-23-22 cm from the division. Change to double pointed needles size 3.5 mm and work rib (knit 1, purl 1). AT THE SAME TIME on the first round increase 1-1-3-3-5-7 stitches evenly spaced = 54-56-60-62-66-70 stitches. When the rib measures 3-3-3-4-4-4 cm, cast off a little loosely with rib. The sleeve measures approx. 33-30-29-27-27-26 cm from the division. ASSEMBLY: Fold the neck double to the inside and sew down. To avoid the neck being tight and rolling outwards, it is important that the seam is elastic. Sew the buttons onto the left band. |
|||||||||||||||||||
Diagram explanations |
|||||||||||||||||||
|
|||||||||||||||||||
 |
|||||||||||||||||||
 |
|||||||||||||||||||
Have you finished this pattern?Tag your pictures with #dropspattern #rememberingspringcardigan or submit them to the #dropsfan gallery. Do you need help with this pattern?You'll find 33 tutorial videos, a Comments/Questions area and more by visiting the pattern on garnstudio.com. © 1982-2026 DROPS Design A/S. We reserve all rights. This document, including all its sub-sections, has copyrights. Read more about what you can do with our patterns at the bottom of each pattern on our site. |
|||||||||||||||||||


With over 40 years in knitting and crochet design, DROPS Design offers one of the most extensive collections of free patterns on the internet - translated to 17 languages. As of today we count 324 catalogues and 12291 patterns translated into English (UK/cm).
We work hard to bring you the best knitting and crochet have to offer, inspiration and advice as well as great quality yarns at incredible prices! Would you like to use our patterns for other than personal use? You can read what you are allowed to do in the Copyright text at the bottom of all our patterns. Happy crafting!
Post a comment to pattern DROPS 250-2
We would love to hear what you have to say about this pattern!
If you want to leave a question, please make sure you select the correct category in the form below, to speed up the answering process. Required fields are marked *.