
Popular categories
Looking for a yarn?


Comments / Questions (122)
![]() Rannveig wrote:
Rannveig wrote:
Ermene skal fortsette uten økning, men skal man da strikke a1, a2 og a3? Eller bare A2? Overgangen der er vanskelig forklart, for her går ikke mønsteret opp om man fortsetter i a1 uten den første maska som økning.
20.05.2025 - 11:45DROPS Design answered:
Hej, sørg for at mønsteret stemmer over det mønster du allerede har strikket, hvis det ikke stemmer under ærmerne, så strikker du bare de ekstra masker i glatstrik :)
22.05.2025 - 11:57
![]() Julia wrote:
Julia wrote:
Hvor stor bevegelsesvidde er det tenkt at denne genseren skal ha? Altså..hva blir forskjellen på kroppsmål og mål på genser?
20.05.2025 - 10:03DROPS Design answered:
Hej Julia, modellen på billedet har en størrelse på som nok er 10 cm større i omkreds... men mål en bluse du synes om at have på og vælg den størrelse i måleskitsen som har de mål. Når du holder strikkefastheden som står i opskriften, så får du samme mål som i måleskitsen :)
22.05.2025 - 11:55
![]() Astic Josiane wrote:
Astic Josiane wrote:
Merci pour votre réponse mais ma question était pour le premier rang.Lorsque j’ai tricoté A1( (4 mailles),A2(6mailles),etA3 (3mailles) il me reste 6mailles .
12.05.2025 - 09:31DROPS Design answered:
Bonjour Mme Astic, vous en êtes au tout premier rang du premier point ajouré en hauteur? Vous devez simplement tricoter 2 fois les 6 mailles de A.2, ainsi vous avez: 4 m de A.1, 2 x 6 m de A.2 et 3 m de A.3 = 4+12+3=19 m pour la manche. Bon tricot!
12.05.2025 - 11:05
![]() Astic Josiane wrote:
Astic Josiane wrote:
Pour le diagramme des manches Lorsque j’ai tricoté A1etA2 il me reste 11mailles pour A3 alors qu’il n’en faut que 3
11.05.2025 - 16:44DROPS Design answered:
Bonjour Mme Astic, quand les diagrammes sont terminés, vous avez 10 m dans A.1 que vous tricotez ainsi: 4 m de A.1 (1er rang) + 6 m de A.2, tricotez ensuite A.2 comme avant jusqu'aux 9 m de A.3, tricotez encore 1 fois A.2 (6 m) et terminez par les 3 m de A.3. Bon tricot!
12.05.2025 - 08:18
![]() Claudia wrote:
Claudia wrote:
Hallo! Bei Größe XXXL Passe: Man muss von 126 auf 114 Maschen reduzieren und sie dann wie folgt einteilen: 18M/ 19M/ 36M/ 19M /18M - das sind dann aber insgesamt nur 110 Maschen!? Da stimmt doch etwas nicht?
27.04.2025 - 21:15DROPS Design answered:
Liebe Claudia, beachten Sie, daß die Markierer in jeweils einer Masche (und nicht zwischen Maschen) eigesetzt werden, daher kommen die 4 fehlenden Maschen. Viel Spaß beim Stricken!
28.04.2025 - 08:43
![]() Anneli Ahnstedt Stengård wrote:
Anneli Ahnstedt Stengård wrote:
Mönstret rad 3. Börjas med Omslag, sedan Räta maska tidigare än rad 1, men hur fortsätter jag efter det?
19.04.2025 - 20:10DROPS Design answered:
Hej Anneli. Rad 3 i A.1 sticka såhär: omslag, 2 räta maskor, 2 rätmaskor tillsammans, omslag, 1 rätmaska. Mvh DROPS Design
25.04.2025 - 11:14
![]() Patrycja wrote:
Patrycja wrote:
Dzień dobry, nie rozumiem tego opisu"przerobić schemat A.1, schemat A.2 ponad 12 następnymi oczkami, schemat A.3, 1 oczko prawe(= rękaw), dodać 1 oczko na reglan, przerobić 26-28-30-32-34-36 oczek prawych, dodać 1 oczko\\\\\\\". Z moich obliczeń wynika że na rękaw powinnam mieć 19 oczek a z opisu mi wychodzi 16. Czy mogę prosić o jaśniejsze wytłumaczenie jak zacząć robić ten raglan ściegiem ażurowym? Co oznacza ponad 12 następnymi oczkami?
18.04.2025 - 22:23DROPS Design answered:
Witaj Patrycjo, przerabiać schemat ponad 12 oczkami oznacza, że powtarzasz schemat A.2 2 razy, jeden po drugim. Jak przerabiać kilka schematów w tym samym rzędzie/okrążeniu znajdziesz TUTAJ. W razie dodatkowych pytań, proszę napisz również, który rozmiar wykonujesz. Pozdrawiamy!
22.04.2025 - 10:14
![]() Sophie wrote:
Sophie wrote:
Je ne comprends pour la manche, lorsque j’ai terminé les augmentations, je suis à débuter le 9e tang de la grille. Est-ce que je je supprime la première jeté de A1 et la dernière de A3?
07.04.2025 - 01:02DROPS Design answered:
Bonjour Sophie, notez dans les diagrammes A.1 et A.3 quelle est votre première maille dans A.1 et quelle est votre dernière maille dans A.3, puis tricotez juste les mailles que vous avez du point fantaisie (sans les ovales noirs car on n'augmente plus) en veillant à diminuer autant que vous faites de jeté; si vous n'avez par ex pas suffisamment de mailles pour faire 1 diminution/1 jeté, tricotez ces mailles à l'endroit. Bon tricot!
07.04.2025 - 09:39
![]() Mieke Sprooten wrote:
Mieke Sprooten wrote:
De vertaling van de steken voor het telpatroon is niet helemaal correct: bij de tweede omslag (het open rondje) moet het woord GEEN weggelaten worden. Er moeten juist wél gaatjes ontstaan😃
05.04.2025 - 17:47
![]() Kerstin wrote:
Kerstin wrote:
Jag har svårt för att sticka tröjor jumprar etc uppifrån och ner då arbetet blir tungt och svårhandterligt Jag har ryggvärk och får ont i axlar av att hålla tungt Varför är nästan alla mönster stickade uppifrån och ner Jag har gamla mönster och kan använda mig av dessa men ibland vill man pröva nya Hälsningar Kerstin Larsson Lund
28.03.2025 - 09:45DROPS Design answered:
Hej Kerstin. Många föredrar att sticka uppifrån och ned eftersom man då enkelt kan se hur långt man vill ha plagget, men vi har mönster som stickas från båda håll. Kom ihåg att du kan filtrera på stickriktning, om du klickar här så ser du allt som är stickat nedifrån och upp till dam. Mvh DROPS Design
28.03.2025 - 10:36
|
|||||||||||||||||||
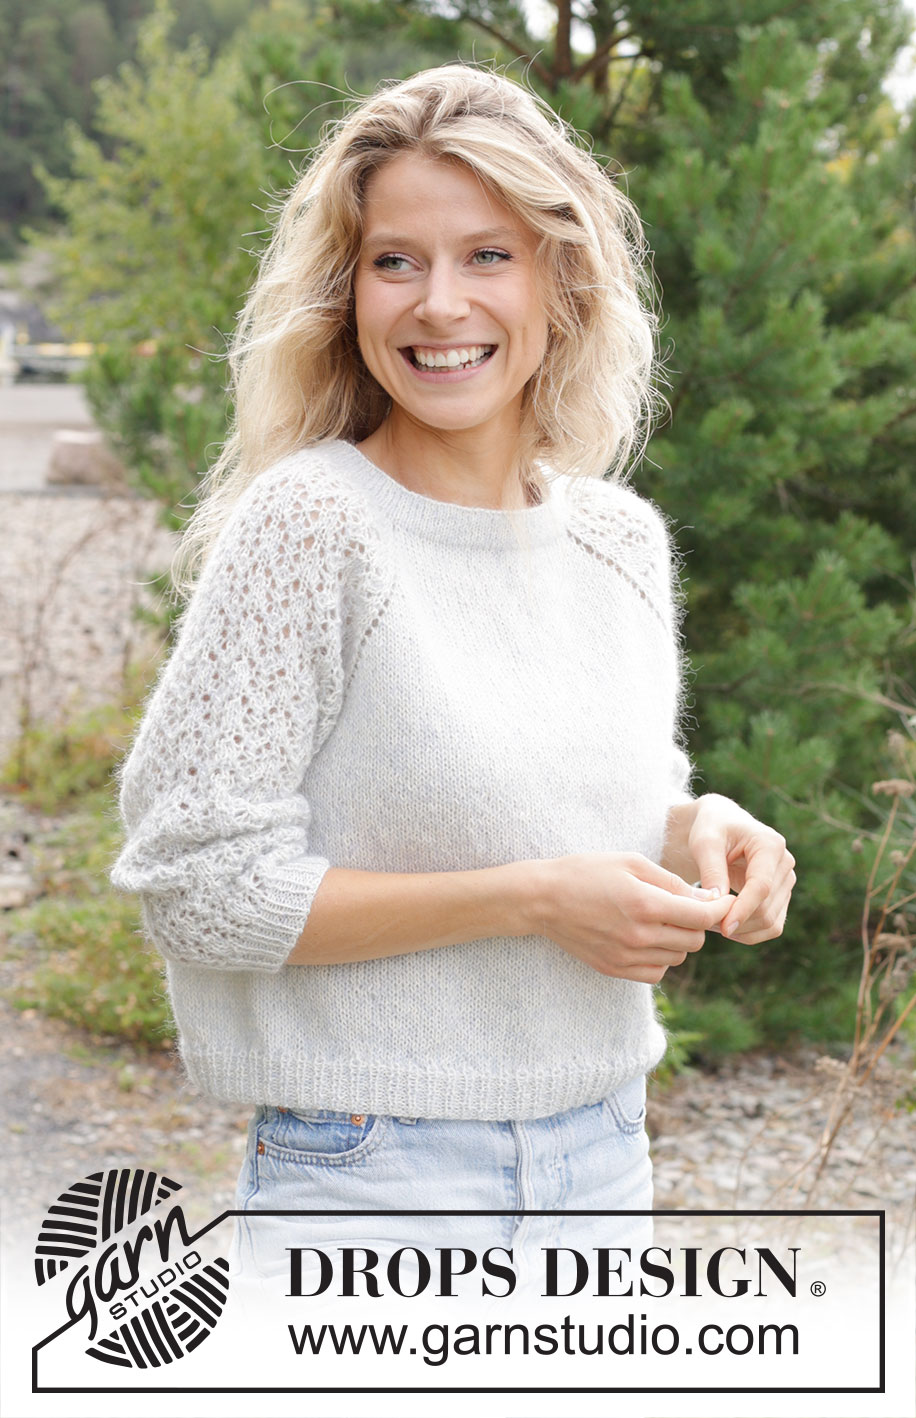
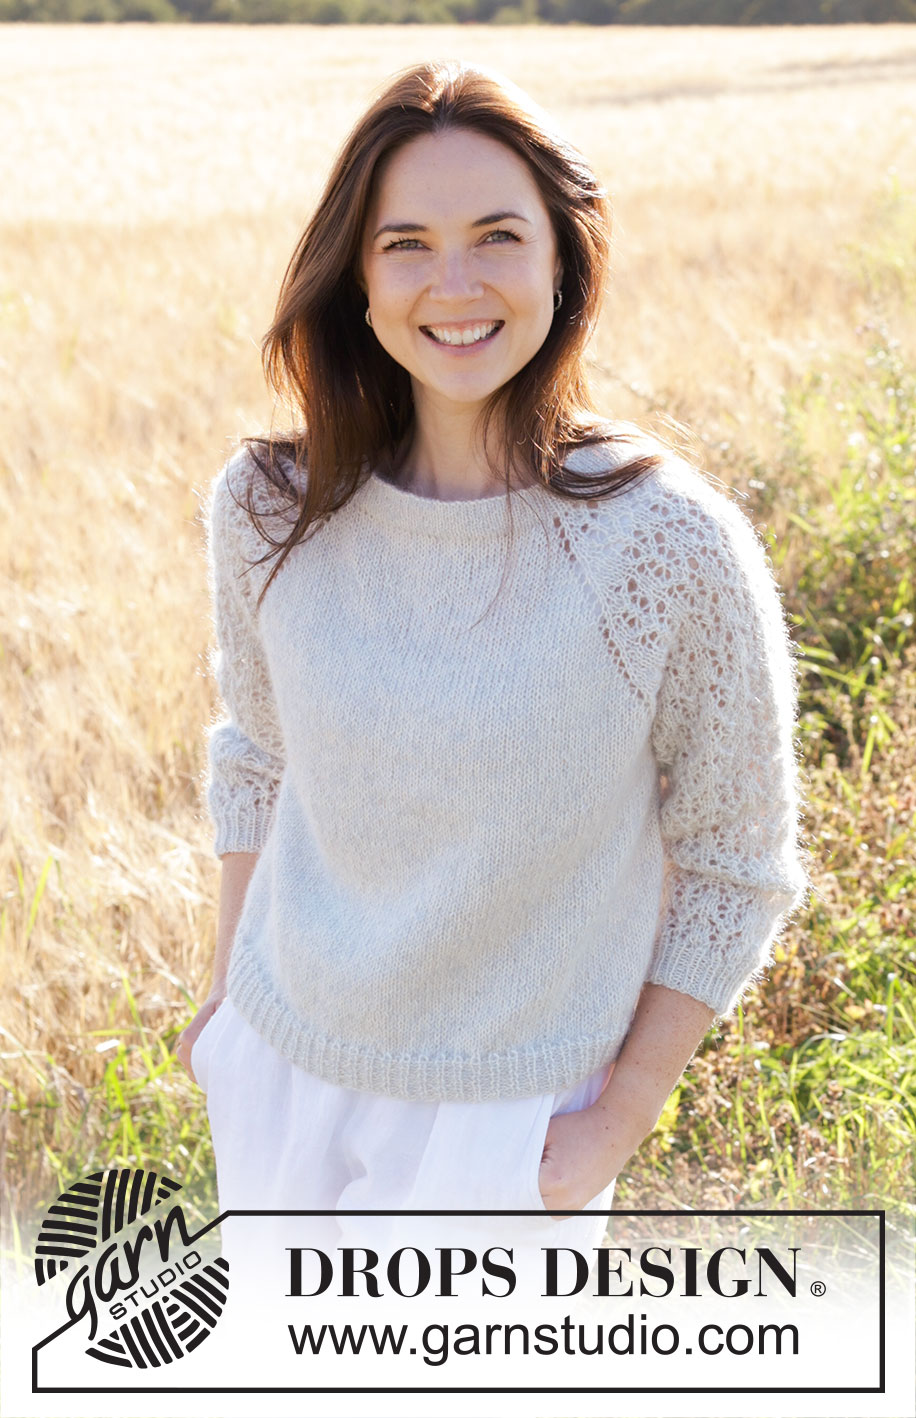
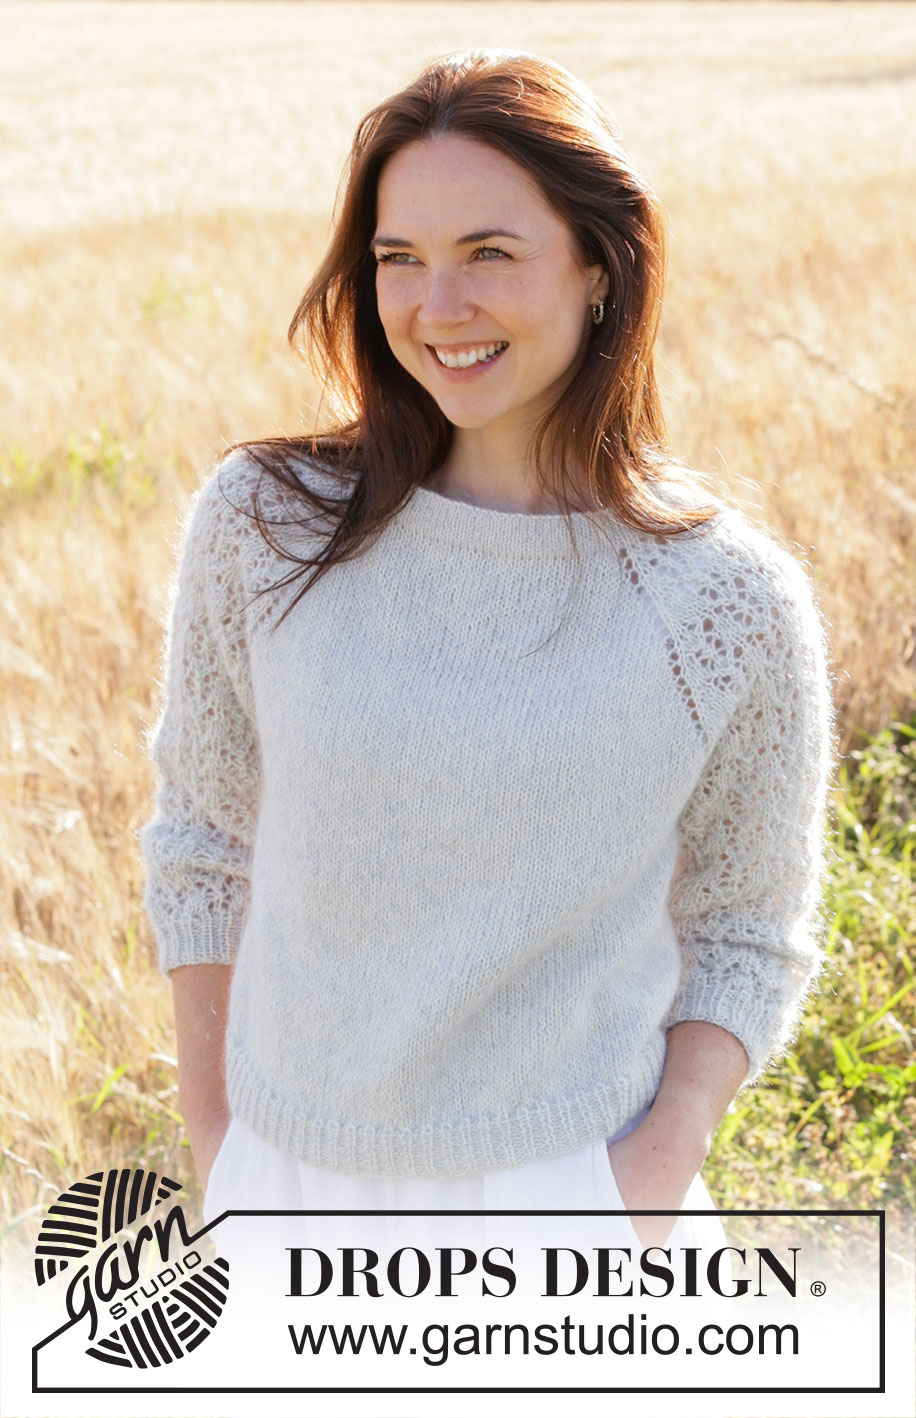
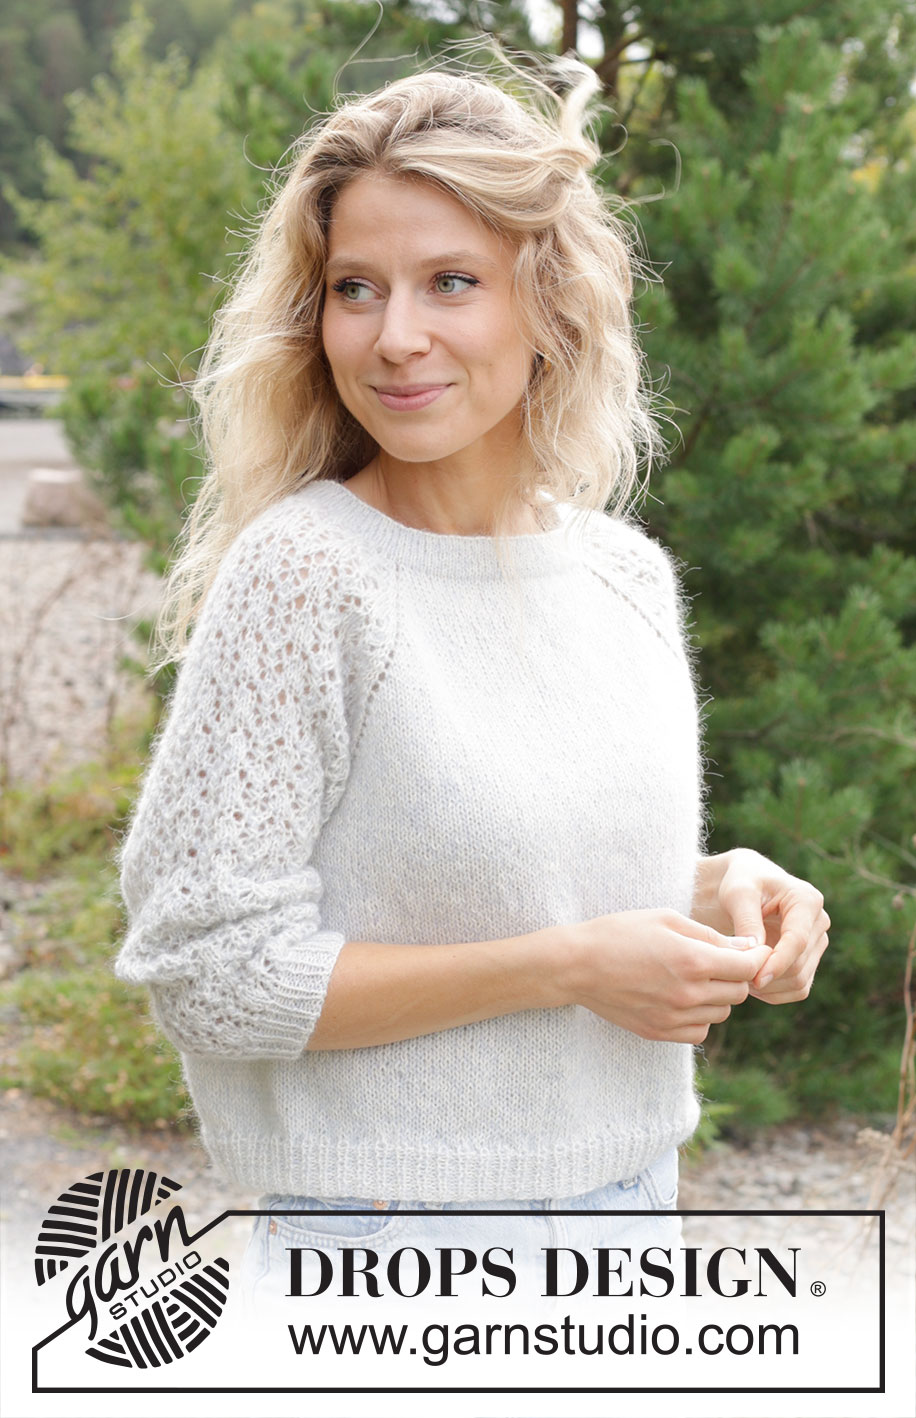
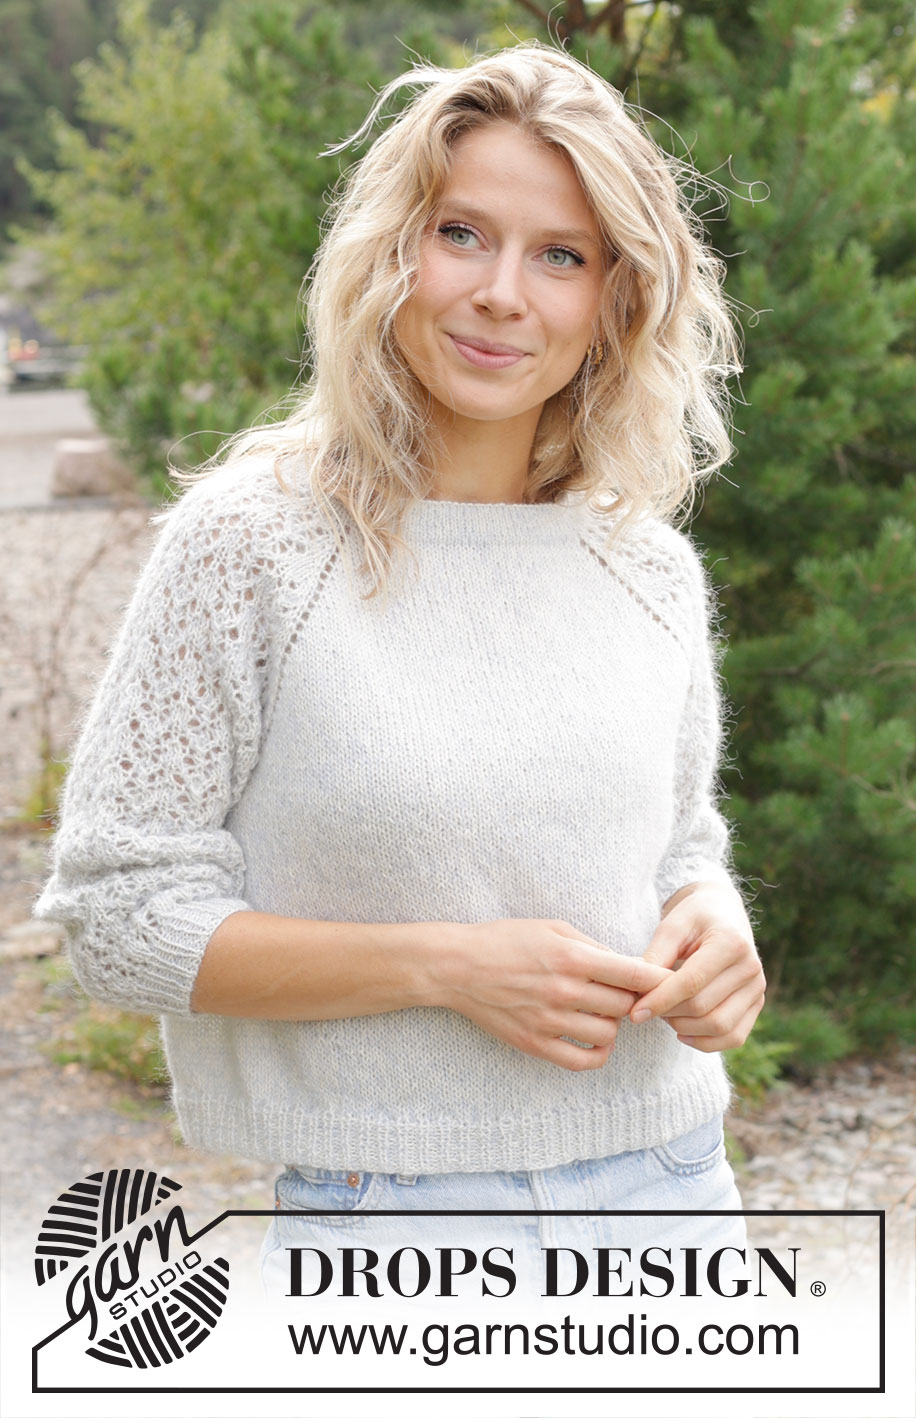
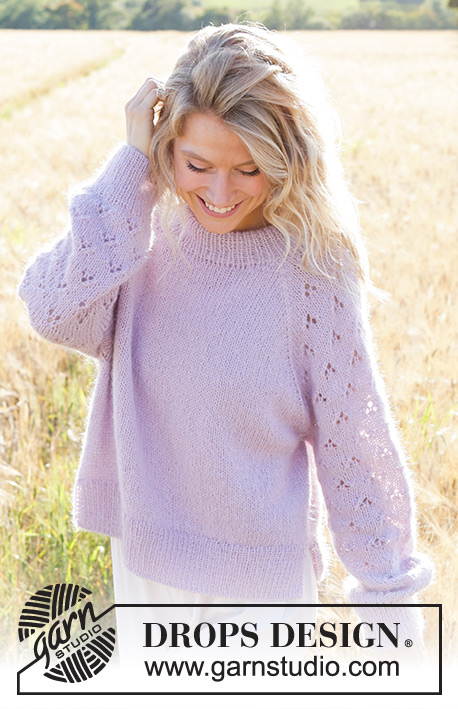
Remembering Spring#rememberingspringsweater |
|||||||||||||||||||
 |
 |
||||||||||||||||||
Knitted jumper in DROPS Alpaca and DROPS Kid-Silk. The piece is worked top down with double neck, raglan, lace pattern and ¾-length sleeves. Sizes S - XXXL.
DROPS 250-1 |
|||||||||||||||||||
|
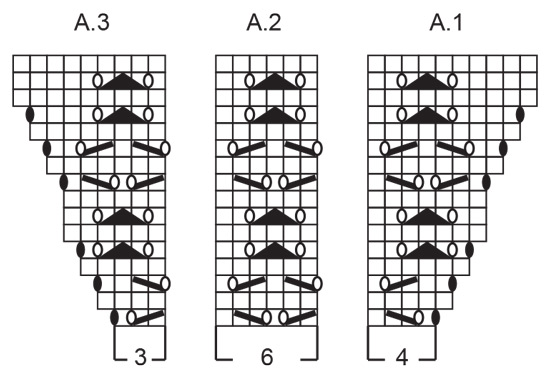
------------------------------------------------------- EXPLANATIONS FOR THE PATTERN: ------------------------------------------------------- PATTERN: See diagrams A.1 to A.3. RAGLAN: Increase 1 stitch by making 1 yarn over before/after each marker-stitch. On the next round knit the yarn overs on the front and back pieces – leaving holes. The yarn overs on the sleeves are knitted twisted – no holes. Work the new stitches in stocking stitch on the front and back pieces and into the pattern on the sleeves. DECREASE TIP (for sleeves): Decrease 1 stitch on each side of the marker-thread as follows: Work until there are 3 stitches left before the marker-thread, knit 2 together, knit 2 (marker-thread sits between these 2 stitches), slip 1 stitch knit-wise, knit 1 and pass the slipped stitch over the knitted stitch (2 stitches decreased). ------------------------------------------------------- START THE PIECE HERE: ------------------------------------------------------- JUMPER – SHORT OVERVIEW OF THE PIECE: The pattern uses both long and short needles; start with the length which fits the number of stitches and change when necessary. The double neck and yoke are worked in the round with circular needle, top down. When the yoke is finished, it is divided for body and sleeves and the body is continued in the round, while the sleeves wait. The sleeves are worked in the round, top down. The neck is folded to the inside and sewn down. If there is a «0» in your chosen size, skip the information and go straight to the next instruction. DOUBLE NECK: Cast on 104-108-114-118-122-126 stitches with circular needle size 4.5 mm, 1 strand DROPS Alpaca and 1 strand DROPS Kid-Silk (= 2 strands). Change to circular needle size 3.5 mm (casting on with a larger needle size gives and elastic cast-on edge). Work stocking stitch in the round for 2½ to 3 cm. Purl 1 round, the neck is later folded along this round. Continue with stocking stitch until the neck measures 6 cm. It will be approx. 3 cm when folded double. Insert 1 marker at the beginning of the round (= mid-back), the yoke is measured from here. YOKE: Change to circular needle size 4.5 mm. Knit 1 round and decrease 10-10-12-12-12-12 stitches evenly spaced = 94-98-102-106-110-114 stitches. Insert 4 markers without working the stitches (these are used when increasing for raglan) as follows: Count 13-14-15-16-17-18 stitches (= half back piece), insert 1 marker in the next stitch, count 19 stitches (= sleeve), insert 1 marker in the next stitch, count 26-28-30-32-34-36 stitches (= front piece), insert 1 marker in the next stitch, count 19 stitches (= sleeve), insert 1 marker in the next stitch, there are 13-14-15-16-17-18 stitches left after the last marker (= half back piece). On the next round, work PATTERN and increase for RAGLAN – read description above, as follows: Knit 13-14-15-16-17-18 (= half back piece), increase 1 stitch for raglan, knit 1 (first marker sits in this stitch), work A.1, A.2 over the next 12 stitches, work A.3, knit 1 (second marker sits in this stitch) (= sleeve), increase 1 stitch for raglan, knit 26-28-30-32-34-36, increase 1 stitch for raglan (= front piece), knit 1 (third marker sits in this stitch), work A.1, A.2 over the next 12 stitches, work A.3, knit 1 (fourth marker sits in this stitch) (= sleeve),increase 1 stitch for raglan, knit 13-14-15-16-17-18 (= half back piece). REMEMBER THE KNITTING TENSION! Continue this pattern but note that the increases are different on the front/back pieces and the sleeves – read INCREASES FOR SLEEVES and INCREASES FOR FRONT/BACK PIECES before continuing! INCREASES FOR SLEEVES: On the sleeves you increase 17-20-21-23-24-25 times on each side (including the first increase described above). The sleeve increases are drawn into diagrams A.1 and A.3. Each time A.1, A.2 and A.3 are finished in height, there is room for 2 more repeats of A.2 between A.1 and A.3. The stitches which do not fit into the pattern on each side of the sleeve are worked in stocking stitch. INCREASES FOR FRONT/BACK PIECES: On the front and back pieces, you increase 22-24-26-29-33-36 times (including the first increase described above), as follows: Increase on each round 0-0-0-0-4-6 times, then every 2nd round 22-24-26-29-29-30 times. AFTER THE LAST INCREASE: When all the increases are finished there are 250-274-290-314-338-358 stitches (70-76-82-90-100-108 stitches on the front/back pieces and 55-61-63-67-69-71 stitches on each sleeve (including the marker-stitches on each side of the sleeves). Continue with pattern and stocking stitch but without further increases. The stitches which do not fit into the pattern on each side of the sleeve are worked in stocking stitch. Work until the yoke measures 19-23-24-26-27-28 cm from the marker. DIVIDE FOR BODY AND SLEEVES: Now divide for the body and sleeves as follows: Knit 35-38-41-45-50-54 (= half back piece), place the next 55-61-63-67-69-71 stitches on a thread for the sleeve, cast on 10-10-12-12-14-16 stitches (in side under sleeve), knit 70-76-82-90-100-108 (= front piece), place the next 55-61-63-67-69-71 stitches on a thread for the sleeve, cast on 10-10-12-12-14-16 stitches (in side under sleeve), knit the last 35-38-41-45-50-54 stitches (= half back piece). The body and sleeves are finished separately. The piece is now measured from here! BODY: = 160-172-188-204-228-248 stitches. Continue with stocking stitch in the round until the body measures 20-18-19-18-19-20 cm from the division. On the next round begin working rib, AT THE SAME TIME on the first round increase 0-4-4-8-8-12 stitches evenly spaced = 160-176-192-212-236-260 stitches, as follows: Change to circular needle size 3.5 mm, work rib (knit 1, purl 1 – remember the increases). When the rib measures 3-3-3-4-4-4 cm, cast off a little loosely with rib. The jumper measures approx. 47-49-51-53-55-57 cm from the shoulder. SLEEVES: Place the 55-61-63-67-69-71 stitches from the thread on the one side of the piece on circular needle size 4.5 mm and knit up 1 stitch in each of the 10-10-12-12-14-16 stitches cast on under the sleeve = 65-71-75-79-83-87 stitches. Insert a marker-thread in the middle of the 10-10-12-12-14-16 stitches under the sleeve. Start at the marker-thread and continue the pattern in the round. The stitches which do not fit into the pattern under the sleeve are worked in stocking stitch. AT THE SAME TIME when the sleeve measures 3-3-3-4-4-4 cm from the division, decrease 2 stitches under the sleeve – read DECREASE TIP. Decrease like this every 4-2½-2-1½-1½-1 cm a total of 6-8-9-10-11-12 times = 53-55-57-59-61-63 stitches. Continue working until the sleeve measures 30-27-26-23-23-22 cm from the division. Change to double pointed needles size 3.5 mm and work rib (knit 1, purl 1). AT THE SAME TIME on the first round increase 1-1-3-3-5-7 stitches evenly spaced = 54-56-60-62-66-70 stitches. When the rib measures 3-3-3-4-4-4 cm, cast off a little loosely with rib. The sleeve measures approx. 33-30-29-27-27-26 cm from the division. ASSEMBLY: Fold the neck double to the inside and sew down. To avoid the neck being tight and rolling outwards, it is important that the seam is elastic. |
|||||||||||||||||||
Diagram explanations |
|||||||||||||||||||
|
|||||||||||||||||||
|
|||||||||||||||||||

|
|||||||||||||||||||
Have you finished this pattern?Tag your pictures with #dropspattern #rememberingspringsweater or submit them to the #dropsfan gallery. Do you need help with this pattern?You'll find 29 tutorial videos, a Comments/Questions area and more by visiting the pattern on garnstudio.com. © 1982-2025 DROPS Design A/S. We reserve all rights. This document, including all its sub-sections, has copyrights. Read more about what you can do with our patterns at the bottom of each pattern on our site. |
|||||||||||||||||||


With over 40 years in knitting and crochet design, DROPS Design offers one of the most extensive collections of free patterns on the internet - translated to 17 languages. As of today we count 314 catalogues and 11822 patterns translated into English (UK/cm).
We work hard to bring you the best knitting and crochet have to offer, inspiration and advice as well as great quality yarns at incredible prices! Would you like to use our patterns for other than personal use? You can read what you are allowed to do in the Copyright text at the bottom of all our patterns. Happy crafting!
Post a comment to pattern DROPS 250-1
We would love to hear what you have to say about this pattern!
If you want to leave a question, please make sure you select the correct category in the form below, to speed up the answering process. Required fields are marked *.