
Popular categories
Looking for a yarn?


Comments / Questions (35)
![]() Kaan wrote:
Kaan wrote:
När ska man byta till rundsticka 5 80cm? Är det efter den dubbla halskanten och resterande ok + fram/backdel på den 80cm?
28.02.2026 - 19:18DROPS Design answered:
Hej Kaan. Du byter till den längre (80 cm) rundstickan när du inte längre får plats med maskorna på den korta (40 cm). Mvh DROPS Design
04.03.2026 - 13:58
![]() Minh Thu wrote:
Minh Thu wrote:
Hallo, ich stricke die Größe XL aber die Anleitung zu den Zunahmen und Markierungen nach der doppelten Halsblende ist falsch. Wenn man nach der Anleitung geht, bleibt nach dem 4. Markierer 17 Maschen übrig und nicht 13. Wie soll ich die 1. Runde bei Größe XL mit Zunahmen und Markierungen stricken? Außerdem sollte die Anleitung korrigiert werden, damit die anderen nicht in diesen Fehler reinlaufen. Vielen Dank im Voraus!
10.01.2026 - 10:19DROPS Design answered:
Liebe Frau Minh Thu, beachten Sie, daß die Markierer jeweils in einer Masche (und nicht zwischen Maschen) eingesetzt werden, so haben Sie in XL: 14 M (1/2 Rückenteil), 1 M mit einer Markierung, 21 M (Ärmel), 1 M mit einer Markierung, 27 M (Vorderteil), 1 M mit einer Markierung, 21 M (ÄRmel), 1 M mit einer Markierung, und 13 M (1/2 Rückenteil= 14+1+21+1+27+1+21+1+13=100 Maschen. Viel Spaß beim Stricken!
12.01.2026 - 09:58
![]() Larissa wrote:
Larissa wrote:
Beim Halsausschnitt heisst es in jeder Reihe (hin und zurück) die Raglanzunahmen beidseitig der Markierer zu arbeiten. Also immer vor und nach dem Markierer einen Umschlag. Um die angegebene Maschenzahl zu erhalten ist das auch nötig. Damit erhalte ich aber sehr grosse Löcher. Wie kann ich das vermeiden und dabei trotzdem genug Maschen zunehmen?
05.12.2025 - 13:13DROPS Design answered:
Liebe Larissa, in diesem Video zeigen wir, wie die Umschläge bei den Rückreihen gestrickt werden, und in diesem Video wie diese Umschläge bei den Hinreihen gestrickt werden. Es kann Ihnen sicher helfen. Viel Spaß beim Stricken!
05.12.2025 - 13:31
![]() Larissa wrote:
Larissa wrote:
Bei den Raglanzunahmen ist immer von Hin- und Rückreihen die Rede. Es werden aber nur die verkürzen Reihen für den Halsausschnitt so gestrickt, alles andere in Runden, richtig? Wie muss ich dann die Raglanzunahmen in den Runden machen?
03.12.2025 - 21:52DROPS Design answered:
Liebe Larissa, ja genau, die Raglanzuanhmen sind zuerst abwechslungsweise bei den Hin- und den Rückreihen wegen der Erhöhung (den verkürzten Reihen) gestrickt, dann strickt man wieder in der Runde und die Raglanzunehmen sind dann immer bei den Hinreihen gestrickt. Sieh dieses Video für verkürzten Reihen und Raglanzunahmen. Viel Spaß beim Stricken!
04.12.2025 - 09:17
![]() Katherine wrote:
Katherine wrote:
Am I missing something fundamental or do the numbers for the small size not add up? Cast on 88 but divide stitches into 21 for both sleeves, 21 for front 21 for body is 84. Then increase 4 is 88 (but it says 92) , then increase 4x4 (16) for short rows is either 104 or (or if the 88-92 is correct) 108 but I'm supposed have 124?
01.12.2025 - 16:13DROPS Design answered:
Hi Katherine, first row: 10+1+1 (marker)+21+1 (marker)+21+2+1 (marker) +21 +1 (marker) + 11+1=92. Then follow the pattern for short rows. If you have any questions, please write to us. Happy knitting!
01.12.2025 - 16:29
![]() Evelyne P wrote:
Evelyne P wrote:
Bonjour, je reviens sur ma question : j'ai compris comment augmenter en faisant un jeté, mais je ne comprends pas "de chaque côté des 2 premières mailles avec un marqueur". Merci de m'expliquer pas à pas.
25.11.2025 - 12:31DROPS Design answered:
Bonjour Evelyne, lorsque vous tricotez le 1er des rangs raccourcis, ce rang commence au milieu dos, vous tricotez ainsi sur l'endroit jusqu'à ce que vous ayez passé les 2 premiers marqueurs - vous augmentez de chaque côté de ces marqueurs = 4 augmentations, tournez et augmentez de chaque côté des 4 marqueurs = 8 augmentations, et ainsi de suite, vous augmenterez 4 mailles seulement au dernier des rangs raccourcis, retrouvez cette technique ici en vidéo. Bon tricot!
26.11.2025 - 08:07
![]() Evelyne P wrote:
Evelyne P wrote:
Bonjour, pour le 1er rang de l\'encolure en rangs raccourcis (raglan), je ne comprends pas \"augmenter de chaque côté des 2 premières mailles avec un marqueur (on augment de 4 mailles) . Pouvez-vous préciser ? Merci
21.11.2025 - 19:40DROPS Design answered:
Bonjour Evelyne P, retrouvez sous RAGLAN au début des explications, où et comment on va augmenter: avec 1 jeté avant/après le marqueur indiqué, et comment tricoter ce jeté au tour suivant en fonction de sa position (avant/après le marqueur). Bon tricot!
24.11.2025 - 07:55
![]() Lois Turner wrote:
Lois Turner wrote:
Will this pattern work using Drops Big Merino
11.10.2025 - 02:05DROPS Design answered:
Dear Lois, yes, you can use DROPS Big Merino to work this pattern. Happy knitting!
12.10.2025 - 15:05
![]() Valérie wrote:
Valérie wrote:
Bonjour, à l'étape de la division dos/devant et manches, - il est indiqué " glisser les XX mailles suivantes en attente" : faut il les TRICOTER ET les glisser en attente? - "monter les XX mailles ( coté sous la manche)" : pouvez vous me dire si ces mailles appartiennent au dos/devant et donc qu'elles doivent etre tricotées avec le dos/devant? ou sont elles à mettre en attente avec chaque manche? merci pour vos réponses
04.08.2025 - 21:26DROPS Design answered:
Bonjour Valérie, pas besoin de tricoter les mailles des manches avant de les mettre en attente, vous pouvez simplement les glisser en attente sur un fil et monter les XX mailles pour l'emmanchure (pour les remplacer); dans cette leçon, vous pourrez voir, à partir de la photo 10) comment on divise l'ouvrage et comment on continue le bas du pull/les manches. Bon tricot!
05.08.2025 - 08:39
![]() Berit Dahl wrote:
Berit Dahl wrote:
Vil gjerne ha Meet the Captain ensfarget gråblå. XL Hvordan bestiller jeg det? Kan jeg skrive bestillingen her?
05.07.2025 - 16:05DROPS Design answered:
Hei Berit. Du kan bestille garn på nettsiden vår, men du blir "omdirigert" til en nettbutikk som selger vårt garn. Eller du kan klikke på Finn en butikk! (helt øverst), og selv velge hvilken butikk du vil handle i fra. Sjekk gjerne prisen på de ulike butikkene, noen kan ha et bedre tilbud enn andre. mvh DROPS Design
10.07.2025 - 06:36
|
|
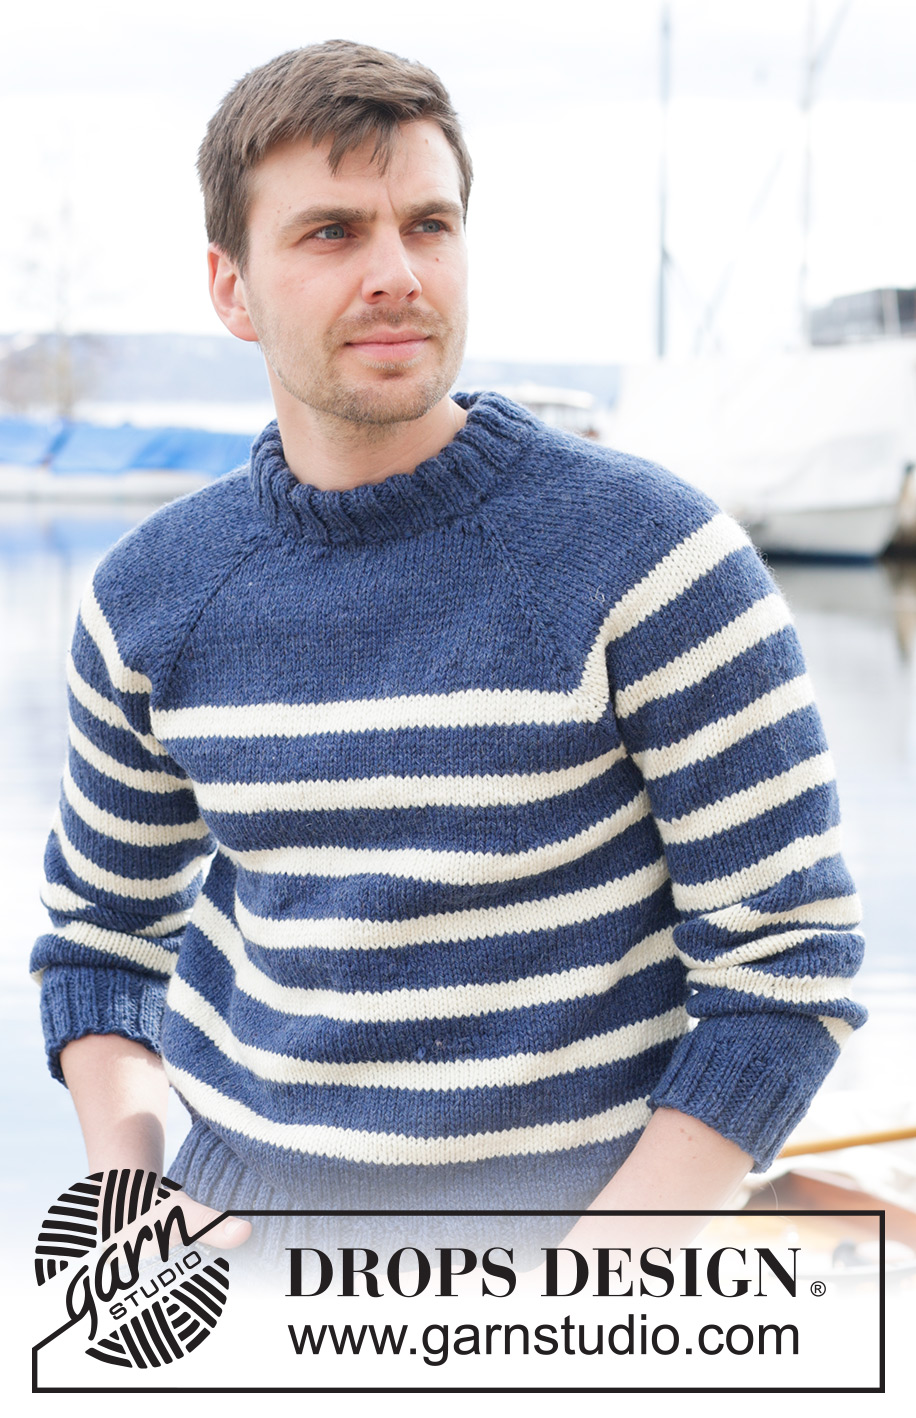
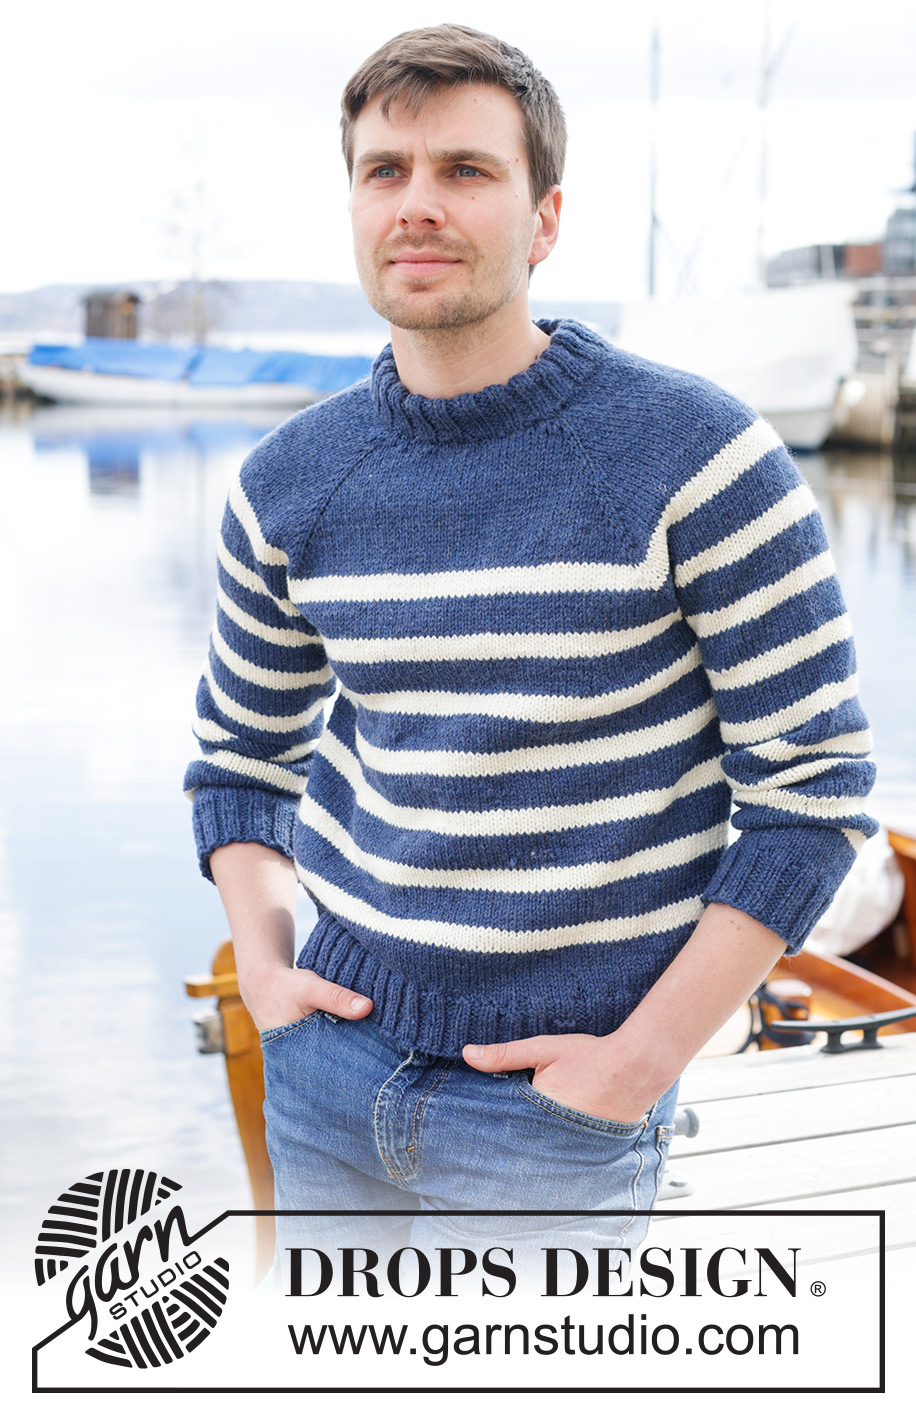
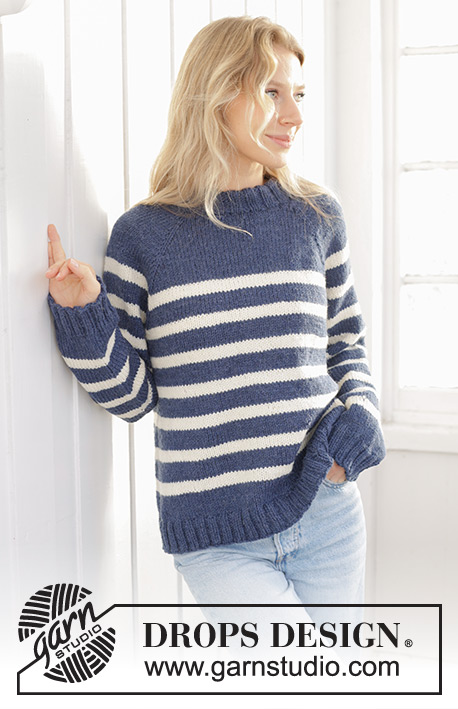
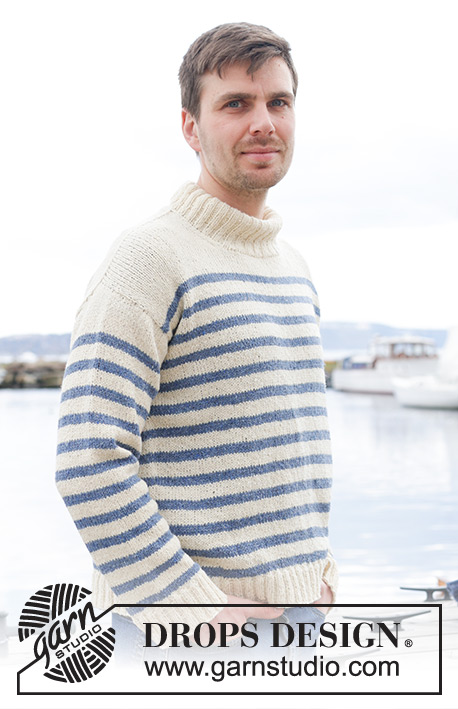
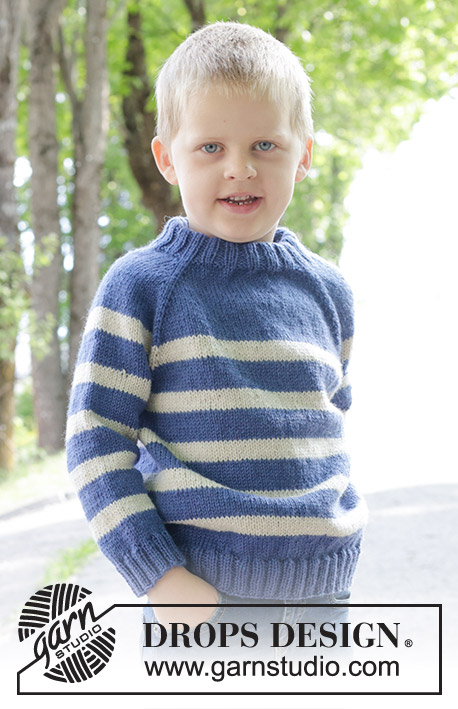
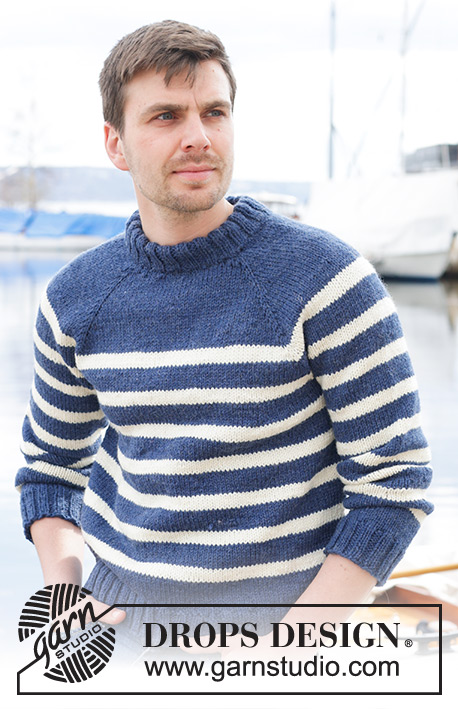
Meet the Captain#meetthecaptainsweater |
|
 |
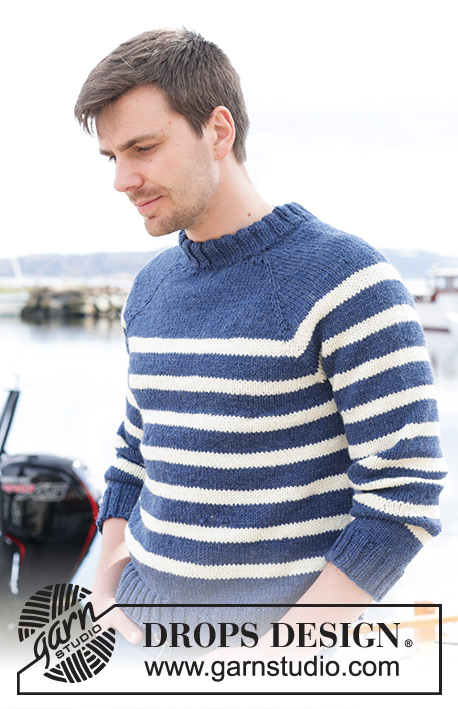 |
Knitted jumper for men in DROPS Alaska. The piece is worked top down with raglan, stripes and double neck. Sizes S - XXXL.
DROPS 233-22 |
|
|
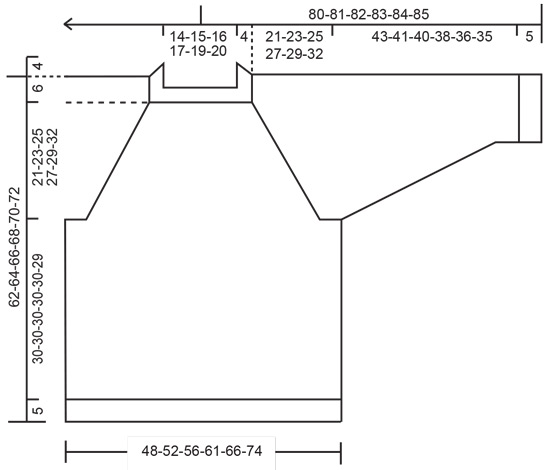
------------------------------------------------------- EXPLANATIONS FOR THE PATTERN: ------------------------------------------------------- RAGLAN: All increases made before/after 1 stitch in stocking stitch (the stitch with the marker in). When working from the right side, increase for the body before markers 1 and 3 and after markers 2 and 4; when working from the wrong side increase after markers 1 and 3 and before markers 2 and 4. Increase for the sleeves after markers 1 and 3 and before markers 2 and 4 (always increase from the right side on the sleeves). Increase 1 stitch by making 1 yarn over. The yarn overs are worked as follows from the wrong side: BEFORE MARKER: Purl the back loop (stitch twists to the right). AFTER MARKER: Slip the yarn over onto the right needle, place it back on the left the other way around, purl the front loop (stitch twists to the left). The yarn overs are worked as follows from the right side: BEFORE MARKER: Slip the yarn over onto the right needle knit-wise, place it back on the left the other way around, knit the front loop (stitch twists to the right). AFTER MARKER: Knit the back loop (stitch twists to the left). STRIPES: Start the stripes at marker 1 (so the colour-changes in the stripes are less visible mid-back) and work as follows: * 5 rounds with colour off white (approx. 2 cm), 8 rounds with colour dark blue (approx. 3½ cm) *, repeat from *-*. DECREASE TIP (for sleeves): Decrease 1 stitch on either side of the marker-thread as follows: Work until there are 3 stitches left before the marker-thread, knit 2 together, knit 2 (marker-thread sits between these 2 stitches), slip 1 stitch knit-wise, knit 1 and pass the slipped stitch over the knitted stitch. ------------------------------------------------------- START THE PIECE HERE: ------------------------------------------------------- JUMPER – SHORT OVERVIEW OF THE PIECE: The neck and yoke are worked in the round with circular needle, from mid back and top down. The yoke is divided for body and sleeves and the body is continued in the round with circular needle. The sleeves are worked in the round, with short circular needle/double pointed needles. DOUBLE NECK: Cast on 88-92-96-100-104-108 stitches with colour dark blue DROPS Alaska, using short circular needles size 5 and 4 mm held together. Remove the needle size 5 mm (this gives you an elastic cast-on edge). Work rib in the round (knit 2, purl 2) for 8 cm. Fold the neck double to the inside and knit 1 round, working every 4th stitch together with its corresponding stitch on the cast-on edge. You now have a double neck. Change to circular needle size 5 mm. Insert 4 markers at the same time as increasing 4 stitches on the round as described below – the markers are used when increasing for raglan: Knit 10-12-12-14-14-16 and increase 1 stitch (half back piece), insert marker-1 in the next stitch, knit 21 (sleeve), insert marker-2 in the next stitch, knit 21-23-25-27-29-31 and increase 2 stitches evenly spaced (front piece), insert marker-3 in the next stitch, knit 21 (sleeve), insert marker-4 in the next stitch, knit the last 11-11-13-13-15-15 stitches and increase 1 stitch (half back piece) = 92-96-100-104-108-112 stitches. NECK-LINE: Now work a neck-line with short rows, starting mid-back: ROW 1 (right side): Knit and increase for RAGLAN – read description above, on each side of the first 2 marker-stitches (4 stitches increased), turn when you have worked 3 stitches past marker-2. ROW 2 (wrong side): Purl and increase for raglan on each side of all the markers (8 stitches increased), turn when you have worked 3 stitches past the last marker. ROW 3 (right side): Knit and increase for raglan on each side of all the markers (8 stitches increased), turn when you have worked 2 stitches more than the previous turn. ROW 4 (wrong side): Purl and increase for raglan on each side of all the markers (8 stitches increased), turn when you have worked 2 stitches more than the previous turn. ROW 5 (right side): Knit and increase for raglan on each side of the first 2 markers (4 increased stitches), work to mid-back. The short rows are finished and you have increased 4 times for raglan at each marker = 124-128-132-136-140-144 stitches. REMEMBER THE KNITTING TENSION! YOKE: Work in the round over all stitches in the different sizes as follows. SIZES S, M, L and XL: Read the next section before continuing! Start mid-back, work stocking stitch and increase for raglan - remember RAGLAN, on body and sleeves (i.e. on each side of all marker-stitches) every 2nd round 2-8-10-11 times = 140-192-212-224 stitches. AT THE SAME TIME, when the piece measures 13 cm from the neck edge, work STRIPES – read description above. Continue with stocking stitch, stripes and increases for raglan but every 2nd increase is only on the body (4 stitches increased), i.e. increase on the body every 2nd round and on the sleeves every 4th round. Increase 18-15-14-16 times on the body (9-7-7-8 times on the sleeves). A total of 24-27-28-31 times on the body and 15-19-21-23 times on the sleeves. There are now 248-280-296-320 stitches. SIZES XXL and XXXL: Read the next section before continuing! Start mid-back, work stocking stitch and increase for raglan every round on the body 2-6 times and every 2nd round on the sleeves 1-3 times = 152-180 stitches. AT THE SAME TIME when the piece measures 13 cm from the neck edge, work STRIPES – read description above. Then increase for raglan on the body and sleeves (on each side of all 4 marker-stitches) every 2nd round 10-7 times = 232-236 stitches. Continue with stocking stitch, stripes and increases for raglan but every 2nd increase is only on the body (4 stitches increased), i.e. increase on the body every 2nd round and on the sleeves every 4th round. Increase 18-22 times on the body (9-11 times on the sleeves). A total of 34-39 times on the body and 24-25 times on the sleeves. There are now 340-368 stitches. ALL SIZES: = 248-280-296-320-340-368 stitches. Work stocking stitch and stripes without further increases until the yoke measures 21-23-25-27-29-32 cm, measured mid-front after the neck edge. On the next round divide for the body and sleeves: Work the first 37-42-43-48-51-58 stitches (half back piece), place the next 49-57-61-65-67-69 stitches on a thread for the sleeve, cast on 6-6-8-8-10-10 stitches (in side under sleeve), work 75-83-87-95-103-115 stitches (front piece), place the next 49-57-61-65-67-69 stitches on a thread for the sleeve, cast on 6-6-8-8-10-10 stitches (in side under sleeve), work the last 38-41-44-47-52-57 stitches (half back piece). BODY: = 162-178-190-206-226-250 stitches. Continue in the round with stocking stitch and stripes for a further 30-30-30-30-30-29 cm – adjust so you finish after a few rounds with colour dark blue before the rib (there is approx. 5 cm left), finish the body with colour dark blue. Knit 1 round and increase 18-22-22-26-26-34 stitches evenly spaced = 180-200-212-232-252-284 stitches. Change to circular needle size 4 mm. Work rib (knit 2, purl 2) for 5 cm. Cast off a little loosely with knit over knit and purl over purl. The jumper measures approx. 62-64-66-68-70-72 cm from the shoulder down. SLEEVES: Place the 49-57-61-65-67-69 stitches from the thread on the one side of the piece on short circular needle/double pointed needles size 5 mm and knit up 1 stitch in each of the new stitches cast on under the sleeve = 55-63-69-73-77-79 stitches. Insert a marker in the middle of the new stitches under the sleeve. Allow the thread to follow your work onwards; it is used when decreasing under the sleeve. Continue in the round with stocking stitch and stripes. When the sleeve measures 4 cm decrease 2 stitches under the sleeve – read DECREASE TIP. Decrease like this every 7-4-3-2½-2-2 cm a total of 6-9-12-13-15-15 times = 43-45-45-47-47-49 stitches. Work until the sleeve measures 43-41-40-38-36-35 cm - adjust so you finish after a few rounds with colour dark blue before the rib (approx. 5 cm left). The rest of the sleeve is finished with colour dark blue. Change to double pointed needles size 4 mm. Knit 1 round and increase 5-7-7-9-9-9 stitches evenly spaced = 48-52-52-56-56-56 stitches. Work rib (knit 2, purl 2) for 5 cm. Loosely cast off with knit over knit and purl over purl. The sleeve measures approx. 48-46-45-43-41-40 cm from the division. Work the other sleeve in the same way. |
|
 |
|
Have you finished this pattern?Tag your pictures with #dropspattern #meetthecaptainsweater or submit them to the #dropsfan gallery. Do you need help with this pattern?You'll find 29 tutorial videos, a Comments/Questions area and more by visiting the pattern on garnstudio.com. © 1982-2026 DROPS Design A/S. We reserve all rights. This document, including all its sub-sections, has copyrights. Read more about what you can do with our patterns at the bottom of each pattern on our site. |
|


With over 40 years in knitting and crochet design, DROPS Design offers one of the most extensive collections of free patterns on the internet - translated to 17 languages. As of today we count 324 catalogues and 12290 patterns translated into English (UK/cm).
We work hard to bring you the best knitting and crochet have to offer, inspiration and advice as well as great quality yarns at incredible prices! Would you like to use our patterns for other than personal use? You can read what you are allowed to do in the Copyright text at the bottom of all our patterns. Happy crafting!
Post a comment to pattern DROPS 233-22
We would love to hear what you have to say about this pattern!
If you want to leave a question, please make sure you select the correct category in the form below, to speed up the answering process. Required fields are marked *.