
Popular categories
Looking for a yarn?


Comments / Questions (74)
![]() Milena Fusari wrote:
Milena Fusari wrote:
Buona sera al 3 ferro dei diagrammi A1 e A3 ci sono 2 gettati ma quando faccio il 4 ferro non mi trovo con 1m a rov 1 m a dir 2 m arov 1m a dir e 1 m a rov mi scuso se mi spiego male se e possibile avere un video grazie mille
17.09.2024 - 22:04
![]() Milena wrote:
Milena wrote:
Buona sera mi scuso se disturbo ancora ho provato tante volte i diagrammi A1eA3 mi sembra che al 3 ferro ci sia un errore con i gettati perché al ferro successivo non mi trovo con le maglie e possibile vedere un video dei diagrammi. Grazie mille
14.09.2024 - 21:48DROPS Design answered:
Buonasera Milena, ci può spiegare in modo più dettagliato la sua difficoltà? Buon lavoro!
17.09.2024 - 19:48
![]() Milena wrote:
Milena wrote:
Buongiorno sto lavorando diagramma A1eA3 volevo chiedere se si leggono da destra verso sinistra .Poi gli aumenti per collo a v sul diagramma A1aumento inizio ferro mentre per diagramma A3 fine ferro ?se ci fosse un video che farebbe vedere inizio dei diagrammi e aumenti per collo per capire meglio grazie mille
14.09.2024 - 15:51DROPS Design answered:
Buonasera Milena, i diagrammi si leggono da destra verso sinistra per i ferri di andata e da sinistra a destra per quelli di ritorno. Gli aumenti per il collo a V si lavorano a entrambi i lati. Buon lavoro!
17.09.2024 - 20:48
![]() Gaby wrote:
Gaby wrote:
Hallo, vielen Dank für die ganzen Anleitungen. Leider ist hier die Schriftgröße mit 9 Punkten im PDF sehr klein. Nur ein Hinweis. Viele Grüße
11.09.2024 - 19:51
![]() Fern wrote:
Fern wrote:
What to do if I got 33-77-77-76-32 before splitting body, sleeve and front?
16.08.2024 - 22:34DROPS Design answered:
Dear Fern, which size are you working? If the number of stitches doesn't match and the number of total stitches doesn't match either it means that you have missed something in the increases for the raglan. You need to redo the increases so that each part matches the number of stitches indicated for your size; otherwise the piece will be irregular and look twisted. Happy knitting!
18.08.2024 - 20:53
![]() Maxorna wrote:
Maxorna wrote:
When it says “ Increase every 8th-8th-8th-6th-6th-6th row 2-2-3-4-5-6 times for V neck” does it mean increase a total of 2 times or 2 times everytime I need to increase (one on each end)? And if it is the latter, how many times do I increase? I asked a question below but it doesn’t make sense to me. Thanks!
06.08.2024 - 19:49DROPS Design answered:
Dear Maxorna, in first and 2nd size you will increase here a total of 2 times on each side (2 sts increased in total on each front piece). Happy knitting!
07.08.2024 - 08:13
![]() Christiane Köhler wrote:
Christiane Köhler wrote:
Verstehe ich das richtig? Bei dem V-Ausschnitt in Größe L werden pro Vorderteil nur gesamt 3 Maschen zugenommen? Es erscheint mir so wenig, um eine Schräge herzustellen. VG
05.08.2024 - 08:01DROPS Design answered:
Liebe Frau Köhler, nicht nur da man auch in A.1/A.3 bei beiden Vorderteil zuerst zunimmt, aber dann nur 3 Mal für den Hals, richtig. Viel Spaß beim Stricken!
05.08.2024 - 15:23
![]() Kari wrote:
Kari wrote:
Strikker sweet spring og lurer på om økninga på bolen skal strikkes 15 cm FØR vrangborden eller hva menes?
04.08.2024 - 15:27DROPS Design answered:
Hei Kari, Økningen er på pinnen rett før du begynner vrangbord og før du bytter til pinnestørrelse 4. Dette er for å hindre at vrangborden blir stramm. God fornøyelse!
05.08.2024 - 06:30
![]() Ute wrote:
Ute wrote:
Hei. Strikkefasthet: strikke prøvestykke med pinne 4 eller pinne 5?
03.08.2024 - 22:16DROPS Design answered:
Hei Ute, Prøvelappen er strikket med pinnestr. 5. God fornøyelse!
05.08.2024 - 06:38
![]() Maxorna wrote:
Maxorna wrote:
Hello! Do I keep increasing V-neck after I split the piece into body and sleeves? Thanks!
23.07.2024 - 18:43DROPS Design answered:
Dear Maxorna, increase for the V-neck the number of times indicated in the piece for your size, even if it ends before or after dividing for the body and sleeves. Happy knitting!
27.07.2024 - 20:43
|
|||||||||||||||||||||||||
Sweet Spring Cardigan#sweetspringcardigan |
|||||||||||||||||||||||||
 |
 |
||||||||||||||||||||||||
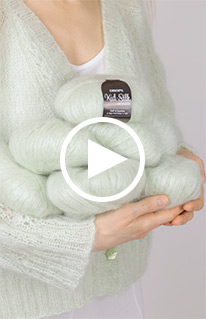
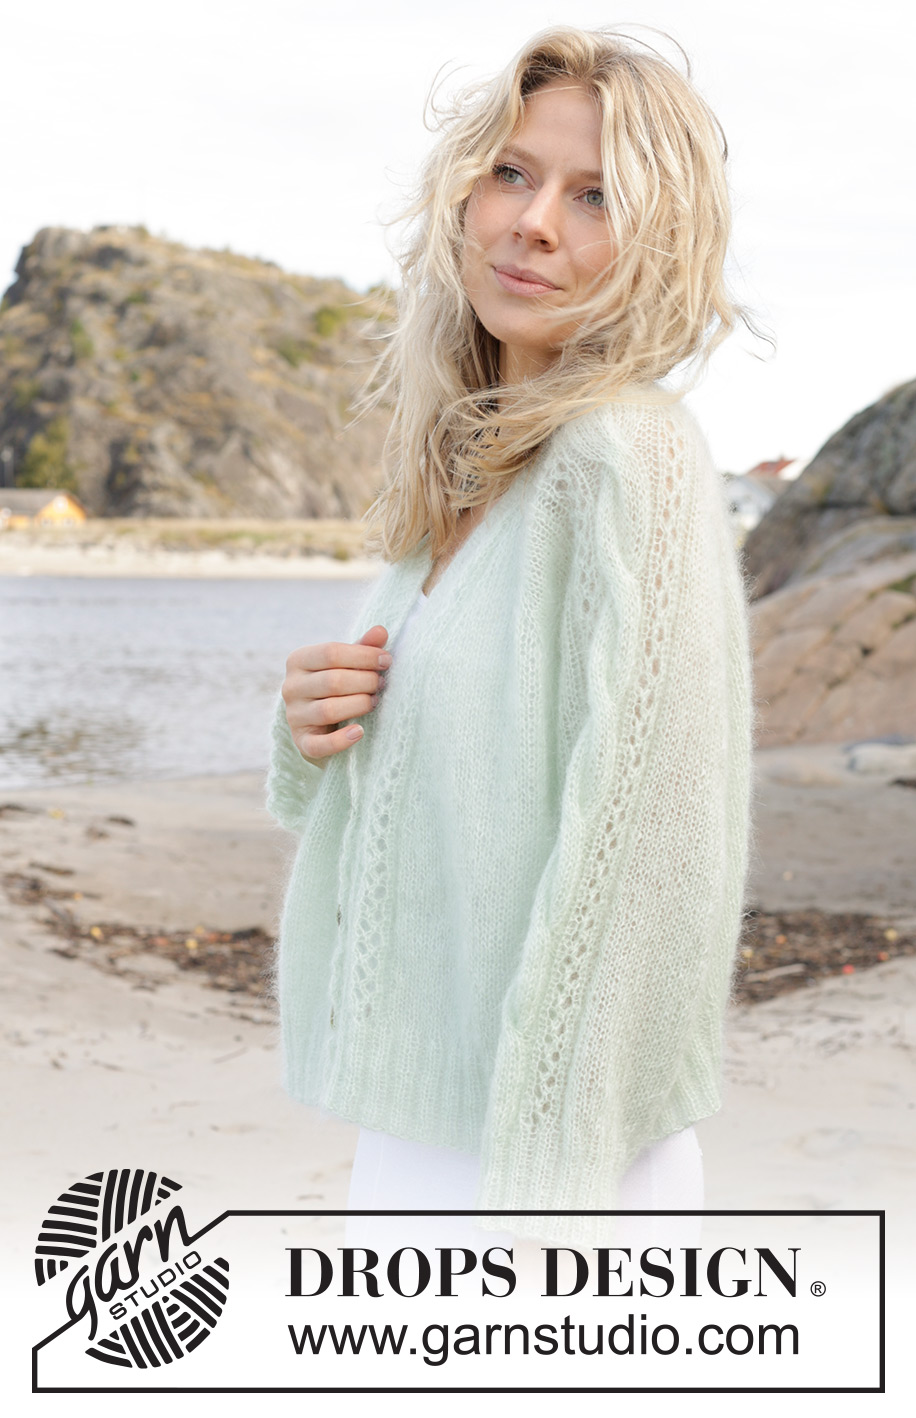
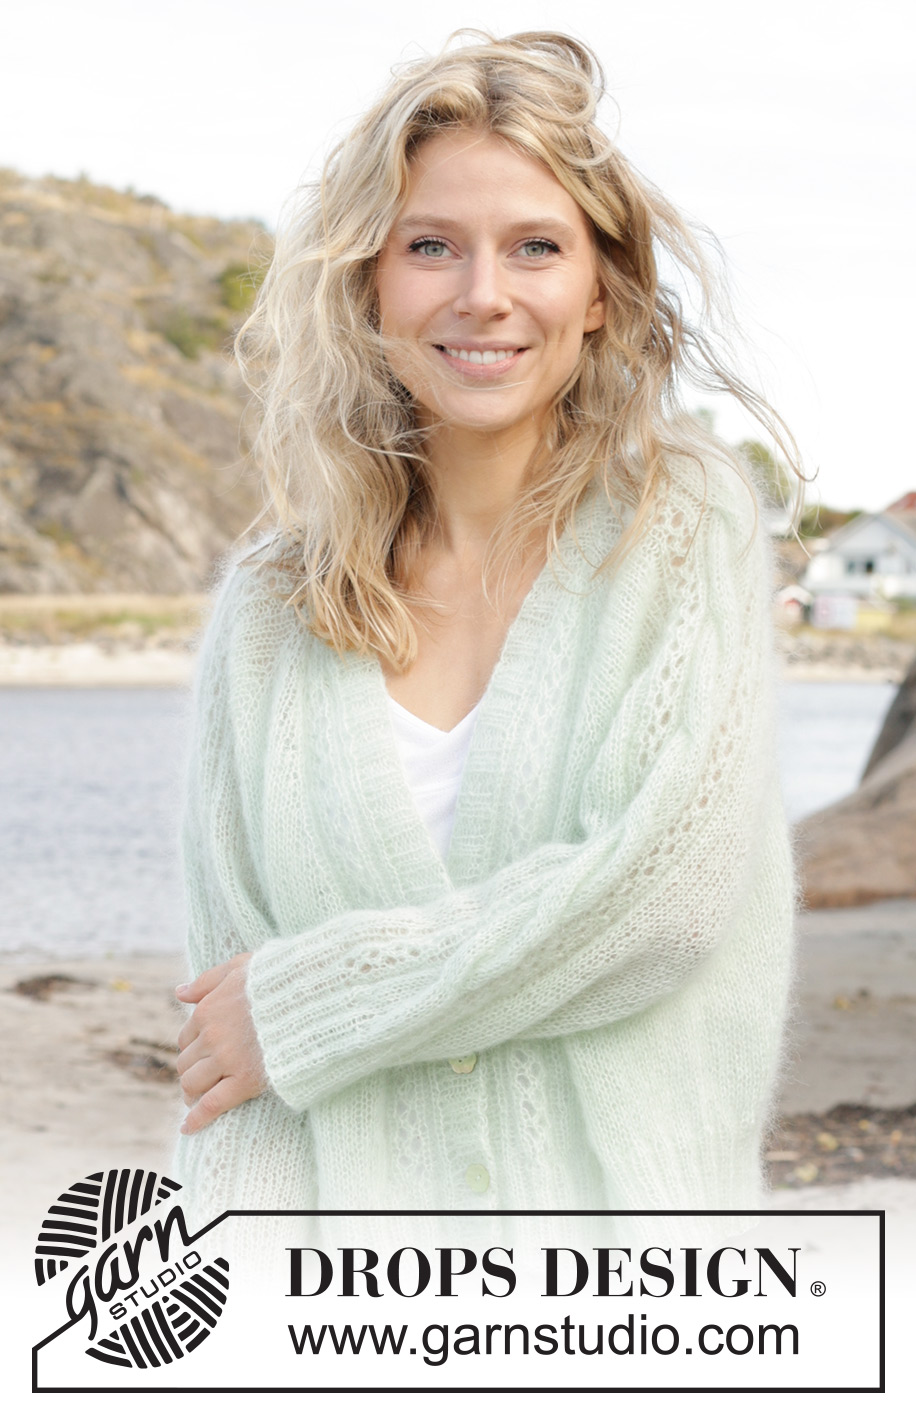
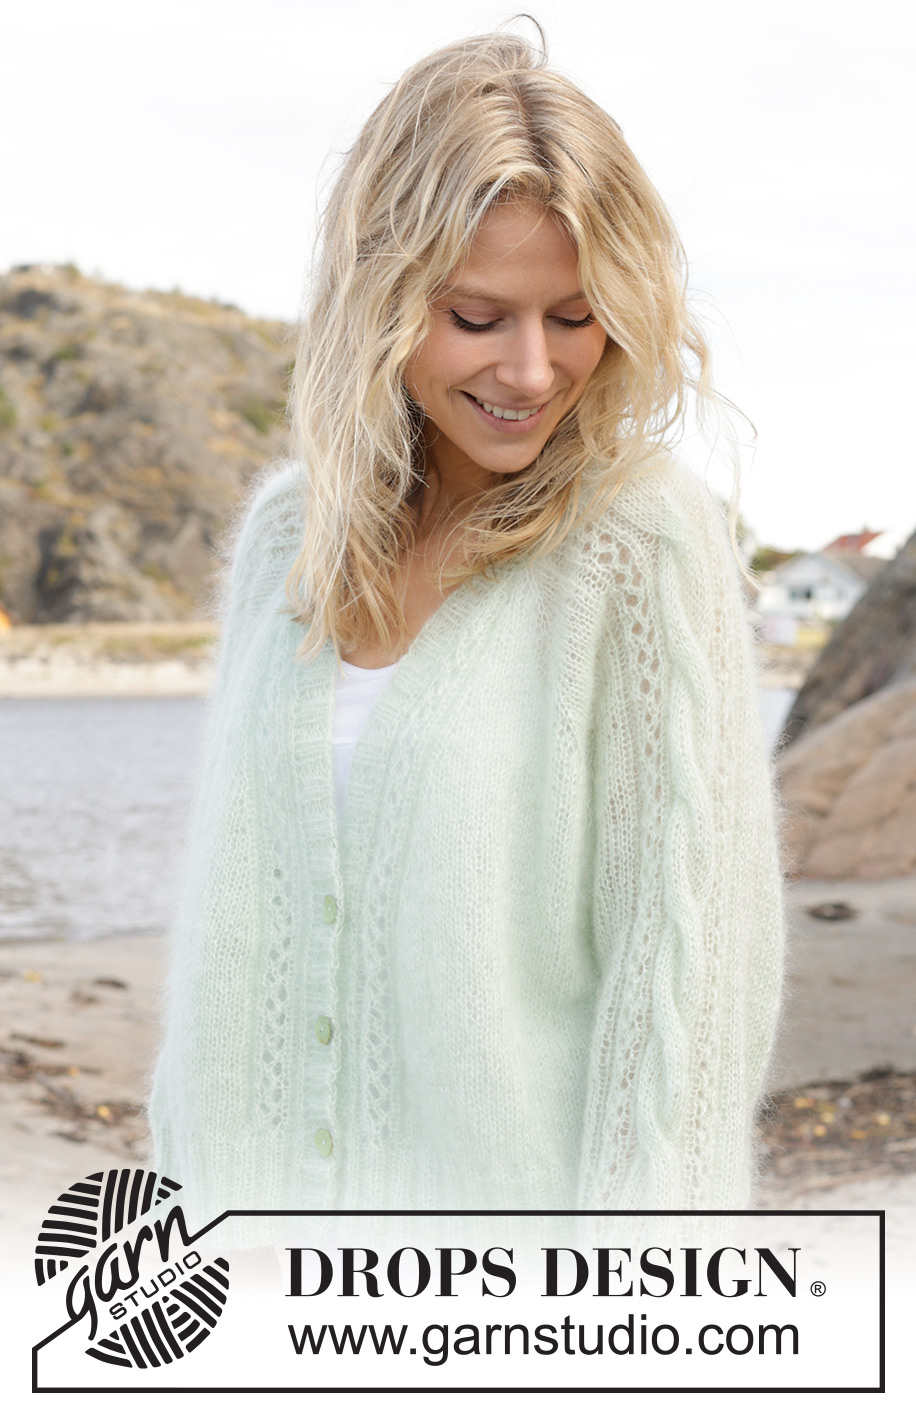
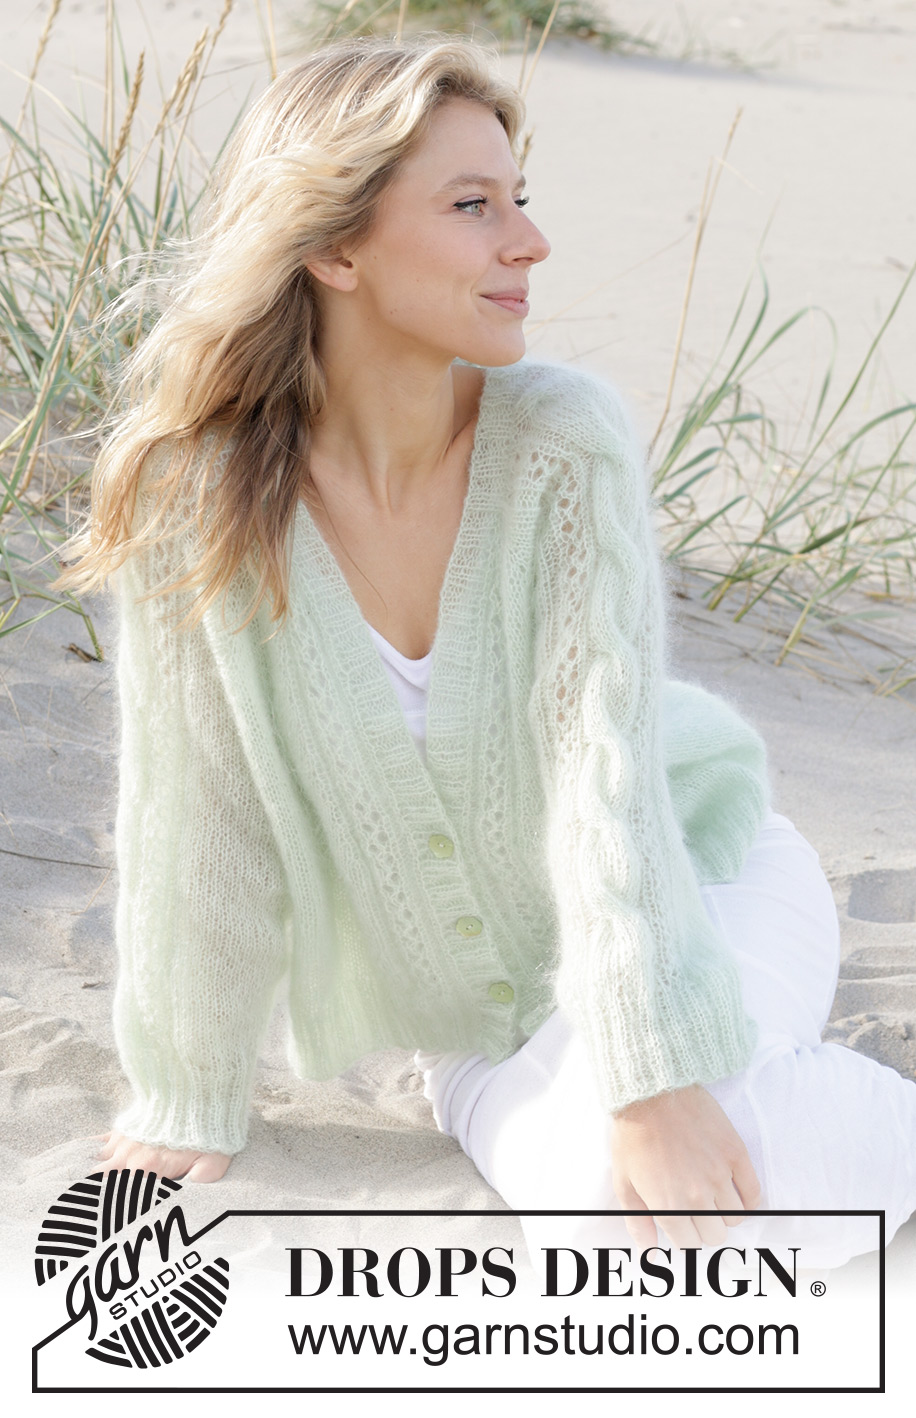
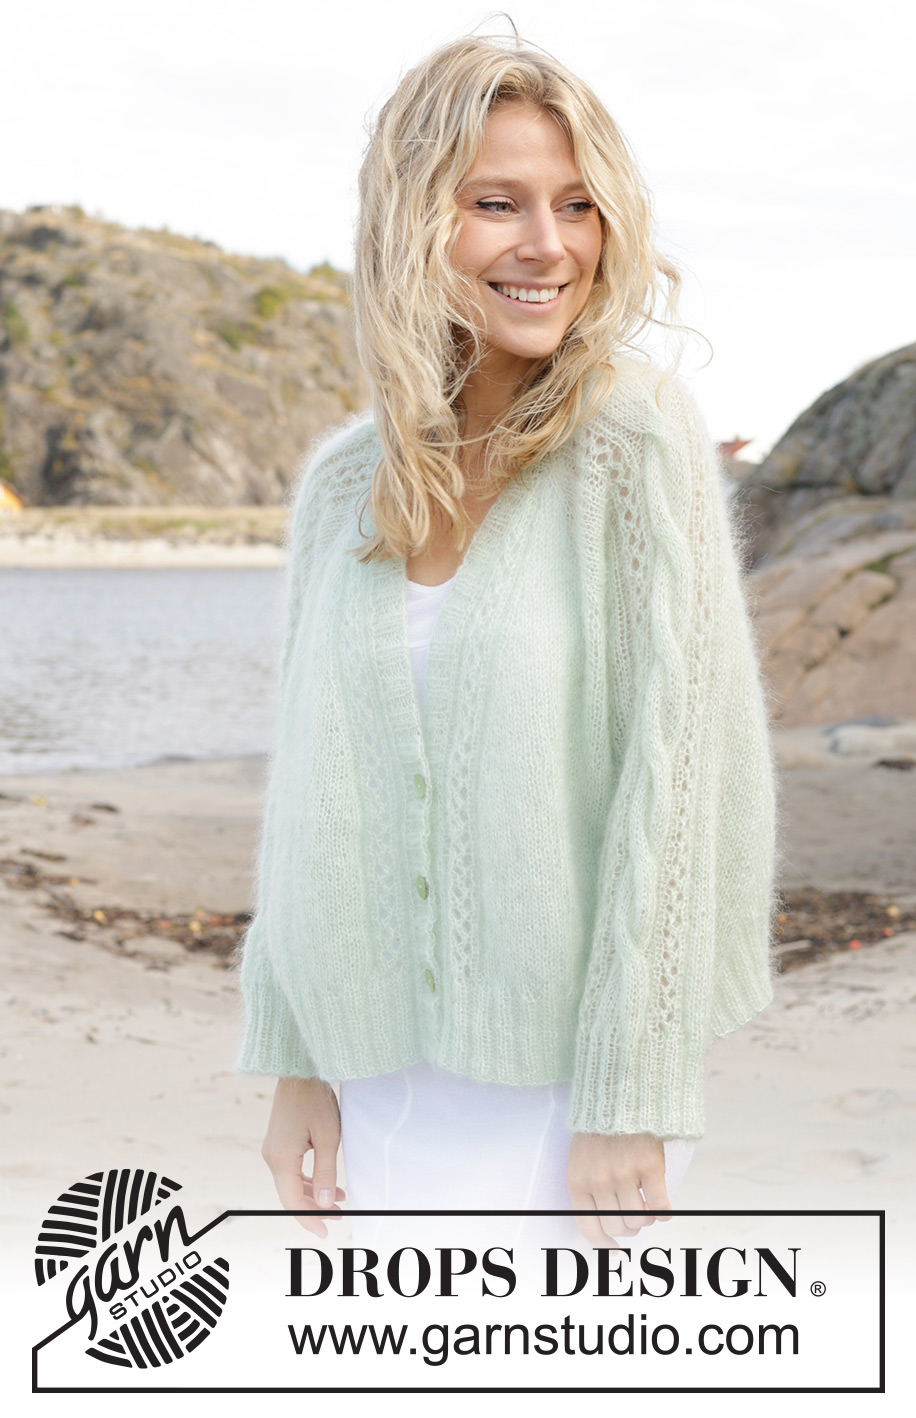
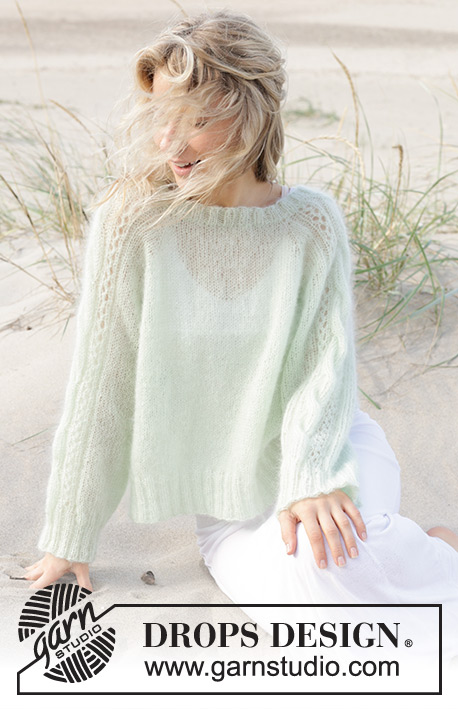
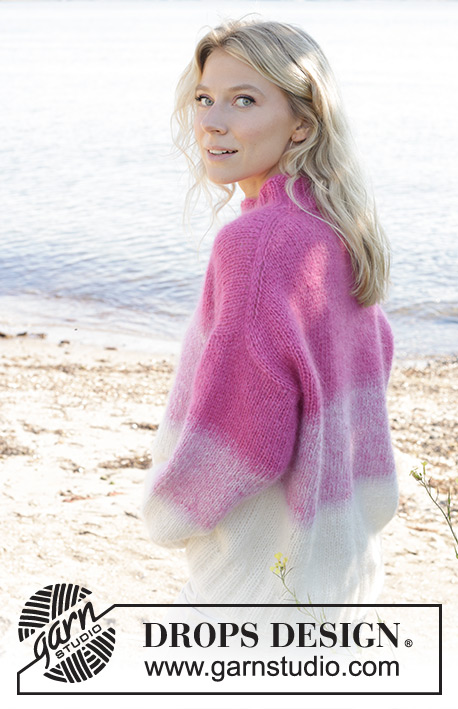
Knitted jacket in 2 strands DROPS Kid-Silk. The piece is worked top down with raglan, V-neck, cables and lace pattern. Sizes S - XXXL.
DROPS 241-11 |
|||||||||||||||||||||||||
|
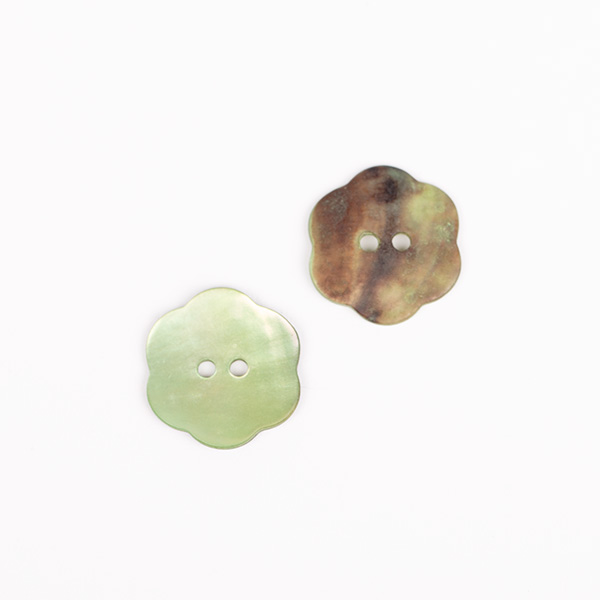
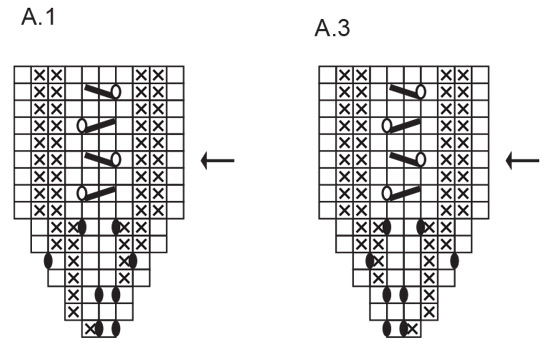
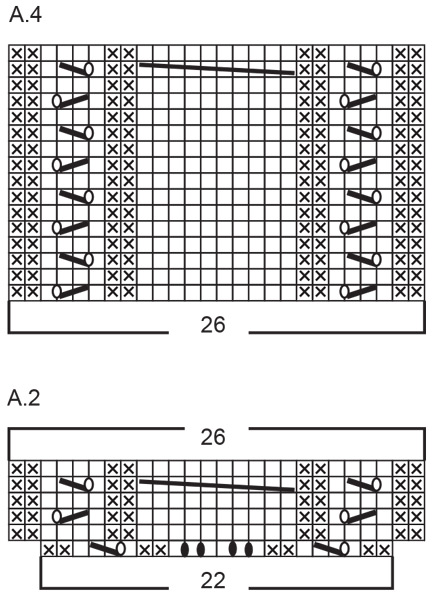
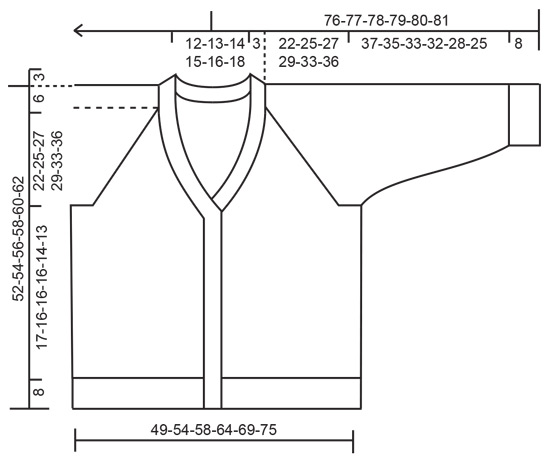
------------------------------------------------------- EXPLANATIONS FOR THE PATTERN: ------------------------------------------------------- RIDGE/GARTER STITCH (worked back and forth): Knit all rows. 1 ridge = knit 2 rows. PATTERN: See diagrams A.1 to A.4. The diagrams show all rows in the pattern from the right side. RAGLAN: Increase 1 stitch before/after the stitch in stocking stitch (= the stitch with the marker) in each transition between body and sleeves. Increase 1 stitch by making 1 yarn over, which is purled twisted on the next row to avoid a hole. Work the new stitches in stocking stitch. V-NECK: All increases are worked from the right side! Make 1 yarn over inside 11 stitches (1 edge stitch + A.1 / A.3 on each side (= 1 stitch increased on each side; 2 stitches increased on the row). On the next row (wrong side) purl the yarn overs twisted to avoid a hole. Work the new stitches in stocking stitch. DECREASE TIP (for sleeves): Decrease 1 stitch on either side of the marker-thread as follows: Work until there are 3 stitches left before the marker-thread, knit 2 together, knit 2 (marker-thread sits between these 2 stitches), slip 1 stitch as if to knit, knit 1 and pass the slipped stitch over the knitted stitch. BUTTONHOLES (on right band when jacket is worn): Decrease 3 buttonholes on the right band. 1 buttonhole = knit 2 together, make 1 yarn over. On the next row knit the yarn over to leave a hole. Work the buttonholes 8, 16 and 24 cm from the bottom edge. ------------------------------------------------------- START THE PIECE HERE: ------------------------------------------------------- JACKET – SHORT OVERVIEW OF THE PIECE: The yoke is worked back and forth with circular needle, top down. The sleeves are worked with cables and lace pattern. At the same time, stitches are increased for the V-neck and raglan. The yoke is divided for body and sleeves and the body continued back and forth with circular needle. The sleeves are worked in the round with double pointed needles/short circular needle. The neck and bands are worked to finish. YOKE: Cast on 72-74-76-78-80-82 stitches (including 1 edge stitch on each side) with circular needle size 5 mm and 2 strands DROPS Kid-Silk. Purl 1 row from the wrong side. OVERVIEW OF THE NEXT SECTION: The pattern starts on the sleeves at the same time as increases are worked for raglan and for the V-neck – read this section before continuing. Insert 4 markers in the piece, without working the stitches: Count 3 stitches (front piece), insert 1 marker in the next stitch, count 22 stitches (sleeve), insert 1 marker in the next stitch, count 18-20-22-24-26-28 stitches (back piece), insert 1 marker in the next stitch, count 22 stitches (sleeve), insert 1 marker in the next stitch, there are 3 stitches left (front piece). Work as follows: 1 edge stitch IN GARTER STITCH – see description above, work A.1, 1 yarn over, knit the marker-stitch, 1 yarn over, A.2, 1 yarn over, knit the marker-stitch, 1 yarn over, work stocking stitch over the next 18-20-22-24-26-28 stitches, 1 yarn over, knit the marker-stitch, 1 yarn over, work A.2, 1 yarn over, knit the marker-stitch, 1 yarn over, work A.3, 1 edge stitch in garter stitch. Continue this pattern and increase to RAGLAN in each transition between body and sleeves on each row from the right side – read description above. When A.2 is finished, work A.4 (26 stitches) over A.2. When A.1 and A.3 have been worked 1 time in height, repeat the last 4 rows onwards. Increase for raglan a total of 10-13-15-15-21-22 times on every other row (= on every row from right side) on each side of all 4 marker-stitches. Then continue to increase for raglan but every 2nd increase is now only on the body (4 stitches increased), i.e. increase every 2nd row on the body and every 4th row on the sleeves). Increase like this 14-14-14-16-14-16 times on the body (7-7-7-8-7-8 times on the sleeve). You increase a total of 24-27-29-31-35-38 times on the yoke and 17-20-22-23-28-30 times on the sleeves. AT THE SAME TIME on the row marked with an arrow in A.1/ A.3, start to increase for the V-NECK on each side – read description above: Increase every 8th-8th-8th-6th-6th-6th row 2-2-3-4-5-6 times. REMEMBER THE KNITTING TENSION! After the last increase for raglan continue working until the yoke measures 22-25-27-29-33-36 cm. There are 264-290-310-326-366-390 stitches. Divide for the body and sleeves on the next row as follows: Work the first 38-41-44-47-52-56 stitches (front piece), place the next 60-66-70-72-82-86 stitches on a thread for the sleeve, cast on 16-16-16-20-20-22 stitches (in side under sleeve), work the next 68-76-82-88-98-106 stitches (back piece), place the next 60-66-70-72-82-86 stitches on a thread for the sleeve, cast on 16-16-16-20-20-22 stitches (in side under sleeve), work the last 38-41-44-47-52-56 stitches (front piece). The piece is now measured from here! BODY: = 176-190-202-222-242-262 stitches. Continue with stocking stitch, 1 edge stitch in garter stitch on each side and A.1 /A.3. When the body measures 16-15-15-15-13-12 cm from the division, knit 1 row from the right side and increase 28-34-42-46-46-50 stitches evenly spaced = 204-224-244-268-288-312 stitches. Change to circular needle size 4 mm and work as follows from the wrong side: 1 edge stitch in garter stitch, * purl 2, knit 2 *, work from *-* until there are 3 stitches left, purl 2 and 1 edge stitch in garter stitch. Continue this rib for 8 cm. Cast off a little loosely. The jacket measures approx. 52-54-56-58-60-62 cm from the shoulder. SLEEVES: Place the 60-66-70-72-82-86 stitches from the thread on the one side of the piece on short circular needle/double pointed needles size 5 mm and knit up 1 stitch in each of the 16-16-16-20-20-22 stitches cast on under the sleeve = 76-82-86-92-102-108 stitches. Insert a marker-thread in the middle of the 16-16-16-20-20-22 stitches under the sleeve and allow it to follow your work onwards; it is used when decreasing under the sleeve. Start at the marker-thread. Continue with A.4 and stocking stitch in the round. When the sleeve measures 3 cm decrease 2 stitches mid under sleeve – read DECREASE TIP. Decrease like this every 2½-2-1½-1-1-1 cm a total of 10-11-13-16-19-20 times = 56-60-60-60-64-68 stitches. Continue working until the sleeve measures 37-35-33-32-28-25 cm from the division or to desired length. Change to double pointed needles size 4 mm and work rib (knit 2, purl 2) for 8 cm. Cast off a little loosely. The sleeve measures approx. 45-43-41-40-36-33 cm from the division. Work the other sleeve in the same way. BANDS/NECK: Insert 1 marker in the middle of the neck on the back piece; it is used to mark half the stitches on the neck/bands. The bands are knitted up inside the 1 edge stitch on the front piece, the neck in the first row on the neckline. Begin from the right side at the bottom of the right front piece and knit up 119-125-131-137-143-149 stitches as far as the marker at the back of the neck, with circular needle size 4 mm (leave the marker in place). Knit up 119-125-131-137-143-149 stitches down to the bottom of the left front piece; total number of stitches should be divisible by 4 + 2 = 238-250-262-274-286-298 stitches. It is important that the rib is neither loose with too many stitches nor tight with too few stitches. Work as follows from the wrong side: 2 garter stitches, * purl 2, knit 2 *, work from *-* until there are 4 stitches left, purl 2 and 2 garter stitches. Work this rib for 1½ cm. Now work the BUTTONHOLES on the right band – read description above. Continue working until the rib measures 3 cm. Cast off a little loosely. Sew the buttons onto the left band. |
|||||||||||||||||||||||||
Diagram explanations |
|||||||||||||||||||||||||
|
|||||||||||||||||||||||||
 |
|||||||||||||||||||||||||
 |
|||||||||||||||||||||||||
 |
|||||||||||||||||||||||||
Have you finished this pattern?Tag your pictures with #dropspattern #sweetspringcardigan or submit them to the #dropsfan gallery. Do you need help with this pattern?You'll find 31 tutorial videos, a Comments/Questions area and more by visiting the pattern on garnstudio.com. © 1982-2026 DROPS Design A/S. We reserve all rights. This document, including all its sub-sections, has copyrights. Read more about what you can do with our patterns at the bottom of each pattern on our site. |
|||||||||||||||||||||||||


With over 40 years in knitting and crochet design, DROPS Design offers one of the most extensive collections of free patterns on the internet - translated to 17 languages. As of today we count 325 catalogues and 12298 patterns translated into English (UK/cm).
We work hard to bring you the best knitting and crochet have to offer, inspiration and advice as well as great quality yarns at incredible prices! Would you like to use our patterns for other than personal use? You can read what you are allowed to do in the Copyright text at the bottom of all our patterns. Happy crafting!
Post a comment to pattern DROPS 241-11
We would love to hear what you have to say about this pattern!
If you want to leave a question, please make sure you select the correct category in the form below, to speed up the answering process. Required fields are marked *.