
Popular categories
Looking for a yarn?


Comments / Questions (54)
![]() Nelly wrote:
Nelly wrote:
Hej! Jag undrar hur jag ska göra med okökningen? Jag håller på att sticka denna kofta i stl S och det står att jag inte ska öka den. Men sen står det ” Det ökas på framstyckena och bakstycket, och de ökade maskorna stickas fortlöpande in i A.3.” Ska jag börja sticka från första maskan i A3 eller ska jag göra 5rättmaskor först och sen köra A3 i hela arbetet. Och så vet jag inte hur många rader jag ska göra i okökningen, ska jag göra 7 rader som på ärmökningen?
21.10.2021 - 15:07DROPS Design answered:
Hei Nelly. Litt usikker på hvor du mener det står at det ikke skal øke? Hvor i oppskrifen er du/hvilket avsnitt? Har du sett videoen som er laget til denne jakken? De 5 stolpemaskene skal alltid strikkes først og sist. mvh DROPS Design
25.10.2021 - 08:13
![]() Nelly wrote:
Nelly wrote:
Hej! Jag undrar hur jag ska göra med okökningen? Jag håller på att sticka denna kofta i stl S och det står att jag inte ska öka den. Men sen står det ” Det ökas på framstyckena och bakstycket, och de ökade maskorna stickas fortlöpande in i A.3.” Ska jag börja sticka från första maskan i A3 eller ska jag göra 5rättmaskor först och sen köra A3 i hela arbetet. Och så vet jag inte hur många rader jag ska göra i okökningen, ska jag göra 7 rader som på ärmökningen?
12.10.2021 - 22:43
![]() Susanne wrote:
Susanne wrote:
Medium str. ang svar på spørgsmålet nedenunder
26.05.2021 - 16:28DROPS Design answered:
Hei Susanne. Da har vi lagt til en rettelse under Sadelskulder. Takk for at du gjorde oss oppmerksom på dette. God Fornøyelse videre på jakken. mvh DROPS design
28.05.2021 - 08:04
![]() Susanne wrote:
Susanne wrote:
Er det mig der tæller forkert? Første udt ved sadelærmer bliver til 21. Næste udt skal man strikke 1 ret i hver side (= 19 tilbage) men opskriften siger 18 med udt i forreste, bagerste og slå om????er nødt til at spørge da det er pivsvært at trævle op i kids silk🤪
25.05.2021 - 20:22DROPS Design answered:
Hei Susanne. Vi skal dobbeltsjekke, men hvilken størrelse refererer du til? mvh DROPS design
26.05.2021 - 14:46
![]() Susanne wrote:
Susanne wrote:
Hvilken pind str skal strikkefastheden tilpasses? 3 eller 5?
15.05.2021 - 14:45DROPS Design answered:
Hej Susanne, vi får 17 masker på 10 cm i glatstrik på pind nr 5 med 2 tråde DROPS Kid-Silk. God fornøjelse!
17.05.2021 - 10:43
![]() Carine wrote:
Carine wrote:
Bonjour, Je suis à la partie "EMPIECEMENT". J'ai partagé les mailles par 4 marqueurs, mais j ai 4 mailles de trop. Pour la plus petite taille on a un total de 261 mailles. In sépare comme suit: pour le devant 5m+28m+3m=36m Pour la Manche 56m Pour le dos 70m+3m=73m Pour la 2e manche 56m Pour le 2e devant 28m+3m+5m=36m Total : 257 mailles, comme j'ai 261mailles ça me fait 4 mailles de trop. Me suis-je trompée ?
23.04.2021 - 21:01DROPS Design answered:
Bonjour Carine, vous devez bien avoir 261 mailles au début de l'empiècement, les marqueurs sont chacun placés dans une maille = les 4 mailles qui vous "manquent", autrement dit vous avez: 36 m pour le devant, 1 m avec un marqueur, 56 m pour la manche, 1 m avec un marqueur, 73 m pour le dos, 1 m avec un marqueur, 56 m pour la manche, 1 m avec un marqueur, 36 m pour le devant = 36+1+56+1+73+1+56+1+36=261 m. Bon tricot!
26.04.2021 - 07:20
![]() Salla wrote:
Salla wrote:
Would I make this alpaca yarn simple enough or should it be double?
16.04.2021 - 10:46
![]() Ellen wrote:
Ellen wrote:
I'm working on the yoke, and I don't understand what you do with the stitches you place a marker at, as the pattern just says insert marker. Do you just put the marker in and slip that stitch from the left needle to the right needle? or do you put the marker in and then knit that stitch across? Thank you
15.03.2021 - 21:20DROPS Design answered:
Hi Ellen, You insert the marker either before or after working the stitch, but the stitch must be worked as normal. Happy crafting!
16.03.2021 - 08:05
![]() Sigrid wrote:
Sigrid wrote:
Hei, når man skal begynne på bærestykket, skal man plassere de fire merkene i «neste maske». Men hvordan skal masken med merket strikkes? Og skal man ta ut merket for så å strikke masken, og så flytte det hver runde?
12.03.2021 - 15:01DROPS Design answered:
Hei Sigrid. Det strikkes etter mønster, er det en vrangmønster i diagrammet som er neste maske, strikkes det vrang. Som regel settes et merke i en rettmaske. Du kan enten flytte merket etter hver omgang som du skriver, eller se etter hvilken maske som har merke og så følge denne "linje". mvh DROPS design
15.03.2021 - 13:59
![]() Sigrid wrote:
Sigrid wrote:
Hei, når man skal begynne på bærestykket, skal man plassere de fire merkene i «neste maske». Men hvordan skal masken med merket strikkes? Og skal man ta ut merket for så å strikke masken, og så flytte det hver runde?
12.03.2021 - 15:00
|
|||||||||||||||||||
White Water Jacket#whitewaterjacket |
|||||||||||||||||||
 |
 |
||||||||||||||||||
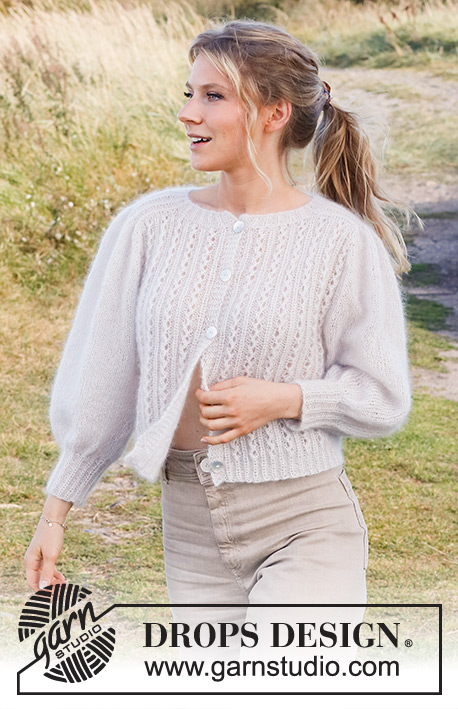
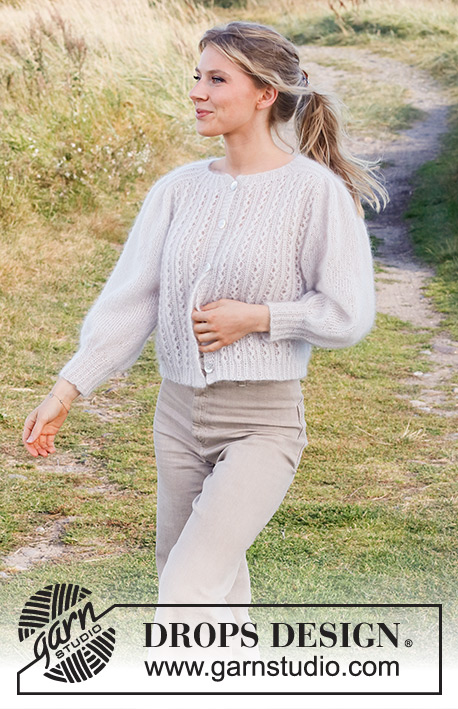
Knitted jacket in 2 strands DROPS Kid-Silk. Piece is knitted top down with round saddle shoulders, lace pattern and pouffe sleeves. Size: S - XXXL
DROPS 222-26 |
|||||||||||||||||||
|
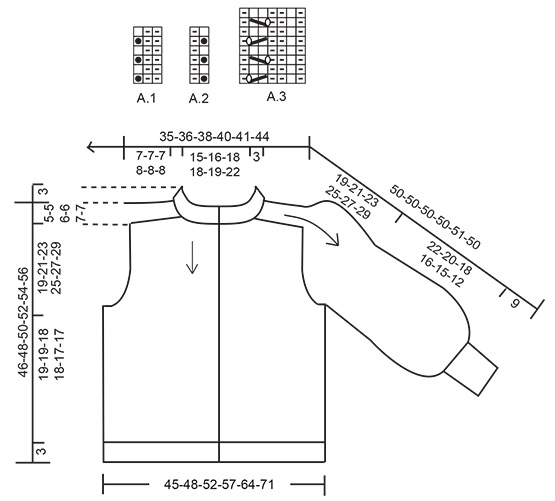
------------------------------------------------------- EXPLANATION FOR THE PATTERN: ------------------------------------------------------- GARTER STITCH (back and forth): Knit all rows. 1 ridge vertically = knit 2 rows. PATTERN: See diagrams A.1 to A.3. Diagrams show all rows in pattern seen from the right side. INCREASE/DECREASE TIP (evenly): To calculate how to increase/decrease evenly, count the stitches to be increased/decreased (e.g. 17 stitches), and divide by stitches of increases/decreases to be done (e.g. 5) = 3.4. In this example increase by making 1 yarn over after alternately approx. every 3rd and 4th stitch. On next row work yarn overs twisted to avoid holes If decreasing knit in this example alternately approx. every 2nd and 3rd stitch and every 3rd and 4th stitch together. INCREASE TIP-1: All increases are done from the right side. Increase 1 stitch by making 1 yarn over. On next row (from wrong side) purl yarn over twisted to avoid holes. INCREASE TIP-2 FROM RIGHT SIDE: BEFORE MARKER: The stitch is twisted towards the right. Use left needle to pick up thread between 2 stitches from row below, pick up thread from behind and knit stitch in front loop. AFTER MARKER: The stitch is twisted towards the left. Use left needle to pick up thread between 2 stitches from row below, pick up thread from front and knit stitch in back loop. BUTTONHOLES: Decrease for buttonholes on right band (when garment is worn). Decrease from right side when 3 stitches remain on row as follows: Make 1 yarn over, knit the next 2 stitches together, knit last stitch. On next row (wrong side) knit the yarn over to make a hole. Decrease first buttonhole when rib in neck measures approx. 3 cm. Then cast off the next 4-4-5-5-5-5 buttonholes approx. 9½-10-8-8½-9-9 cm apart. CAST-OFF TIP: To avoid a tight cast-off edge you may use a larger needle size. If this also is too tight, work a 1 yarn over after approx. 3rd or every 6th stitch while casting off (cast off yarn overs as regular stitches). ------------------------------------------------------- START THE PIECE HERE: ------------------------------------------------------- JACKET - SHORT OVERVIEW OF THE PIECE: Worked top down. Work neck edge back and forth from mid front. Then work shoulders back and forth separately. Then slip all stitches on to same circular needle, at the same time pick up stitches along the saddle shoulders. Then work yoke back and forth from mid front, at the same time increase for sleeves and yoke. Now divide yoke for body and sleeves. Work body back and forth on circular needle, top down. Work sleeves in the round on double pointed needles/short circular needle, top down. NECK EDGE: Cast on 96-102-106-106-110-122 stitches (including 5 band stitches in each side towards mid front) on circular needle size 3 mm with 2 strands Kid-Silk. Purl 1 row (= wrong side). Work next row as follows from right side: Work 5 band stitches in GARTER STITCH – read explanation above, work A.1 over the next 12-15-15-15-15-18 stitches, work the first 2 stitches in A.1, insert 1 marker here (= in transition between front piece and left saddle shoulder), work A.2 over the next 13-13-15-15-17-17 stitches, insert 1 marker here (= in transition between left saddle shoulder and back piece), work A.1 over the next 30-30-30-30-30-36 stitches, work the first 2 stitches in A.1, insert 1 marker here (= in transition between back piece and right saddle shoulder), work A.2 over the next 13-13-15-15-17-17 stitches, insert 1 marker here (= in transition between right saddle shoulder and right front piece), work A.1 over the next 12-15-15-15-15-18 stitches, work the first 2 stitches in A.1, 5 band stitches in garter stitch. Continue back and forth like this. When rib measures 3 cm, cut the yarn. Now divide the piece for front pieces, back piece and saddle shoulders. Slip the first and last 19-22-22-22-22-25 stitches on separate stitch holders (= front piece), skip the next 13-13-15-15-17-17 stitches in each side (= shoulder stitches), slip the middle 32-32-32-32-32-38 stitches on a stitch holder (= back piece). Now work saddle shoulder separately. SADDLE SHOULDERS: = 13-13-15-15-17-17 stitches. Work back and forth over shoulder stitches in one side on circular needle size 3 mm, as follows: Cast on 1 stitch on row (= edge stitch), work the 13-13-15-15-17-17 stitches in pattern as before, at the same time increase all 1 purl stitch to 2 purl stitches – read INCREASE TIP-1 (= 6-6-7-7-8-8 stitches increased), cast on 1 stitch at the end of row (= edge stitch) = 21-21-24-24-27-27 stitches. Now work pattern (1 English rib stitch, purl 2) back and forth until piece measures 7-7-7-8-8-8 cm from where all 1 purl stitches were increased to 2 purl stitches, adjust so that last row is worked from wrong side. Slip stitches on a stitch holder. Work the other saddle shoulder the same way. Now work front pieces, back piece and shoulder stitch on to same circular needle size 5 mm, at the same time pick up stitches along the sides on saddle shoulders. Work as follows from RS: 5 band stitches in garter stitch, knit over the next 14-17-17-17-17-20 stitches and increase at the same time 1-5-5-8-8-12 stitches evenly – read INCREASE/DECREASE TIP (= 15-22-22-25-25-32 stitches), pick up 16-16-16-20-20-20 stitches inside edge stitch along the side on saddle shoulder, knit 1 * knit 1 in front and back loop of next stitch, make 1 yarn over *, work from *-* a total of 18-18-21-21-24-24 times, knit 1 in front and back loop of stitch, knit 1 (= 37-37-43-43-49-49 stitches increased to = 58-58-67-67-76-76 stitches on the saddle shoulder), pick up 16-16-16-20-20-20 stitches inside edge stitch along the other side of saddle shoulder, knit over the 32-32-32-32-32-38 stitches on back piece and increase at the same time 9-9-9-15-15-9 stitches evenly (= 41-41-41-47-47-47 stitches), pick up 16-16-16-20-20-20 stitches inside edge stitch along the side on saddle shoulder, knit 1 * knit 1 in front and back loop of next stitch, make 1 yarn over *, work from *-* a total of 18-18-21-21-24-24 times, knit 1 in front and back loop of stitch, knit 1 (= 37-37-43-43-49-49 stitches increased to = 58-58-67-67-76-76 stitches on the saddle shoulder), pick up 16-16-16-20-20-20 stitches inside edge stitch along the other side of saddle shoulder, knit over the next 14-17-17-17-17-20 stitches and increase at the same time 1-5-5-8-8-12 stitches evenly (= 15-22-22-25-25-32 stitches), 5 band stitches in garter stitch. Remember BUTTONHOLES on right band - read explanation above. There are now 261-275-293-321-339-353 stitches on needle. Purl 1 row from wrong side (band stitches in garter stitches as before). YOKE: Insert a marker thread after band at the beginning of stitches mid front - NOW MEASURE PIECE FROM HERE! Now work pattern and 4 markers in the piece as follows: 1st marker: Work 5 band stitches in garter stitch, A.3 over the next 28-35-35-42-42-49 stitches, work the first 3 stitches in A.3, insert 1st marker in next stitch (= right front piece). 2nd marker: Work in stocking stitch over the next 56-56-65-65-74-74 stitches, insert 2nd marker in next stitch (= right sleeve). 3rd marker: Work A.3 over the next 70-70-70-84-84-84 stitches, work the first 3 stitches in A.3, insert 3rd marker in next stitch (= back piece). 4th marker: Work in stocking stitch over the next 56-56-65-65-74-74 stitches, insert 4th marker in next stitch (= left sleeve). Work A.3 over the next 28-35-35-42-42-49 stitches, work the first 3 stitches in A.3, 5 band stitches in garter stitch (= left front piece). Move these 4 markers upwards when working; increase at each of these markers. Continue back and forth with pattern like this (stitches with markers are worked in stocking stitch). AT THE SAME TIME on next row from right side the increase for SLEEVE INCREASE and YOKE INCREASE starts. Increase as explained below: SLEEVE INCREASE: Work in stocking stitch on sleeves. AT THE SAME TIME on next row from right side increase 4 stitches for sleeves as follows: Increase AFTER 1st and 3rd marker and increase BEFORE 2nd and 4th marker – read INCREASE TIP-2 (= 4 stitches increased). Increase stitches on sleeves, and work the increased stitches in stocking stitch. Increase like this every other round 7-10-7-9-6-8 times in total. YOKE INCREASE: Work pattern as before on front pieces and back piece. AT THE SAME TIME on next row from right side increase 4 stitches for yoke as follows: Increase BEFORE 1st and 3rd marker and increase AFTER 2nd and 4th marker – remember INCREASE TIP-2 (= 4 stitches increased). Increase on front pieces and back piece, and work the increased stitches in A.3. Increase like this every other round 0-7-7-7-14-21 times in total. When all increases are done there are 289-343-349-385-419-469 stitches on row. Work until piece measures 19-21-23-25-27-29 cm from marker after neck edge. Now divide piece for body and sleeves. Work next row as follows: Work the first 40-50-52-57-64-78 stitches as before (= front piece), slip the next 64-78-77-85-88-92 stitches on a stitch holder for sleeve, cast on 6-6-8-10-10-10 new stitches on row (= in the side under sleeve), work the next 81-87-91-101-115-129 stitches as before (= back piece), slip the next 64-78-77-85-88-92 stitches on a stitch holder for sleeve, cast on 6-6-8-10-10-10 new stitches on row (= in the side under sleeve), work the last 40-50-52-57-64-78 stitches as before (= front piece). Now finish body and sleeves separately. NOW MEASURE PIECE FROM HERE! BODY: = 173-199-211-235-263-305 stitches. Continue back and forth with pattern as before, but over the 14-6-12-10-10-10 stitches in each side (i.e. the 6-6-8-10-10-10 new stitches cast on + 4-0-2-0-0-0 stitches on each side of these stitches) work in stocking stitch. When piece measures 19-19-18-18-17-17 cm from division, next row from right side as follows: 5 band stitches in garter stitch, work A.3 as before over the next 31-45-45-52-59-73 stitches, but skip the yarn over in every repetition A.3 (decrease 1 stitch in every repetition A.3 = 4-6-6-7-8-10 stitches decreased), knit over the next 14-6-12-10-10-10 stitches and increase at the same time 4-3-6-5-5-5 stitches evenly, work pattern as before over the next 73-87-87-101-115-129 stitches but skip the yarn over in every repetition A.3 (decrease 1 stitch in each repetition A.3 = 10-12-12-14-16-18 stitches deceased), knit the next 14-6-12-10-10-10 stitches and increase at the same time 4-3-6-5-5-5 stitches evenly, work pattern as before over the next 31-45-45-52-59-73 stitches, but skip the yarn over in every repetition A.3 (decrease 1 stitch in every repetition A.3 = 4-6-6-7-8-10 stitches decreased), 5 band stitches in garter stitch = 163-181-199-217-241-277 stitches. Switch to circular needle size 3 mm. Now work rib as follows: 5 band stitches in garter stitch, work the last 2 stitches in A.1, then work A.1 until 6 stitches remain on row, work first stitch in A.1, 5 band stitches in garter stitch - English rib stitch in A.1 should fit knit stitches in A.3. Continue rib like this for 3 cm. Cast off with knit over garter stitches and English rib stitches and purl over purl - read CAST-OFF TIP. Jacket measures approx. 46-48-50-52-54-56 cm from shoulder and down. SLEEVES: Slip the 64-78-77-85-88-92 stitches from stitch holder in one side back on a short circular needle/double pointed needles size 5 mm. Pick in addition up 1 stitch in each of the 6-6-8-10-10-10 new stitches under sleeve = 70-84-85-95-98-102 stitches. Work in stocking stitch in the round. When piece measures 22-20-18-16-15-12 cm from division - try the jacket on and work until desired length (approx. 9 cm rib remain until finished measurements), decrease 28-42-40-47-47-51 stitches evenly = 42-42-45-48-51-51 stitches. Switch to double pointed needles size 3 mm. Work A.1 in the round for 9 cm. Cast off with knit over English rib stitches and purl over purl - read CAST-OFF TIP. Sleeve measures approx. 31-29-27-25-24-21 cm from division. Work the other sleeve the same way. ASSEMBLY: Sew the buttons on to left band. |
|||||||||||||||||||
Diagram explanations |
|||||||||||||||||||
|
|||||||||||||||||||
 |
|||||||||||||||||||
Have you finished this pattern?Tag your pictures with #dropspattern #whitewaterjacket or submit them to the #dropsfan gallery. Do you need help with this pattern?You'll find 36 tutorial videos, a Comments/Questions area and more by visiting the pattern on garnstudio.com. © 1982-2026 DROPS Design A/S. We reserve all rights. This document, including all its sub-sections, has copyrights. Read more about what you can do with our patterns at the bottom of each pattern on our site. |
|||||||||||||||||||


With over 40 years in knitting and crochet design, DROPS Design offers one of the most extensive collections of free patterns on the internet - translated to 17 languages. As of today we count 324 catalogues and 12290 patterns translated into English (UK/cm).
We work hard to bring you the best knitting and crochet have to offer, inspiration and advice as well as great quality yarns at incredible prices! Would you like to use our patterns for other than personal use? You can read what you are allowed to do in the Copyright text at the bottom of all our patterns. Happy crafting!
Post a comment to pattern DROPS 222-26
We would love to hear what you have to say about this pattern!
If you want to leave a question, please make sure you select the correct category in the form below, to speed up the answering process. Required fields are marked *.