
Popular categories
Looking for a yarn?


Comments / Questions (104)
![]() Biligma wrote:
Biligma wrote:
I need more explanation about pattern A.1. I don’t quite understand how to pass the first stitch over the other two in the 3rd row. Do I need to use a braiding needle here? Thanks in advance )
18.06.2022 - 11:54DROPS Design answered:
Dear Biligma, no, you don't need a braiding needle. You can check how to work this in the following video: https://www.garnstudio.com/video.php?id=526&lang=en. Happy knitting!
18.06.2022 - 15:54
![]() Ritva Nordin wrote:
Ritva Nordin wrote:
Hoppsan! Jag läste slarvigt – fram- och bakstyckena stickas inte runt, utan fram- och tillbaka! Min undervisande text är helt irrelevant. Ber om ursäkt: tabort den!
17.06.2022 - 16:40
![]() Ritva Nordin wrote:
Ritva Nordin wrote:
Det heter slätstickning när man stickar alla m räta på rätsidan och aviga på avigsidan = alltså bara räta maskor på rundsticka. I rätstickning fram och tillbaka stickas alla maskor räta också på avigan. Snårigt, javisst, men stickning är en konst, och det gäller att använda rätt ord också i översättning.
17.06.2022 - 16:32
![]() Annelise Welts wrote:
Annelise Welts wrote:
FORSTÅR IKKE DIAGRAM FORKLARING. DETTE ER INGEN MASKE EFTERSOM MASKEN IKKE EKSISTERE?????????????????????????????????
13.06.2022 - 14:49DROPS Design answered:
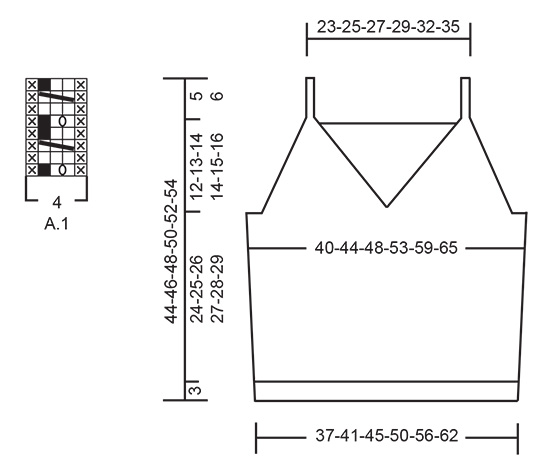
Hej Annelise, du starter nederst i diagrammet med 4 masker. 1.pind: 1vr, 1r, 1oms, 1r,1vr. På næste pind har du 5 masker: 1vr, 3r, 1vr. På 3.p (fra neden): 1vr, strik 3 ret, løft den første over de 2 andre, 1 vr (nu har du 4 masker igen på næste pind)... osv. Du hopper altså bare over de sorte ruder :)
13.06.2022 - 14:57
![]() Hélène wrote:
Hélène wrote:
Joli modèle Pas encore terminé .
12.06.2022 - 09:26
![]() Hélène wrote:
Hélène wrote:
Bonjour Désolée je ne comprends pas bien pur les bretelles. Doit- on avoir un fil sur l'envers du travail ou bien les bretelles doivent se "tordre" ? Je ne vois passur la photo. Utilise t on alors des aiguilles double pointes? Merci de votre aide
12.06.2022 - 09:25DROPS Design answered:
Bonjour Hélène, les bretelles se font en suivant la technique dite du "I-cord" - cette vidéo devrait pouvoir vous aider à comprendre comment faire. Bon tricot!
13.06.2022 - 09:29
![]() Laura wrote:
Laura wrote:
Lo schema dice: Quando il lavoro misura 26-27-28-29-30-31 cm (aggiustarlo in modo che il ferro successivo sia il ferro 3 o 7 di A.2) --> non c'è un A2. Si intende A1? E in questo caso come "aggiustare" per rendere il ferro successivo 3 o 7?
10.06.2022 - 16:31DROPS Design answered:
Buonasera Laura, grazie per la segnalazione, c'è un errore nella traduzione inglese, lo segnaliamo alla casa madre: si fa riferimento ad A.1, deve lavorare fermandosi dopo il ferro 3 o 7 di A.1. Buon lavoro!
15.06.2022 - 21:46
![]() Paola wrote:
Paola wrote:
Buongiorno, All'inizio del progetto, dopo aver avviato le maglie e aver fatto la fila dietro a rovescio bisogna cominciare a lavorare a costa. Sulla schema mi dice di fare 1 diritto, 1 rovescio, sui consigli precedenti allo schema mi dice "Lavorare tutti i ferri a diritto. 1 costa in altezza = 2 ferri diritto". Cosa vuol dire? Cosa devo fare quindi? Scusatemi, ma sono i primi progetti che faccio ai ferri. Vi ringrazio in anticipo Buona giornata a tutti =)
12.05.2022 - 10:24DROPS Design answered:
Buonasera Paola, le coste in quel punto vanno lavorate come indicate nel testo, cioè 1 maglia diritto, 1 maglia rovescio. Buon lavoro!
12.05.2022 - 17:55
![]() Chiara wrote:
Chiara wrote:
Grazie per la risposta veloce. Ma ho chiesto una cosa un po' diversa. Sul dietro sono state intrecciate SOLO 5 maglie per lato. Sul davanti avete scritto che bisogna intrecciare 10 maglie (alla fine della parte uno e 5 maglie all'inizio della parte 2). È corretto o è un errore? Grazie mille
08.05.2022 - 20:48DROPS Design answered:
Buonasera Chiara, per la taglia S si intrecciano 5 maglie alla fine del paragrafo "davanti" (parte I) e 5 maglie nella parte II. Buon lavoro!
08.05.2022 - 21:30
![]() Chiara wrote:
Chiara wrote:
Buongiorno ho lavorato già il dietro. Ora sto lavorando il davanti. Sono arrivata alla PARTE DUE. Il pattern dice di intrecciare 5 maglie per lo scalfo. Ma le 5 maglie per lo scalfo sono state intrecciate alla fine della PARTE UNO. E' un errore o bisogna intrecciare dieci maglie (per il dietro sono state intrecciate solo 5 maglie) Grazie mille
08.05.2022 - 20:25DROPS Design answered:
Buonasera Chiara, si intrecciano 5 maglie per lato per lo scalfo, sia sul davanti che sul dietro. Sul dietro si intrecciano 5 maglie all'inizio di 2 ferri successivi. Buon lavoro!
08.05.2022 - 20:40
|
||||||||||||||||
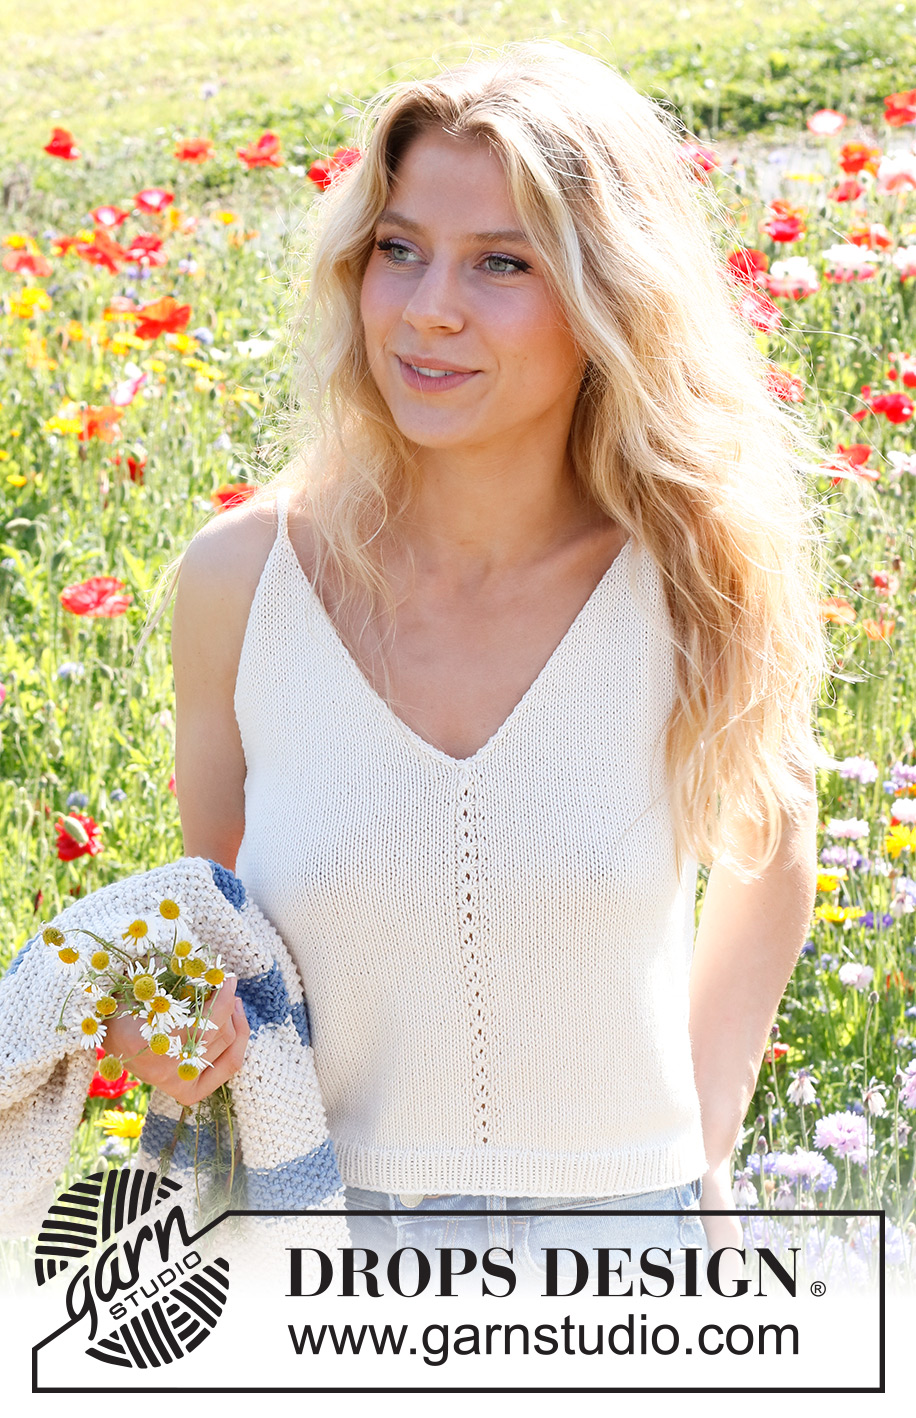
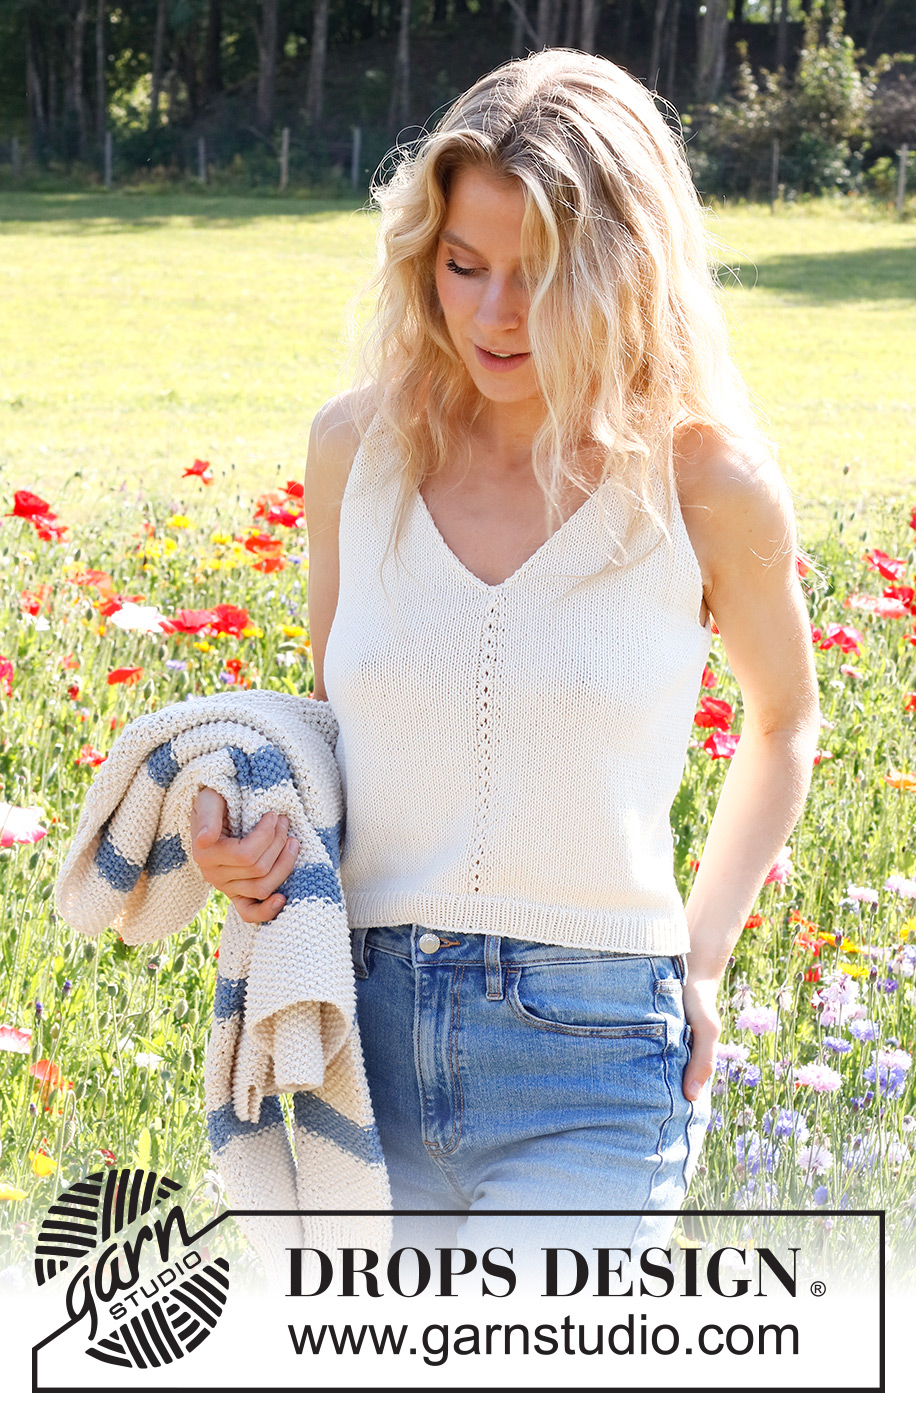
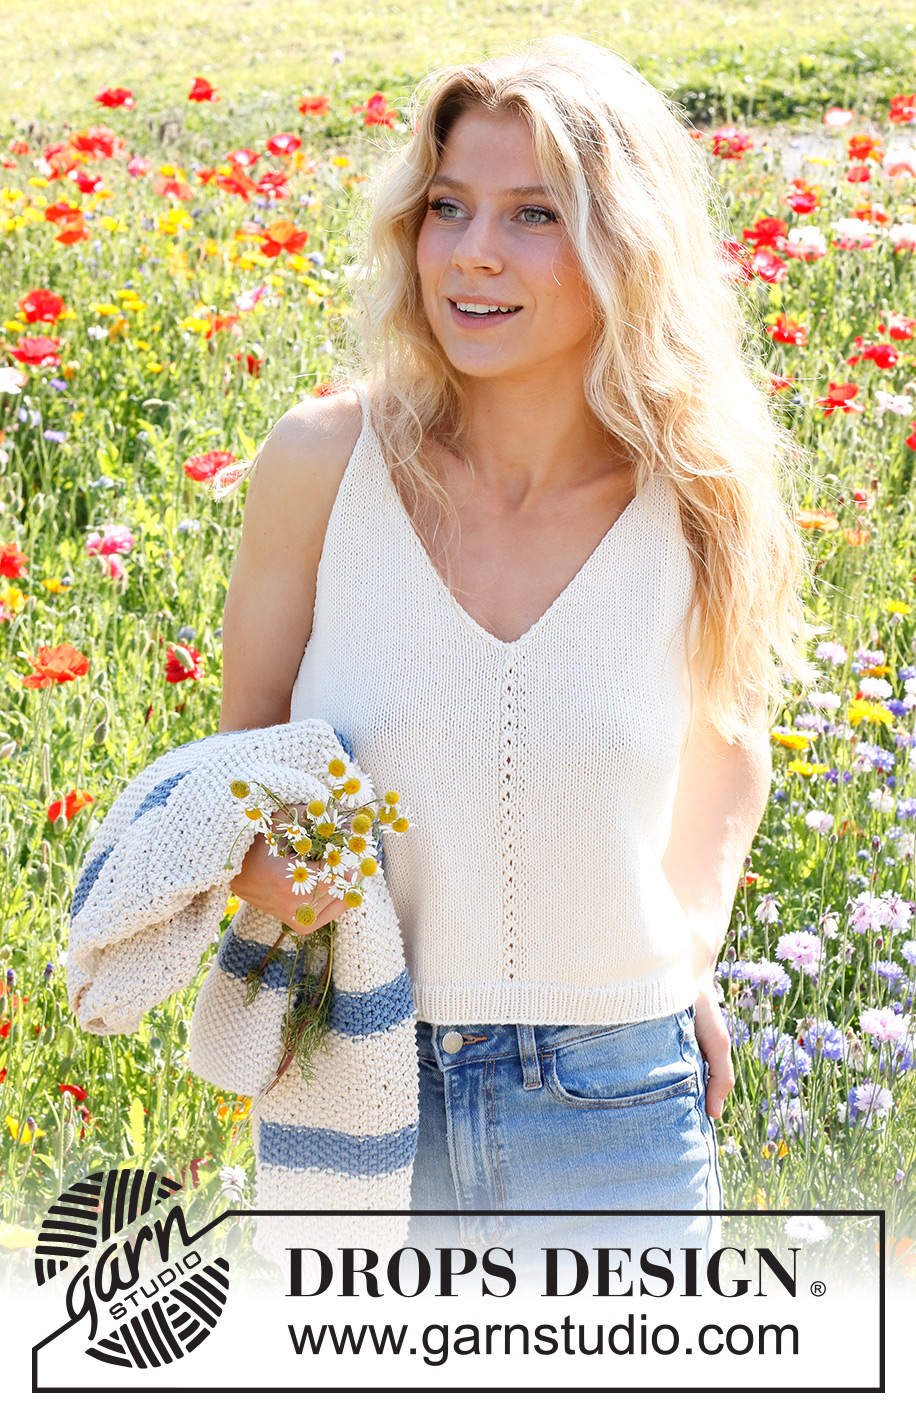
White Sails#whitesailstop |
||||||||||||||||
 |
 |
|||||||||||||||
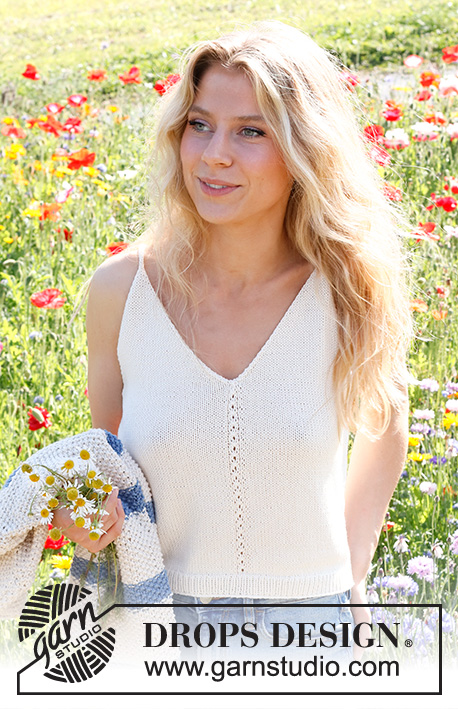
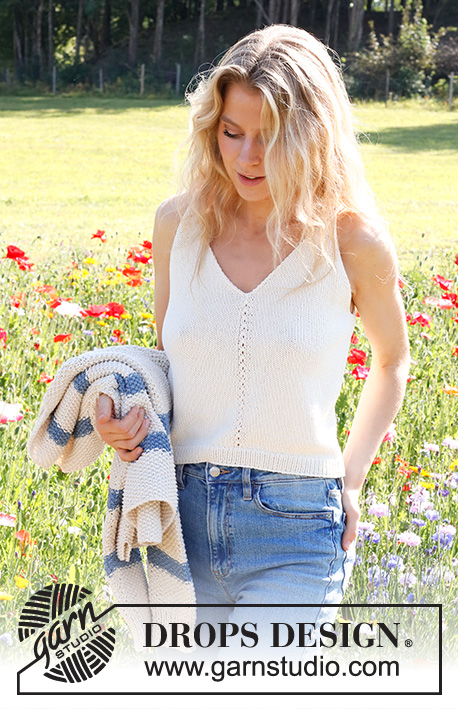
Knitted top in DROPS Safran. The piece if worked bottom up in stocking stitch. Sizes S - XXXL.
DROPS 230-1 |
||||||||||||||||
|
------------------------------------------------------- EXPLANATIONS FOR THE PATTERN: ------------------------------------------------------- RIDGE/GARTER STITCH (worked back and forth): Knit all rows. 1 ridge = knit 2 rows. PATTERN: See diagram A.1. The diagram shows all rows in the pattern from the right side. INCREASE TIP (sides): All increases are worked from the right side. Increase 1 stitch inside the 2 outermost stitches by making 1 yarn over. On the next row purl the yarn over twisted to avoid a hole. Then work the new stitch in stocking stitch. DECREASE TIP (for the armholes and V-neck): FROM THE RIGHT SIDE: After the 1 edge stitch: Slip 1 stitch as if to knit, knit 1 and pass the slipped stitch over the knitted stitch (= 1 stitch decreased). Before the 1 edge stitch: Work until there are 3 stitches left, knit 2 together, 1 edge stitch in garter stitch (= 1 stitch decreased). FROM THE WRONG SIDE: After the 1 edge stitch: Purl 2 together (= 1 stitch decreased). Before the 1 edge stitch: Work until there are 3 stitches left, purl 2 twisted together, edge stitch in garter stitch (= 1 stitch decreased). ------------------------------------------------------- START THE PIECE HERE: ------------------------------------------------------- TOP – SHORT OVERVIEW OF THE PIECE: The back and front pieces are worked separately, back and forth and bottom up. Straps are worked on the front piece, then sewn onto the back piece. BACK PIECE: Cast on 100-112-122-136-150-166 stitches with needle size 2.5 mm and DROPS Safran. Purl 1 row from the wrong side, then work rib (knit 1, purl 1), with 1 edge stitch in GARTER STITCH on each side – read description above. When the rib measures 3 cm, knit 1 row from the right side where you decrease 10-12-12-14-14-16 stitches evenly spaced = 90-100-110-122-136-150 stitches. Change to needle size 3 mm. Work stocking stitch back and forth with 1 edge stitch in garter stitch on each side. REMEMBER THE KNITTING TENSION! When the piece measures 6 cm, increase 1 stitch on each side – read INCREASE TIP. Increase like this every 6 cm a total of 4 times on each side = 98-108-118-130-144-158 stitches. When the piece measures 26-27-28-29-30-31 cm, work 2 ridges over the outermost 6-8-10-12-14-16 stitches on each side (the other stitches are continued in stocking stitch). After the 2 ridges, cast off 5-7-9-11-13-15 stitches at the beginning of the next 2 rows for the armholes = 88-94-100-108-118-128 stitches. Continue with stocking stitch and 1 edge stitch in garter stitch on each side. AT THE SAME TIME on the first row from the right side decrease 1 stitch on each side for the armholes – read DECREASE TIP. Decrease like this every 2nd row (each row from the right side) a total of 16-17-18-19-21-22 times = 56-60-64-70-76-84 stitches. Knit 1 row from the right side where you increase 7-7-7-7-9-9 stitches evenly spaced = 63-67-71-77-85-93 stitches. Change to needle size 2.5 mm. Work rib as follows from the wrong side: 1 edge stitch in garter stitch, * purl 1, knit 1 *, work from *-* until there are 2 stitches left, purl 1 and1 edge stitch in garter stitch. Continue this rib for 3 cm. Cast off a little loosely. FRONT PIECE: Cast on 100-112-122-136-150-166 stitches with needle size 2.5 mm and DROPS Safran. Purl 1 row from the wrong side, then work rib (knit 1, purl 1) with 1 edge stitch in garter stitch on each side. When the rib measures 3 cm, knit 1 row from the right side where you decrease 10-12-12-14-14-16 stitches evenly spaced = 90-100-110-122-136-150 stitches. Change to needle size 3 mm. Work stocking stitch back and forth with 1 edge stitch in garter stitch on each side. Purl 1 row from the wrong side with 1 edge stitch in garter stitch on each side. The next row is worked as follows from the right side: 1 edge stitch in garter stitch, 42-47-52-58-65-72 stitches in stocking stitch, A.1, 42-47-52-58-65-72 stitches in stocking stitch and 1 edge stitch in garter stitch. Continue this pattern. When the piece measures 6 cm, increase 1 stitch on each side. Increase like this every 6 cm a total of 4 times on each side = 98-108-118-130-144-158 stitches. When the piece measures 26-27-28-29-30-31 cm (adjust so the next row is either row 3 or 7 in A.1), work 2 ridges over the outermost 6-8-10-12-14-16 stitches on each side (the other stitches are continued in stocking stitch and pattern as before). After the 2 ridges work the next row from the right side as follows: Cast off 5-7-9-11-13-15 stitches for the armhole, work 42-45-48-52-57-62 stitches in stocking stitch, place the next 2 stitches on a cable needle in front of the piece, knit the next 3 stitches together and place these 43-46-49-53-58-63 stitches on a thread or extra needle = PART-1. PART-2: Knit twisted together the 2 stitches from the cable needle, work 41-44-47-51-56-61 stitches in stocking stitch and 6-8-10-12-14-16 stitches in garter stitch. Turn, cast off 5-7-9-11-13-15 stitches for the armhole, work stocking stitch until there is 1 stitch left and 1 stitch in garter stitch = 43-46-49-53-58-63 stitches. OVERVIEW OF THE NEXT SECTION: Continue with stocking stitch and 1 edge stitch in garter stitch on each side. AT THE SAME TIME on the first row from the right side, begin to decrease for the armhole and V-neck. Decrease inside the 1 edge stitch – read DECREASE TIP; the decreases are different for the armhole and neck - read ARMHOLE and V-NECK before continuing. ARMHOLE: Decrease every 2nd row (each row from the right side) a total of 16-17-18-19-21-22 times. V-NECK: Decrease every row (both right side and wrong side) a total of 7-7-9-9-13-17 times, then every 2nd row (each row from the right side) 15-17-17-18-17-17 times. After all the decreases there are 5-5-5-7-7-7 stitches left for the strap. STRAP: = 5-5-5-7-7-7 stitches. Knit 1 row from the right side, * push the stitches back to the beginning of the needle, tighten the strand and knit the 5-5-5-7-7-7 stitches from the right side again *, work from *-* until the strap measures 9-9-10-11-11-11 cm – work to desired length; the strap is sewn to the back piece later. Cut the strand, pull it through the 5-5-5-7-7-7 stitches, tighten and fasten well. PART-1: Place the 43-46-49-53-58-63 stitches from PART-1 back on needle size 3 mm. Work stocking stitch back and forth with 1 edge stitch in garter stitch on each side. AT THE SAME TIME on the first row from the right side, begin to decrease for the armhole and V-neck in the same way as on PART-2 = 5-5-5-7-7-7 stitches left for the strap. Work the strap in the same way as on part-2. ASSEMBLY: Sew the straps to the back piece – outermost on each side. Sew the side seams inside the 1 edge stitch. |
||||||||||||||||
Diagram explanations |
||||||||||||||||
|
||||||||||||||||
 |
||||||||||||||||
Have you finished this pattern?Tag your pictures with #dropspattern #whitesailstop or submit them to the #dropsfan gallery. Do you need help with this pattern?You'll find 27 tutorial videos, a Comments/Questions area and more by visiting the pattern on garnstudio.com. © 1982-2026 DROPS Design A/S. We reserve all rights. This document, including all its sub-sections, has copyrights. Read more about what you can do with our patterns at the bottom of each pattern on our site. |
||||||||||||||||


With over 40 years in knitting and crochet design, DROPS Design offers one of the most extensive collections of free patterns on the internet - translated to 17 languages. As of today we count 324 catalogues and 12291 patterns translated into English (UK/cm). 12291
We work hard to bring you the best knitting and crochet have to offer, inspiration and advice as well as great quality yarns at incredible prices! Would you like to use our patterns for other than personal use? You can read what you are allowed to do in the Copyright text at the bottom of all our patterns. Happy crafting!
Post a comment to pattern DROPS 230-1
We would love to hear what you have to say about this pattern!
If you want to leave a question, please make sure you select the correct category in the form below, to speed up the answering process. Required fields are marked *.