
Popular categories
Looking for a yarn?


Comments / Questions (32)
![]() Alexandra wrote:
Alexandra wrote:
Liebes Team, nun eine Frage zum Ärmel…Dort heißt es ‚Dann am Anfang der nächsten 2 Reihen, d.h. beidseitig, je 2 Maschen abketten, bis die Arbeit eine Länge von 54-55-55-56-56-56 cm hat.‘ Heißt das, nach dem Abketten der je 2 Maschen, weiterstricken ohne abnehmen bis zu meiner Höhe von 55cm? Danke und liebe Grüße
22.02.2025 - 17:44DROPS Design answered:
Liebe Alexandra, nach den ersten Abketten, ketten Sie noch weiter so: 2 Maschen am Anfang jeder Reihe (Hin- sowie Rückreihen damit die Armkugel symmetrisch wird) bis die Arbeit 55 cm misst. Viel Spaß beim Stricken!
24.02.2025 - 08:22
![]() Alexandra wrote:
Alexandra wrote:
Liebes Team, beim linken Vorderteil heißt es: „Zusätzlich für den Armausschnitt am Anfang der nächsten Hin-Reihe abnehmen – ABNAHMETIPP-2 beachten, dabei zuerst 2 Maschen am Anfang jeder 4. Reihe insgesamt…“ Nehme ich nun gleich am Anfang der nächsten Hinreihe das erste Mal ab oder erst in der 4. Reihe das erste Mal die 2 Maschen? Danke und liebe Grüße!
27.01.2025 - 20:38DROPS Design answered:
Liebe Alexandra, die erste Abnahmen für den Armausschnitt stricken Sie bei der 1. Hinreihe vom linken Vorderteil, dann wiederholen Sie diese Abnahmen in jeder 2. Reihe = in jeder Hinreihe und dann nehmen Sie in jeder 4. Reihe (= in jeder 2. Hinreihe) ab. Viel Spaß beim Stricken!
28.01.2025 - 09:18
![]() Krystyna wrote:
Krystyna wrote:
Dzień dobry, wróciłam do drutów po -nastu latach, robię ten sweter dla córki. Sweter piękny, wzór wydawał się bardzo łatwy, póki nie zaczęły się zamykania oczek na dekolt, ramienia, schematy A.1 A.2 oraz A.3. Nie rozumiem zamykania oczek ponad 3 następnymi, a zostają zamknięte 2. Ponad 3 następnymi, a zostaje zamknięte 1 o. Dużo czasu straciłam na szukanie filmiku na ten temat, nie ma. Dzięki
25.06.2024 - 20:06DROPS Design answered:
Witaj Krysiu, jak zamykać te oczka masz wyjaśnione przed opisem wzoru. Zamykasz 2 oczka ponad 3 oczkami (schemat A.1) przerabiając 3 oczka razem na prawo (z 3 oczek zostaje 1). Zamykasz 1 oczko zgodnie ze schematami A.2 i A.3, tutaj w pierwszym rzędzie schematów faktycznie zamkniesz 2 oczka (przerabiając 3 oczka razem na prawo), ale zrekompensujesz to wykonując narzut w następnym rzędzie (ostatecznie będzie zamknięte 1 oczko). Pozdrawiamy!
26.06.2024 - 12:57
![]() Carolyn wrote:
Carolyn wrote:
The decrease tips says all decreases are made on the right side. The neck decrease pattern says follow A1 pattern. A1 says to purl three together. Why are the instructions to purl three together on the right (knit) row? Thank you!
18.03.2024 - 04:07DROPS Design answered:
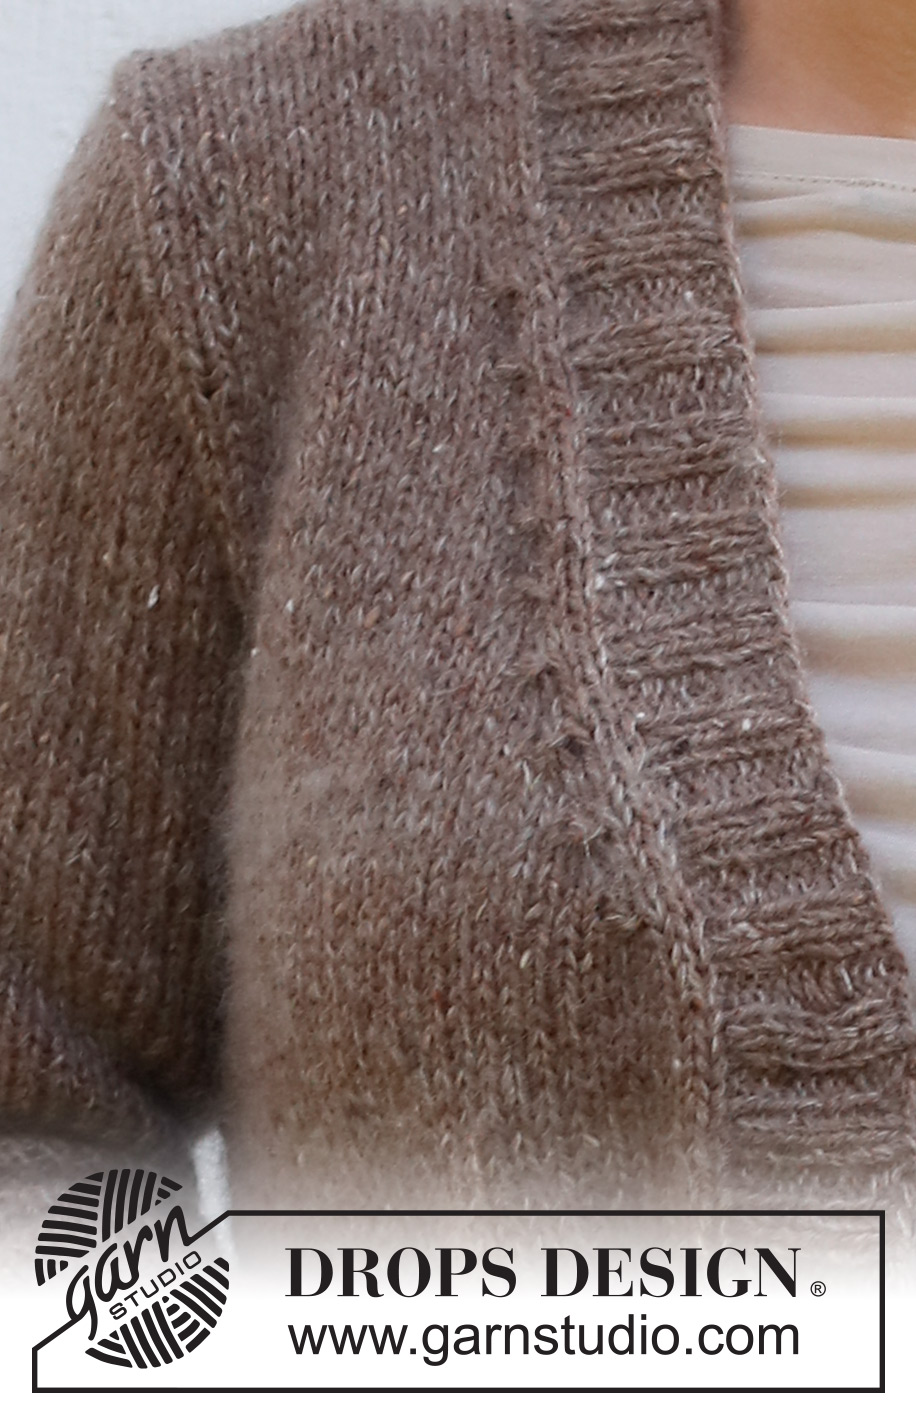
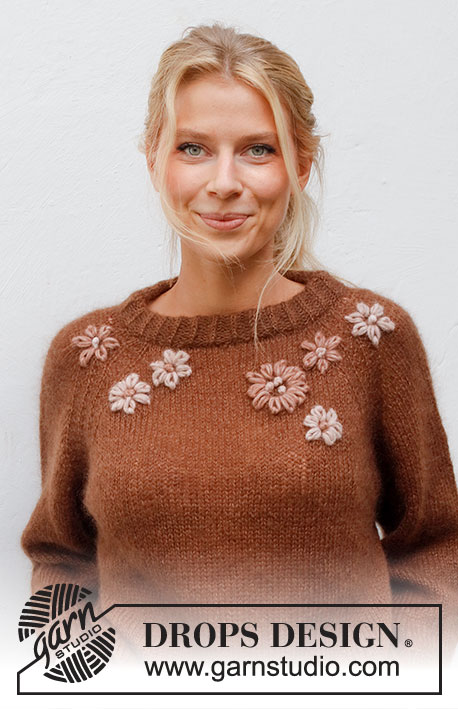
Hi Carolyn, The purling 3 together in A.1, A.2 and A.3 gives you the irregular pattern inside each band and around each armhole, as shown in the photo. Happy knitting!
18.03.2024 - 06:46
![]() Rosita Högberg wrote:
Rosita Högberg wrote:
A1 då skall man minska 2 maskor genom att sticka ihop 3 maskor avigt. Förstår inte A2 och A3 ?
04.03.2024 - 10:54DROPS Design answered:
Hej Rosita. På varv 1 gör du likadant i alla 3 diagram. På varv 2 i A.2 gör du ett omslag och sedan stickar du de 3 ihopstickade maskorna från varvet innan. På varv 2 i A.3 stickar du de 3 ihopstickade maskorna från varvet innan och sedan gör du ett omslag. Mvh DROPS Design
05.03.2024 - 08:21
![]() Rosita Högberg wrote:
Rosita Högberg wrote:
Minskningstips. Minska 2 maskor A1 sticka ihop tre maskor, 2 maskor minskade. Minska 1 maska A2 sticka ihop 3 maskor, 1 maska minskad. Får inte ihop det , tycker A1och -A2 är likadana minskningar.
03.03.2024 - 22:51DROPS Design answered:
Hej Rosita, jo minskningen er den samme, men selve udtagningen er strikket på forskellige sider af den midterste maske :)
05.03.2024 - 15:26
![]() Sara wrote:
Sara wrote:
Hei, kysyisin kuinka monta lankarullaa (per lankatyyppi) tähän ohjeeseen kuluu? Mietin kuinka monta rullaa ostan kerralla kotiin :) Sara
28.02.2024 - 11:53DROPS Design answered:
DROPS Soft Tweed -langan kerässä on 50 grammaa ja DROPS Kid-Silk -langan kerässä on 25 grammaa. Eli jos neulot esim. koon M mukaan, tarvitset 7 kerää Soft Tweed -lankaa ja 5 kerää Kid Silk -lankaa.
05.03.2024 - 17:39
![]() Lucie Čuntova wrote:
Lucie Čuntova wrote:
Dobrý den mohla bych poprosit jak na to ubirani ve výstřihu a v průramku nemohu to stále pochopit Děkuji
08.02.2024 - 18:37
![]() Carolyn Trudel wrote:
Carolyn Trudel wrote:
Hello, please tell me which Drops Kids Silk colour to pair with Drops Extra Fine Merino Colour 07 Taupe for the best match?
13.01.2024 - 22:20DROPS Design answered:
Hello Carolyn, you can use DROPS Kid Silk 12, beige. Happy knitting!
14.01.2024 - 09:35
![]() Alli wrote:
Alli wrote:
Liebes DROPS Team, Ich finde Eure Strickmuster klasse, aber wäre es nicht möglich, unter die Bilder zu schreiben, welche Größe das Model auf dem Foto trägt? Für mich wäre es eine Orientierungshilfe , und bei diesem Model z. B. wüsste ich gerne ob sie Größe s oder m trägt. Liebe Grüße, Alli
02.12.2023 - 07:32
|
||||||||||
Twinkle Tweed#twinkletweedjacket |
||||||||||
 |
 |
|||||||||
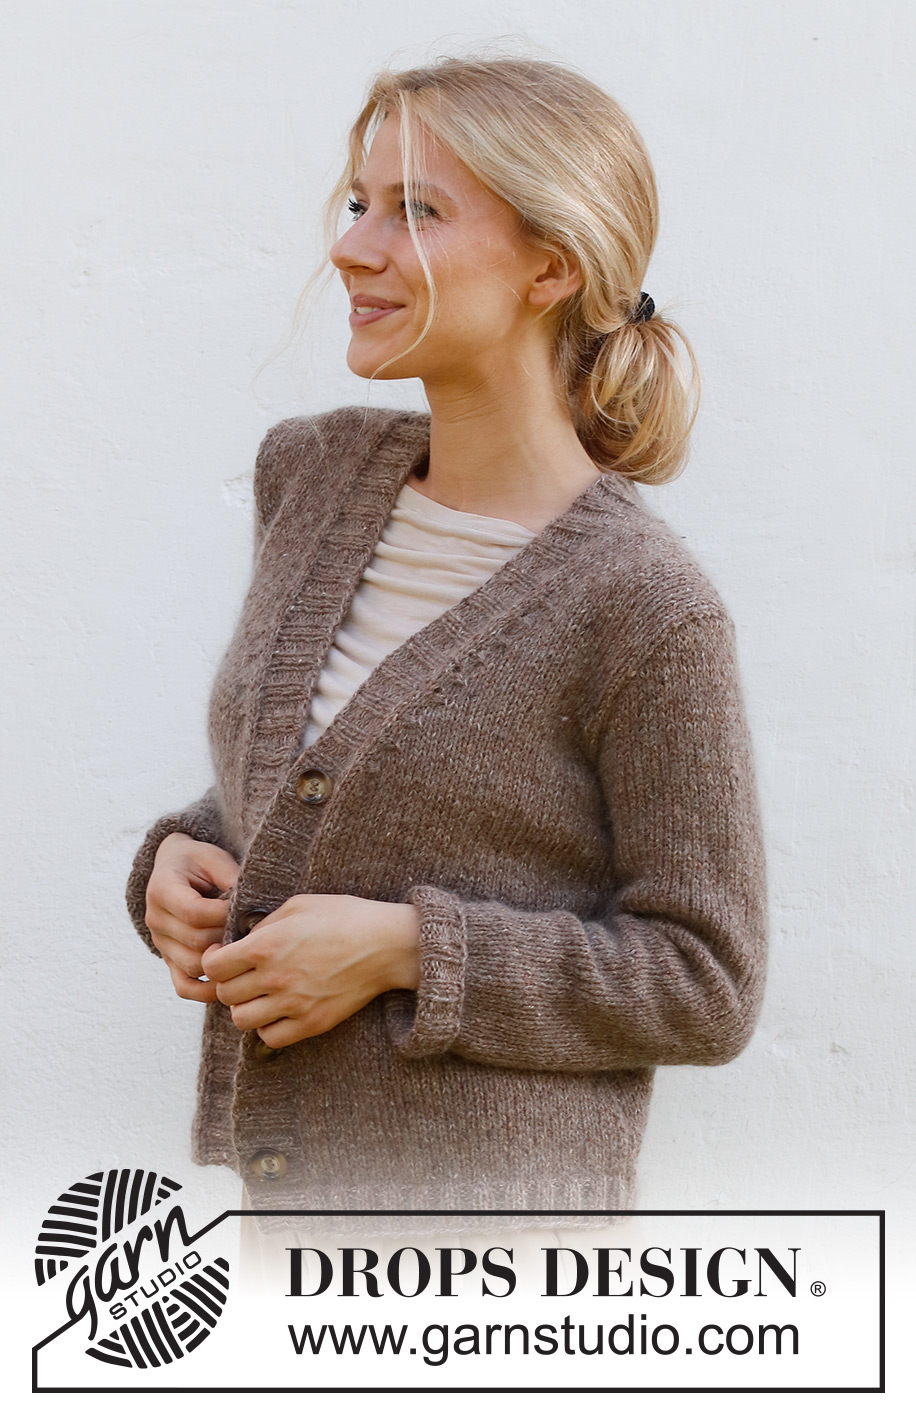
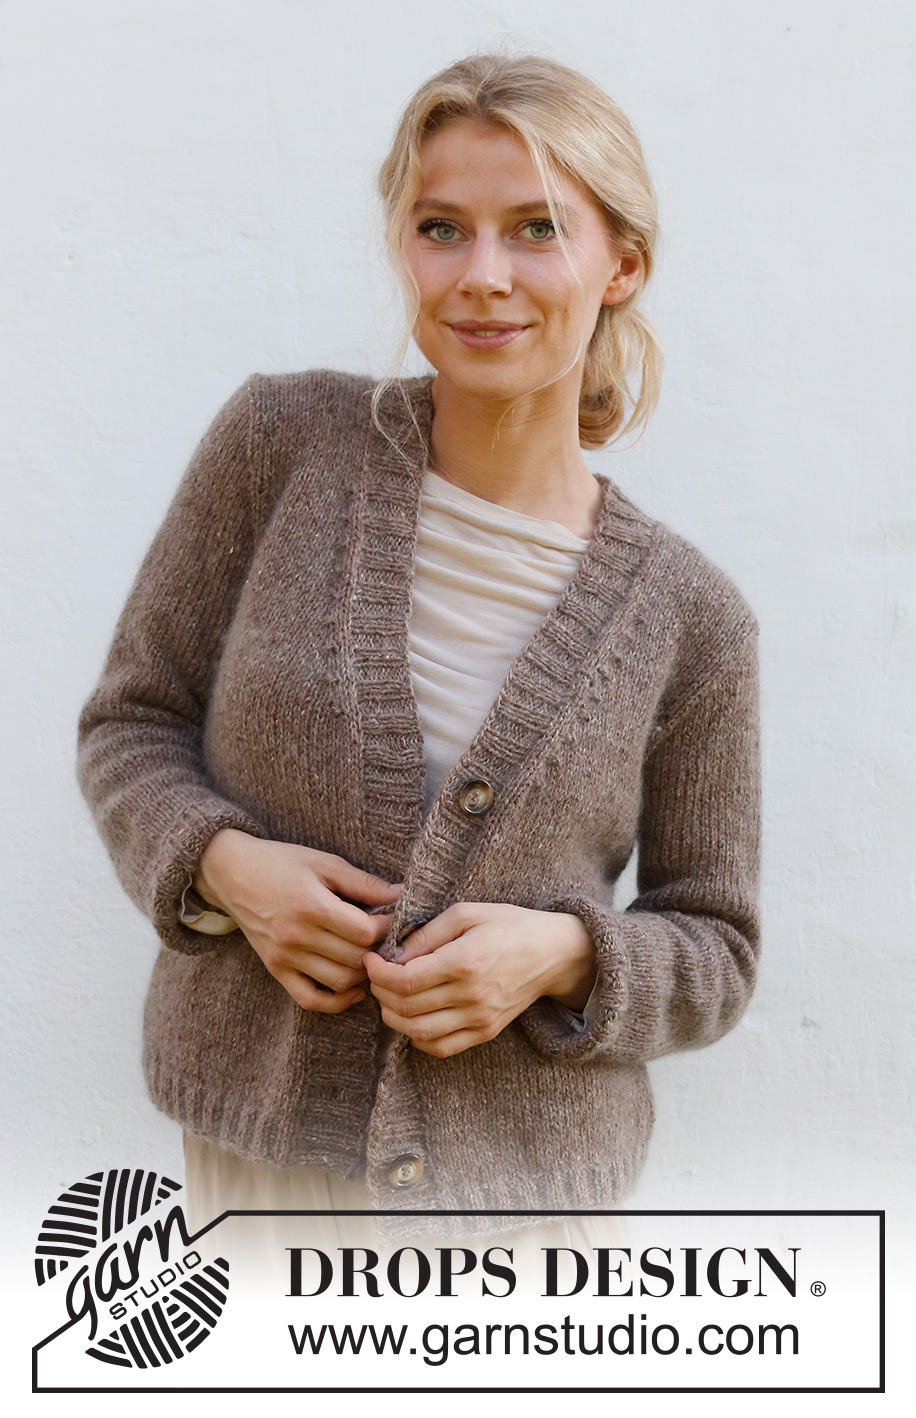
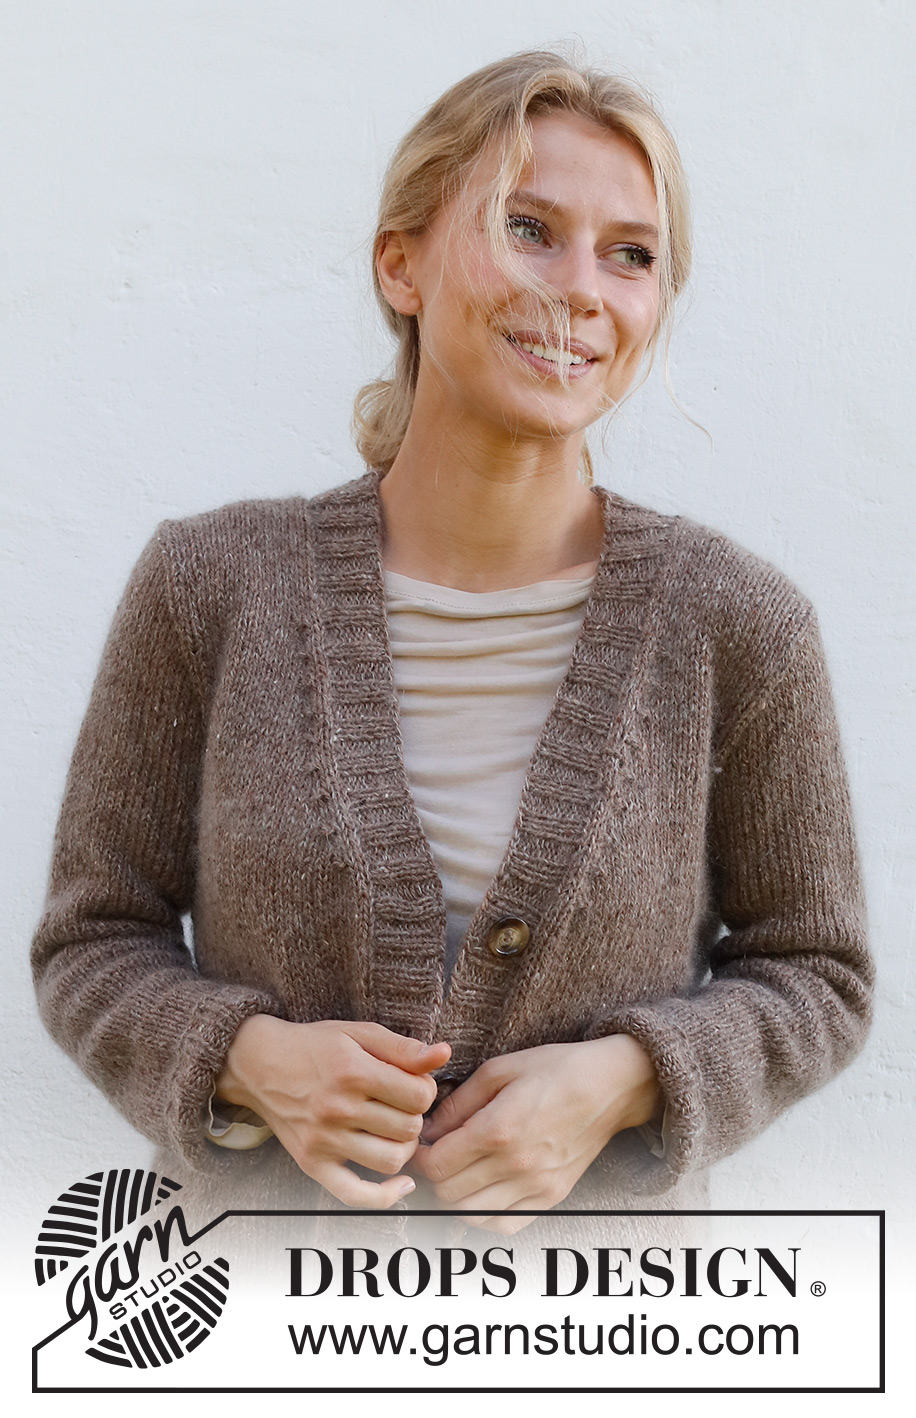
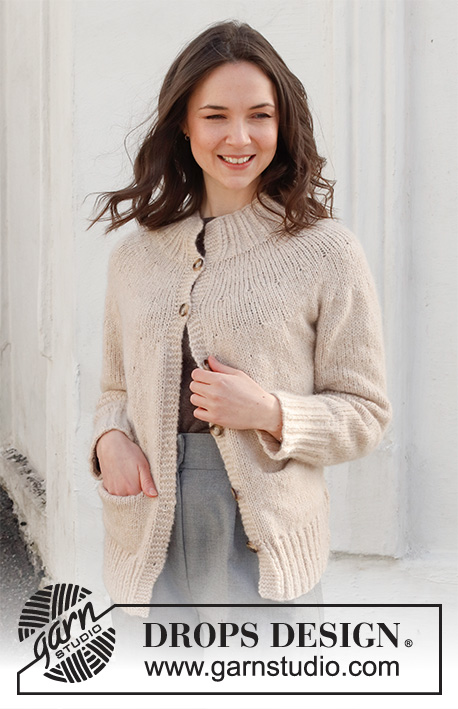
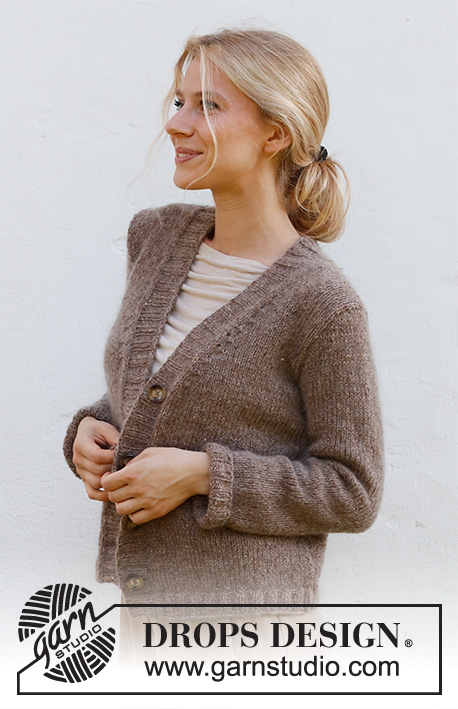
Knitted jacket in DROPS Soft Tweed and DROPS Kid-Silk. The piece is worked with V-neck and ribbed edges. Sizes: S - XXXL.
DROPS 227-45 |
||||||||||
|
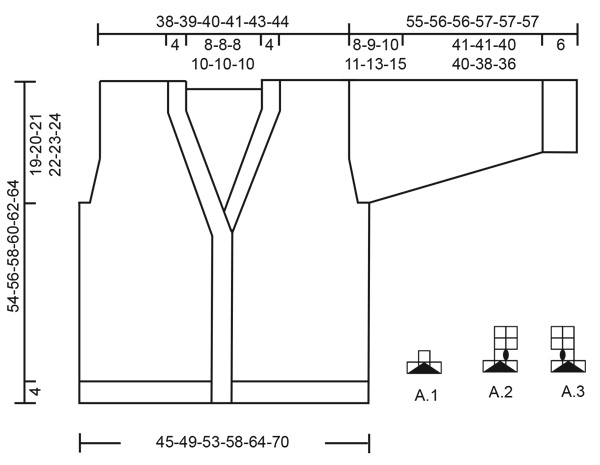
------------------------------------------------------- EXPLANATIONS FOR THE PATTERN: ------------------------------------------------------- RIDGE/GARTER STITCH (worked back and forth): Knit all rows. 1 ridge = knit 2 rows PATTERN (for decreases to neck and armholes– read DECREASE TIP-2): See diagrams A.1 to A.3. The diagrams show all rows in the pattern from the right side. DECREASE TIP-1 (evenly spaced): To work out how to decrease evenly, count the total number of stitches on needle (e.g. 176 stitches), minus the edge stitches (e.g. 2 stitches) and divide the remaining stitches by the number of decreases to be made (e.g. 30) = 5.8. In this example decrease by knitting together approx. each 5th and 6th stitch. Do not decrease the edge stitches. DECREASE TIP-2 (armholes and neck): All decreases are worked from the right side! DECREASE 2 STITCHES AT THE BEGINNING OF THE ROW: Work 1 edge stitch in garter stitch, 2 stitches in stocking stitch, A.1 over the next 3 stitches (= 2 stitches decreased). DECREASE 2 STITCHES AT THE END OF THE ROW: Work until there are 6 stitches left, A.1 over the next 3 stitches (= 2 stitches decreased), 2 stitches in stocking stitch,1 edge stitch in garter stitch. DECREASE 1 STITCH AT THE BEGINNING OF THE ROW: Work 1 edge stitch in garter stitch, 2 stitches in stocking stitch, A.2 over the next 3 stitches (= 1 stitch decreased). DECREASE 1 STITCH AT THE END OF THE ROW: Work until there are 6 stitches left, A.3 over the next 3 stitches (= 1 stitch decreased), 2 stitches in stocking stitch,1 edge stitch in garter stitch INCREASE TIP (sleeves): Work until there are 2 stitches left before the marker thread, 1 yarn over, knit 4 (marker thread sits between these 4 stitches), 1 yarn over (2 stitches increased). On the next round knit the yarn overs twisted to avoid holes. Then work the new stitches in stocking stitch. CASTING-OFF TIP: To avoid the cast-off edge being tight you can cast off with a larger size needle. If the edge is still tight, make 1 yarn over after approx. each 4th stitch at the same time as casting off; the yarn overs are cast off as normal stitches. ------------------------------------------------------- START THE PIECE HERE: ------------------------------------------------------- JACKET – SHORT OVERVIEW OF THE PIECE: The piece is worked back and forth with circular needle bottom up as far as the armholes, then the front and back pieces are finished separately. The sleeves are worked in the round with double pointed needles/short circular needle, bottom up as far as the sleeve cap, then finished back and forth. The piece is sewn together and the neck/bands are worked to finish. BODY: Cast on 176-192-204-224-248-272 stitches with circular needle size 4 mm and 1 strand of each quality (= 2 strands). Purl 1 row from the wrong side, then work rib as follows: 1 edge stitch in GARTER STITCH – read description above, * knit 2, purl 2 *, work from *-* until there are 3 stitches left, knit 2 and 1 edge stitch in garter stitch. Continue this rib for 4 cm. Knit 1 row from the right side where you decrease 30-34-34-38-42-46 stitches evenly spaced – read DECREASE TIP-1 = 146-158-170-186-206-226 stitches. Insert 1 marker thread 37-40-43-47-52-57 stitches in from each side (= sides). There are 72-78-84-92-102-112 stitches between the threads on the back piece. Allow the markers to follow your work onwards – they are used when casting off for the armholes. Change to circular needle size 5 mm and purl 1 row from the wrong side (the edge stitches are knitted). Continue with stocking stitch and 1 edge stitch in garter stitch in each side. REMEMBER THE KNITTING TENSION! OVERVIEW OF THE NEXT SECTION: When the piece measures 31-32-33-34-35-36 cm, start to decrease for the neck. AT THE SAME TIME cast off for the armholes, when each piece is finished separately. Read V-NECK and ARMHOLES before continuing. V-NECK: When the piece measures 31-32-33-34-35-36 cm, on the next row from the right side, decrease for the neck on each side – read DECREASE TIP-2. Decrease 2 stitches on each side every 4th row (every second row from the right side) a total of 5 times in all sizes. Then decrease 1 stitch on each side every 4th row 4-4-4-5-5-5 times. ARMHOLES: AT THE SAME TIME when the piece measures 35-36-37-38-39-40 cm and the next row is from the right side, cast off for the armholes as follows: Work until there are 3-3-4-4-5-6 stitches left before the first marker thread, cast off 6-6-8-8-10-12 stitches, work until there are 3-3-4-4-5-6 stitches left before the second marker thread, cast off 6-6-8-8-10-12 stitches and work to the end of the row. Front and back pieces are finished separately. LEFT FRONT PIECE (when the garment is worn): Start from the wrong side and continue with stocking stitch and 1 edge stitch in garter stitch on each side; continue to decrease for the neck as described above. In addition, decrease for the armhole at the beginning of the next row from the right side – remember DECREASE TIP-2. Decrease 2 stitches every 4th row 0-2-3-4-6-7 times. Then decrease 1 stitch every 4th row 3-1-0-1-0-1 times. After all the decreases to neck and armhole there are 17-18-19-19-20-21 stitches on the shoulder. Continue with stocking stitch and 1 edge stitch in garter stitch on each side until the piece measures 54-56-58-60-62-64 cm (19-20-21-22-23-24 cm from the bottom of the armhole). Cast off with knit from the right side. RIGHT FRONT PIECE: Start from the wrong side and continue with stocking stitch and 1 edge stitch in garter stitch on each side; continue to decrease for the neck as described above. In addition, decrease for the armhole at the end of the next row from the right side. Decrease 2 stitches every 4th row 0-2-3-4-6-7 times. Then decrease 1 stitch every 4th row 3-1-0-1-0-1 times. After all the decreases to neck and armhole there are 17-18-19-19-20-21 stitches on the shoulder. Continue with stocking stitch and 1 edge stitch in garter stitch on each side until the piece measures 54-56-58-60-62-64 cm (19-20-21-22-23-24 cm from the bottom of the armhole). Cast off with knit from the right side. BACK PIECE: = 66-72-76-84-92-100 stitches. Start from the wrong side and work stocking stitch back and forth with 1 edge stitch in garter stitch on each side. AT THE SAME TIME on the next row from the right side decrease for the armholes as follows: Decrease 2 stitches on each side every 4th row a total of 0-2-3-4-6-7 times. Then decrease 1 stitch on each side every 4th row 3-1-0-1-0-1 times = 60-62-64-66-68-70 stitches. When the piece measures 52-54-56-58-60-62 cm, cast off the middle 22-22-22-24-24-24 stitches for the neck and each shoulder is finished separately. On the next row from the right side decrease 2 stitches by the neck - remember DECREASE TIP-2 = 17-18-19-19-20-21 stitches on the shoulder. Continue working until the piece measures 54-56-58-60-62-64 cm (19-20-21-22-23-24 cm from the bottom of the armholes). Cast off with knit. Work the other shoulder in the same way. SLEEVES: Cast on 44-48-48-52-52-56 stitches with double pointed needles size 4 mm and 1 strand of each quality (= 2 strands). Knit 1 round, then work rib in the round (knit 2, purl 2) for 6 cm. Knit 1 round where you decrease 6-8-6-8-8-10 stitches evenly spaced = 38-40-42-44-44-46 stitches. Insert 1 marker thread at the beginning of the round (= mid-under sleeve). Allow the thread to follow your work onwards – it is used when increasing. Change to double pointed needles size 5 mm and work stocking stitch in the round for 10-9-11-9-10-8 cm. Now increase 1 stitch on each side of the marker thread – read INCREASE TIP. Increase like this every 5-4½-3½-3½-2½-2½ cm a total of 8-9-10-11-13-14 times = 54-58-62-66-70-74 stitches. When the sleeve measures 47-47-46-46-44-42 cm, work as follows: Start 3-3-4-4-5-6 stitches before the marker thread, cast off 6-6-8-8-10-12 stitches and work to the end of the round = 48-52-54-58-60-62 stitches. Starting from the wrong side, work stocking stitch back and forth for the sleeve cap. AT THE SAME TIME cast off at the beginning of each row as follows: 2 stitches 1-2-2-3-3-3 times and 1 stitch 3-3-3-3-5-6 times on each side. Then 2 stitches at the beginning of each row on each side until the piece measures 54-55-55-56-56-56 cm. Then 3 stitches at the beginning of the next 2 rows. Cast off the remaining stitches. The sleeve measures approx. 55-56-56-57-57-57 cm. Work the other sleeve in the same way. You can turn up the bottom 3 cm if you wish – see photo. ASSEMBLY: Sew the shoulder seams inside the cast-off edge. Sew in the sleeves, inside the 1 edge stitch on the armholes. BANDS/NECK: Insert a marker mid-back of the neck. Start from the right side at the bottom of the right front piece, knit up stitches inside the 1 edge stitch with circular needle size 4 mm and 1 strand of each quality (= 2 strands) as follows: 118-122-126-130-134-138 stitches up the front piece and around to the marker on the neck (number of stitches should be divisible by 4 + 2). Then knit up the same number of stitches from the marker and down the left front piece = a total of 236-244-252-260-268-276 stitches on the needle. Work the first row from the wrong side as follows: 1 edge stitch in garter stitch, * purl 2, knit 2 *, work from *-* until there are 3 stitches left, purl 2 and 1 edge stitch in garter stitch (the marker should sit between 2 knitted stitches seen from the right side). Continue this rib for 2 cm. Now work 4-4-4-5-5-5 buttonholes on the right band. The top buttonholes is worked 1 cm below the beginning of the V-neck and the bottom buttonhole 6 cm from the bottom edge. 1 BUTTONHOLE = Cast off, a little tightly, 2 purled stitches (seen from the right side) and cast on 2 new stitches over the cast-off stitches on the next row. Continue the rib until the bands measure 4 cm. Cast off with knit over knit and purl over purl – read CASTING-OFF TIP! Sew the buttons onto the left band. |
||||||||||
Diagram explanations |
||||||||||
|
||||||||||
 |
||||||||||
Have you finished this pattern?Tag your pictures with #dropspattern #twinkletweedjacket or submit them to the #dropsfan gallery. Do you need help with this pattern?You'll find 28 tutorial videos, a Comments/Questions area and more by visiting the pattern on garnstudio.com. © 1982-2026 DROPS Design A/S. We reserve all rights. This document, including all its sub-sections, has copyrights. Read more about what you can do with our patterns at the bottom of each pattern on our site. |
||||||||||


With over 40 years in knitting and crochet design, DROPS Design offers one of the most extensive collections of free patterns on the internet - translated to 17 languages. As of today we count 324 catalogues and 12290 patterns translated into English (UK/cm). 12290
We work hard to bring you the best knitting and crochet have to offer, inspiration and advice as well as great quality yarns at incredible prices! Would you like to use our patterns for other than personal use? You can read what you are allowed to do in the Copyright text at the bottom of all our patterns. Happy crafting!
Post a comment to pattern DROPS 227-45
We would love to hear what you have to say about this pattern!
If you want to leave a question, please make sure you select the correct category in the form below, to speed up the answering process. Required fields are marked *.