
Popular categories
Looking for a yarn?


Comments / Questions (4)
![]() Lory wrote:
Lory wrote:
Modello adorabile e veloce da fare. Quest'anno i miei pensierini di Natale saranno questa bella porta. Grazie per il modello e per tutti i modelli che ci mettete a disposizione!
06.12.2020 - 17:26
![]() Bi wrote:
Bi wrote:
Ik heb dit model met veel plezier gemaakt en nu krijg complimenten! mijn vriendin vond dat ook super leuk en wil een...apotheekzakje maken))
04.03.2015 - 22:09
![]() Bi. wrote:
Bi. wrote:
Ik vind dat ook zeer leuk, maar Kersttijd is snel voorbij... Daarom wil ik een tijdschriftenrek van dit patroon nadoen en de hele jaar door te gebruiken!
07.01.2015 - 07:35
![]() Mamie wrote:
Mamie wrote:
J'adore ce modèle de poignée de porte, j'en fais trois pour mes soeurs
03.12.2014 - 10:02
|
|
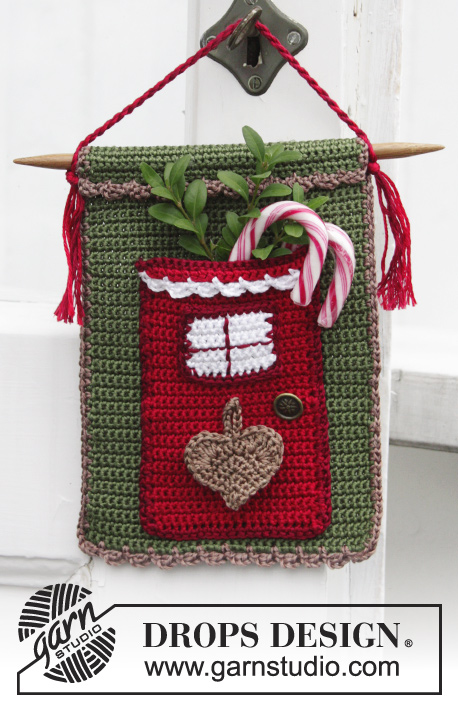
Christmas Treat |
|
 |
 |
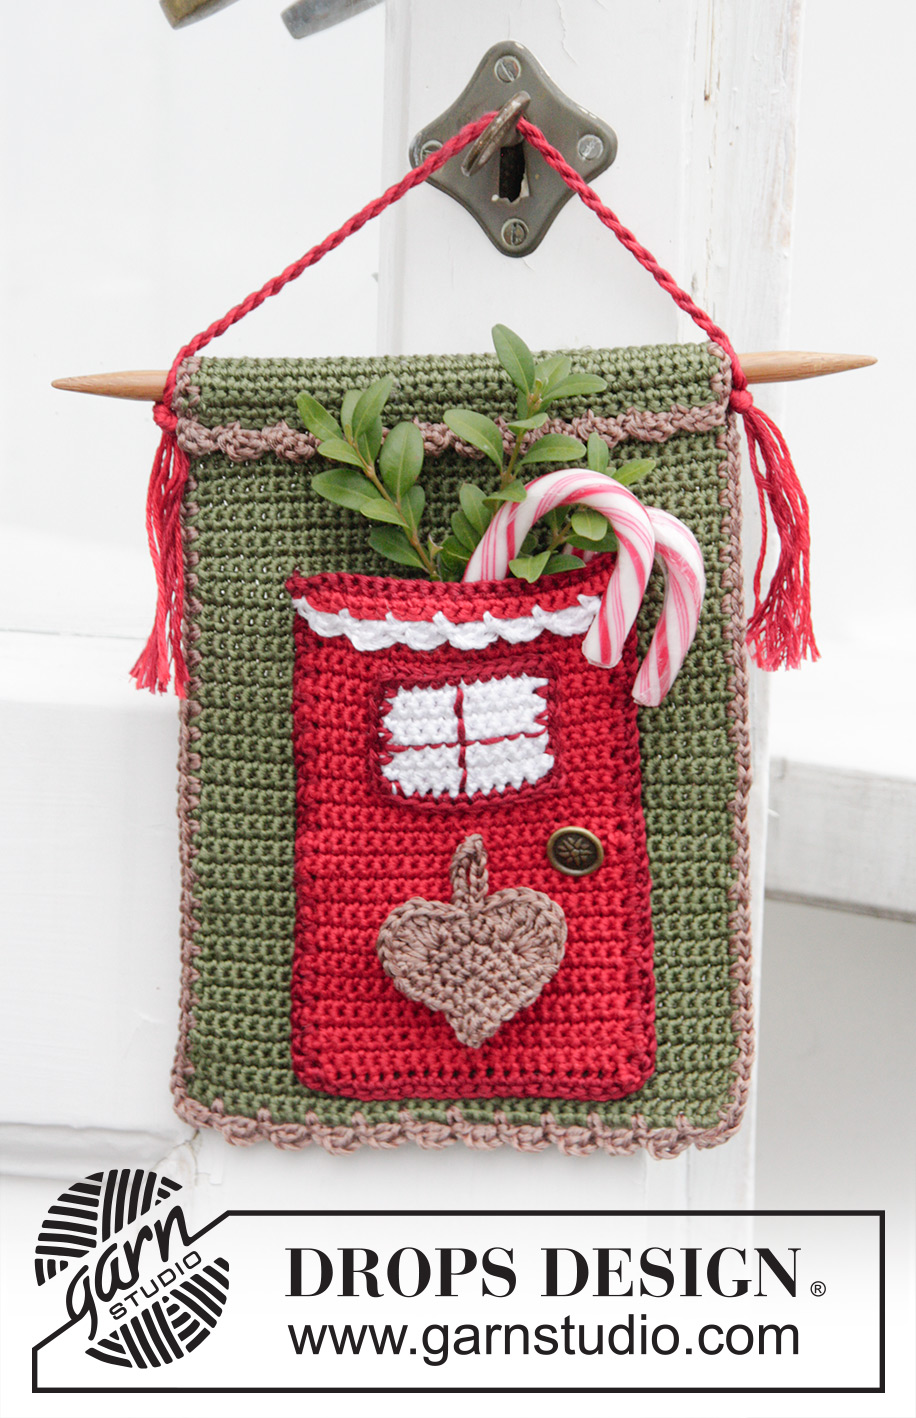
DROPS Christmas: Crochet DROPS calender door with pocket in "Cotton Viscose".
DROPS Extra 0-1070 |
|
|
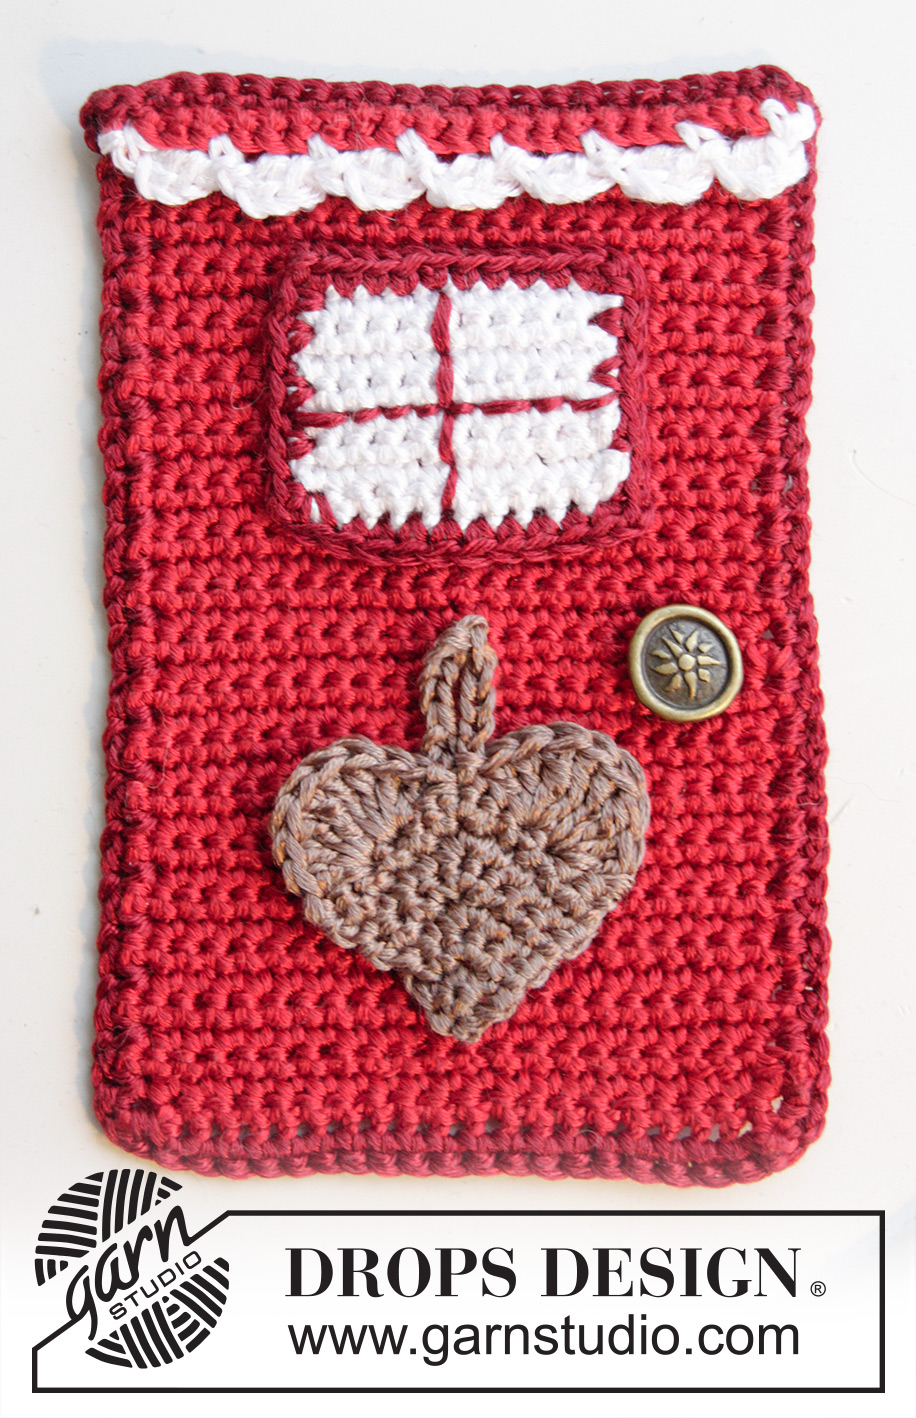
CROCHET TIP: Beg every row with ch 1, this does NOT replace first sc but is extra. FRINGE TIP: To get nice fringes do the following: Make the yarn ends wet, hang the strand up to dry so that the ends dry while hanging straight. ---------------------------------------------------------- CALENDER DOOR WITH POCKET: The wall decoration consists of several parts that are worked separately and sewn tog when finished. BACKGROUND: Work 37 ch with moss green on hook size 3 mm / C. Turn and work back in ch-row as follows: ROW 1: READ CROCHET TIP! Work 1 sc in every ch, beg in 2nd ch from hook = 36 sc. Continue to work 1 sc in every sc on every row until piece measures approx. 22 cm / 8¾''. REMEMBER THE CROCHET GAUGE! Now work an edge around the entire background with chestnut as follows: Turn the piece to start working down one long side: Work * 1 sc, 1 ch and skip 1 row, * repeat from *-* down the long side, adjust so that row ends with 1 sc in last row and work 1 ch. Then work a picot edge along the short side: Work 1 sc in first sc, * work 3 ch and 1 dc in 3rd ch from hook, skip 2 sc and work 1 sc in next sc*, repeat from *-* the entire row. Work ch 1, then work as on the other long side. Work a picot edge along the short side as on the other short side. Finish with a sl st in first sc. Fasten off. DOOR: Work 23 ch with red on hook size 3 mm / C. Turn and work back in ch-row as follows: ROW 1: Work 1 sc in every ch, beg in 2nd ch from hook = 22 sc. Turn piece. Continue to work 1 sc in every sc on every row until piece measures approx. 13 cm / 5¼". On next row work 1 sc in front loop of every sc the entire row. Fasten off. DOOR FRAME: Switch to dark red and work an edge around the door, fold the last row forwards and work in back loop of sts in the next to last row worked (= short side). Along the short sides work 1 sc in every sc, in the corners work 1 sc, ch 1, 1 sc. And along the long sides work * 1 sc, ch 1, skip 1 row *, repeat from *-* the entire row. Finish with 1 sl st in first sc, fasten off. SNOW EDGE: Now work a snow edge with white along the last sc row in red that is folded in, beg from RS in the right side as follows: Work 1 sc in first sc, * 3 ch and 1 dc in 3rd ch from hook, skip 2 sc and work 1 sc in next sc*, repeat from *-* the entire row = 7 picots. Fasten off. WINDOW: Work 11 ch with white on hook size 3 mm / C. Turn and work back in ch-row as follows: ROW 1: Work 1 sc in every ch, beg in 2nd ch from hook = 10 sc. Turn piece. Continue by working 1 sc in every sc on row until 10 rows have been worked in total. Fasten off. WINDOW FRAME: Switch to dark red and work an edge around the window. Along the short sides work * 1 sc, ch 1, skip 1 row *, repeat from *-* the entire row. Along the long sides work 1 sc in every sc and in the corners work 1 sc, ch 1, 1 sc. Finish with 1 sl st in first sc, fasten off. Sew backstitches with dark red across the window to make squares. Fasten off. HEART: Work 2 ch with chestnut on hook size 3 mm / C. ROW 1: Turn and work 3 sc in 2nd ch from hook = 3 sc. Turn piece. ROW 2: Work 1 sc in every sc = 3 sc. Turn piece. ROW 3: Work 1 sc in first sc, 3 sc in next sc and 1 sc in last sc = 5 sc. Turn piece. ROW 4: Work 1 sc in each of the first 2 sc, 3 sc in next sc, 1 sc in each of the next 2 sc = 7 sc. Turn piece. ROW 5: Work 1 sc in each of the first 3 sc, 3 sc in next sc, 1 sc in each of the next 3 sc = 9 sc. Turn piece. ROW 6: Work 1 sc in each of the first 4 sc, 3 sc in next sc, 1 sc in each of the next 4 sc = 11 sc. Turn piece. ROW 7: Work 1 sc in each of the first 5 sc, 3 sc in next sc, 1 sc in each of the next 5 sc = 13 sc. Turn piece. ROW 8: Work ch 1, skip 2 sc, in next sc work 2 dc and 3 tr. In next sc work 3 tr and 2 dc. Skip 2 sc, in next sc work 1 sl st, 12 ch (= strap) and 1 sl st in same sc. Skip 2 sc, in next sc work 2 dc and 3 tr. In next sc work 3 tr and 2 dc, skip 2 sc and work 1 sl st in beg of previous round. Fasten off. TIE: Cut 2 lengths red and 2 lengths dark red of approx. 1 meter each. Twine them tog and place them double to make a tie. Tie a knot in each end and leave it to hand down approx. 6-7 cm / 2½-2¾" with strand in each end, cut threads to make fringes - READ FRINGE TIP! ASSEMBLY: Sew window, heart and button on to door - see picture. Then sew the door to the background BUT do not sew along the upper edge, this becomes the pocket. Fold the upper part of background forwards around a double pointed needle or similar, fasten the fold with neat little stitches so that it is tightly around the needle. Thread the tie in on each side of the needle and let the fringes hang down below the needle. |
|
Have you finished this pattern?Tag your pictures with #dropspattern or submit them to the #dropsfan gallery. Do you need help with this pattern?You'll find 9 tutorial videos, a Comments/Questions area and more by visiting the pattern on garnstudio.com. © 1982-2026 DROPS Design A/S. We reserve all rights. This document, including all its sub-sections, has copyrights. Read more about what you can do with our patterns at the bottom of each pattern on our site. |
|


With over 40 years in knitting and crochet design, DROPS Design offers one of the most extensive collections of free patterns on the internet - translated to 17 languages. As of today we count 324 catalogs and 12291 patterns - 12281 of which are translated into English (US/in).
We work hard to bring you the best knitting and crochet have to offer, inspiration and advice as well as great quality yarns at incredible prices! Would you like to use our patterns for other than personal use? You can read what you are allowed to do in the Copyright text at the bottom of all our patterns. Happy crafting!
Post a comment to pattern DROPS Extra 0-1070
We would love to hear what you have to say about this pattern!
If you want to leave a question, please make sure you select the correct category in the form below, to speed up the answering process. Required fields are marked *.