
Popular categories
Looking for a yarn?


Comments / Questions (109)
![]() Bouhours wrote:
Bouhours wrote:
Je suis deçue car je sais pas tricoter avec des aiguillesncirculaires alors que vous zavz de tres brau modele "kristin" super mais on ne peut le reraliser avec des circulaires pourriez vous m aider avec deux aiguilles merci
27.11.2013 - 09:37DROPS Design answered:
Bonjour Mme Bouhours, pour tricoter en allers et retours, répartissez le nbe de mailles pour chaque pièce et ajoutez les m lis pour les coutures. Faites bien attention aux calculs pour l'empiècement ou bien regardez nos vidéos (cf onglet "vidéo" à droite de la photo) pour apprendre à tricoter en rond sur aiguille circulaire, nombreuses sont celles qui les ont finalement essayées et adoptées. Bon tricot!
27.11.2013 - 09:40
![]() Susanne Jensen wrote:
Susanne Jensen wrote:
Har strikket den, er en af mine favoritter. God pasform og dejlig at have på
11.11.2013 - 08:40
![]() ILARIA wrote:
ILARIA wrote:
Complimenti è bellissimo!!!!
01.11.2013 - 18:56
![]() Elizabeth wrote:
Elizabeth wrote:
Thank you SO much for your help and advice! I really appreciate it. I can't wait to finish and wear this beautiful, simple knitted dress. God bless.
21.10.2013 - 18:18
![]() Elizabeth wrote:
Elizabeth wrote:
So mid front means center front- like right below the nose of the wearer and mid back means center back? I'm trying to understand, are the short rows going across the back or the front? I'm guessing the back, that would make sense. If mid means center, I'd start my round in the center back and knit until I'm 24 sts away from the center front, turn around and purl until I'm 24 sts away from the other side of the center front, leaving 48 unworked sts on the front. Right?
19.10.2013 - 19:20DROPS Design answered:
Dear Elizabeth, you are correct, mid front is center front. You will then work back and forth starting from mid back (center back) leaving unworked first 24 sts from center front each side, then 30 sts, then 36 sts etc. Happy knitting!
21.10.2013 - 11:01
![]() Elizabeth wrote:
Elizabeth wrote:
At the part of the pattern where you begin knitting the yoke, on the second line of that paragraph it says to insert a marker. Where would I insert that marker? Then, later on it says to insert a marker in the middle front. Why is that? I've never done short rows before, so I find myself a bit confused. I know how to do them, but where exactly do I do them? In between the sleeves on the back? Just wondering.
18.10.2013 - 18:19DROPS Design answered:
Dear Elisabeth, the 1st marker on yoke will help you to measure yoke. Rounds start on mid back piece, and the marker has to be placed on mid front (you should have same no of sts each side of both mid front/mid back). Starting mid back, work until 24-34 sts (see size) remain before marker front piece, turn and work from WS until 24-34 sts remain before marker mid front piece. Continue that way back and forth (see pattern) until 42-52 sts remain before mid front each side. Happy knitting!
19.10.2013 - 10:17
![]() Sara wrote:
Sara wrote:
Man kan inte se "rillerne" på bilden, då dom finns under ärmen.
02.09.2013 - 16:59
![]() Merethe wrote:
Merethe wrote:
Hei:) jeg lurer på om det skal være 2 riller når det er strikket 50 cm? Det ser ut på bilde at det er bare 1.
31.08.2013 - 21:26DROPS Design answered:
Hej Merethe. Det er 2 riller i armhulerne du skal strikke. Det kan du ikke se paa billedet, men paa BÆRESTK starter du rigtig nok med 1 rille (A.1). God fornöjelse.
04.09.2013 - 10:56
![]() Marianne wrote:
Marianne wrote:
Øv...er kommet til ribstykket og kan se, at jeg løber tør for garn til det sidste stykke. Lidt ærgeligt, at man ikke kan regne med den angivet garnforbruge. Havde sådan glædet mig til at blive hurtig færdig med dig, for synes den er så sød, at den jo er en: Must have. :)
11.06.2013 - 23:50
![]() Jutta wrote:
Jutta wrote:
Habe die Tunika in vanille gestrickt; sie ist wunderschön geworden. Habe sie bisher mit einem dünnen Langarmshirt drunter getragen. Die empfohlene Menge bei XL hatte bei mir auch nicht ausgereicht.
09.05.2013 - 09:50
|
|||||||||||||
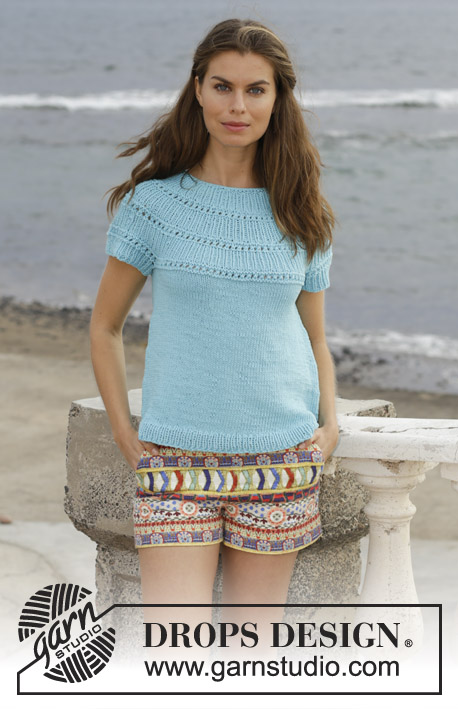
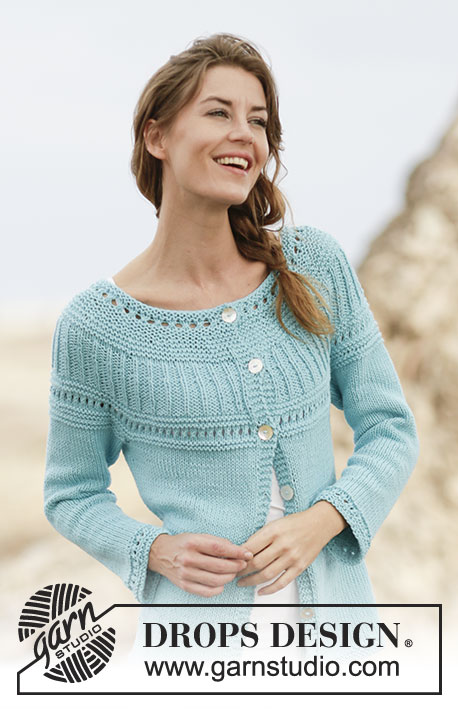
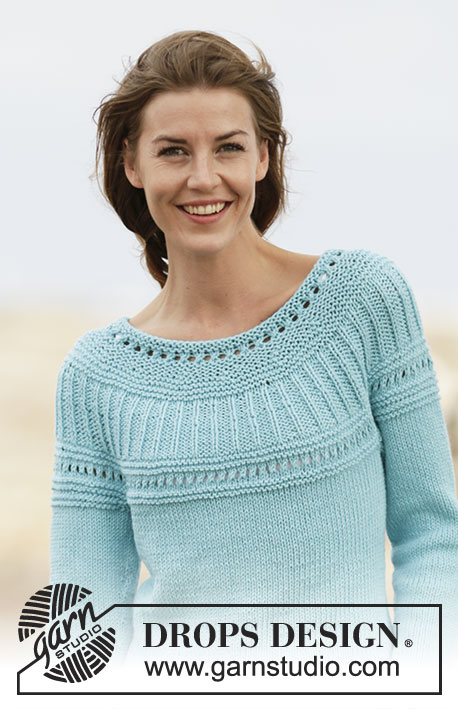
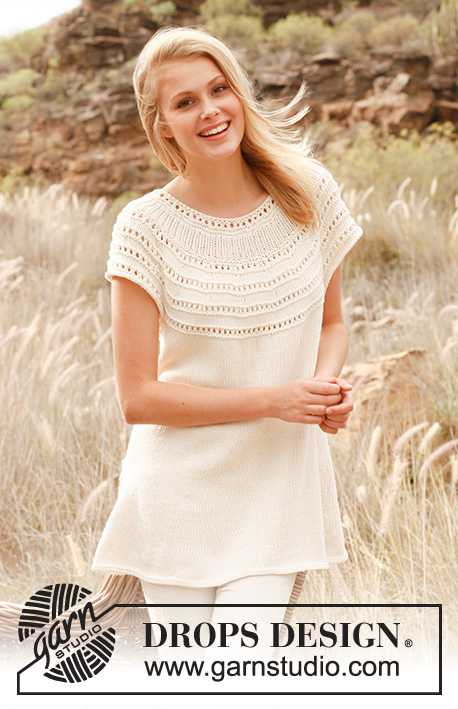
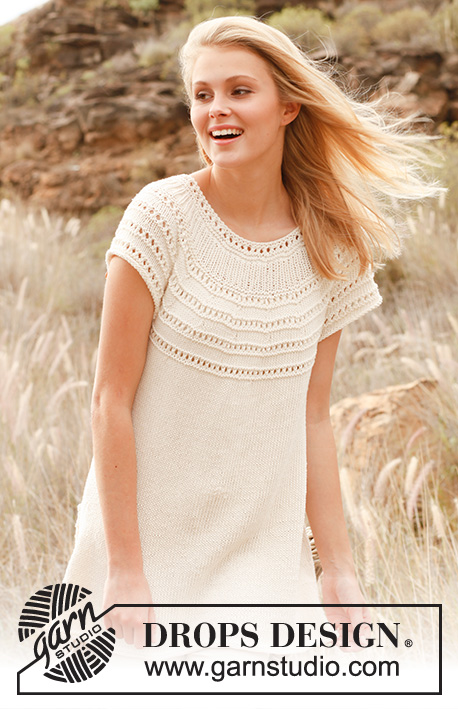
Kristin#kristintunic |
|||||||||||||
 |
 |
||||||||||||
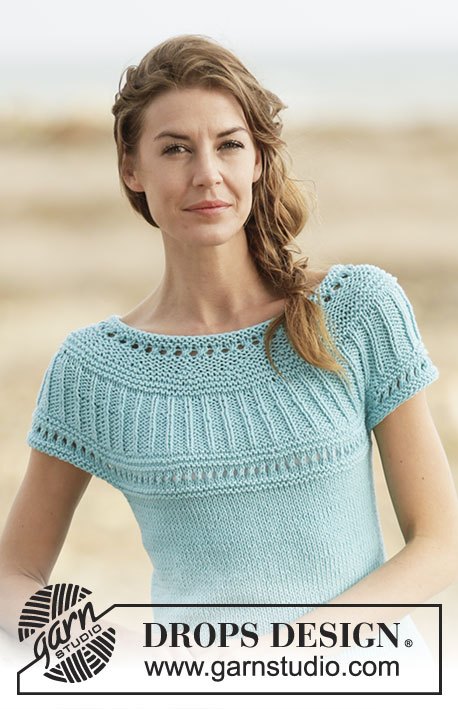
Knitted DROPS sleeveless tunic with round yoke in ”Cotton Light”. Size: S - XXXL.
DROPS 147-2 |
|||||||||||||
|
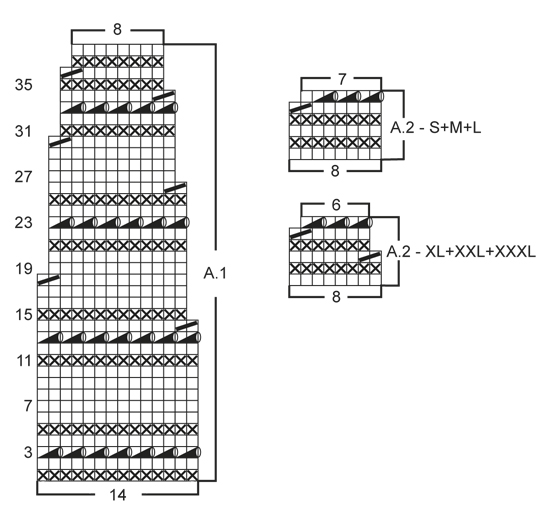
GARTER ST (in the round on needle): * K 1 round and P 1 round *, repeat from *-*. 1 ridge = 2 rounds. DECREASE TIP: Dec as follows before marker: K 2 tog. Dec as follows after marker: Slip 1 st as if to K, K 1, psso. PATTERN: See diagrams A.1 and A.2. ---------------------------------------------------------- BODY: Worked in the round on circular needle. Cast on 216-236-260-284-308-336 sts on circular needle size 3 mm / US 2.5 with Cotton Light. Work 2 ridges in GARTER ST - see explanation above. Switch to circular needle size 4 mm / US 6 and continue in stockinette st. REMEMBER THE KNITTING GAUGE. When piece measures 6-7-8-8-8-8 cm / 2½"-2¾"-3"-3"-3"-3", insert 1 marker at beg of round and 1 marker after 108-118-130-142-154-168 sts (= in the sides on body). Now dec 1 st on each side of both markers – READ DECREASE TIP (= 4 sts dec). Repeat dec every 4½-4-3½-3½-3-3 cm / 1¾"-1½"-1¼"-1¼"-1⅛"-1⅛" 9-10-11-12-13-14 more times (= 10-11-12-13-14-15 dec in total) = 176-192-212-232-252-276 sts. When piece measures approx. 49-50-51-52-53-54 cm / 19¼"-19¾"-20"-20½"-21"-21¼", work 2 ridges over the middle 14 sts in each side (i.e. 7 sts in garter st on each side of both markers, work the other sts in stockinette st as before). On next round bind off 10 sts in each side for armholes (i.e. bind off 5 sts on each side of both markers) = 78-86-96-106-116-128 sts remain on front and back piece. Put piece aside and knit the sleeve edges. SLEEVE EDGE: Worked in the round on double pointed needles. Cast on 56-58-60-66-70-74 sts on double pointed needles size 4 mm / US 6 with Cotton Light. Work 2 ridges. On next round bind off the 10 sts mid under sleeve (i.e. 5 sts at beg and 5 sts at the end of round) = 46-48-50-56-60-64 sts. Put piece aside and knit another sleeve edge. YOKE: Slip sleeve edges on to same circular needle size 4 mm / US 6 as body (without working sts) = 248-268-292-324-352-384 sts. Insert 1 marker – NOW MEASURE PIECE FROM HERE. Beg mid back and K 1 round while AT THE SAME TIME dec 10-2-12-2-2-6 sts evenly = 238-266-280-322-350-378 sts. Then work pattern according to diagram A.1 (= 17-19-20-23-25-27 repetitions on round). When A.1 has been worked, 136-152-160-184-200-216 sts remain on needle. Then work rib = K 1/P 1. AT THE SAME TIME when rib measures 1-2-3-4-5-6 cm / ⅜"-¾"-1⅛"-1½"-2"-2⅜", insert 1 marker in the middle st at the front. Now work an elevation at the back of neck with short rows - beg from RS mid back and continue with rib back and forth on needle as follows: Work until 24-26-28-30-32-34 sts remain before st with marker, turn and work from WS until 24-26-28-30-32-34 sts remain before st with marker in the other side, turn piece. Work until 30-32-34-36-38-40 sts remain before st with marker, turn piece and work until 30-32-34-36-38-40 sts remain before st with marker in the other side. Turn piece, work until 36-38-40-42-44-46 sts remain before st with marker, turn piece and work until 36-38-40-42-44-46 sts remain before st with marker in the other side. Turn piece, work until 42-44-46-48-50-52 sts remain before st with marker, turn piece and work until 42-44-46-48-50-52 sts remain before st with marker in the other side, turn and work until mid back. Continue working in the round over all sts again. Work 2 rounds rib. Then work pattern according to A.2 (choose diagram for your size) AT THE SAME TIME dec 8 sts evenly on 1st round = 128-144-152-176-192-208 sts. When A.2 has been worked, 112-126-133-132-144-156 sts remain on needle. Switch to circular needle size 3 mm / US 2.5 and K 1 round while AT THE SAME TIME dec 28-38-41-36-44-50 sts evenly = 84-88-92-96-100-106 sts. P 1 round and K 1 round, before loosely binding off with P. ASSEMBLY: Sew the openings under the sleeves. |
|||||||||||||
Diagram explanations |
|||||||||||||
|
|||||||||||||
 |
|||||||||||||
 |
|||||||||||||
Have you finished this pattern?Tag your pictures with #dropspattern #kristintunic or submit them to the #dropsfan gallery. Do you need help with this pattern?You'll find 27 tutorial videos, a Comments/Questions area and more by visiting the pattern on garnstudio.com. © 1982-2026 DROPS Design A/S. We reserve all rights. This document, including all its sub-sections, has copyrights. Read more about what you can do with our patterns at the bottom of each pattern on our site. |
|||||||||||||


With over 40 years in knitting and crochet design, DROPS Design offers one of the most extensive collections of free patterns on the internet - translated to 17 languages. As of today we count 324 catalogs and 12290 patterns - 12280 of which are translated into English (US/in).
We work hard to bring you the best knitting and crochet have to offer, inspiration and advice as well as great quality yarns at incredible prices! Would you like to use our patterns for other than personal use? You can read what you are allowed to do in the Copyright text at the bottom of all our patterns. Happy crafting!
Post a comment to pattern DROPS 147-2
We would love to hear what you have to say about this pattern!
If you want to leave a question, please make sure you select the correct category in the form below, to speed up the answering process. Required fields are marked *.