
Popular categories
Looking for a yarn?


Comments / Questions (73)
![]() Marianne wrote:
Marianne wrote:
Door het plat voor me te leggen op een dienblad en dit blad telkens een kwartslag te draaien kon ik het bijna liggend breien. Uiteindelijk gelukt, ben bij pen 13!
24.05.2012 - 23:33
![]() Marianne wrote:
Marianne wrote:
En 1 O-ringetje aan het eind van elke naald. VOorkomt afglijden en zo kon ik de volgorde zien.
24.05.2012 - 23:32
![]() Marianne wrote:
Marianne wrote:
Ik heb uiteindelijk de pennen gemarkeerd met O-ringetjes, resp 1, 2, 3 en 4 aan het begin van elke naald.
24.05.2012 - 23:31
![]() Marianne wrote:
Marianne wrote:
Ik vond het starten heel lastig, ben wel 4 keer opnieuw begonnen omdat de 4 pennen draaien en ik dan niet meer wist waar te beginnen.
24.05.2012 - 23:29
![]() Poignavant wrote:
Poignavant wrote:
Comment peut on faire entricotant en rond pour avoir les torsades a l'endroit au niveau du col car il est retourne
21.03.2012 - 08:08DROPS Design answered:
Bonjour Poignavant, la bordure tout autour du gilet se tricote en côtes 1/1 avec des torsades, elles-mêmes tricotées en côtes, ainsi, les torsades sont "réversibles". Bon tricot !
21.03.2012 - 09:40
![]() Eveline Grymonprez wrote:
Eveline Grymonprez wrote:
Idem bij dit model,brei al jaren maar waanneer met een gewone naald breien en wanneer met de rondbreinaald, snap ik geen barst van, heb de garens nochtans al aangekocht. Kunnen jullie mij hierbij helpen aub?
25.02.2012 - 18:59DROPS Design answered:
Dit model wordt zowel in de rondte als heen en weer gebreid. Het is bij dit model niet mogelijk (of in iedere geval zeer moeilijk) om heen en weer te breien. Ik zou het niet aanraden. Kijk eventueel bij onze instructievideo's met uitleg over het rondbreien.
04.03.2012 - 15:23
![]() Siv wrote:
Siv wrote:
Sommarens absoluta favorit!!
01.02.2012 - 09:32
![]() Bezige Bij wrote:
Bezige Bij wrote:
Mooi vestje. Lijkt ingewikkeld, maar is het niet. Gaat lekker vlot, ik ben al voorbij de mouwen.
31.01.2012 - 11:13
![]() Gudrun wrote:
Gudrun wrote:
Ein tolles Modell,sieht einfach Klasse aus!1 Warte schon auf die Anleitungen!!
15.01.2012 - 19:54
![]() Evelyne wrote:
Evelyne wrote:
Très féminin! Je vois bien ce modèle réalisé également en Verdi.
15.01.2012 - 14:03
|
||||||||||
Ocean Waves#oceanwavesbolero |
||||||||||
 |
 |
|||||||||
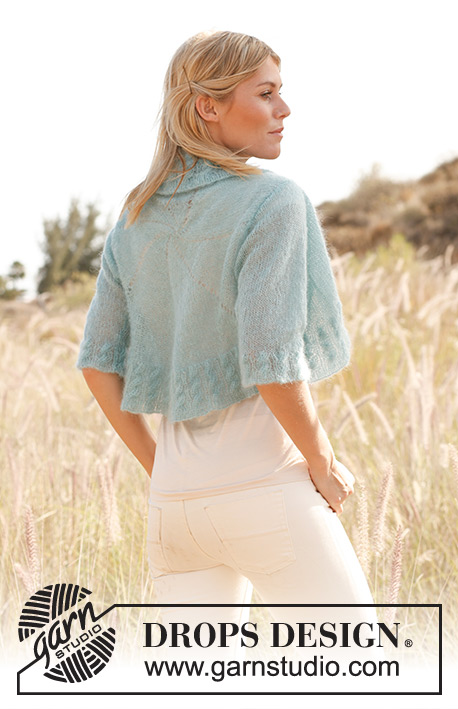
Knitted DROPS bolero with ¾ sleeves and cable edges in ”Vivaldi”. SIZE S - XXXL
DROPS 138-24 |
||||||||||
|
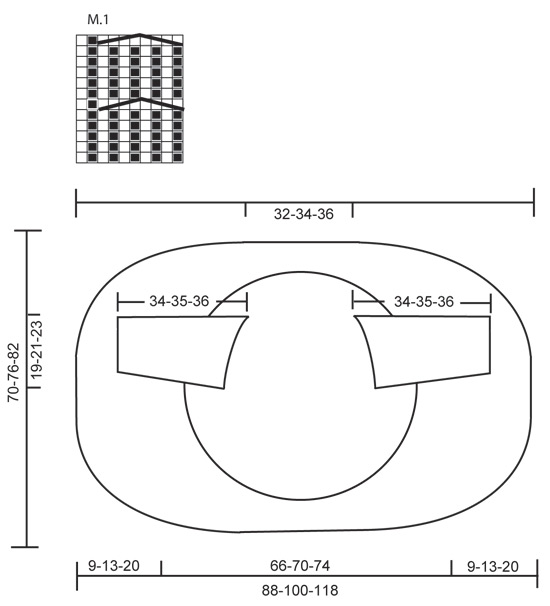
BOLERO: Worked in the round in a circle from mid back. All measurements should be done when piece is flat. Cast on 8 sts with Vivaldi and divide them on 4 double pointed needles size 4 mm / US 6 (= 2 sts on every needle). Insert a marker at beg of round = mid up towards neck. ROUND 1: * K 1, 1 YO, P 1, 1 YO *, repeat from *-* 4 times = 16 sts. ROUND 2: * K 2, P 2 *, repeat from *-* the entire round. ROUND 3: * K 2, 1 YO, P 2, 1 YO *, repeat from *-* the entire round = 24 sts. ROUND 4: * K 3, P 3 *, repeat from *-* the entire round. ROUND 5: * K 3, 1 YO, P 3, 1 YO *, repeat from *-* the entire round = 32 sts. ROUND 6: * K 4, P 4 *, repeat from *-* the entire round. Continue to inc the same way every other round (= 8 inc). For every inc there will be 1 st more between every inc. Switch to circular needle when needed. REMEMBER THE GAUGE! When piece measures 19-21-23 cm / 7½"-8¼"-9" from the middle (there are approx. 200-224-240 sts on needle), work next round as follows (this must be a round without inc): Work 30-32-34 sts, bind off 36-40-44 sts (= armhole), work until 66-72-78 sts remain, bind off 36-40-44 sts (= armhole), work the last 30-32-34 sts on round. On next round cast on the same no of new sts over each armhole as was bind off + sts which are to be inc over the armhole on this round. Continue to work with inc until piece measures 25-28-31 cm / 9¾"-11"-12¼" from the middle (= approx. 264-296-328 sts on needle). On next round work as follows (this must be a round without inc): Slip the last 33-37-41 sts that were worked on a stitch holder, work the first 33-37-41 sts on round and then slip them on to same stitch holder (= up towards neck), work 66-74-82 sts and slip them on another stitch holder (= left front piece), work 66-74-82 sts and slip them on a third stitch holder (= bottom mid back), work the last 66-74-82 sts (= right front piece). RIGHT FRONT PIECE: Continue to work back and forth over the 66-74-82 sts on needle as before – NOTE: Inc are now done – AT THE SAME TIME slip the last 2-2-1 sts on every row on to the same stitch holder where sts towards neck and towards mid back are. This is done 12-16-26 times in each side (= 24-32-26 sts in each side). Finally slip the remaining sts on to one of the stitch holders. LEFT FRONT PIECE: Slip the 66-74-82 sts from stitch holder in the left side back on needle. Work as right side. EDGE: Slip all sts back on circular needle size 4 mm / US 6. K 1 round while AT THE SAME TIME making 1 YO between approx. every st – adjust so that total no of sts is divisible by 10. On next round work P 1/K 1 (work YOs twisted to avoid holes, i.e. work in back loop of st). Then work diagram M.1 for 8 cm / 3⅛" (make sure that P and K sts fit over each other from first round), continue with P 1/K 1 for 5 rounds after last cable, then bind off with P over P and K over K. SLEEVE: Worked in the round on double pointed needles. Cast on 80-90-100 sts on double pointed needles size 4 mm / US 6 with Vivaldi. Insert a marker at beg of round (= mid under sleeve). Work diagram M.1 one time vertically + the first 4 rounds one more time. Work next round as follows: * K 1, K 2 tog *, repeat from *-* until 2-0-1 st remains, K this/these st(s) = 54-60-67 sts. Continue in stockinette st. When piece measures 8 cm / 3⅛", inc 1 st on each side of marker mid under sleeve. Repeat inc every 3 cm / 1⅛" a total of 6 times = 66-72-79 sts. When piece measures 25 cm / 9¾", bind off 6 sts mid under sleeve (i.e. Bind off 3 sts on each side of marker) and work back and forth on needle until finished measurements. Then bind off for sleeve cap at beg of every row in each side: 2 sts 3 times and 1 st 4-5-6 times, then bind off 2 sts in each side until piece measures 33-34-35 cm / 13"-13½"-13¾"", then bind off 3 sts 1 time in each side. Bind off the remaining sts, piece measures approx. 34-35-36 cm / 13½"-14"-14¼". ASSEMBLY: Sew in the sleeves so that middle of sleeve cap is placed where armholes are the closest tog (i.e. where 1st st was bound off for first armhole and where last st was bound off on second armhole). |
||||||||||
Diagram explanations |
||||||||||
|
||||||||||
 |
||||||||||
Have you finished this pattern?Tag your pictures with #dropspattern #oceanwavesbolero or submit them to the #dropsfan gallery. Do you need help with this pattern?You'll find 15 tutorial videos, a Comments/Questions area and more by visiting the pattern on garnstudio.com. © 1982-2026 DROPS Design A/S. We reserve all rights. This document, including all its sub-sections, has copyrights. Read more about what you can do with our patterns at the bottom of each pattern on our site. |
||||||||||


With over 40 years in knitting and crochet design, DROPS Design offers one of the most extensive collections of free patterns on the internet - translated to 17 languages. As of today we count 324 catalogs and 12285 patterns - 12275 of which are translated into English (US/in).
We work hard to bring you the best knitting and crochet have to offer, inspiration and advice as well as great quality yarns at incredible prices! Would you like to use our patterns for other than personal use? You can read what you are allowed to do in the Copyright text at the bottom of all our patterns. Happy crafting!
Post a comment to pattern DROPS 138-24
We would love to hear what you have to say about this pattern!
If you want to leave a question, please make sure you select the correct category in the form below, to speed up the answering process. Required fields are marked *.