
Popular categories
Looking for a yarn?


Comments / Questions (59)
![]() Camilla wrote:
Camilla wrote:
Jeg er ved at lave pandebåndet. I diagrammet står der man skal strikke ret over ret og vrang over vrang. Når jeg har slået de 12 masker op er 1. pind på vrang-siden, den næste pind på ret-siden. Dvs. snoninger bliver lavet fra vrang siden? Hvorfor skal jeg så strikke ret på hjælpepinden og de resterende masker?
02.11.2014 - 23:31DROPS Design answered:
Hej Camilla. 1. pind er retsiden. Snoningerne laves paa retsiden.
06.11.2014 - 13:42
![]() Carla wrote:
Carla wrote:
Il modello è bellissimo, ma devo mettere il doppio dei punti. Come costruire lo schema? Devo farlo speculare? Grazie per la risposta
07.09.2014 - 10:29DROPS Design answered:
Deve mettere il doppio dei punti perché utilizza un filato più sottile? Nel caso in cui dovesse fare così potrebbe lavorare la treccia più larga (con più maglie ogni fascia della treccia) per esempio. Se deve fare la fascia deve fare prima un campione per capire quanto rende con il filato che utilizzerà.
11.09.2014 - 16:31
![]() Klára S wrote:
Klára S wrote:
Dobrý den, v českém návodu neodpovídá popis vzorku originálu. Hezký den Klára S
01.02.2014 - 20:23DROPS Design answered:
Dobrý den, děkuji za upozornění - opraveno!
08.02.2014 - 01:06
![]() Isabel wrote:
Isabel wrote:
Hallo, Maakt het nog uit wat voor maat kabelnaald ik gebruik voor de hoofdband? Bedankt
26.10.2013 - 14:06DROPS Design answered:
Hoi Isabel. De kabelnld moet niet te dun zijn. Heb je niet een hele dikke kabelnld, dan kan je eventueel een sokkenbreinld gebruiken.
28.10.2013 - 19:13
![]() Jan wrote:
Jan wrote:
Got it - thank you - sorry to be so dense :)
30.01.2013 - 00:43
![]() Jan wrote:
Jan wrote:
Yes, I have checked your video which is great for a cable stitch in the middle of a row, not as the first stitch in the row. The difference is that the skein side of the wrapping yarn is on the cable needle not the right hand needle so i am not sure if that yarn should go behind the cable needle or infront of the cable needle prior to knitting the next/6th stitch.
29.01.2013 - 18:49DROPS Design answered:
In front, because stitches you have to knit next are in front of slipped sts.
29.01.2013 - 21:49
![]() Jan wrote:
Jan wrote:
Another source of my confustion -the wrap over yarn is on the cable needle since it is the first 5 stiches being slipped, when a cable is worked in the middle of a piece, the wrap over yarn is on the right hand knitting needle. Thank you again.
29.01.2013 - 13:41DROPS Design answered:
Have you checked out our Video tutorials for cable knitting?
29.01.2013 - 14:58
![]() Jan wrote:
Jan wrote:
Thank you for your response and clarification. One more question - does the wrapping yarn for the 11th row go behind the cable needle and slipped stiches or in front? Thank you
29.01.2013 - 13:35DROPS Design answered:
The yarn should not run over stitches in front and should not be visible. When you slip first 5 sts to cable needle behind piece, keep yarn front to knit next st from left needle.
29.01.2013 - 14:48
![]() Jan wrote:
Jan wrote:
I am making the neckwarmer and have a question regarding the 11th row. If I read the pattern correctly, this row starts with the 5 stitches slipped off to the cable needle. I find this awkward since the first stitch has the wrapping yarn (for lack of a better term). Am I reading the pattern correctly? I hope I am explaining myself properly.
28.01.2013 - 23:43DROPS Design answered:
Dear Jan, you are correct, on row 11 the first 5 sts are slipped on cable needle behind piece for the cable. Happy knitting!
29.01.2013 - 09:02
![]() Isabel Hicks wrote:
Isabel Hicks wrote:
Would be grateful for some help! Am doing this lovely headband but- cast on 12 stitches K1 then cabled 4 back knitted 4 . Three stitches left - please tell me how do I get the braiding as no stitches left to do the other half of the chart - where am I going wrong?.. Many thanks
20.01.2013 - 00:32DROPS Design answered:
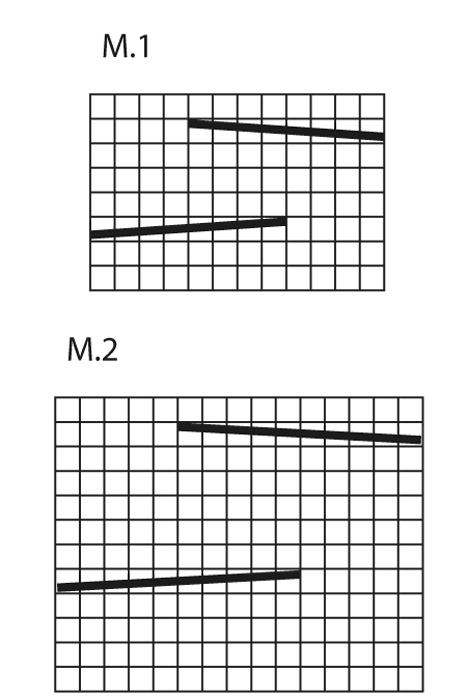
Dear Mrs Hicks, diagram is read from bottom right towards the left (RS) and left towards right side (WS), and M1 =12 sts, row 3 is : K4, cable on the next 8 sts. R7 : cable on the first 8 sts, K4. Happy knitting!
21.01.2013 - 18:21
|
||||||||||||||||
Braidy#braidyset |
||||||||||||||||
 |
 |
|||||||||||||||
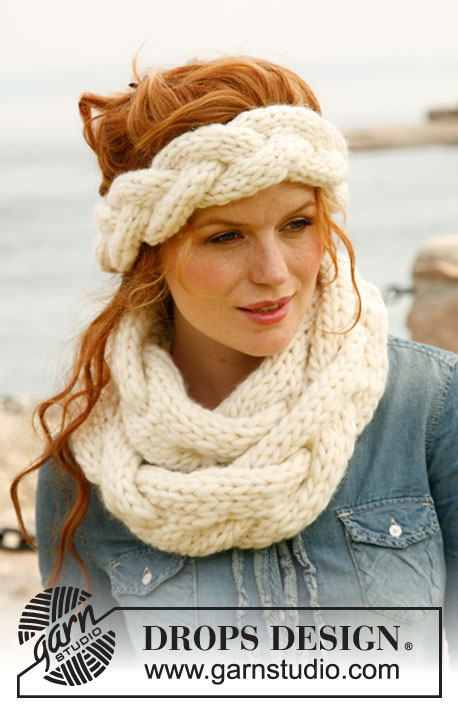
Knitted DROPS head band and neck warmer with large cable in ”Polaris”.
DROPS 134-7 |
||||||||||||||||
|
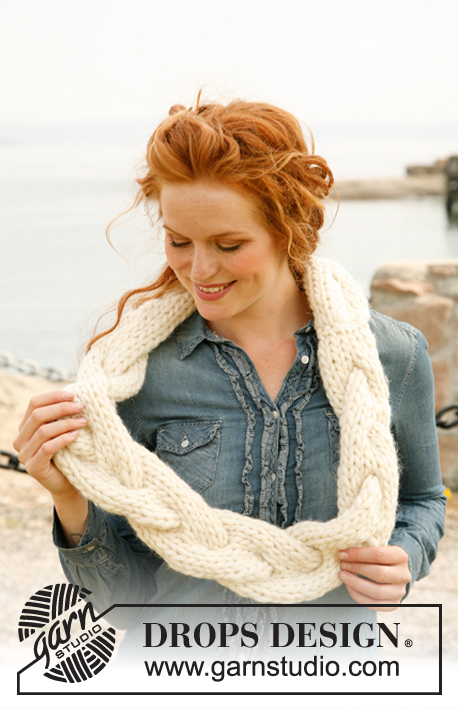
PATTERN: See diagram M.1 for head band and diagram M.2 for neck warmer. The diagrams show pattern from RS. NEW BALL TIP: When switching ball with Polaris, split the old strand in two on the last 15 cm / 6" – cut off one part, do the same on the new strand. Place the first and last 15 cm / 6" on top of each other so that the yarn is the normal thickness and continue to work – this is done to make the switch invisible. -------------------------------------------------------- -------------------------------------------------------- HEAD BAND: Worked back and forth in one long piece that is sewn tog when finished. Cast on 12 sts on needle size 12 mm / US 17 with Polaris. Work diagram M.1 until piece measures approx 50 cm / 19¾" - finish after 1 full repetition of the diagram. Work 1 row in stockinette st before loosely binding off. Sew tog cast on edge and bind off edge, sew edge to edge to avoid a chunky seam. -------------------------------------------------------- NECK WARMER: Worked back and forth in one long piece that is sewn tog when finished. Cast on 15 sts on needle size 15 mm / US 19 with Polaris. Work diagram M.2 until piece measures approx 120 cm / 47" - finish after 1 full repetition of the diagram. Work 4 rows in stockinette st before loosely binding off. Sew tog cast on edge and bind off edge, sew edge to edge to avoid a chunky seam. Fold the neck warmer double (as-a-figure-of-eight-knot) before wearing it. |
||||||||||||||||
Diagram explanations |
||||||||||||||||
|
||||||||||||||||
 |
||||||||||||||||
Have you finished this pattern?Tag your pictures with #dropspattern #braidyset or submit them to the #dropsfan gallery. Do you need help with this pattern?You'll find 5 tutorial videos, a Comments/Questions area and more by visiting the pattern on garnstudio.com. © 1982-2026 DROPS Design A/S. We reserve all rights. This document, including all its sub-sections, has copyrights. Read more about what you can do with our patterns at the bottom of each pattern on our site. |
||||||||||||||||


With over 40 years in knitting and crochet design, DROPS Design offers one of the most extensive collections of free patterns on the internet - translated to 17 languages. As of today we count 325 catalogs and 12298 patterns - 12288 of which are translated into English (US/in).
We work hard to bring you the best knitting and crochet have to offer, inspiration and advice as well as great quality yarns at incredible prices! Would you like to use our patterns for other than personal use? You can read what you are allowed to do in the Copyright text at the bottom of all our patterns. Happy crafting!
Post a comment to pattern DROPS 134-7
We would love to hear what you have to say about this pattern!
If you want to leave a question, please make sure you select the correct category in the form below, to speed up the answering process. Required fields are marked *.