
Popular categories
Looking for a yarn?


Comments / Questions (24)
![]() Gitte wrote:
Gitte wrote:
Hvordan laver jeg opskriften i str. XXS?
08.05.2026 - 09:35DROPS Design answered:
Hei Gitte. Denne oppskriften er allerede skrevet i 6 forskjellige størrelser og Design avd. har dessverre ikke muligheten til å omregne en allerede publisert oppskrift for å tilpasse til hver enkelt bruker. mvh DROPS Design
11.05.2026 - 11:37
![]() Heike wrote:
Heike wrote:
Hallo, Ich möchtdas Topgerne stricken, allerdingsmöchte ich es von unten ohne Teilung, sprich Vorder- und Rückenteilbis unter die Arme in Runden stricken. Könnt ihr mir sagen worauf ich achten muss?
05.05.2026 - 20:12DROPS Design answered:
Liebe Heike, schlagen Sie die Maschenanzahl für das ganze Rumpfteil (ohne Randmaschen da keine Naht), so sie den Umfang vom Rumpfteil passt, dann in der Runde bis zum Armloch stricken. Viel Spaß beim Stricken !
06.05.2026 - 07:57
![]() Olga wrote:
Olga wrote:
Buongiorno trovo un tutorial per imparare a cucire a punto maglia le parti lavorate in piano?
15.04.2026 - 14:29DROPS Design answered:
Buonasera Olga, in alto sotto il titolo può trovare la sezione dei video dove sono riportati tutti i video relativi alle tecniche utilizzate nel modello. Buon lavoro!
15.04.2026 - 16:54
![]() Ulrike wrote:
Ulrike wrote:
Hi, ich habe zu dieser Anleitung bomull lin genommen. Maschenprobe war identisch. Ich habe jetzt 50 g der Wolle verstrickt und das Vorderteil misst nur 13 cm. Bei einer Länge von 55cm für Größe xxl wird man mit der angegebenen Menge an Garn von 350 g niemals auskommen.
31.03.2026 - 17:06DROPS Design answered:
Liebe Ulrike, stimmt Ihre Maschenprobe? Es soll auch beim Stricken immer 18 Maschen x 24 Reihen glattrechts sein. Edit 08/04 Garnmenge wird aktualisiert, danke für den Hinweis. Viel Spaß beim Stricken!
07.04.2026 - 15:31
![]() Marith wrote:
Marith wrote:
Jag stickar strö M utifrån planch med mått och provlopp för rätt stickfasthet. Linnet ser ut att bli väldigt stort. Är det någon som har referens. Är mönstret stort i storlek?
23.03.2026 - 13:20DROPS Design answered:
Hej Marith, du finder målene på de forskellige størrelser nederst i mønsteret. Strikker du i Bomull-Lin og holder strikkefastheden på 18 masker, så får du målene i måleskitsen :)
08.04.2026 - 14:39
![]() Marith wrote:
Marith wrote:
Nedre kant stickad i slätstickning rullar ihop sig. Tips tack🙏
22.03.2026 - 12:32DROPS Design answered:
Hei Marith. Prøv å dampt kanten lett. mvh DROPS Design
23.03.2026 - 08:43
![]() Sarah wrote:
Sarah wrote:
Am I correct in thinking that even though a circular needle is needed, you do not knit in the round?
08.03.2026 - 14:54DROPS Design answered:
Hi Sarah, Yes, the piece is worked in sections, back and forth. We recommend a circular needle due to the number of stitches. Regards, Drops Team.
09.03.2026 - 07:00
![]() KC wrote:
KC wrote:
I’m knitting a size M. For the right shoulder portion, there’s no live yarn to continue to the next row. How do I continue?
03.03.2026 - 08:19DROPS Design answered:
Hi KC, You begin with a new strand on the right shoulder. Regards, Drops Team.
04.03.2026 - 06:58
![]() DEWARRAT Maryse wrote:
DEWARRAT Maryse wrote:
Bonjour, je ne comprends pas si le modèle est tricoté en point mousse (sur les 6 cm de départ?) ou tout en jersey. Si tout en jersey, où se tricote le point mousse svp? Merci d'avance, Maryse Dewarrat
28.02.2026 - 13:18DROPS Design answered:
Bonjour Mme Dewarrat, on tricote en jersey avec 1 maille lisière au point mousse (après la bordure I-cord du dos par ex., je cite: Tricoter ensuite en jersey avec 1 maille lisière au POINT MOUSSE – voir ci-dessus, de chaque côté.. Bon tricot!
02.03.2026 - 08:57
![]() Karen P wrote:
Karen P wrote:
For the armpit section where it says: At the beginning of the next 2 rows bind off 3-4-5-6-7-8 stitches in each side for armholes = 78-82-88-94-104-112 stitches. (I’m medium sized) How is it that if I bind off 4 stitches on each side for 2 rows, I end up with 82? Should it be 74 stitches instead? (90 minus 8 for row one with 4 bind off on each end=82, then minus another 8 for row 2 with 4 bind off in each end=74)? Thank you.
25.02.2026 - 23:05DROPS Design answered:
Hi Karen, You start off with 90 stitches, then bind off 4 stitches on each side x 1 (at the beginning of the next 2 rows): Bind off 4 stitches, work the row, turn and bind of 4 stitches at the beginning of the next row = 82 stitches remaining. Regards, Drops Team.
26.02.2026 - 06:01
|
|
Silver Reflection#silverreflection |
|
 |
 |
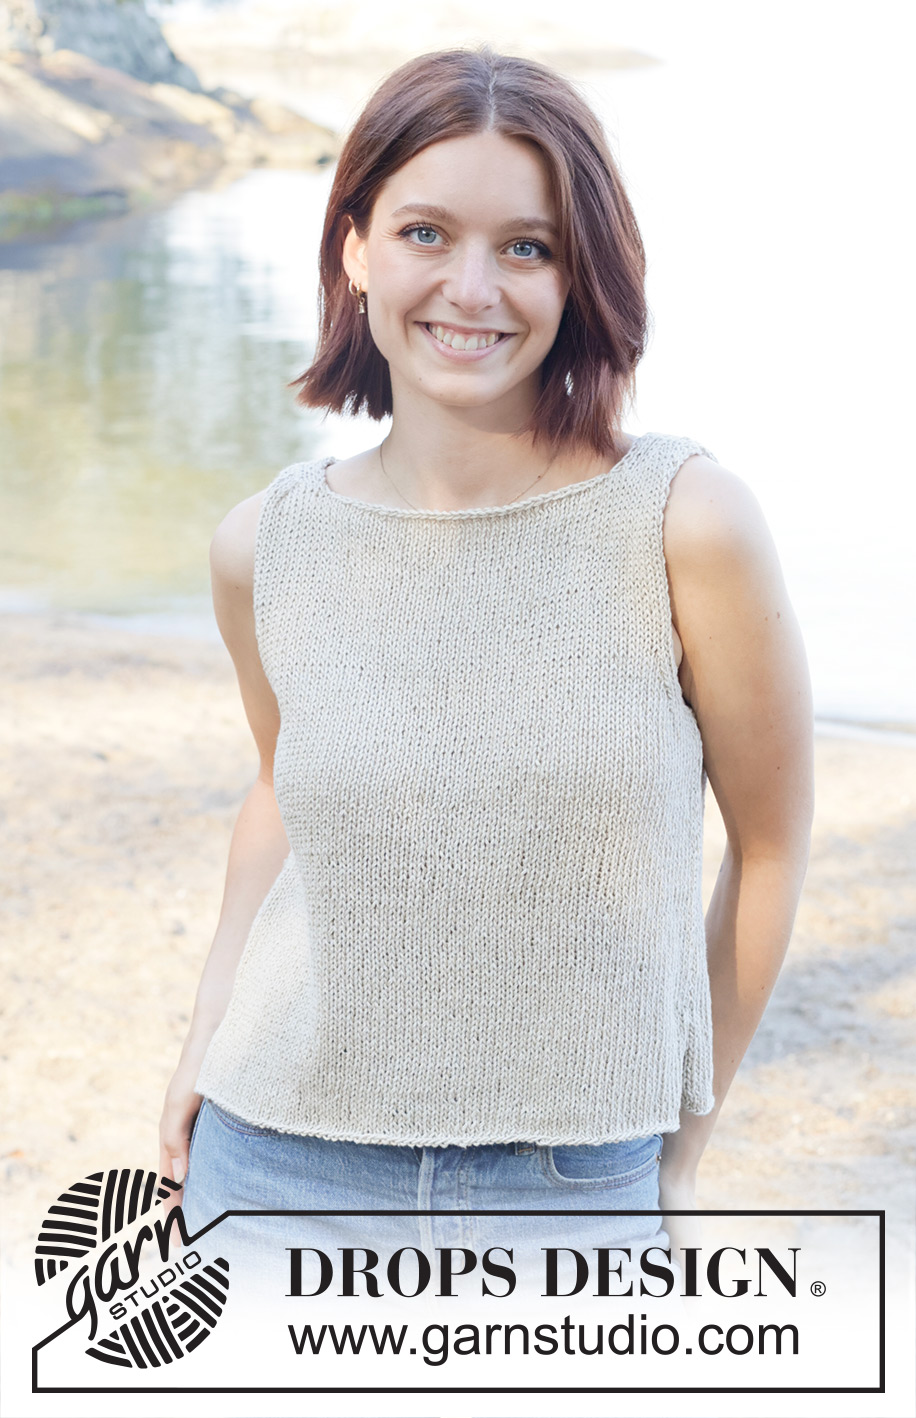
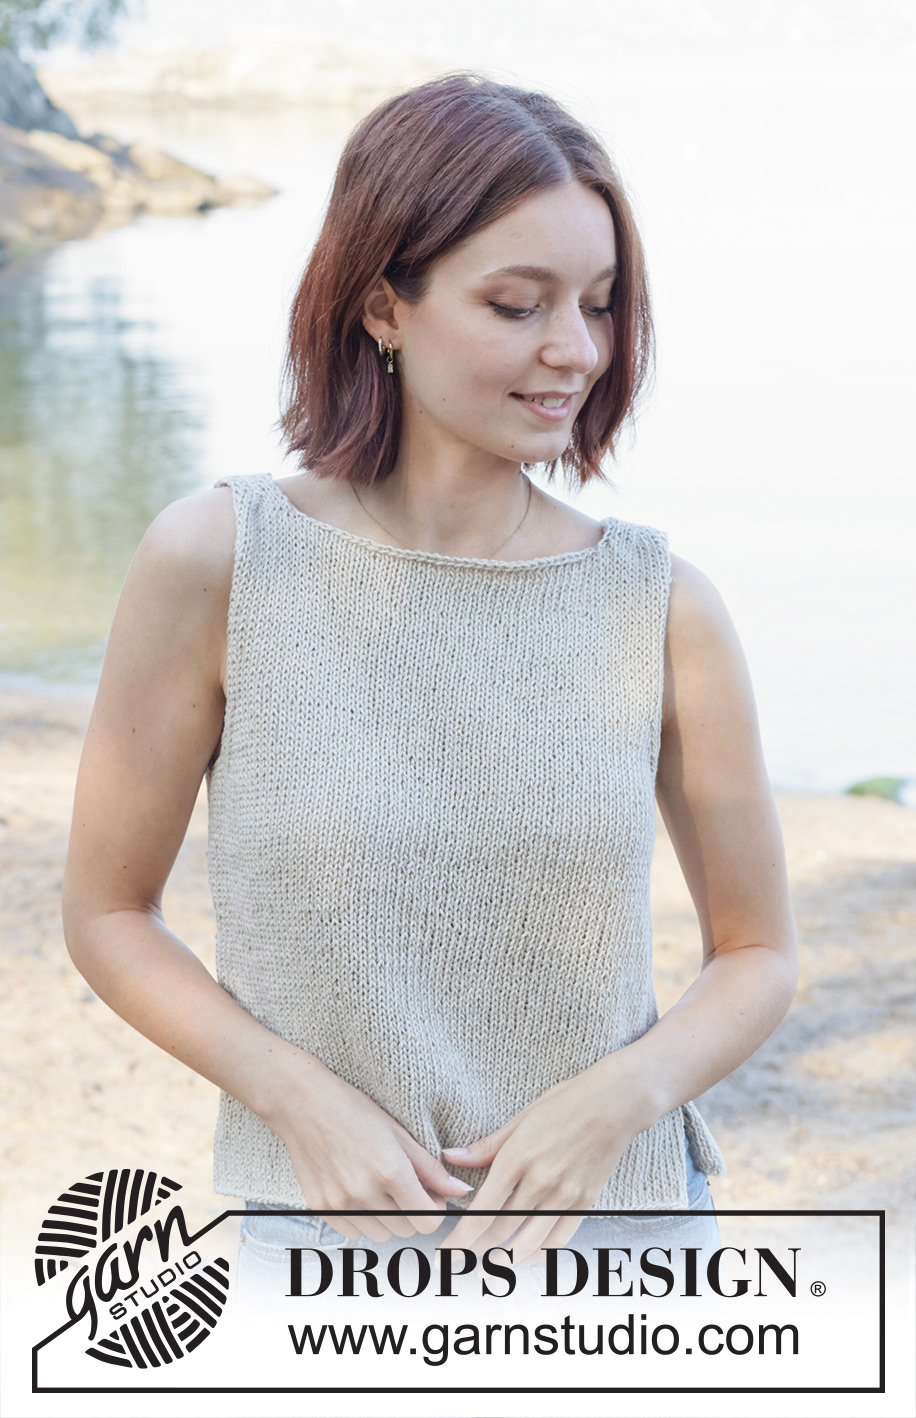
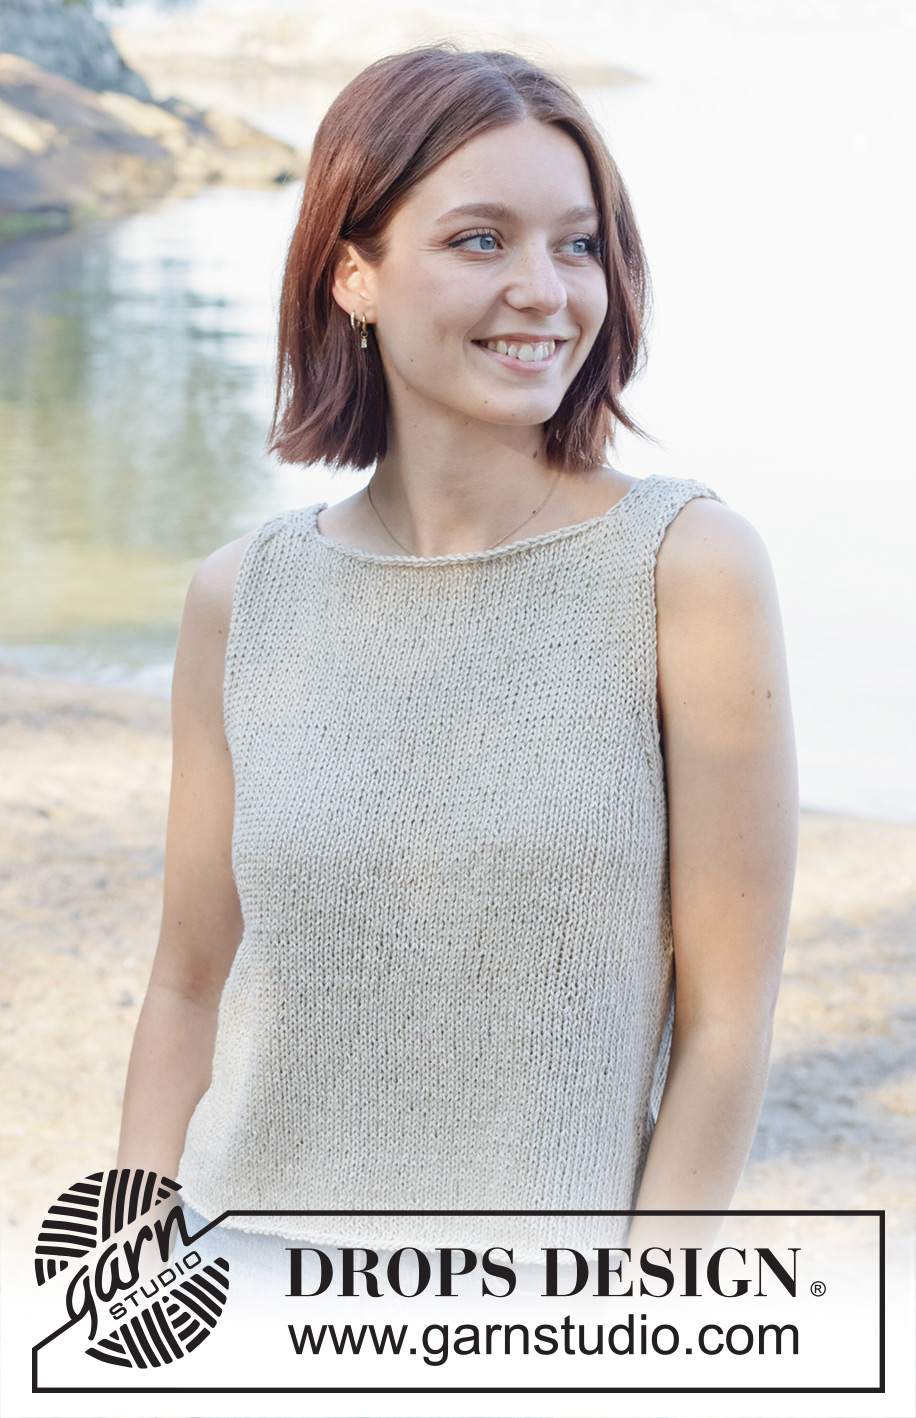
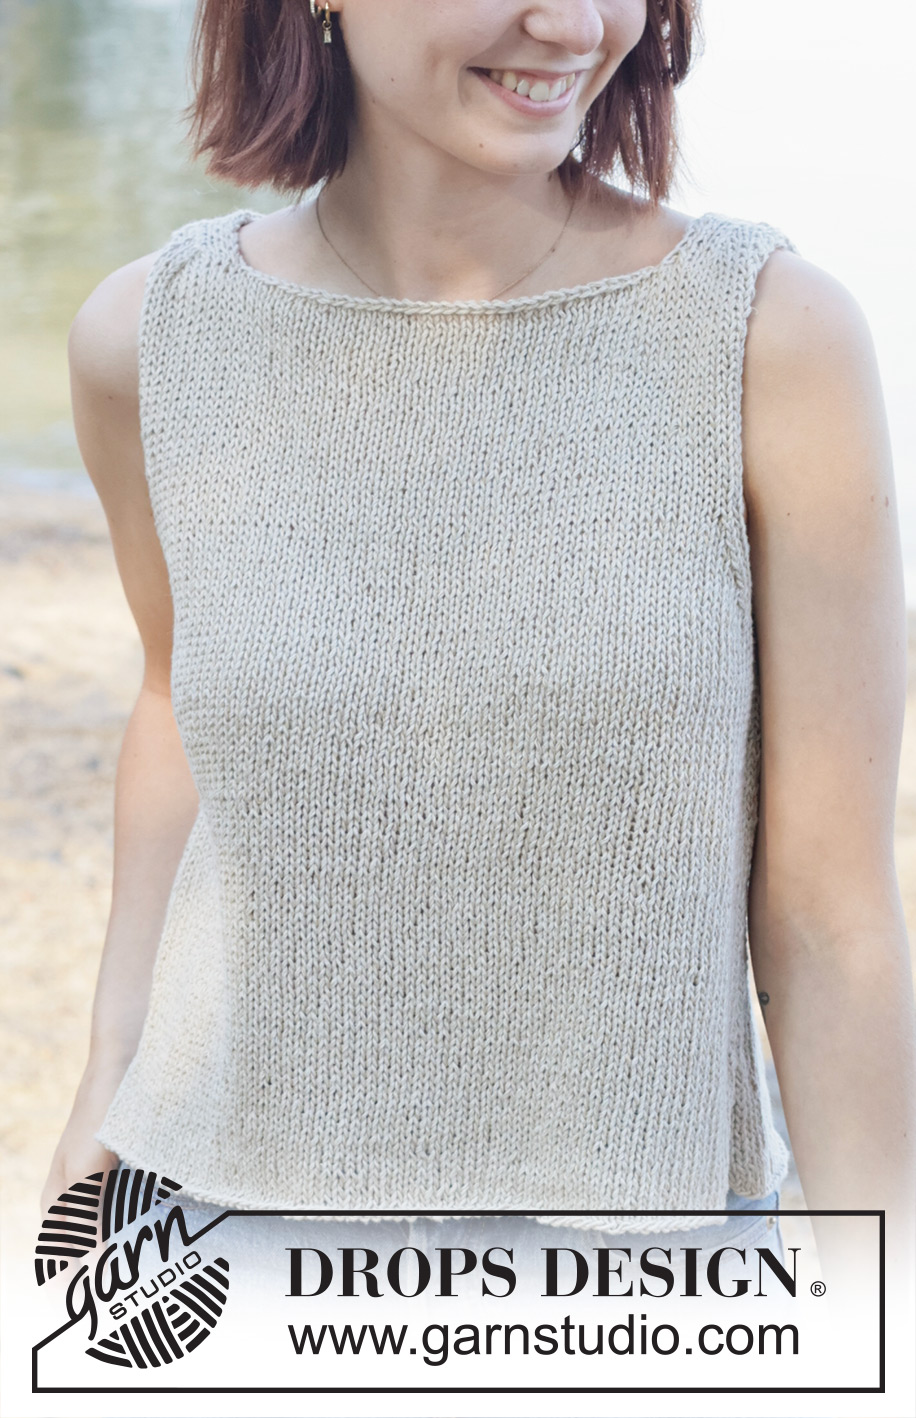
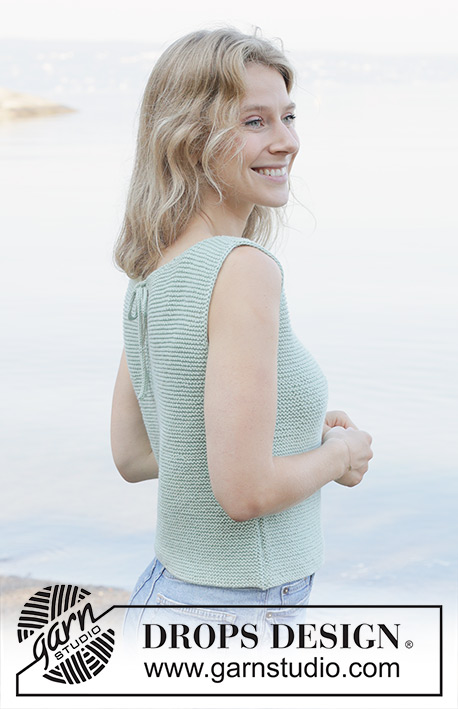
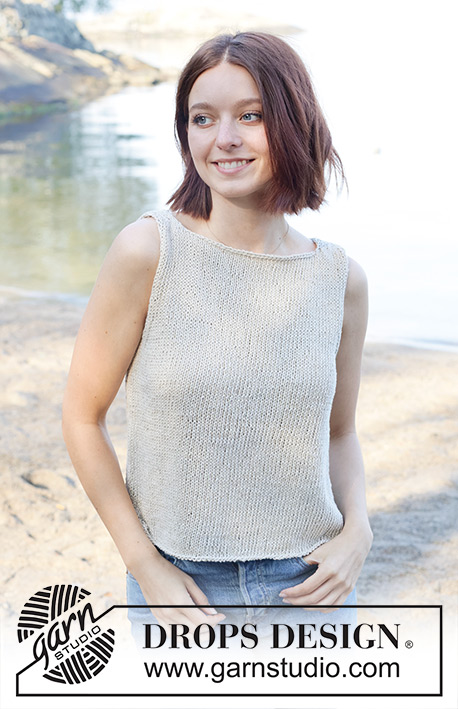
Knitted top in DROPS Bomull-Lin. Piece is knitted bottom up in stockinette stitch with I-cord and boat neck. Size: S - XXXL.
DROPS 257-18 |
|
|
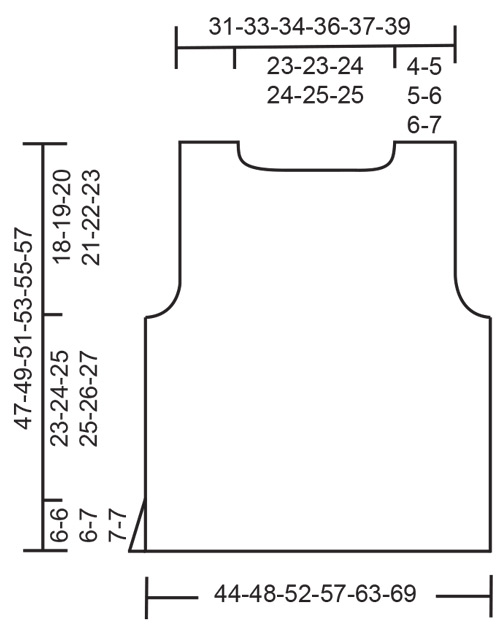
---------------------------------------------------------- EXPLANATION FOR THE PATTERN: ---------------------------------------------------------- I-CORD: BEGINNING OF ROW: Slip 1 stitch purlwise with strand in front of piece, knit 1. END OF ROW: Work until 2 stitches remain on needle, slip 1 stitch purlwise with strand in front of piece, knit 1. Work the same way both from right side and wrong side. GARTER STITCH (when working back and forth): Knit on all rows, i.e. knit from right side and knit from wrong side. 1 ridge vertically = knit 2 rows. DECREASE TIP-1 (applies to armholes): All decreases are done from the right side! DECREASE 1 STITCH IN EACH SIDE AS FOLLOWS: Work I-cord as before, work 2 stitches in stockinette stitch, slip 1 stitch knitwise, knit 1 and pass slipped stitch over stitch worked (= 1 stitch decreased). Work until 6 stitches remain, knit 2 together, work 2 stitches in stockinette stitch and work I-cord as before (= 1 stitch decreased). DECREASE 2 STITCHES IN EACH SIDE AS FOLLOWS: Work I-cord as before, work 2 stitches in stockinette stitch, slip 1 stitch knitwise, knit 2 together and pass slipped stitch over stitch worked (= 2 stitches decreased). Work until 7 stitches remain, knit 3 together, work 2 stitches in stockinette stitch and work I-cord as before (= 2 stitches decreased). DECREASE TIP-2 (applies to neck): All decreases are done from the right side! DECREASE 1 STITCH AS FOLLOWS: TOWARDS THE LEFT: Work I-cord as before, work 2 stitches in stockinette stitch, slip 1 stitch knitwise, knit 1 and pass slipped stitch over stitch worked (= 1 stitch decreased). TOWARDS THE RIGHT: Work until 6 stitches remain, knit 2 together, work 2 stitches in stockinette stitch and work I-cord as before (= 1 stitch decreased). DECREASE 2 STITCHES AS FOLLOWS: TOWARDS THE LEFT: Work I-cord as before, work 2 stitches in stockinette stitch, slip 1 stitch knitwise, knit 2 together and pass slipped stitch over stitch worked (= 2 stitches decreased). TOWARDS THE RIGHT: Work until 7 stitches remain, knit 3 together, work 2 stitches in stockinette stitch and work I-cord as before (= 2 stitches decreased). ---------------------------------------------------------- START THE PIECE HERE: ---------------------------------------------------------- TOP - SHORT OVERVIEW OF THE PIECE: Worked back and forth on circular needle, bottom up in parts, and sewn together when finished. BACK PIECE: Cast on 82-88-96-104-116-126 stitches on circular needle size 4.5 MM = US 7 with DROPS Bomull-Lin. ROW 1 (= wrong side): I-CORD - read explanation above, purl until 2 stitches remain and work I-CORD. ROW 2 (= right side): Work I-cord, knit until 2 stitches remain and 2 in I-cord stitches. Continue back and forth as 1st and 2nd row until piece measures 6-6-6-7-7-7 cm = 2⅜"-2⅜"-2⅜"-2¾"-2¾"-2¾". On next row work as follows: Work 2 stitches in first stitch, work in stockinette stitch until 1 stitch remain, work 2 stitches in last stitch = 84-90-98-106-118-128 stitches. Then work in stockinette stitch with 1 edge stitch in each side which is worked in GARTER STITCH - read explanation above. Remember to follow the knitting gauge! Work until piece measures 29-30-31-32-33-34 cm = 11⅜"-11¾"-12¼"-12½"-13"-13⅜". At the beginning of the next 2 rows bind off 3-4-5-6-7-8 stitches in each side for armholes = 78-82-88-94-104-112 stitches. Now continue with I-cord in each side as before and stockinette stitch, at the same time decrease for armholes on the inside of 4 stitches in each side on every other row - read DECREASE TIP-1 in explanation above and work as follows: Decrease 2 stitches 0-0-0-2-5-7 times in each side, then decrease 1 stitch 9-10-12-10-8-7 times in each side = 60-62-64-66-68-72 stitches. Work until piece measures 43-45-46-47-48-49 cm = 17"-17¾"-18"-18½"-19"-19¼". On next row from right side bind off for neck as follows: Work over the first 14-15-15-17-17-19 stitches as before and slip them on a thread, bind off the next 32-32-34-32-34-34 stitches for neck, work over the last 14-15-15-17-17-19 stitches as before. Then work each shoulder separately. LEFT SHOULDER: = 14-15-15-17-17-19 stitches. Begin from wrong side and work as follows: ROW 1 (= wrong side): Work I-cord as before, purl until 2 stitches remain and work I-cord. ROW 2 (= right side): Work i-cord, knit 2, decrease 2 stitches towards the left - remember DECREASE TIP-2, knit until 2 stitches remain and work i-cord = 12-13-13-15-15-17 stitches. ROW 3 (= wrong side): Work I-cord, purl until 2 stitches remain and work I-cord. ROW 4 (= right side): Work i-cord, knit 2, decrease 1 stitch towards the left - read DECREASE TIP-2, knit until 2 stitches remain and work i-cord = 11-12-12-14-14-16 stitches. Repeat 3rd and 4th row 1 more time = 10-11-11-13-13-15 stitches. Work in stockinette stitch with I-cord until piece measures 47-49-51-53-55-57 cm = 18½"-19¼"-20"-21"-21⅝"-22½". Slip stitches on a thread, stitch stitches together later. RIGHT SHOULDER: = 14-15-15-17-17-19 stitches. Begin from wrong side and work as follows: ROW 1 (= wrong side): Work I-cord as before, purl until 2 stitches remain and work I-cord. ROW 2 (= right side): Work i-cord, knit until 7 stitches remain, decrease 2 stitches towards the right - remember DECREASE TIP-2, knit 2 and work i-cord = 12-13-13-15-15-17 stitches. ROW 3 (= wrong side): Work I-cord, purl until 2 stitches remain and work I-cord. ROW 4 (= right side): Work i-cord, knit until 6 stitches remain, decrease 1 stitch towards the right - remember DECREASE TIP-2, knit 2 and work i-cord = 11-12-12-14-14-16 stitches. Repeat 3rd and 4th row 1 more time = 10-11-11-13-13-15 stitches. Work in stockinette stitch with I-cord until piece measures 47-49-51-53-55-57 cm = 18½"-19¼"-20"-21"-21⅝"-22½". Slip stitches on a thread, stitch stitches together later. FRONT PIECE: Cast on the same number of stitches, and work the same way as back piece. ASSEMBLY: Use grafting/kitchener stitches and sew shoulders together. Sew side seams in outer loops of edge ridge to form a vent of 6-6-6-7-7-7 cm = 2⅜"-2⅜"-2⅜"-2¾"-2¾"-2¾" at the bottom in each side. |
|
 |
|
Have you finished this pattern?Tag your pictures with #dropspattern #silverreflection or submit them to the #dropsfan gallery. Do you need help with this pattern?You'll find 19 tutorial videos, a Comments/Questions area and more by visiting the pattern on garnstudio.com. © 1982-2026 DROPS Design A/S. We reserve all rights. This document, including all its sub-sections, has copyrights. Read more about what you can do with our patterns at the bottom of each pattern on our site. |
|


With over 40 years in knitting and crochet design, DROPS Design offers one of the most extensive collections of free patterns on the internet - translated to 17 languages. As of today we count 325 catalogs and 12298 patterns - 12288 of which are translated into English (US/in).
We work hard to bring you the best knitting and crochet have to offer, inspiration and advice as well as great quality yarns at incredible prices! Would you like to use our patterns for other than personal use? You can read what you are allowed to do in the Copyright text at the bottom of all our patterns. Happy crafting!
Post a comment to pattern DROPS 257-18
We would love to hear what you have to say about this pattern!
If you want to leave a question, please make sure you select the correct category in the form below, to speed up the answering process. Required fields are marked *.