
Popular categories
Looking for a yarn?


Comments / Questions (52)
![]() Tarja Kolehmainen wrote:
Tarja Kolehmainen wrote:
Vartalon 6 kerroksesta lähtien ohje väärä...kääntäjän mukaan kun tekee niin tulee oikein. Silmukat lisääntyy ei kavene ja 6 kerroksen jälkeen silmukoita on 42 yhteensä. Aloittelijalle todella vaikeaa kun ohje on käännetty väärin
28.07.2023 - 15:29
![]() Katja wrote:
Katja wrote:
In making Bob the dinosaur, I have now made the face and have 27 stiches. But moving on to the neck I am very confused. How can I get to 22 stitches without decreasing? I am very much in need of your help. Sincerely Katja.
07.07.2023 - 17:58DROPS Design answered:
Dear Katja, you don't work over the 27 stitches of the face. You work over the row end of the face. You have 8 rows on the face and you work on both sides, so you will work over 16 "stitches" or row ends. Since you work over 16 stitches and increase 6 times on the first row of the neck you should have 22 stitches. Happy crocheting!
10.07.2023 - 16:25
![]() Marij wrote:
Marij wrote:
Zou iemand mij kunnen en willen uitleggen hoe ik de hals van deze dino haak ik vind het een mooi maar moeilijk te lezen patroon
13.03.2023 - 22:01
![]() Sallamari wrote:
Sallamari wrote:
Vartalon rivi 6 on suomennettu väärin. Muuten tosi ihana ohje ja täällä valmistumassa jo kolmas Bob!
12.03.2023 - 16:30
![]() Marij V Dijk wrote:
Marij V Dijk wrote:
Hoe haak ik toer 6 van het lijf van deze dino ik heb het idee dat die niet klopt ik heb het al op verschillende manieren geprobeerd en ik kom er niet uit ik wil mijn kleinkind niet teleur stellen groetjes oma marij
07.03.2023 - 09:26DROPS Design answered:
Dag Marij,
Er lijkt inderdaad iets niet te kloppen, want je komt op deze manier niet uit met de steken. Ik heb het doorgegeven aan de ontwerpafdeling om na te kijken. Hopelijk komt er spoedig een correctie.
08.03.2023 - 12:33
![]() Geraldine Holmes wrote:
Geraldine Holmes wrote:
Hi Thank you for your reply. When doing the face are you closing off after each round or turning without closing? I closed maybe this is why I\'m stuck now? Geraldine
12.12.2022 - 09:07DROPS Design answered:
Dear Mrs Holmes, the FACE section is worked in rows, not in the round, ie work alternately from RS and from WS withoug joining rows, the sides of this section will shape the neck and you will work around these rows to work the neck later. Happy crocheting!
12.12.2022 - 10:19
![]() Geraldine Holmes wrote:
Geraldine Holmes wrote:
Hi I'm loving this pattern. I'm just about to start the neck and I'm unsure how to. How do I work the sides? 8 stitches? 16 stitches? I'm not sure what direction to go. I hope you can understand what I mean. And thank you for the pattern
11.12.2022 - 21:25DROPS Design answered:
Dear Geraldine, work 2 double crochets in the last row worked on the face, * 1 double crochet in each of the next 2 rows, 2 double crochets in the next row *, work from *-* to end of row (you should have worked over 16 rows of the face, 8 on each side) = 22 stitches and turn the work and continue with row 2. Happy crocheting!
12.12.2022 - 00:10
![]() Robine wrote:
Robine wrote:
Ik kan niet verder vanaf toer 5en leer veel over dat t vanaf daar de mist in gaat zou iemand het mij astublieft fatsoenelijk kunnen uitleggen zodat ik verder kan !!!!
23.09.2022 - 16:00
![]() Gerda Van Kessel wrote:
Gerda Van Kessel wrote:
Toer 6 is nog steeds niet gecorrigeerd. Jammer dat je eerst de reacties moet gaan lezen voordat je pas een juist correctie vind van iemand die hem gecorrigeerd heeft.
25.06.2022 - 21:31
![]() Julia wrote:
Julia wrote:
Hallo! Ich habe Bob nun schon ein paar Male gehäkelt und bin total begeistert! Ich würde ihn nun gerne als Hundespielzeug häkeln. Gibt es bestimmte Sachen, die ich zu beachten habe? Kann ich als Wolle für Hundespielzeug Drops Paris verwenden und gibt es bestimmte Füllwatte, die ich verwenden sollte oder sind solche Plüschtiere generell eher nicht gut für Hunde geeignet? Ich kenne mich damit leider bisher nicht sehr gut aus und möchte nichts falsch machen :) Liebe Grüße!
20.06.2022 - 22:45DROPS Design answered:
Liebe Julia, wir haben mal Paris für Spielzeuge schon mal benutzt, aber für Füllwatte haben wir damit keine Erfahrung, fragen Sie mal Ihren DROPS Händlern, dort kann mann vielleicht (auch telefonisch oder per E-Mail) weiter helfen. Viel Spaß beim häkeln!
21.06.2022 - 09:23
|
|
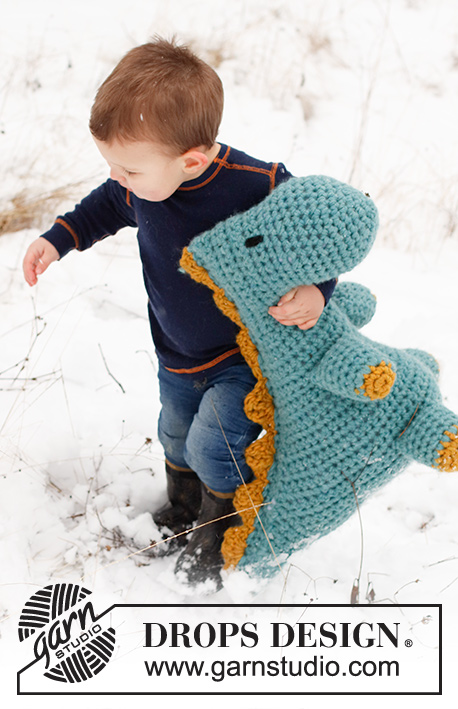
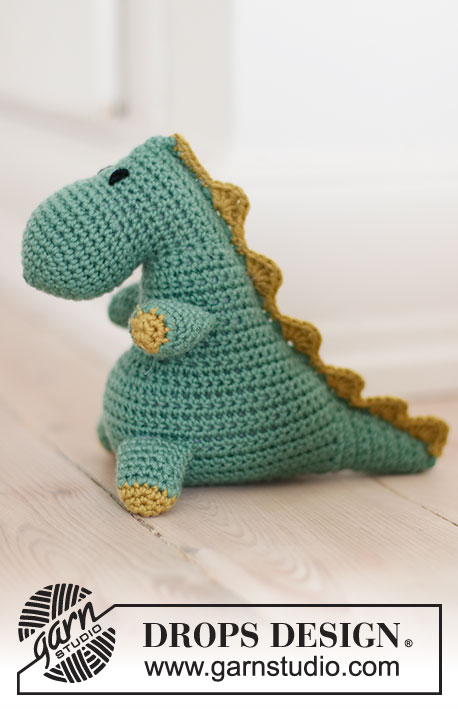
Bob the Dinosaur#dropsbobthedinosaur |
|
 |
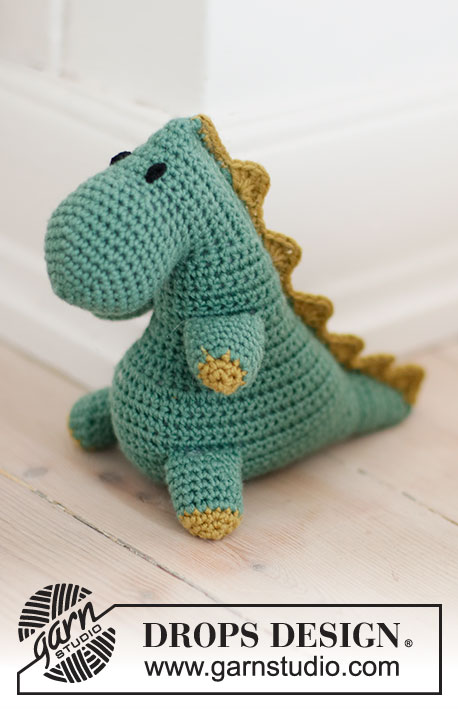 |
Crocheted T-Rex dinosaur in DROPS Merino Extra Fine. The piece is worked from nose to tail with one seam. Theme: Soft toys.
DROPS Children 37-21 |
|
|
------------------------------------------------------- EXPLANATIONS FOR THE PATTERN: ------------------------------------------------------- CROCHET TIP (for chain stitches): 1 chain stitch should equal 1 single crochet in width. Make sure the chain-stitch loop is pulled up the hook so it is not tight. If the chain stitches are tight the pattern will be tight in sections with a lot of chain stitches. CROCHET TOGETHER: Work 2 single crochets together to 1 single crochet: Insert the hook through the first stitch and pick up the strand, insert the hook through the next stitch and pick up the strand (= 3 loops on the hook), make 1 yarn over and pull it through all 3 loops (= 1 stitch decreased). LOOP STITCH: Sew with a single black strand. The eye is embroidered over rows 1 and 2 on the face and there are 5 stitches between each eye. See diagram showing how to work loop stitch. ------------------------------------------------------- START THE PIECE HERE: ------------------------------------------------------- DINOSAUR – SHORT OVERVIEW OF THE PIECE: The piece is worked from nose to tail with one seam under the body. First you work 4 legs. Then the dinosaur is started at the nose followed by the head. The neck and body are continued from the head, attaching the legs as you go. Then the under-body is worked and tail and the back crocheted together. The spines along the back are worked to finish. FRONT LEGS: Work 2 chain stitches with hook size 3.5 mm = US E/4 and olive - read CROCHET TIP. In the first chain stitch work 5 single crochets, making a small circle of stitches. Finish the circle with 1 slip stitch in the first single crochet, closing the circle and finishing ROUND 1. ROUND 2: Work 1 chain stitch then 2 single crochets in each stitch. The round is finished with 1 slip stitch in the first single crochet = 10 stitches on the round. Cut the strand and change to forest green. ROUND 3: Work 1 chain stitch, * 2 single crochets in the next stitch, 1 single crochet in the next stitch, * work from *-* to end of round (= 15 stitches). Finish with 1 slip stitch in the first single crochet on the round. ROUNDS 4-9: Work 1 chain stitch, 1 single crochet in all stitches. Finish with 1 slip stitch in the first single crochet on the round (= 15 stitches). Cut the strand and pull it through the last loop. Work 2 legs like this and fill with wadding. BACK LEGS: Worked as FRONT LEGS, but work one more round with olive before changing to forest green. NOSE: Work 2 chain stitches with hook size 3.5 mm = US E/4 and forest green - read CROCHET TIP. In the first chain stitch work 5 single crochets, making a small circle of stitches. Finish the circle with 1 slip stitch in the first single crochet, closing the circle and finishing ROUND 1. ROUND 2: Work 1 chain stitch, then 2 single crochets in each stitch (= 10 stitches). Finish with 1 slip stitch in the first single crochet on the round. ROUND 3: Work 1 chain stitch, * 2 single crochets in the next stitch, 1 single crochet in the next stitch, * work from *-* to end of round. Finish with 1 slip stitch in the first single crochet on the round (= 15 stitches). ROUND 4: Work 1 chain stitch, * 2 single crochets in the next stitch, 1 single crochet in each of the next 2 stitches *, work from *-* to end of round. Finish with 1 slip stitch in the first single crochet on the round (= 20 stitches). ROUND 5: Work 1 chain stitch, * 2 single crochets in the next stitch, 1 single crochet in each of the next 3 stitches *, work from *-* to end of round. Finish with 1 slip stitch in the first single crochet on the round (= 25 stitches). ROUND 6: Work 1 chain stitch, * 2 single crochets in the next stitch, 1 single crochet in each of the next 4 stitches *, work from *-* to end of round. Finish with 1 slip stitch in the first single crochet on the round (= 30 stitches). ROUNDS 7-11: Work 1 chain stitch, 1 single crochet in all stitches. Finish with 1 slip stitch in the first single crochet on the round (= 30 stitches). ROUND 12: Work 1 chain stitch, * 1 single crochet in each of the next 2 stitches, work the next 2 single crochets together – read CROCHET TOGETHER in descriptions above *, work from *-* until there are 2 stitches left. Work 1 single crochet in each of the last 2 stitches and finish with 1 slip stitch in the first single crochet on the round (= 23 stitches in the circle). ROUND 13: Work 1 chain stitch, 1 single crochet in all the stitches. Finish with 1 slip stitch in the first single crochet on the round (= 23 stitches). FACE: From here you continue working back and forth. ROWS 1-4: Work 1 chain stitch, 1 single crochet in each of the 23 stitches. Turn. ROWS 5-6: Work 1 chain stitch, work 2 single crochets in the first stitch, 1 single crochet in each stitch until there is 1 stitch left and 2 single crochets in the last stitch (= 2 increased stitches per row and 27 stitches). Turn. ROWS 7-8: Work 1 chain stitch, 1 single crochet in each stitch. Turn. Now embroider 2 eyes on the face using LOOP STITCH – read description above. NECK: Along the side of the FACE there are 8 rows; you now continue back and forth along both sides of the face; i.e. a total of 16 rows: ROW 1: Work 2 single crochets in the last row worked on the face, * 1 single crochet in each of the next 2 rows, 2 single crochets in the next row *, work from *-* to end of row = 22 stitches. Turn. ROW 2: Work 1 chain stitch, 1 single crochet in each stitch. Turn. ROW 3: Work 1 chain stitch, 2 single crochets in the first stitch, 1 single crochet in each stitch until there is 1 stitch left, 2 single crochets in the last stitch (= 2 stitches increased). Turn. Continue with ROWS 2 and 3 until you have worked a total of 6 rows (= 26 stitches). Turn. BODY: Now the 2 front legs are attached to the body, working back and forth. ROW 1: Work 1 chain stitch, 2 single crochets in the first stitch, 1 single crochet in each of the next 4 stitches, fold one of the front legs double and lay it on the body so the next 6 single crochets are worked through 3 layers, work 1 single crochet in each of the next 4 stitches (= mid-front/between the legs), fold the other front leg double and lay it on the body so the next 6 single crochets are worked through 3 layers, 1 single crochet in each of the next 4 stitches, 2 single crochets in the last stitch (= 28 stitches). Turn. ROW 2: Work 1 chain stitch, 1 single crochet in all stitches. Turn. ROW 3: Work 1 chain stitch, 2 single crochets in the first stitch, 1 single crochet in each stitch until there is 1 stitch left, 2 single crochets in the last stitch (= 2 stitches increased). Turn. Continue with ROWS 2 and 3 until you have worked a total of 5 rows on the body (= a total of 32 stitches on ROW 5). Turn. ROW 6: On this row you increase for the stomach as follows: Work 1 chain stitch, 2 single crochets in the first stitch, 1 single crochet in each of the next 8 stitches, * 2 single crochets in the next stitch, 1 single crochet in the next stitch *, work from *-* a total of 7 times, work 2 single crochets in the next stitch, 1 single crochet in each of the next 7 stitches, 2 single crochets in the last stitch (= 10 stitches increased and 42 stitches on the row). Turn. ROW 7: Work 1 chain stitch, 1 single crochet in all stitches. Turn. ROW 8: On this row you also increase for the stomach as follows: Work 1 chain stitch, 2 single crochets in the first stitch, 1 single crochet in each of the next 16 stitches, * 2 single crochets in the next stitch, 1 single crochet in the next stitch *, work from *-* a total of 4 times, 1 single crochet in each of the next 16 stitches, 2 single crochets in the last stitch (= 6 stitches increased and 48 stitches on the row). Turn. ROW 9: Work 1 chain stitch, 1 single crochet in all stitches. Turn. ROW 10: Work 1 chain stitch, 2 single crochets in the first stitch, 1 single crochet in each stitch until there is 1 stitch left, 2 single crochets in the last stitch (= 2 stitches increased and 50 stitches on the row). Turn. ROW 11: Work 1 chain stitch, 1 single crochet in all stitches. Turn. ROW 12: Work 1 chain stitch, 2 single crochets in the first stitch, 1 single crochet in each stitch until there is 1 stitch left, 2 single crochets in the last stitch (= 2 stitches increased and 52 stitches on the row). Turn. ROW 13: Now attach the back legs to the body. Work 1 chain stitch, 1 single crochet in each of the first 15 stitches, fold one of the back legs double and lay it on the body so the next 6 single crochets are worked through 3 layers, work 1 single crochet in each of the next 10 stitches (= mid-front/between the legs), fold the other back leg double and lay it on the body so the next 6 single crochets are worked through 3 layers, work 1 single crochet in each of the last 15 stitches. Turn. UNDER-BODY: ROWS 1-3: Work 1 chain stitch, 1 single crochet in all stitches. Turn. ROW 4: On this row you decrease for a flat bottom as follows: Work 1 chain stitch, 1 single crochet in each of the first 18 stitches, * crochet together the next 2 single crochets - read CROCHET TOGETHER in description above *, work from *-* a total of 8 times, work 1 single crochet in each of the last 18 stitches (= 8 stitches decreased and 44 stitches on the row). Turn. ROW 5: Work 1 chain stitch, 1 single crochet in all stitches. Turn. ROW 6: On this row you also decrease for a flat bottom as follows: Work 1 chain stitch, 1 single crochet in each of the first 14 stitches, * crochet together the next 2 single crochets *, work from *-* a total of 8 times, work 1 single crochet in each of the last 14 stitches (= 8 stitches decreased and 36 stitches on the row). Turn. ROW 7: Work 1 chain stitch, 1 single crochet in all stitches. Turn. ROW 8: On this row you also decrease for a flat bottom as follows: Work 1 chain stitch, 1 single crochet in each of the first 14 stitches, * crochet together the next 2 stitches *, work from *-* a total of 4 times, work 1 single crochet in each of the last 14 stitches (= 4 stitches decreased and 32 stitches on the row). Cut and fasten the strand. ASSEMBLY: Fold the bottom double, length-wise, and sew together stitch for stitch. TAIL: Use crochet hook size 3.5 mm = US E/4 and forest green. Along the sides of the UNDER-BODY there are 8 rows (on each side of the seam) and you now work back and forth along both sides; a total of 16 rows: ROW 1: Work 1 single crochet in each row (= 16 stitches). Turn. ROW 2: Work 1 chain stitch, crochet together the first 2 single crochets, work 1 single crochet in each stitch until there are 2 stitches left and work together the last 2 single crochets (= 2 stitches decreased). Turn. Work ROWS 1 and 2 for a total of 12 rows and with 4 stitches left on the last row. Cut and fasten the strand. BACK: Use crochet hook size 3.5 mm = US E/4 and forest green. Work 1 row of single crochets along the whole opening on the back, starting by the tail as follows: ROW 1: Work 1 single crochet in each stitch or row – from the tail to the top of the head and back along the other side to the tail. There are approx. 45 stitches on each side of the back and 90 stitches around the whole opening. Turn. Now fill the dinosaur with wadding while continuing as follows: ROW 2: Fold the dinosaur double and work a row of single crochets through both layers, from the tail to the head, so the back is closed = approx. 45 stitches. Cut and fasten the strand. SPINES: Using olive and crochet hook size 3.5 mm = US E/4, start at the tip of the tail and work as follows: * Work 1 single crochet, skip 1 stitch and work in the next stitch: 2 double crochets, 1 treble crochet, 2 chain stitches, 1 treble crochet and 2 double crochets. Skip 1 stitch and work 1 single crochet in the next stitch *, work from *-* a total of 2 times, then repeat from *-* up the back but skipping 2 stitches instead of 1 as far as the head. When there are too few stitches to repeat by the head, finish with single crochets. Cut and fasten the strand. |
|
 |
|
Have you finished this pattern?Tag your pictures with #dropspattern #dropsbobthedinosaur or submit them to the #dropsfan gallery. Do you need help with this pattern?You'll find 11 tutorial videos, a Comments/Questions area and more by visiting the pattern on garnstudio.com. © 1982-2026 DROPS Design A/S. We reserve all rights. This document, including all its sub-sections, has copyrights. Read more about what you can do with our patterns at the bottom of each pattern on our site. |
|


With over 40 years in knitting and crochet design, DROPS Design offers one of the most extensive collections of free patterns on the internet - translated to 17 languages. As of today we count 325 catalogs and 12298 patterns - 12288 of which are translated into English (US/in).
We work hard to bring you the best knitting and crochet have to offer, inspiration and advice as well as great quality yarns at incredible prices! Would you like to use our patterns for other than personal use? You can read what you are allowed to do in the Copyright text at the bottom of all our patterns. Happy crafting!
Post a comment to pattern DROPS Children 37-21
We would love to hear what you have to say about this pattern!
If you want to leave a question, please make sure you select the correct category in the form below, to speed up the answering process. Required fields are marked *.