
Popular categories
Looking for a yarn?


Comments / Questions (47)
![]() Helena wrote:
Helena wrote:
Hej, är den virkad i enkelt garn?
20.06.2025 - 10:36DROPS Design answered:
Hei Helena. Ja, 1 tråd DROPS Merino Extra Fine fra Garnstudio. mvh DROPS Design
23.06.2025 - 12:45
![]() Annika wrote:
Annika wrote:
Super Muster. Es hat richtig Spaß gemacht, Bob zu häkeln und es ging sehr schnell. Mir gefällt besonders, dass man quasi nicht nähen muss. Die Technik ist ungewöhnlich, aber gut nachzuvollziehen. Danke dafür.
09.06.2025 - 19:46
![]() Barbara Pickell wrote:
Barbara Pickell wrote:
Most confusing pattern I have ever attempted. I did not finish it. I wanted a dinosaur for my grandson.
21.05.2025 - 16:10
![]() Angela wrote:
Angela wrote:
Ach, kommen in der ersten Reihe 22 Maschen heraus und nicht 26. sorry :-)
17.01.2025 - 14:20
![]() Angela wrote:
Angela wrote:
Ich habe einen kleinen aber wichtigen Fehler in der Beschreibung gefunden: Beim Hals 1. Reihe steht geschrieben:\" * je 1 feste Masche in die nächsten 2 Reihen des Gesichts, 2 feste Maschen in die nächste Reihe des Gesichts *\". Richtig muss es aber heissen, \"*je 1 feste Masche in die nächsten 2 Maschen des Gesichts, 2 feste Maschen in die nächste Masche des Gesichts*\", dann kommen 26 Maschen in der Reihe heraus.
17.01.2025 - 14:18
![]() Charlotta Johnsson wrote:
Charlotta Johnsson wrote:
Hej! Jag undrar om man inte ska stoppa benen innan man virkar ihop dem med kroppen? När det står att man ska vika benen dubbelt, menar ni då att man lägger ihop de två sidorna av öppningen? Skulle vara tacksam för svar!
01.10.2024 - 17:32DROPS Design answered:
Hej Charlotte. Ja det stämmer att du ska fylla benen med vadd innan de virkas på kroppen och att du ska lägga ihop de 2 sidorna av öppningen av benet och virka fast med kroppen. Mvh DROPS Design
14.10.2024 - 14:40
![]() Dominique Marengo wrote:
Dominique Marengo wrote:
Vos modèles sont trop mignons Je vais voir si je peux réaliser Dino. Je vous tiens au courant de la facilité ou de la difficulté avec laquelle j'ai pu réaliser ce modèle. Cordialement
25.06.2024 - 09:47
![]() Peter Sandra wrote:
Peter Sandra wrote:
Ich finde den Dino cool und würde ihn gerne Nachhäkeln. Ich habe eine Stelle wo ich nicht ganz kapiere. Und zwar bei 8 Reihen am Gesicht gehäkelt, an beiden Seiten nun Maschen angehäkelt insgesamt 16 MA. Heisst das die erste und letzte MA wird verdoppelt bis 16 Ma sind? Besten Dank für eine Antwort
25.03.2024 - 17:48DROPS Design answered:
Liebe Sandra, fürs Gesicht hat man 8 Reihen gehäkelt, für den Hals wird man jetzt in den Seiten (Anfang/Ende von den Reihen fürs Gesicht) häkeln, dh in je die 8 Reihen einer Seite + in je die 8 Reihen vom anderen Seite (die letzte Reihen vom Gesicht bleibt jetzt offen, wird später zusammengehäkelt) - bei der 1. Reihe wird man regelmäßig verteilt bis 22 Maschen zunehmen; die Reihen beginnen jetzt beim oberen Teil/Rückenteil vom Dino. Viel Spaß beim häkeln!
02.04.2024 - 10:04
![]() Heidi wrote:
Heidi wrote:
Hei! Jeg skal starte på underdelen men skjønner ikke hvor jeg starter?
20.03.2024 - 18:06DROPS Design answered:
Hei Heidi. Du starter der du sluttet 13. rad av Kroppen. Nå skal det hekles 1 fastmaske i hver maske, samtidig som det felles masker til en flat bunn. mvh DROPS Design
02.04.2024 - 13:28
![]() Stefania Piras wrote:
Stefania Piras wrote:
Buongiorno, non capisco come si lavora in piano...il pezzo tra il naso e il muso
30.12.2023 - 17:47DROPS Design answered:
Buongiorno Stefania, alla fine del naso deve lavorare in righe di andata e ritorto iniziando sulle 23 maglie del naso come indicato. Buon lavoro!
31.12.2023 - 13:34
|
|
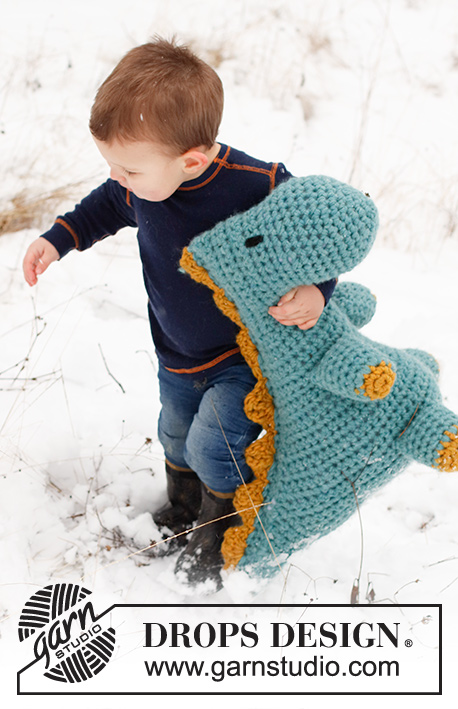
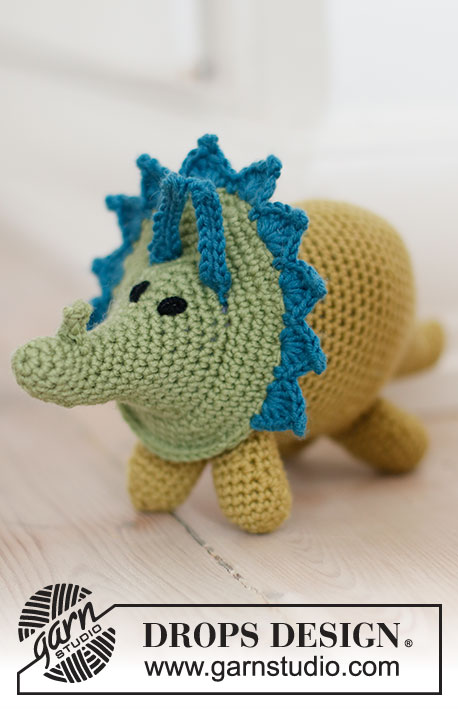
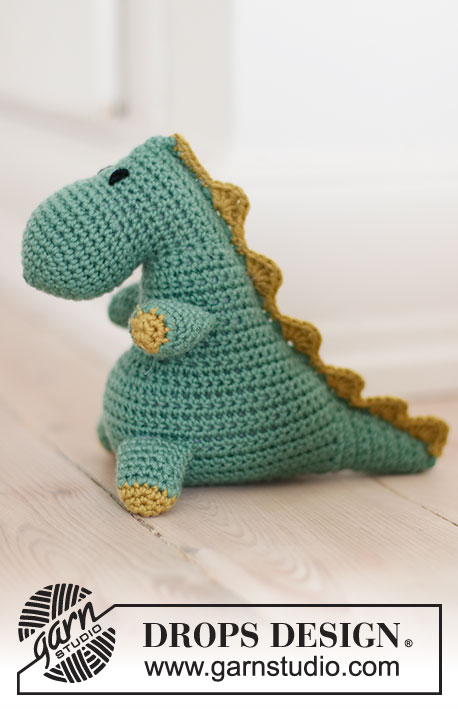
Bob the Dinosaur#dropsbobthedinosaur |
|
 |
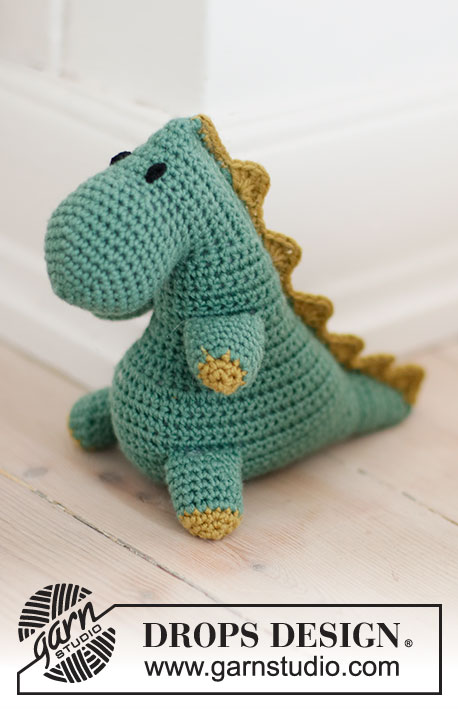 |
Crocheted T-Rex dinosaur in DROPS Merino Extra Fine. The piece is worked from nose to tail with one seam. Theme: Soft toys.
DROPS Children 37-21 |
|
|
------------------------------------------------------- EXPLANATIONS FOR THE PATTERN: ------------------------------------------------------- CROCHET TIP (for chain stitches): 1 chain stitch should equal 1 double crochet in width. Make sure the chain-stitch loop is pulled up the hook so it is not tight. If the chain stitches are tight the pattern will be tight in sections with a lot of chain stitches. CROCHET TOGETHER: Work 2 double crochets together to 1 double crochet: Insert the hook through the first stitch and pick up the strand, insert the hook through the next stitch and pick up the strand (= 3 loops on the hook), make 1 yarn over and pull it through all 3 loops (= 1 stitch decreased). LOOP STITCH: Sew with a single black strand. The eye is embroidered over rows 1 and 2 on the face and there are 5 stitches between each eye. See diagram showing how to work loop stitch. ------------------------------------------------------- START THE PIECE HERE: ------------------------------------------------------- DINOSAUR – SHORT OVERVIEW OF THE PIECE: The piece is worked from nose to tail with one seam under the body. First you work 4 legs. Then the dinosaur is started at the nose followed by the head. The neck and body are continued from the head, attaching the legs as you go. Then the under-body is worked and tail and the back crocheted together. The spines along the back are worked to finish. FRONT LEGS: Work 2 chain stitches with hook size 3.5 mm and olive - read CROCHET TIP. In the first chain stitch work 5 double crochets, making a small circle of stitches. Finish the circle with 1 slip stitch in the first double crochet, closing the circle and finishing ROUND 1. ROUND 2: Work 1 chain stitch then 2 double crochets in each stitch. The round is finished with 1 slip stitch in the first double crochet = 10 stitches on the round. Cut the strand and change to forest green. ROUND 3: Work 1 chain stitch, * 2 double crochets in the next stitch, 1 double crochet in the next stitch, * work from *-* to end of round (= 15 stitches). Finish with 1 slip stitch in the first double crochet on the round. ROUNDS 4-9: Work 1 chain stitch, 1 double crochet in all stitches. Finish with 1 slip stitch in the first double crochet on the round (= 15 stitches). Cut the strand and pull it through the last loop. Work 2 legs like this and fill with wadding. BACK LEGS: Worked as FRONT LEGS, but work one more round with olive before changing to forest green. NOSE: Work 2 chain stitches with hook size 3.5 mm and forest green - read CROCHET TIP. In the first chain stitch work 5 double crochets, making a small circle of stitches. Finish the circle with 1 slip stitch in the first double crochet, closing the circle and finishing ROUND 1. ROUND 2: Work 1 chain stitch, then 2 double crochets in each stitch (= 10 stitches). Finish with 1 slip stitch in the first double crochet on the round. ROUND 3: Work 1 chain stitch, * 2 double crochets in the next stitch, 1 double crochet in the next stitch, * work from *-* to end of round. Finish with 1 slip stitch in the first double crochet on the round (= 15 stitches). ROUND 4: Work 1 chain stitch, * 2 double crochets in the next stitch, 1 double crochet in each of the next 2 stitches *, work from *-* to end of round. Finish with 1 slip stitch in the first double crochet on the round (= 20 stitches). ROUND 5: Work 1 chain stitch, * 2 double crochets in the next stitch, 1 double crochet in each of the next 3 stitches *, work from *-* to end of round. Finish with 1 slip stitch in the first double crochet on the round (= 25 stitches). ROUND 6: Work 1 chain stitch, * 2 double crochets in the next stitch, 1 double crochet in each of the next 4 stitches *, work from *-* to end of round. Finish with 1 slip stitch in the first double crochet on the round (= 30 stitches). ROUNDS 7-11: Work 1 chain stitch, 1 double crochet in all stitches. Finish with 1 slip stitch in the first double crochet on the round (= 30 stitches). ROUND 12: Work 1 chain stitch, * 1 double crochet in each of the next 2 stitches, work the next 2 double crochets together – read CROCHET TOGETHER in descriptions above *, work from *-* until there are 2 stitches left. Work 1 double crochet in each of the last 2 stitches and finish with 1 slip stitch in the first double crochet on the round (= 23 stitches in the circle). ROUND 13: Work 1 chain stitch, 1 double crochet in all the stitches. Finish with 1 slip stitch in the first double crochet on the round (= 23 stitches). FACE: From here you continue working back and forth. ROWS 1-4: Work 1 chain stitch, 1 double crochet in each of the 23 stitches. Turn. ROWS 5-6: Work 1 chain stitch, work 2 double crochets in the first stitch, 1 double crochet in each stitch until there is 1 stitch left and 2 double crochets in the last stitch (= 2 increased stitches per row and 27 stitches). Turn. ROWS 7-8: Work 1 chain stitch, 1 double crochet in each stitch. Turn. Now embroider 2 eyes on the face using LOOP STITCH – read description above. NECK: Along the side of the FACE there are 8 rows; you now continue back and forth along both sides of the face; i.e. a total of 16 rows: ROW 1: Work 2 double crochets in the last row worked on the face, * 1 double crochet in each of the next 2 rows, 2 double crochets in the next row *, work from *-* to end of row = 22 stitches. Turn. ROW 2: Work 1 chain stitch, 1 double crochet in each stitch. Turn. ROW 3: Work 1 chain stitch, 2 double crochets in the first stitch, 1 double crochet in each stitch until there is 1 stitch left, 2 double crochets in the last stitch (= 2 stitches increased). Turn. Continue with ROWS 2 and 3 until you have worked a total of 6 rows (= 26 stitches). Turn. BODY: Now the 2 front legs are attached to the body, working back and forth. ROW 1: Work 1 chain stitch, 2 double crochets in the first stitch, 1 double crochet in each of the next 4 stitches, fold one of the front legs double and lay it on the body so the next 6 double crochets are worked through 3 layers, work 1 double crochet in each of the next 4 stitches (= mid-front/between the legs), fold the other front leg double and lay it on the body so the next 6 double crochets are worked through 3 layers, 1 double crochet in each of the next 4 stitches, 2 double crochets in the last stitch (= 28 stitches). Turn. ROW 2: Work 1 chain stitch, 1 double crochet in all stitches. Turn. ROW 3: Work 1 chain stitch, 2 double crochets in the first stitch, 1 double crochet in each stitch until there is 1 stitch left, 2 double crochets in the last stitch (= 2 stitches increased). Turn. Continue with ROWS 2 and 3 until you have worked a total of 5 rows on the body (= a total of 32 stitches on ROW 5). Turn. ROW 6: On this row you increase for the stomach as follows: Work 1 chain stitch, 2 double crochets in the first stitch, 1 double crochet in each of the next 8 stitches, * 2 double crochets in the next stitch, 1 double crochet in the next stitch *, work from *-* a total of 7 times, work 2 double crochets in the next stitch, 1 double crochet in each of the next 7 stitches, 2 double crochets in the last stitch (= 10 stitches increased and 42 stitches on the row). Turn. ROW 7: Work 1 chain stitch, 1 double crochet in all stitches. Turn. ROW 8: On this row you also increase for the stomach as follows: Work 1 chain stitch, 2 double crochets in the first stitch, 1 double crochet in each of the next 16 stitches, * 2 double crochets in the next stitch, 1 double crochet in the next stitch *, work from *-* a total of 4 times, 1 double crochet in each of the next 16 stitches, 2 double crochets in the last stitch (= 6 stitches increased and 48 stitches on the row). Turn. ROW 9: Work 1 chain stitch, 1 double crochet in all stitches. Turn. ROW 10: Work 1 chain stitch, 2 double crochets in the first stitch, 1 double crochet in each stitch until there is 1 stitch left, 2 double crochets in the last stitch (= 2 stitches increased and 50 stitches on the row). Turn. ROW 11: Work 1 chain stitch, 1 double crochet in all stitches. Turn. ROW 12: Work 1 chain stitch, 2 double crochets in the first stitch, 1 double crochet in each stitch until there is 1 stitch left, 2 double crochets in the last stitch (= 2 stitches increased and 52 stitches on the row). Turn. ROW 13: Now attach the back legs to the body. Work 1 chain stitch, 1 double crochet in each of the first 15 stitches, fold one of the back legs double and lay it on the body so the next 6 double crochets are worked through 3 layers, work 1 double crochet in each of the next 10 stitches (= mid-front/between the legs), fold the other back leg double and lay it on the body so the next 6 double crochets are worked through 3 layers, work 1 double crochet in each of the last 15 stitches. Turn. UNDER-BODY: ROWS 1-3: Work 1 chain stitch, 1 double crochet in all stitches. Turn. ROW 4: On this row you decrease for a flat bottom as follows: Work 1 chain stitch, 1 double crochet in each of the first 18 stitches, * crochet together the next 2 double crochets - read CROCHET TOGETHER in description above *, work from *-* a total of 8 times, work 1 double crochet in each of the last 18 stitches (= 8 stitches decreased and 44 stitches on the row). Turn. ROW 5: Work 1 chain stitch, 1 double crochet in all stitches. Turn. ROW 6: On this row you also decrease for a flat bottom as follows: Work 1 chain stitch, 1 double crochet in each of the first 14 stitches, * crochet together the next 2 double crochets *, work from *-* a total of 8 times, work 1 double crochet in each of the last 14 stitches (= 8 stitches decreased and 36 stitches on the row). Turn. ROW 7: Work 1 chain stitch, 1 double crochet in all stitches. Turn. ROW 8: On this row you also decrease for a flat bottom as follows: Work 1 chain stitch, 1 double crochet in each of the first 14 stitches, * crochet together the next 2 stitches *, work from *-* a total of 4 times, work 1 double crochet in each of the last 14 stitches (= 4 stitches decreased and 32 stitches on the row). Cut and fasten the strand. ASSEMBLY: Fold the bottom double, length-wise, and sew together stitch for stitch. TAIL: Use crochet hook size 3.5 mm and forest green. Along the sides of the UNDER-BODY there are 8 rows (on each side of the seam) and you now work back and forth along both sides; a total of 16 rows: ROW 1: Work 1 double crochet in each row (= 16 stitches). Turn. ROW 2: Work 1 chain stitch, crochet together the first 2 double crochets, work 1 double crochet in each stitch until there are 2 stitches left and work together the last 2 double crochets (= 2 stitches decreased). Turn. Work ROWS 1 and 2 for a total of 12 rows and with 4 stitches left on the last row. Cut and fasten the strand. BACK: Use crochet hook size 3.5 mm and forest green. Work 1 row of double crochets along the whole opening on the back, starting by the tail as follows: ROW 1: Work 1 double crochet in each stitch or row – from the tail to the top of the head and back along the other side to the tail. There are approx. 45 stitches on each side of the back and 90 stitches around the whole opening. Turn. Now fill the dinosaur with wadding while continuing as follows: ROW 2: Fold the dinosaur double and work a row of double crochets through both layers, from the tail to the head, so the back is closed = approx. 45 stitches. Cut and fasten the strand. SPINES: Using olive and crochet hook size 3.5 mm, start at the tip of the tail and work as follows: * Work 1 double crochet, skip 1 stitch and work in the next stitch: 2 treble crochets, 1 double-treble crochet, 2 chain stitches, 1 double-treble crochet and 2 treble crochets. Skip 1 stitch and work 1 double crochet in the next stitch *, work from *-* a total of 2 times, then repeat from *-* up the back but skipping 2 stitches instead of 1 as far as the head. When there are too few stitches to repeat by the head, finish with double crochets. Cut and fasten the strand. |
|
|
|
Have you finished this pattern?Tag your pictures with #dropspattern #dropsbobthedinosaur or submit them to the #dropsfan gallery. Do you need help with this pattern?You'll find 11 tutorial videos, a Comments/Questions area and more by visiting the pattern on garnstudio.com. © 1982-2025 DROPS Design A/S. We reserve all rights. This document, including all its sub-sections, has copyrights. Read more about what you can do with our patterns at the bottom of each pattern on our site. |
|


With over 40 years in knitting and crochet design, DROPS Design offers one of the most extensive collections of free patterns on the internet - translated to 17 languages. As of today we count 314 catalogues and 11822 patterns translated into English (UK/cm).
We work hard to bring you the best knitting and crochet have to offer, inspiration and advice as well as great quality yarns at incredible prices! Would you like to use our patterns for other than personal use? You can read what you are allowed to do in the Copyright text at the bottom of all our patterns. Happy crafting!
Post a comment to pattern DROPS Children 37-21
We would love to hear what you have to say about this pattern!
If you want to leave a question, please make sure you select the correct category in the form below, to speed up the answering process. Required fields are marked *.