
Popular categories
Looking for a yarn?


Comments / Questions (38)
Raji Ajith wrote:
In left front did I have to leave 2 chain spaces in both side in each and every row upto 16 cms
11.02.2016 - 19:06Rajiajith wrote:
Thank u very much for you explanation.....
05.02.2016 - 09:01
![]() Rajiajith wrote:
Rajiajith wrote:
Thank you very much for the beautiful pattern...... please let me know what should i put around the armhole chain... i am making S/M size .... i put 48 chain....
04.02.2016 - 12:54DROPS Design answered:
Dear Mrs Rajiajith, when you crochet the 48 ch for the armholes, they replace the sts skipped on previous round - on next round after armholes, continue in pattern as before, ie crochet in chains for armholes as you crocheted before the chains. Happy crocheting!
04.02.2016 - 16:33
![]() Margit wrote:
Margit wrote:
Wird demnächst in Angriff genommen, hoffentlich gelingt es mir !!!
11.01.2016 - 14:36
![]() Cousseau wrote:
Cousseau wrote:
Très mignon, la capuche lui donne son originalité
03.01.2016 - 14:45
![]() Susanne wrote:
Susanne wrote:
Auf diese Jacke freue ich micht!
02.01.2016 - 14:48
![]() Angelika K. wrote:
Angelika K. wrote:
Sicher eine Herausforderung, aber sieht super aus!
13.12.2015 - 11:26
![]() CAROL SCHWEIGER wrote:
CAROL SCHWEIGER wrote:
A Hood, long and light! Perfect for all seasons.
12.12.2015 - 18:20
|
||||||||||||||||||||||
Oasis#oasisjacket |
||||||||||||||||||||||
 |
 |
|||||||||||||||||||||
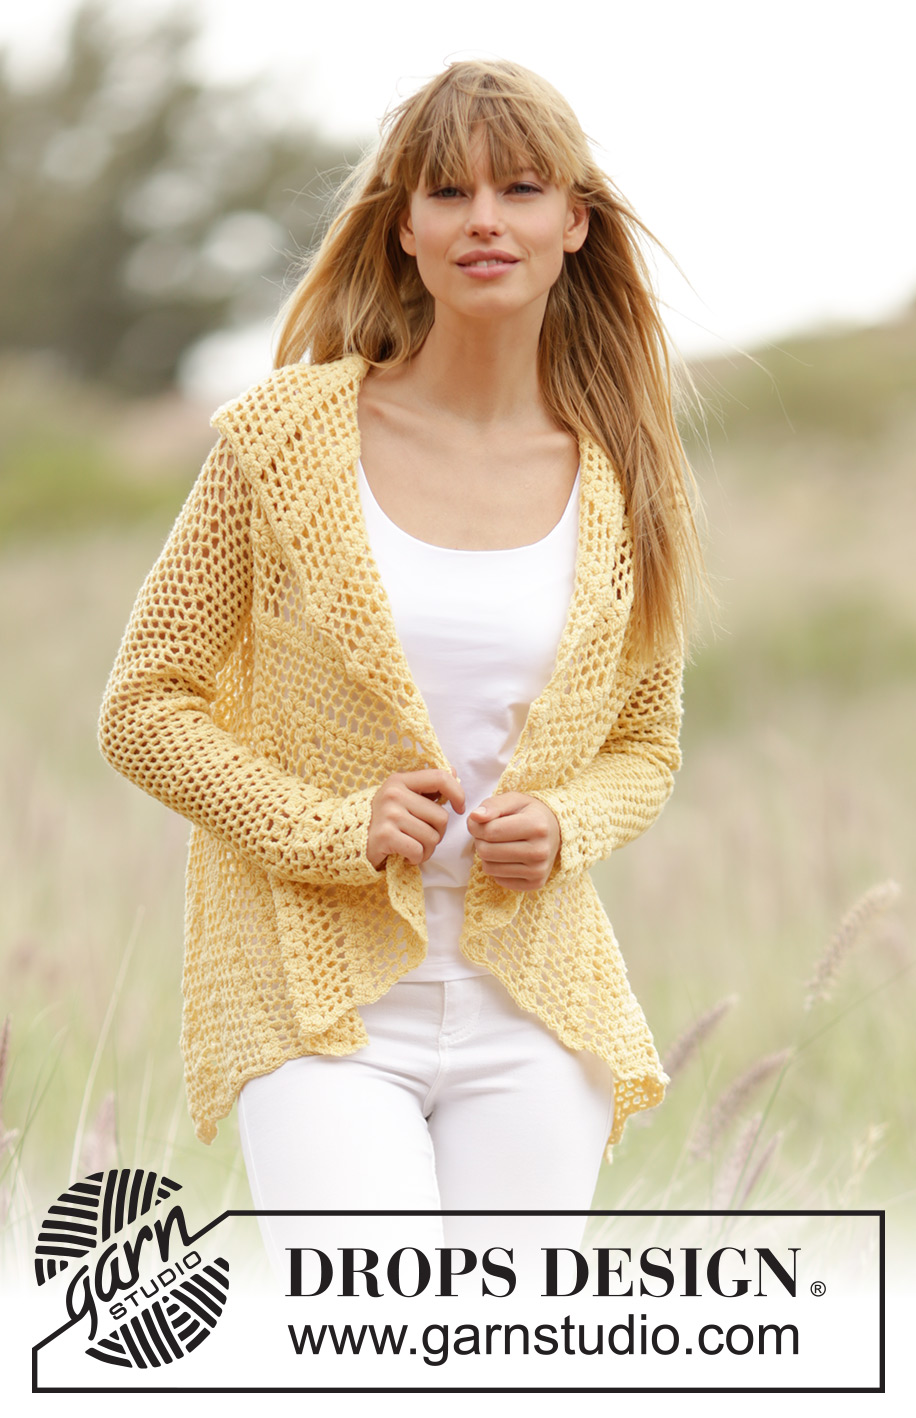
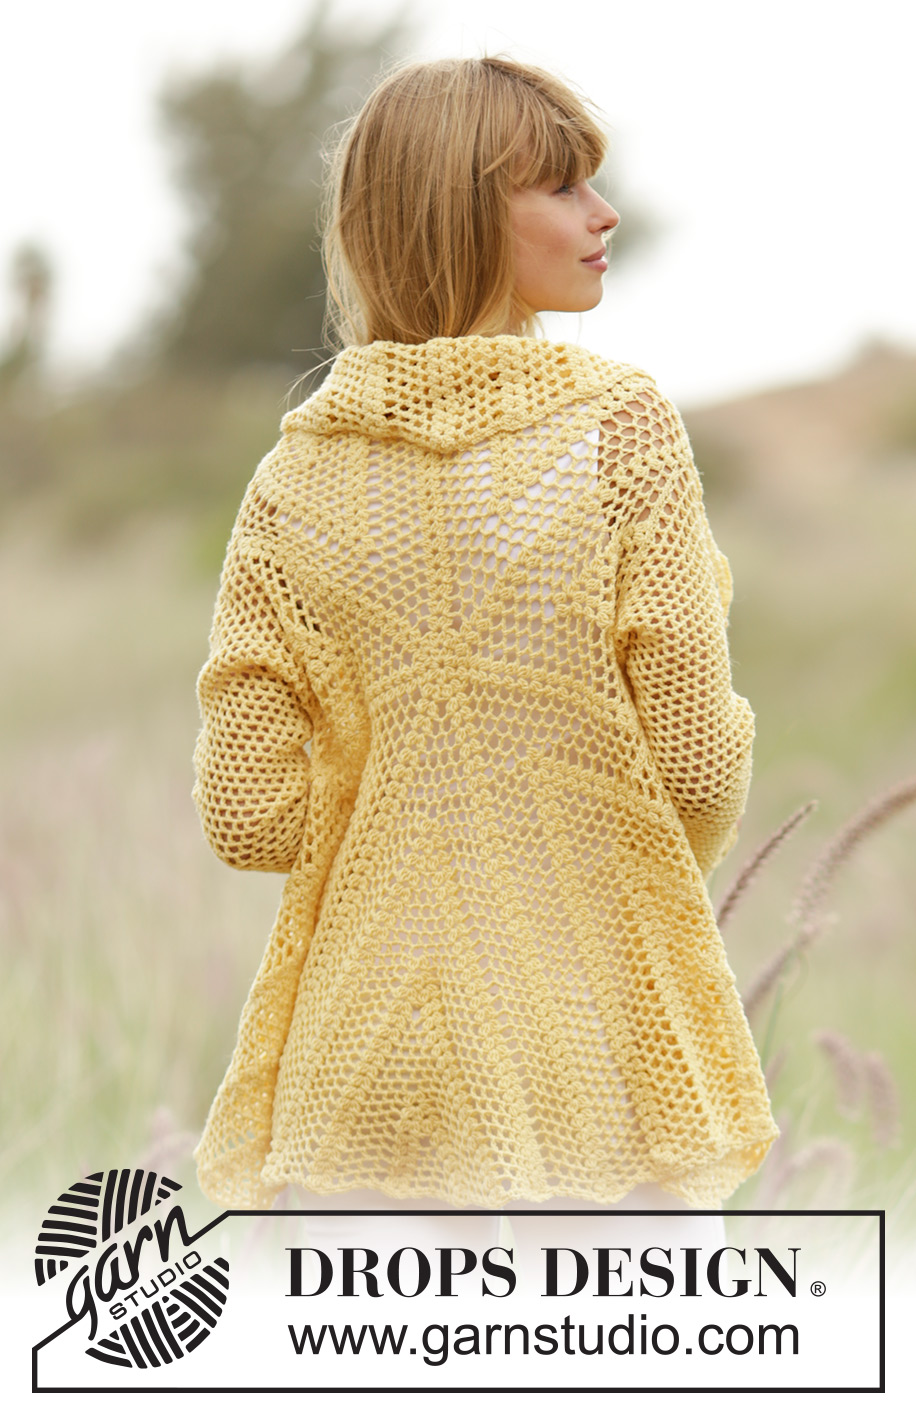
Crochet DROPS jacket worked in a circle with lace and fan pattern in "BabyMerino". Size: S - XXXL.
DROPS 169-35 |
||||||||||||||||||||||
|
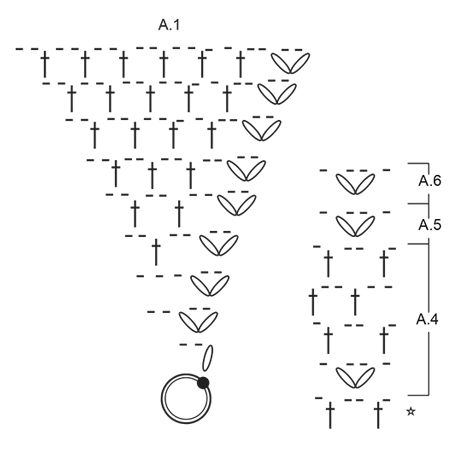
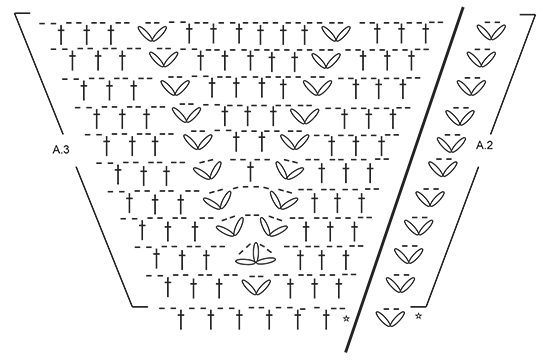
PATTERN: See diagrams A.1 to A.6. CROCHET INFO: Beg every round with 3 ch and finish with 1 sl st in 3rd ch. CROCHET TIP (applies to sleeves): After last dc on the round, continue to next round with 1 dc in next ch-space (= first ch-space on next round). NOTE: Insert 1 marker at the beg of round between last ch and first dc on the next round, move the marker upwards. NOTE: BE CAREFUL NOT TO DISPLACE THE MARKER. DECREASE TIP: Work 1 dc around next ch-space but wait with last pull through, work next dc around next ch-space (do not work 2 ch between dc), on last pull through, pull yarn through all 3 loops on hook. ---------------------------------------------------------- CIRCLE: Worked in the round from the middle of circle and outwards. Work 8 ch on hook size 3.5 mm/E/4 with Baby Merino and form a ring with 1 sl st in first ch. Then repeat A.1 7 times in total on round - READ CROCHET INFO. When A.1 has been worked 1 time vertically, work as follows: * Work A.2 over fan in A.1, work A.3 over the remaining dc/ch in A.1 *, repeat from *-* 7 times in total. REMEMBER THE CROCHET GAUGE! When A.2 and A.3 have been worked 1 time vertically, there are 378 dc/ch on round (= 4 dc/ch in every repetition of A.2 and 50 dc/ch in every repetition of A.3). NOTE: Every fan consist of 3 dc worked tog (= 1 dc), 2 ch and 3 dc worked tog (= 1 dc). Then repeat A.2 and A.3 vertically, continue with pattern over the remaining dc/ch as before (i.e. Work fan over fan and 1 dc around every ch-space and 2 ch between every dc as before). Insert 1 marker before every A.2 (= 7 markers in piece). First marker marks beg of round. Move the markers upwards when working. Work until piece measures 18-19-20 cm / 7"-7½"-8" the middle (= 36-38-40 cm / 14¼"-15"-15¾" in diameter). Then work as follows: Work pattern as before until 2nd marker (= 1 repetition of pattern), skip 16-17-18 ch-spaces (includes ch-space in A.2 and between fans in A.3 i.e. all ch-spaces), work 48-51-54 ch for armhole, work pattern as before until 16-17-18 ch-spaces remain before 7th marker (includes ch-space in A.2 and fans between A.3 i.e all ch-spaces), skip these ch-spaces, work 48-51-54 ch for armhole, work as before the rest of round. Then work pattern as before, work around ch-row over each armhole. When piece measures approx. 39-42-45 cm / 15¼"-16½"-17¾" from middle (= 78-84-90 cm / 30¾"-33"-35½" in diameter), work back and forth over front pieces. Fasten off. LEFT FRONT PIECE: Work back and forth. Insert 1 marker in piece, NOW MEASURE PIECE FROM HERE. Start at 2nd marker. Work from RS: 1 sc in ch-space before A.2, ch 4, continue to work pattern as before (i.e. A.2 and A.3) until 4th marker, finish with 1 dc around next ch-space, turn piece. Now work short rows as follows: Work ch 3, skip 1 ch-space, 1 sc around next ch-space, 3 ch (these 2 ch-spaces will not be worked in again), 1 dc around next ch-space, work pattern as before until 2 ch-spaces remain (i.e. ch-spaces between dc, these ch-spaces will no longer be worked in), turn work. Continue pattern and short rows like this. I.e. continue to inc in A.3. Work until piece measures 16-17-18 cm / 6¼"-6¾-7" from marker. Fasten off. RIGHT FRONT PIECE: Work as left front piece but now work between 5th and 7th marker. EDGE: Work 1 edge around the entire jacket as follows: Start from 1st marker. Work * 1 sc around first/next ch-space, ch 3, 1 sc around next ch-space *, repeat from *-* around the entire circle. Fasten off. SLEEVE: Sleeve is worked in the round, top down. Work 96-102-108 ch on hook size 3.5 mm/E/4 with Baby Merino. ROUND 1: Work ch 3, * ch 2, skip ch 2, 1 dc in next ch *, repeat from *-* in ch on row, work 2 ch and 1 dc around the first 3 ch = 32-34-36 ch-spaces - READ CROCHET TIP - explanation above. Continue to work 2 ch and 1 dc around every ch-space. When piece measures 4 cm / 1½", dec 1 ch-space before marker - READ DECREASE TIP! NOTE: BE CAREFUL NOT TO DISPLACE THE MARKER. Repeat dec alternately on each side of marker every 2½-3-3 cm / ⅞"-1⅛"-1⅛" 13-11-11 more times = 18-22-24 ch-spaces. When piece measures 42 cm / 16½" for all sizes, finish round with 1 sl st in last ch mid under sleeve. Continue in the round as follows: Work A.4 9-11-12 times on round. Repeat A.4 2 times in total vertically. Then work A.5 over A.4. When A.5 has been worked 1 time vertically, work A.6 over A.5 2 times in total vertically. Fasten off. The piece now measures approx. 53 cm / 21" in all sizes. Work another sleeve the same way. ASSEMBLY: Work sleeves tog with circle as follows: 1 sl st, * ch 2, 1 sl st around next ch-space *, repeat from *-*. |
||||||||||||||||||||||
Diagram explanations |
||||||||||||||||||||||
|
||||||||||||||||||||||
 |
||||||||||||||||||||||
 |
||||||||||||||||||||||
 |
||||||||||||||||||||||
Have you finished this pattern?Tag your pictures with #dropspattern #oasisjacket or submit them to the #dropsfan gallery. Do you need help with this pattern?You'll find 6 tutorial videos, a Comments/Questions area and more by visiting the pattern on garnstudio.com. © 1982-2026 DROPS Design A/S. We reserve all rights. This document, including all its sub-sections, has copyrights. Read more about what you can do with our patterns at the bottom of each pattern on our site. |
||||||||||||||||||||||


With over 40 years in knitting and crochet design, DROPS Design offers one of the most extensive collections of free patterns on the internet - translated to 17 languages. As of today we count 324 catalogs and 12291 patterns - 12281 of which are translated into English (US/in).
We work hard to bring you the best knitting and crochet have to offer, inspiration and advice as well as great quality yarns at incredible prices! Would you like to use our patterns for other than personal use? You can read what you are allowed to do in the Copyright text at the bottom of all our patterns. Happy crafting!
Post a comment to pattern DROPS 169-35
We would love to hear what you have to say about this pattern!
If you want to leave a question, please make sure you select the correct category in the form below, to speed up the answering process. Required fields are marked *.