
Popular categories
Looking for a yarn?


Comments / Questions (110)
![]() Lyn Griffiths wrote:
Lyn Griffiths wrote:
What does the pattern mean when it says 15-15 or 20-20.i'm new to crochet & never come across this before
28.12.2013 - 20:40DROPS Design answered:
Dear Mrs Griffiths, instructions for hat are given in 2 sizes, so that first number is valid for size S/M and 2nd for size L/XL. Happy crocheting !
30.12.2013 - 16:04
![]() Hetty Van Duren wrote:
Hetty Van Duren wrote:
Waarom staat er 20-20v enz. moet ik 2 keer rond met 20v ?
27.12.2013 - 11:41DROPS Design answered:
Hoi Hetty. Er zijn 2 maten voor deze hoed, het is om duidelijk te maken hoeveel v je hebt per maat
28.12.2013 - 18:07
![]() Nicolaas Hoedjes wrote:
Nicolaas Hoedjes wrote:
Begrijp de eerste tour met kleur roest niet,wat is de voorste lus van v.
11.11.2013 - 15:48DROPS Design answered:
Hoi Nicolaas. Je haakt met roest in de lus aan de buitenkant van de vaste van de vorige toer.
12.11.2013 - 12:02
![]() Mariethe House wrote:
Mariethe House wrote:
Au secours!! La maille en l'air qui remplace la première maille serrée compte-t-elle pour une maille serrée lorsque vous faites des augmentations dans le cercle. Par exemple, on me dit: tricotez 3 mailles serrées dans chaque maille suivante et 2 mailles serrées dans la maille suivante. Donc, pouvez-vous me dire si en début du tour, la première maille e, l'air est considérée comme la premiere maille serrée du tour? merci!
28.10.2013 - 20:28DROPS Design answered:
Bonjour Mme House, si vous remplacez la 1ère ms au début de chaque rang par 1 ml (cf début des explications), alors cette ml remplace bien la 1ère ms et doit compter comme tel. Bon crochet!
29.10.2013 - 10:36
![]() Rosaria wrote:
Rosaria wrote:
Grazie per avermi risposto, ma quindi vanno applicate al cappello in seguito? vanno cucite?
23.10.2013 - 12:45DROPS Design answered:
Buongiorno Rosaria, le strisce non vanno cucite, ma si lavorano durante la lavorazione del cappello. Dopo il 18° giro (19° per la taglia L/XL), lavora le strisce come indicato nelle spiegazioni e seguendo il video se necessario, e poi prosegue con la lavorazione della visiera. Buon lavoro!
23.10.2013 - 13:47
![]() Garnstudio Deutschland wrote:
Garnstudio Deutschland wrote:
Tipp: Achten Sie darauf, die Reihen mit Kett-Maschen nicht zu fest zu häkeln, damit sich der Hut an dieser Stelle nicht zusammenzieht.
01.09.2013 - 09:02
![]() NE wrote:
NE wrote:
The rust colour in sample colours (0707) looks nothing like the picture of the flower on the hat. What colour should I order to achieve that as shown in the prictue? Thanks
22.08.2013 - 17:29DROPS Design answered:
Dear Ne, this hat has been crocheted with Lima 0707, rust. Your DROPS store may help you choosing the colour you'd like to have. Happy crocheting!
23.08.2013 - 16:05
![]() Miia wrote:
Miia wrote:
Ihana syyshattu ;)
04.07.2013 - 10:11
![]() Margret wrote:
Margret wrote:
Den Hut finde ich ganz toll und den werde ich mir nacharbeiten, klasse Idee
01.07.2013 - 06:58
![]() Monique wrote:
Monique wrote:
Zeer mooi hoedje en zeker met die bloem erbij. Hopelijk komt het patroon er nog bij.
30.06.2013 - 09:23
|
|
Miss Potter#misspotterhat |
|
|
|
|
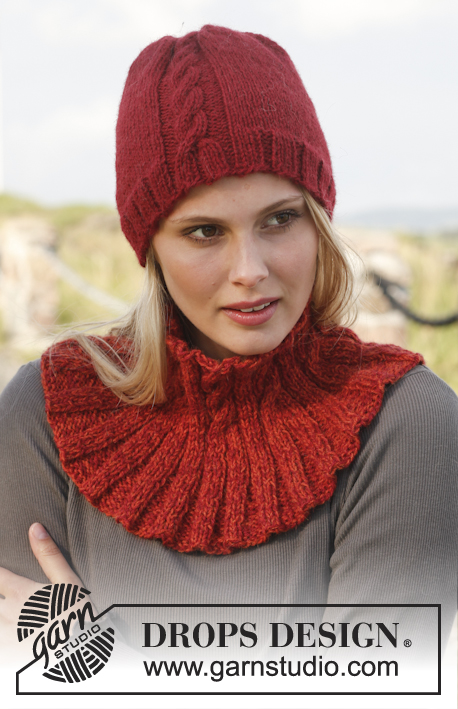
Crochet DROPS hat with stripes and flowers in ”Lima”.
DROPS 150-2 |
|
|
CROCHET INFO: Replace first sc at beg of every sc round with 1 ch. Finish every round with 1 sl st in ch from beg of round. STRIPES: ROUND 1: Switch to rust and work 1 sl st in front loop of every sc the entire round. ROUND 2: Switch to brown and work 1 sc in back loop of every sc from previous round with sc. ROUND 3: Work 1 sc in every sc the entire round. ROUND 4: Switch to rust and work 1 sl st in front loop of every sc the entire round. ROUND 5: Switch to brown and work 1 sc in back loop of every sc from previous round with sc. ROUND 6- 7: Work 1 sc in every sc the entire round. ROUND 8: Switch to rust and work 1 sl st in front loop of every sc the entire round. ROUND 9: Switch to brown and work 1 sc in back loop of every sc from previous round with sc. ROUND 10: Work 1 sc in every sc the entire round. ROUND 11: Switch to rust and work 1 sl st in front loop of every sc the entire round. ROUND 12: Switch to brown and work 1 sc in back loop of every sc from previous round with sc. ROUND 13: Work 1 sc in every sc the entire round. ROUND 14: Switch to rust and work 1 sl st in front loop of every sc the entire round. ROUND 15: Switch to brown and work 1 sc in back loop of every sc from previous round with sc. ROUND 16- 17: Work 1 sc in every sc the entire round. ---------------------------------------------------------- HAT: The piece is worked top down. Ch 4 on hook size 4.5 mm/ US 7 with brown, form a ring with 1 sl st in first ch. REMEMBER THE GAUGE! ROUND 1: READ CROCHET INFO! Work 5-5 sc in ch-ring. ROUND 2: Work 2 sc in every sc the entire round = 10-10 sc. ROUND 3: * 1 sc in first sc, 2 sc in next sc *, repeat from *-* the entire round = 15-15 sc. ROUND 4: * 1 sc in each of the first 2 sc, 2 sc in next sc *, repeat from *-* the entire round = 20-20 sc. ROUND 5: * 1 sc in each of the first 3 sc, 2 sc in next sc *, repeat from *-* the entire round = 25-25 sc. ROUND 6: * 1 sc in each of the first 4 sc, 2 sc in next sc *, repeat from *-* the entire round = 30-30 sc. ROUND 7: * 1 sc in each of the first 5 sc, 2 sc in next sc *, repeat from *-* the entire round = 35-35 sc. ROUND 8: * 1 sc in each of the first 6 sc, 2 sc in next sc *, repeat from *-* the entire round = 40-40 sc. ROUND 9: * 1 sc in each of the first 7 sc, 2 sc in next sc *, repeat from *-* the entire round = 45-45 sc. ROUND 10: * 1 sc in each of the first 8 sc, 2 sc in next sc *, repeat from *-* the entire round = 50-50 sc. ROUND 11: * 1 sc in each of the first 9 sc, 2 sc in next sc *, repeat from *-* the entire round = 55-55 sc. ROUND 12: * 1 sc in each of the first 10 sc, 2 sc in next sc *, repeat from *-* the entire round = 60-60 sc. ROUND 13: * 1 sc in each of the first 11 sc, 2 sc in next sc *, repeat from *-* the entire round = 65-65 sc. ROUND 14: * 1 sc in each of the first 12 sc, 2 sc in next sc *, repeat from *-* the entire round = 70-70 sc. ROUND 15: * 1 sc in each of the first 13 sc, 2 sc in next sc *, repeat from *-* the entire round = 75-75 sc. ROUND 16: * 1 sc in each of the first 14 sc, 2 sc in next sc *, repeat from *-* the entire round = 80-80 sc. ROUND 17: * 1 sc in each of the first 15 sc, 2 sc in next sc *, repeat from *-* the entire round = 85-85 sc. ROUND 18: * 1 sc in each of the first 16 sc, 2 sc in next sc *, repeat from *-* the entire round = 90-90 sc. ROUND 19: Only worked in size L/XL: * 1 sc in each of the first 17 sc, 2 sc in next sc *, repeat from *-* the entire round = 95 sc. BOTH SIZES: Work 1 sc in every sc for 4 rounds. Then work STRIPES - see explanation above. BRIM: Work with brown on hook size 4.5 mm/ US 7 as follows: ROUND 1: Work 1 sc in every sc the entire round. ROUND 2: * Work 1 sc in each of the first 4 sc, 2 sc in next sc *, repeat from *-* the entire round = 108-114 sc. ROUND 3: Work 1 sc in every sc the entire round. ROUND 4: * Work 1 sc in each of the first 5 sc, 2 sc in next sc *, repeat from *-* the entire round = 126-133 sc. ROUND 5: Work 1 sc in every sc the entire round. ROUND 6: Work * 1 sc in next sc, 1 ch and skip 1 sc *, repeat from *-* the entire round, fasten off. Piece measures approx. 22-23 cm / 8¾"-9". FLOWER: Worked in the round. Ch 4 on hook size 4.5 mm/ US 7 with red and form a ring with 1 sl st in first ch. ROUND 1: ch 3 (= 1st dc), 11 dc in ch-ring, switch to rust and finish with 1 sl st in 3rd ch from beg of round = 12 dc. ROUND 2: ch 1, 1 sc in front loop of first dc, * ch 5, work back in ch-row as follows: 1 sc in 2nd ch from hook, 1 dc in each of the next 2 ch, 1 sc in last ch, 1 sl st in front loop of next dc from 1st round *. Repeat from *-* 11 more times (= 12 times in total) and finish with 1 sl st in 1st sc from beg of round = 12 petals. ROUND 3: Then work at the back of leaves from previous round. 1 ch, 1 sc in back loop of first dc, * ch 7, work back in ch-row as follows: 1 sc in 2nd ch from hook, 1 dc in each of the next 4 ch, 1 sc in last ch, 1 sl st in back loop of next dc from 1st round *. Repeat from *-* 11 more times (= 12 times in total) and finish with 1 sl st in 1st sc from beg of round = 12 petals. Fasten off. LEAF: Ch 12 on hook size 4.5 mm/ US 7 with green, turn and work back in ch-row. Beg in 2nd ch from hook and work 1 st in every st: 4 sc, 1 hdc, 1 dc, 2 tr, 1 dc, 1 hdc, 1 sc, 1 ch, turn and work on the underside of ch-row, beg in first ch: 1 sc, 1 hdc, 1 dc, 2 tr, 1 dc, 1 hdc, 4 sc and 1 sl st in last ch on row. Fasten off. Work 4 leaves in total. ASSEMBLY: Sew leaves on to the back of flower and fasten the flower on the side of the hat. |
|
Have you finished this pattern?Tag your pictures with #dropspattern #misspotterhat or submit them to the #dropsfan gallery. Do you need help with this pattern?You'll find 11 tutorial videos, a Comments/Questions area and more by visiting the pattern on garnstudio.com. © 1982-2026 DROPS Design A/S. We reserve all rights. This document, including all its sub-sections, has copyrights. Read more about what you can do with our patterns at the bottom of each pattern on our site. |


With over 40 years in knitting and crochet design, DROPS Design offers one of the most extensive collections of free patterns on the internet - translated to 17 languages. As of today we count 324 catalogs and 12291 patterns - 12281 of which are translated into English (US/in).
We work hard to bring you the best knitting and crochet have to offer, inspiration and advice as well as great quality yarns at incredible prices! Would you like to use our patterns for other than personal use? You can read what you are allowed to do in the Copyright text at the bottom of all our patterns. Happy crafting!
Post a comment to pattern DROPS 150-2
We would love to hear what you have to say about this pattern!
If you want to leave a question, please make sure you select the correct category in the form below, to speed up the answering process. Required fields are marked *.