
Popular categories
Looking for a yarn?


Comments / Questions (108)
![]() Sven wrote:
Sven wrote:
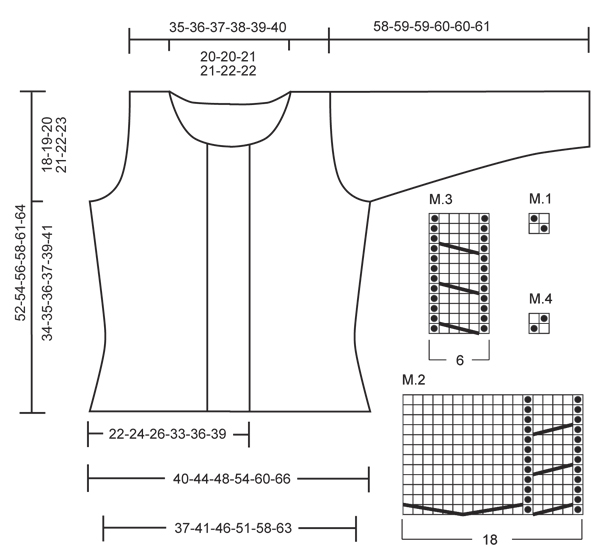
1+13+24+13+1=52
31.07.2016 - 10:43
![]() Åsa Rangälv wrote:
Åsa Rangälv wrote:
Ärmar lägger upp 52 maskor = storlek M Mönster på ärmarna: 1 kantm, sticka 13 m M.1, sticka M.2 och sedan M.3 en gång, sticka 13, avsluta med 1 kantm detta blir 1+13+2+18+6+13+1=54 - vad är fel?
31.07.2016 - 09:48DROPS Design answered:
Hej. Du stickar 1(=kantm)+13(=13m av M.1)+18(=M.2)+6(=M.3)+13(=13 m av M.4)+1(=kantm) = 52 m. Lycka till!
11.08.2016 - 12:24
![]() Danielle wrote:
Danielle wrote:
I'm working on the back piece and I've just started the cable pattern. As I read the diagram, the full cable pattern is 12 rows, is this correct? What is the gauge for this project or at least the cable pattern - in other words how many inches does one 12 row pattern equal? The directions say to begin the decrease when piece measures 2 3/8 inches - does this include the first 1 1/8 inches of rib?
11.06.2015 - 02:37DROPS Design answered:
Dear Danielle, tension is stockinette st should be 20 sts x 26 rows in stockinette st = 4'' x 4'' (see on the right side of the picture under tab "video") - Diagrams M.2 and M.3 are worked over 12 rows, that's right. The 2 3/8" should be measured from bottom edge, ie including rib, but remember "Measuring Tip" at the beg of the pattern. Happy knitting!
11.06.2015 - 09:48
![]() Kati wrote:
Kati wrote:
Müsste die Reihenfolge der Muster für die Rückseite nicht folgendermaßen sein?: M1-M2-M3-M4 und dann erst die restlichen 20 Maschein? In der Alneitung kommen die 20 Maschen vor M4. Danke für eine kurze Info Kati
03.11.2014 - 07:51DROPS Design answered:
Liebe Kati, es ist gemeint, dass Sie M.4 über 20 M stricken, nicht M.4 1x und dann 20 M. Ebenso stricken Sie ja auch M.1 über 20 M. So wird es dann auf beiden Seiten gleich.
03.11.2014 - 08:59
![]() Regina wrote:
Regina wrote:
Wie liest man denn die Musterbilder? von unten rechts angefangen? Reihe 1 von rechts nach links und die nächste Reihe von links nach rechts?
09.05.2014 - 20:13DROPS Design answered:
Liebe Regina, ganz genau. Es sind alle Reihen eingezeichnet, sowohl Hin-R als auch Rück-R, daher lesen Sie die R wie von Ihnen beschrieben. Viel Spaß beim Stricken!
10.05.2014 - 10:26
![]() Kristine Ledet Odgaard wrote:
Kristine Ledet Odgaard wrote:
Jeg undrer mig over måletipset. Der står at man skal måle i snoningsmønsteret for ellers bliver jakken for kort. Patent-mønsteret bliver da kortere end snoningsmønsteret? Skal der stadig måles i snoningsmønsteret?
19.03.2014 - 19:50DROPS Design answered:
Hej Kristine. Pga snoningerne skulle M.2 og M.3 trække sig mere sammen i højden end perlestrikken (M.1 og M.4), du skal derfor måle i snoningerne.
02.04.2014 - 12:06
![]() Rune wrote:
Rune wrote:
"At end of row"
05.03.2013 - 13:32
![]() Darien Nichols-Smith wrote:
Darien Nichols-Smith wrote:
On the armhole decrease for the right side it states start decrease on the RS at the beginning on the row, this would put the armhole on the button hole band!
05.03.2013 - 13:07DROPS Design answered:
Dear Mrs Nichols-Smith, pattern has been edited to say from WS, thank you. Happy knitting!
06.03.2013 - 09:27DC wrote:
Knitted the second size and it worked out beautifully. Made some minor adjustments:shorter bodice and 3/4 sleeve, changed to a shawl/roll collar and shaped the curve of the sleeve slightly differently. Beautiful pattern, thank you.
11.11.2012 - 09:58
![]() Diana wrote:
Diana wrote:
Wird mit den ersten Abnahmen beim Rückenteil nach 6 cm Gesamtlänge (3cm Bund und 3cm Muster) oder nach 9 cm Gesamtlänge (3cm Bund und 6 cm Muster) begonnen?
06.11.2012 - 17:42DROPS Design answered:
Liebe Diana, wenn nichts anderes steht wird immer ab Anschlagskante gemessen.
07.11.2012 - 07:40
|
|||||||||||||||||||
Nordic River#nordicrivercardigan |
|||||||||||||||||||
 |
 |
||||||||||||||||||
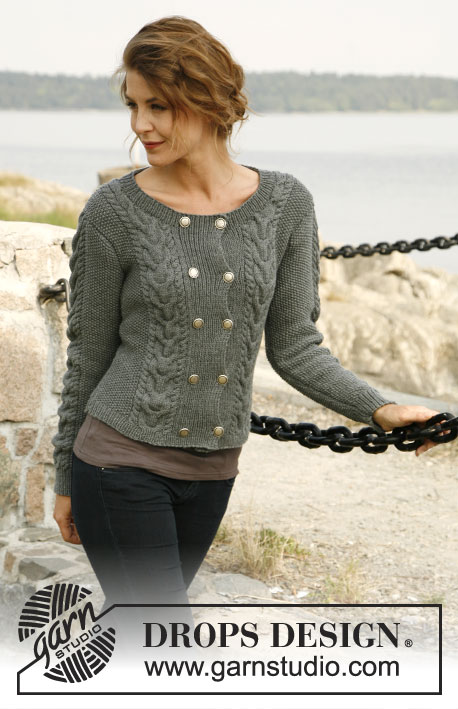
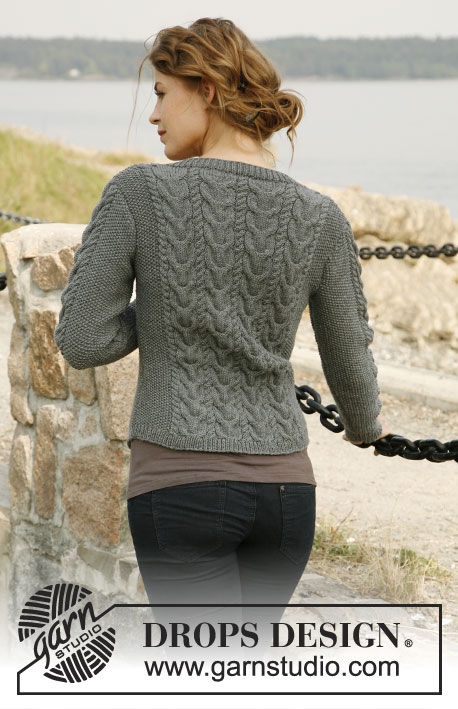
Knitted DROPS jacket with textured pattern in "Merino Extra Fine". Size: S - XXXL.
DROPS 131-3 |
|||||||||||||||||||
|
GARTER ST (back and forth on needle): K all rows. DECREASE TIP: At beg of row: Dec 1 st by working the 2 sts after edge st tog, K tog if next st is P, P tog if next st is K. Continue with pattern as before. At end of row: Dec 1 st by working the 2 sts before edge st tog, K tog if previous st was P, P tog if previous st was K. INCREASE TIP: At beg of row: Inc 1 st after edge st by picking up the yarn between 2 sts from previous row - work this st twisted, i.e. work in back loop of st instead of front to avoid holes. K the new st twisted if next st is P, P the new st twisted if next st is K. Continue with pattern as before. At end of row: Inc 1 st before edge st by picking up the yarn between 2 sts from previous row - work this st twisted, i.e. work in back loop of st instead of front to avoid holes. K the new st twisted if previous st was P, P the new st twisted if previous st was K. EDGE ST IN RIB: To get a nice edge mid front, work 1 edge st in rib as follows: Right front piece: 1st row (= RS): * K 1, P 1 *, repeat from *-*, finish row with 1 edge st in garter st. 2nd row (= WS): K last st on row (= 1 edge st in rib), turn piece. 3rd row (= RS): Slip 1st st as if to P and place yarn behind piece, slip slipped st back on left needle and K st twisted (= 1 edge st in rib). Work edge st in rib as on 2nd and 3rd row upwards until finished measurements. Left front piece: 1st row (= RS): 1 edge st in garter st, * K 1, P 1 *, repeat from *-*, K last st on row (= 1 edge st in rib), turn piece. 2nd row (= WS): Slip 1st st as if to P and place thread behind piece, slip slipped st back on left needle and K st twisted. Work edge st in rib as 1st and 2nd row upwards until finished measurements. PATTERN: See diagram M.1, M.2, M.3 and M.4 (the diagrams show the pattern from RS) SHORT ROWS ALONG FRONT BAND: To make rib on front band and cable pattern the same height, work short rows over sts on body every 4 cm / 1½" (measured on band) as follows: 1st row (= WS on right front piece, RS on left front piece): Work until 23-23-23-25-25-25 band sts remain, turn piece (tighten thread when turning to avoid holes). 2nd row (= RS on right front piece, WS on left front piece): Work back, turn piece. 3rd row: Work all sts. Continue with short rows like this until finished measurements. BUTTON HOLES: Bind off for 5-5-5-5-6-6 button holes on right front band. 1 BUTTON HOLE = bind off 5th and 6th st from edge and cast on 2 new sts on next row over these sts. Bind off for button holes when piece measures approx.: SIZE S: 3, 12½, 22, 31½, 41 cm / 1⅛",4⅞",8¾",12⅜",16⅛". SIZE M: 3, 13, 23, 33, 43 cm / 1⅛",5⅛",9",13",17" SIZE L: 3, 13½, 24, 34½, 45 cm / 1⅛",5¼",9½",13½",17¾". SIZE XL: 3, 14, 25, 35½, 46 cm / 1⅛",5½",9¾",14",18". SIZE XXL: 3, 12, 21, 30, 39½, 49 cm / 1⅛",4¾",8¼",11¾",15½",19¼". SIZE XXXL: 3, 12½, 22, 32, 42, 52 cm / 1⅛",4⅞",8¾",12½",16½",20½". Approx. 2 cm / ¾" remain up to neck edge after last button hole. MEASURING TIP: Measure length on cable pattern otherwise the piece will be too short because of difference in knitting gauge. -------------------------------------------------------- BACK PIECE: Worked back and forth on needle. Cast on 104-112-120-138-150-162 sts (includes 1 edge st in garter st in each side) on circular needle size 3.5 mm / US 4 with Merino Extra Fine. On 1st row (= RS) work rib as follows: 1 edge st in garter st - See explanation above, * K 1, P 1 *, repeat from *-*, finish with 1 edge st in garter st. When rib measures 3 cm / 1⅛", switch to circular needle size 4 mm / US 6 and work next row from RS as follows: 1 edge st, work 12-16-20-20-26-32 sts diagram M.1, work diagram M.2 a total of 4-4-4-5-5-5 times, then diagram M.3 1 time, 12-16-20-20-26-32 sts diagram M.4, finish with 1 edge st. REMEMBER THE GAUGE! Continue like this until piece measures 6 cm / 2⅜" - Read Measuring tip above, then dec from RS 1 st in each side of piece - Read decrease tip above. Repeat dec every 3-3-3-3-3-2½ cm / 1⅛"-1⅛"-1⅛"-1⅛"-1⅛"-⅞" a total of 4-4-4-5-5-6 times = 96-104-112-128-140-150 sts. Continue with pattern until piece measures 19-20-21-22-23-24 cm / 7½"-8"-8¼"-8¾"-9"-9½". On next row from RS, inc 1 st in each side of piece - Read increase tip above. Repeat inc every 3½-3½-3½-3-3-2½ cm / 1¼"-1¼"-1¼"-1⅛"-1⅛"-⅞" a total of 4-4-4-5-5-6 times = 104-112-120-138-150-162 sts. When piece measures 34-35-36-37-39-41 cm / 13⅜"-13¾"-14¼"-14½"-15¼"-16⅛", bind off and dec for armholes at the beg of every row in each side as follows: bind off 3 sts a total of 1-1-2-3-3-4 times, 2 sts a total of 0-1-1-2-3-3 times and 1 st a total of 2-3-3-3-6-8 times = 94-96-98-106-108-110 sts. Continue with pattern as before until piece measures 50-52-54-56-59-62 cm / 19¾"-20½"-21¼"-22"-23¼"-24⅜". Now bind off the middle 50-50-52-52-56-56 sts for neck and finish each shoulder separately. Bind off 3 sts on next row from neck = 19-20-20-24-23-24 sts remain on shoulder. When piece measures 52-54-56-58-61-64 cm / 20½"-21¼"-22"-22¾"-24"-25¼", loosely bind off all sts while AT THE SAME TIME working in pattern. RIGHT FRONT PIECE: Worked back and forth on needle. Cast on 61-65-69-89-95-101 sts (includes 1 edge st in garter st in the side) on circular needle size 3.5 mm / US 4. On 1st row (= RS) work as follows: * K 1, P 1 *, repeat from *-*, finish with 1 edge st in garter st - Read EDGE ST IN RIB above. When rib measures 3 cm / 1⅛", dec 1 st in the side on last row from WS by working 2 sts tog after edge st in garter st = 60-64-68-88-94-100 sts. On next row from RS, switch to circular needle size 4 mm / US 6 and bind off for 1st button hole - Read explanation above - At the same time work as follows: Continue with rib until 22-22-22-24-24-24 sts have been worked (incl bind off sts for button hole), K 1 (= 23-23-23-25-25-25 band sts in rib), work diagram M.2 1-1-1-2-2-2 times, then diagram M.3 1 time, 12-16-20-20-26-32 sts diagram M.4, finish with 1 edge st in garter st. Then work SHORT ROWS and BUTTON HOLES ON RIGHT FRONT BAND - Read explanation above. Continue like this until piece measures 6 cm / 2⅜" - Read Measuring tip above, then dec 1 st from RS at end of row. Repeat dec every 3-3-3-3-3-2½ cm / 1⅛"-1⅛"-1⅛"-1⅛"-1⅛"-⅞" a total of 4-4-4-5-5-6 times = 56-60-64-83-89-94 sts. Continue with pattern until piece measures 19-20-21-22-23-24 cm / 7½"-8"-8¼"-8¾"-9"-9½". On next row from RS, inc 1 st at end of row. Repeat inc every 3½-3½-3½-3-3-2½ cm / 1¼"-1¼"-1¼"-1⅛"-1⅛"-⅞" a total of 4-4-4-5-5-6 times = 60-64-68-88-94-100 sts. When piece measures 34-35-36-37-39-41 cm / 13⅜"-13¾"-14¼"-14½"-15¼"-16⅛", bind off and dec for armholes at the beg of every row from WS as follows: bind off 3 sts a total of 1-1-2-3-3-4 times, 2 sts a total of 0-1-1-2-3-3 times and 1 st a total of 2-3-3-3-6-8 times = 55-56-57-72-73-74 sts. Continue with pattern as before until piece measures 40-42-44-45-48-51 cm / 15¾"-16½"-17¼"-17¾"-19"-20". On next row from WS, work until 23-23-23-25-25-25 sts (= rib) remain, slip the remaining sts on a stitch holder, turn piece. Then bind off and dec for neck at beg of every row from RS (= dec every other row) - while AT THE SAME TIME working pattern - as follows: bind off 3 sts a total of 2-2-2-3-3-3 times, 2 sts a total of 2-2-2-4-4-4 times and 1 st a total of 1-1-1-6-8-8 times. Then dec 1 st every 4 rows a total of 2-2-3-0-0-0 times = 19-20-20-24-23-24 sts remain on shoulder. When piece measures 52-54-56-58-61-64 cm / 20½"-21¼"-22"-22¾"-24"-25¼" loosely bind off all sts while AT THE SAME TIME working in pattern. LEFT FRONT PIECE: Worked back and forth on needle. Cast on 60-64-68-88-94-100 sts (includes 1 edge st in garter st in the side) on circular needle size 3.5 mm / US 4. On 1st row (= RS) work as follows: 1 edge st in garter st, * K 1, P 1 *, repeat from *-*, finish with K 1 - Read EDGE ST IN RIB above. When rib measures 3 cm / 1⅛", switch to circular needle size 4 mm / US 6 and work next row from RS as follows: 1 edge st in garter st, work 12-16-20-20-26-32 sts diagram M.1, work diagram M.2 1-1-1-2-2-2 times, then diagram M.3 1 time, continue with rib as before, finish with K 1 (= 23-23-23-25-25-25 band sts in rib). Continue to work as right front piece but reversed (with SHORT ROWS but without button holes). SLEEVE: Worked back and forth on needle. Cast on 50-52-54-58-60-62 sts (includes 1 edge st in garter st in each side) on circular needle size 3.5 mm / US 4. On 1st row (= RS) work rib as follows: 1 edge st in garter st, * K 1, P 1 *, repeat from *-*, finish with 1 edge st in garter st. When rib measures 6 cm / 2⅜", switch to circular needle size 4 mm / US 6 and work next row from RS as follows: 1 edge st, work 12-13-14-16-17-18 sts diagram M.1, work diagram M.2 and then diagram M.3 one time, work 12-13-14-16-17-18 sts diagram M.4, finish with 1 edge st. When piece measures 8 cm / 3⅛" - Read Measuring tip above - inc 1 st from RS in each side of piece. Repeat inc every 4-3½-3-2½-2½-2 cm / 1½"-1¼"-1⅛"-⅞"-⅞"-¾" a total of 10-11-12-14-15-16 times = 70-74-78-86-90-94 sts. Continue until piece measures 49-49-48-48-47-47 cm / 19¼"-19¼"-19"-19"-18½"-18½" (shorter measurements in the larger sizes because of broader shoulder width). Then bind off and dec for sleeve cap at beg of every row in each side as follows: bind off 3 sts 1-1-1-1-1-2 times, 2 sts a total of 1-1-1-2-2-2 times and 1 st a total of 5-4-4-6-6-5 times. When piece measures 56-57-57-58-58-59 cm / 22"-22½"-22½"-22¾"-22¾"-23¼", bind off at beg of every row in each side as follows: 2 sts 1 times, 3 sts 1-2-2-2-2-2 times = 40-40-44-44-48-48 sts. When piece measures approx. 58-59-59-60-60-61 cm / 22¾"-23¼"-23¼"-23⅝"-23⅝"-24" bind off all sts while AT THE SAME TIME working pattern. Knit another sleeve. ASSEMBLY: Sew the shoulder seams. Sew in sleeves. Sew sleeve and side seams in one inside 1 edge st. NECK EDGE: The neck edge is worked inside 1 edge st from RS on circular needle size 3.5 mm / US 4 as follows: Start on the right front band, slip sts from stitch holder back on needle and work these sts, pick up approx. 110-130 sts along the neck edge, slip sts from stitch holder on left front band back on needle and work these sts. On next row (= WS) work 23-23-23-25-25-25 band sts in each side of piece in rib as before, P sts between band sts - while at the same time adjusting no of sts around the neck (not over band sts) to 115-115-125-121-131-131 = 161-161-171-171-181-181 sts on needle. Work next row from RS as follows: * K 1, P 1 *, repeat from *-*, and K last st on row. Continue with rib (with edge st in rib - See explanation above). Bind off for last button hole when neck edge measures approx. 1 cm / ⅜" - Read explanation above. When neck edge measures 3 cm / 1⅛", loosely bind off all sts with K over K and P over P. Sew on 5-5-5-5-6-6 buttons approx. 1½ cm / ½" from right edge on left band, 5-5-5-5-6-6 buttons approx. 1½ cm / ½" from left edge on right band (= decorative buttons without button holes). |
|||||||||||||||||||
Diagram explanations |
|||||||||||||||||||
|
|||||||||||||||||||
 |
|||||||||||||||||||
Have you finished this pattern?Tag your pictures with #dropspattern #nordicrivercardigan or submit them to the #dropsfan gallery. Do you need help with this pattern?You'll find 15 tutorial videos, a Comments/Questions area and more by visiting the pattern on garnstudio.com. © 1982-2026 DROPS Design A/S. We reserve all rights. This document, including all its sub-sections, has copyrights. Read more about what you can do with our patterns at the bottom of each pattern on our site. |
|||||||||||||||||||


With over 40 years in knitting and crochet design, DROPS Design offers one of the most extensive collections of free patterns on the internet - translated to 17 languages. As of today we count 324 catalogs and 12290 patterns - 12280 of which are translated into English (US/in).
We work hard to bring you the best knitting and crochet have to offer, inspiration and advice as well as great quality yarns at incredible prices! Would you like to use our patterns for other than personal use? You can read what you are allowed to do in the Copyright text at the bottom of all our patterns. Happy crafting!
Post a comment to pattern DROPS 131-3
We would love to hear what you have to say about this pattern!
If you want to leave a question, please make sure you select the correct category in the form below, to speed up the answering process. Required fields are marked *.