
Popular categories
Looking for a yarn?


Comments / Questions (90)
![]() Dina wrote:
Dina wrote:
Hei! Jeg bare lurer på når jeg skal måle underveis; burde det gjøres når man holder strikketøyet oppe, eller liggende flatt? Det blir vel en viss tyngde i plagget, slik at det vil strekke seg litt i lengden..? Takk!
04.04.2016 - 16:56DROPS Design answered:
Hej Dina, Bomull-Lin er ikke så tung så tøjet vil vokse, så det behøver du egentlig ikke tænke på, men vil du være helt sikker, så kan du selvfølgelig måle det når du holder det op. God fornøjelse!
05.04.2016 - 11:09
![]() Stephanie wrote:
Stephanie wrote:
Hi Drops team! I have a question about the front pieces. I'm making the large and have cast on 97 st and knitted stockinette to 13-3/4in. Could you explain how you bind off the first 59 st from RS? Is it done every other row or all on one row. If it is done every other row it would seem to be too long. I can't figure out how to make it look like the picture. Thanks! ~steph
09.12.2015 - 23:31DROPS Design answered:
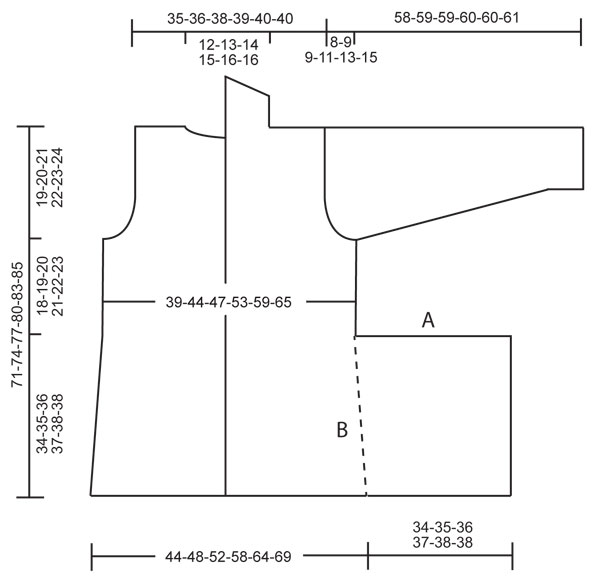
Dear Stephanie, the 59 sts should be bind off on 1 row => first 59 sts at beg of a row from RS - this match the side "A" in measurement chart. This side will be then sewn together to the part "B" on back piece (side seams). Happy knitting!
10.12.2015 - 10:07
![]() Marina wrote:
Marina wrote:
Hallo liebes Drops-Team, ich hänge beim Halsausschnitt des rückenteils-fest . nachdem ich die mittleren maschen abgekettet habe, heißt es weiter, und ab hier versteh ich nur noch Bahnhof, das in der nächsten runde 1 masche abgekettet wird = in allen größen 20 maschen ???????? hoffe sie können mir auf die sprünge helfen und verbleibe mit freundlichen grüßen ...........
05.07.2015 - 19:12DROPS Design answered:
Sie haben ja die mittleren M abgekettet und stricken nun jede Schulter einzeln weiter. Am Anfang der nächsten R, die am Halsrand beginnt, d.h. neben den abgeketteten M, ketten Sie nun noch 1 M ab. Dann bleiben für die Schulter noch 20 M übrig. Dies gilt für alle Größen, daher der Hinweis "in allen Größen 20 M". Bei der anderen Schulter gehen Sie ebenso vor, ketten also auch in der nächsten R, die am Halsrand beginnt, 1 M ab und haben dann noch 20 M übrig.
06.07.2015 - 22:43Mariola wrote:
Can I ask for a translation in Polish
27.12.2014 - 21:44Jean Halford-Thompson wrote:
I think the measurements on the schematic are incorrect. I haven't checked them but the depth of the armhole is marked for my size (fourth size) as 11cms. But the pattern says to cast off 13 stitches. With a gauge of 17sts to 10cms this cannot be 11cms. As it happened, I made this on my knitting machine so I drew my own schematic on the knit radar. That is how I noticed the problem. Apologies if I am wrong
15.12.2014 - 19:48
![]() Anna wrote:
Anna wrote:
Könnte man diese Jacke auch in Bomull-Lin stricken? Die Maschenprobe ist anscheinend doch ähnlich und ich würde ungern auf den Leinencharakter dieser Jacke verzichten wollen.
13.11.2014 - 17:04DROPS Design answered:
Obwohl Bomull-Lin zu einer anderen Garngruppe als Lin gehört, wird in diesem Fall auch Bomull-Lin als Ersatz empfohlen, da damit der Charakter wirklich am besten erhalten bleibt. Da die Jacke in Lin eher locker gestrickt wird, müssten Sie auch mit der dickeren Bomull-Lin die Maschenprobe gut einhalten können. Insgesamt wird die Jacke dann aber eben etwas dicker und dichter. Beachten Sie, dass Sie den Mengenverbrauch neu berechnen müssen, Bomull-Lin hat eine LL von 85m/50g, Lin = 120m/50g.
16.11.2014 - 11:29
![]() Andrea Dahlhoff wrote:
Andrea Dahlhoff wrote:
Hallo liebes Drops-Team! Verstehe den Halsausschnitt nicht ganz. Wo wird zusammengenäht, wofür ist die Schräge?
20.09.2014 - 14:22DROPS Design answered:
Ich bin nicht sicher, ob ich Ihre Frage verstanden habe... Bei diesem Modell arbeiten Sie vorne keinen Halsausschnitt, die Form ergibt sich durch das Tragen der Jacke. Die 20 M, die Sie abketten, sind die Schulter-M. Die M in Richtung Hals stricken Sie für den hinteren Kragen weiter und ketten ihn schräg ab, damit er eine bessere Passform bekommt. Die abgeketteten Schulter-M nähen Sie anschließend an die 20 abgeketteten Schulter-M des Rückenteils.
20.09.2014 - 23:31Sheila Wood wrote:
Would it be possible to knit this in Vivaldi mohair?
01.05.2014 - 10:29
![]() Jessica Uyede wrote:
Jessica Uyede wrote:
How many yards do i need for the large size specifically? (I have a certain amount of yarn that was given to me and would like to make sure i have enough)
03.03.2014 - 19:51DROPS Design answered:
You would need approx 1575 yds for the largest size.
03.03.2014 - 22:38
![]() Rosemary wrote:
Rosemary wrote:
I don't see the LIN yarn on here. Is it discontinued?
24.01.2014 - 01:44DROPS Design answered:
Dear Rosemary, DROPS Lin is discontinued, you will find a list of suggesions in the tab "Yarn alternatives" and help here to calculate amount of the alternative yarn. Happy knitting!
24.01.2014 - 09:17
|
|
Lady Jane#ladyjanecardigan |
|
 |
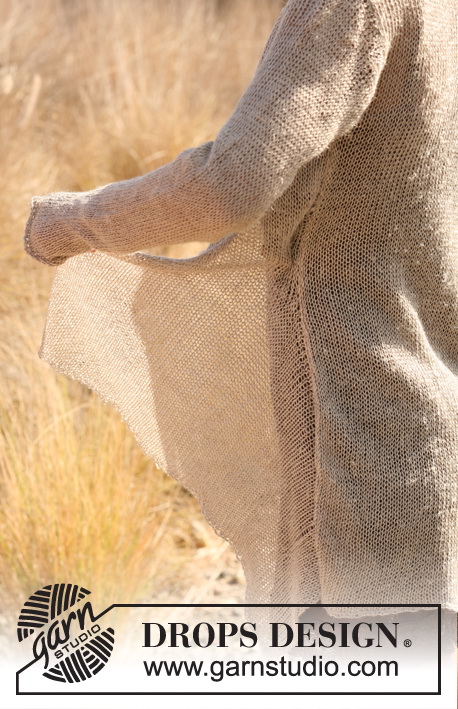 |
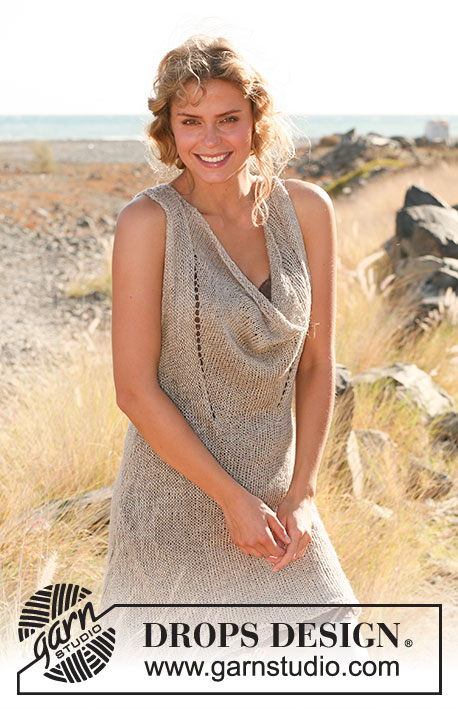
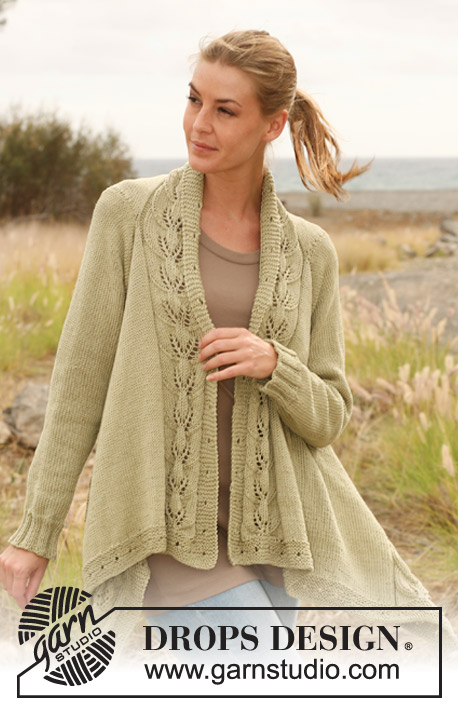
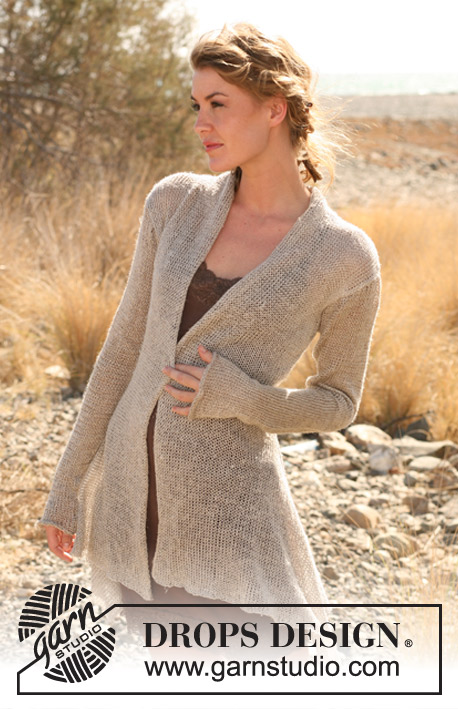
Knitted DROPS asymmetric jacket in ”Lin” or ”Muskat”. Size S-XXXL.
DROPS 129-3 |
|
|
BACK PIECE: Worked back and forth on circular needle. Cast on 76-84-90-100-110-120 sts (includes 1 edge st in each side) on circular needle size 5 mm / US 8 with Lin. Work in stockinette st. When piece measures 10 cm / 4", dec 1 st in each side. Repeat dec every 7-7½-7½-8-8½-8½ cm / 2¾"-2⅞"-2⅞"-3⅛"-3¼"-3¼" a total of 4 times = 68-76-82-92-102-112 sts. REMEMBER THE GAUGE! Insert a marker in edge st in each side when piece measures 34-35-36-37-38-38 cm / 13⅜"-13¾"-14¼"-14½"-15"-15" (= markers for assembly). When piece measures 52-54-56-58-60-61 cm / 20½"-21¼"-22"-22¾"-23⅝"-24", bind off for armholes at the beg of row in each side as follows: 3 sts 1 time, 2 sts 0-1-2-3-5-7 times and dec 1 st 1-2-2-4-4-5 times = 60-62-64-66-68-68 sts. When piece measures 69-72-75-78-81-83 cm / 27⅛"-28⅜"-29½"-30¾"-32"-32¾", bind off the middle 18-20-22-24-26-26 sts for neck and finish each shoulder separately. Dec 1 st on next row from neck = 20 sts remain in all sizes. Bind off when piece measures 71-74-77-80-83-85 cm / 28"-29⅛"-30⅜"-31½"-32¾"-33½". LEFT FRONT PIECE: Worked back and forth on circular needle. Cast on 91-97-103-109-115-121 sts (includes 1 edge st in the side) on circular needle size 5 mm / US 8 with Lin. Work in stockinette st. When piece measures 34-35-36-37-38-38 cm / 13⅜"-13¾"-14¼"-14½"-15"-15", bind off the first 57-59-62-63-64-65 sts from RS = 34-38-41-46-51-56 sts. Continue in stockinette st. When piece measures 52-54-56-58-60-61 cm / 20½"-21¼"-22"-22¾"-23⅝"-24", bind off for armhole in the side as on back piece = 30-31-32-33-34-34 sts. When piece measures 71-74-77-80-83-85 cm / 28"-29⅛"-30⅜"-31½"-32¾"-33½", bind off the first 20 sts from RS for shoulder in all sizes = 10-11-12-13-14-14 sts remain for collar. Continue in stockinette st until collar measures 8-8-9-9-10-10 cm / 3⅛"-3⅛"-3½"-3½"-4"-4", measured from the shoulder. Continue in stockinette st, AT THE SAME TIME bind off 1 st at the beg of every row from RS until all sts have been bind off. RIGHT FRONT PIECE: Work as left front piece but reversed. SLEEVE: Worked back and forth on circular needle. Cast on 36-38-40-42-44-46 sts (includes 1 edge st in each side) on circular needle size 5 mm / US 8 with Lin. Work in stockinette st. When piece measures 8 cm / 3⅛", inc 1 st in each side. Repeat inc every 4-3½-3-2½-2½-2 cm / 1½"-1¼"-1⅛"-⅞"-⅞"-¾" a total of 10-12-13-15-15-17 times = 56-62-66-72-74-80 sts. When piece measures 50-50-50-49-47-46 cm / 19¾"-19¾"-19¾"-19¼"-18½"-18" (NOTE! Shorter measurements in the larger sizes because of longer sleeve cap and broader shoulder width), bind off for sleeve cap at beg of row in each side as follows: 3 sts 1 time, 2 sts 2-2-3-3-3-3 times, 1 st 3-4-2-5-7-9 times. Then bind off 2 sts in each side until piece measures 57-58-58-59-59-60 cm / 22½"-22¾"-22¾"-23¼"-23¼"-23⅝", then bind off 3 sts 1 time in each side. Bind off. Now piece measures approx. 58-59-59-60-60-61 cm / 22¾"-23¼"-23¼"-23⅝"-23⅝"-24". Knit another sleeve. ASSEMBLY: Sew the shoulder seams. Sew collar tog mid back and sew on to back of neck. Sew side seams inside 1 edge st (sew A (= bind off edge on front piece) against B (= side of back piece) - see chart. NOTE! Adjust so that bind off edge on each front piece is sewn up to marker on back piece, then continue side seam as before inside 1 edge st up to armhole) - see chart. Sew sleeve seams inside 1 edge st and sew in the sleeves. |
|
 |
|
Have you finished this pattern?Tag your pictures with #dropspattern #ladyjanecardigan or submit them to the #dropsfan gallery. Do you need help with this pattern?You'll find 12 tutorial videos, a Comments/Questions area and more by visiting the pattern on garnstudio.com. © 1982-2026 DROPS Design A/S. We reserve all rights. This document, including all its sub-sections, has copyrights. Read more about what you can do with our patterns at the bottom of each pattern on our site. |
|


With over 40 years in knitting and crochet design, DROPS Design offers one of the most extensive collections of free patterns on the internet - translated to 17 languages. As of today we count 324 catalogs and 12290 patterns - 12280 of which are translated into English (US/in).
We work hard to bring you the best knitting and crochet have to offer, inspiration and advice as well as great quality yarns at incredible prices! Would you like to use our patterns for other than personal use? You can read what you are allowed to do in the Copyright text at the bottom of all our patterns. Happy crafting!
Post a comment to pattern DROPS 129-3
We would love to hear what you have to say about this pattern!
If you want to leave a question, please make sure you select the correct category in the form below, to speed up the answering process. Required fields are marked *.