
Popular categories
Looking for a yarn?


Comments / Questions (77)
![]() Rina wrote:
Rina wrote:
If I increase in any other position than after 1st stitch on needle the seed stitch won't happen. After increase anywhere else pattern goes purl on top of purl & knit on top of knit. Which makes it look very wierd ...
04.06.2014 - 01:06DROPS Design answered:
Dear Rina, when you work seed st, you work K over P and P over K, when you inc at beg/end of row, you just have to continue in pattern as before, working K over P and P over K. Happy knitting!
04.06.2014 - 09:04Gunda wrote:
Pattern says: "towards the mid front" not in the middle.
03.06.2014 - 08:09
![]() Rina wrote:
Rina wrote:
I dont understand how to do Front parts. It says to do increase in the middle of every other row. But it messes up all seed stitches. I did all increases in my front part looks just awful. Did I red it wrong?
03.06.2014 - 03:58DROPS Design answered:
Dear Rina, you have to inc towards middle front, continue seed sts as before incorporating new sts into seed st. Happy knitting!
03.06.2014 - 10:20
![]() Rina wrote:
Rina wrote:
I dont understand how to do Front parts. It says to do increase in the middle of every other row. But it messes up all seed stitches. I did all increases in my front part looks just awful. Do I red it wrong?
02.06.2014 - 18:41
![]() Dawn wrote:
Dawn wrote:
Hello, I would like verification number of colors used. It says two, but the picture leads me to believe there are three colors.
12.04.2014 - 20:13DROPS Design answered:
Dear Dawn, 2 colors are used here, each piece is worked with 1 thread each qualitiy (=1 thread each colour), and then edge is first crocheted with 1 thread Cotton Viscose, and finished with 1 thread Kid-Silk. Happy crocheting!
14.04.2014 - 09:46
![]() Paula wrote:
Paula wrote:
The sleeves turned out very ornate and full--more what I would call raglan. I see that another person on this board had a problem with the sleeves (they were from France). Respectfullly, I wonder if there was an alternate pattern, and the wrong one was posted?
27.02.2014 - 23:40
![]() Paula wrote:
Paula wrote:
Well, I did indeed follow the instructions, but the sleeves turn out into a boomerang shape. I was able to set them in, but they look strange. Too bad, as the body of the sweater is lovely. :(
26.02.2014 - 11:48DROPS Design answered:
Dear Paula, number of sts bound off each side should be the same, ie you bind off each side: 4 sts 1 time, 2 sts 2 times and 1 st 5-7-8-9-11-12 times, then 2 sts until piece measures 9-10-11-12-13-14 cm / 3½''-4''-4 3/8''-4¾''-5 1/8''-5½'', and finally 3 sts 1 time before binding off remaining sts. Happy knitting!
26.02.2014 - 14:06
![]() Paula wrote:
Paula wrote:
Just so I am really clear, on the sleeve, will I decrease 4 stitches only one time? Or twice? (I did twice and the sleeves look funny). I'm not quite sure.
26.02.2014 - 02:40DROPS Design answered:
Dear Paula, for sleeve cap when sleeve measures you cast off 4 sts at the beg of next 2 rows, ie. 4 sts bound off each side, then cast off 2 sts 2 times each side, then 5-12 (see size) sts 1 time each side, the 2 sts each side until sleeve measures 9-14 cm, then 3 sts 1 time each side. Happy knitting!
26.02.2014 - 09:17
![]() Paula wrote:
Paula wrote:
Hello, I need some clarification on the sleeves. The way I interpreted it, I had to do all the decreases TWICE, i.e. one time on each side, but the finished sleeve seems toosmall. How many times should I decrease 4 stitches in total? Once, or twice? thanks Paula
20.02.2014 - 12:27DROPS Design answered:
Dear Paula, you cast off for sleeve at the beg of each row from RS and from WS as stated, eg for 1st size : 4 sts 1 time, 2 sts 2 times and 1 st 5 times, then bind off 2 sts each side until piece measures 9 cm, then cast off 1 time 3 sts each side, sleeve should measure approx. 10 cm from cast on edge. Happy knitting!
20.02.2014 - 14:31
![]() Rita wrote:
Rita wrote:
Super Anleitung - idiotensicher und perfekt geeignet für blutige Anfänger! Bolero ist toll gelungen - in weiß mit schwarz-weißer Häkelkante. Danke!
29.01.2014 - 16:32
|
|
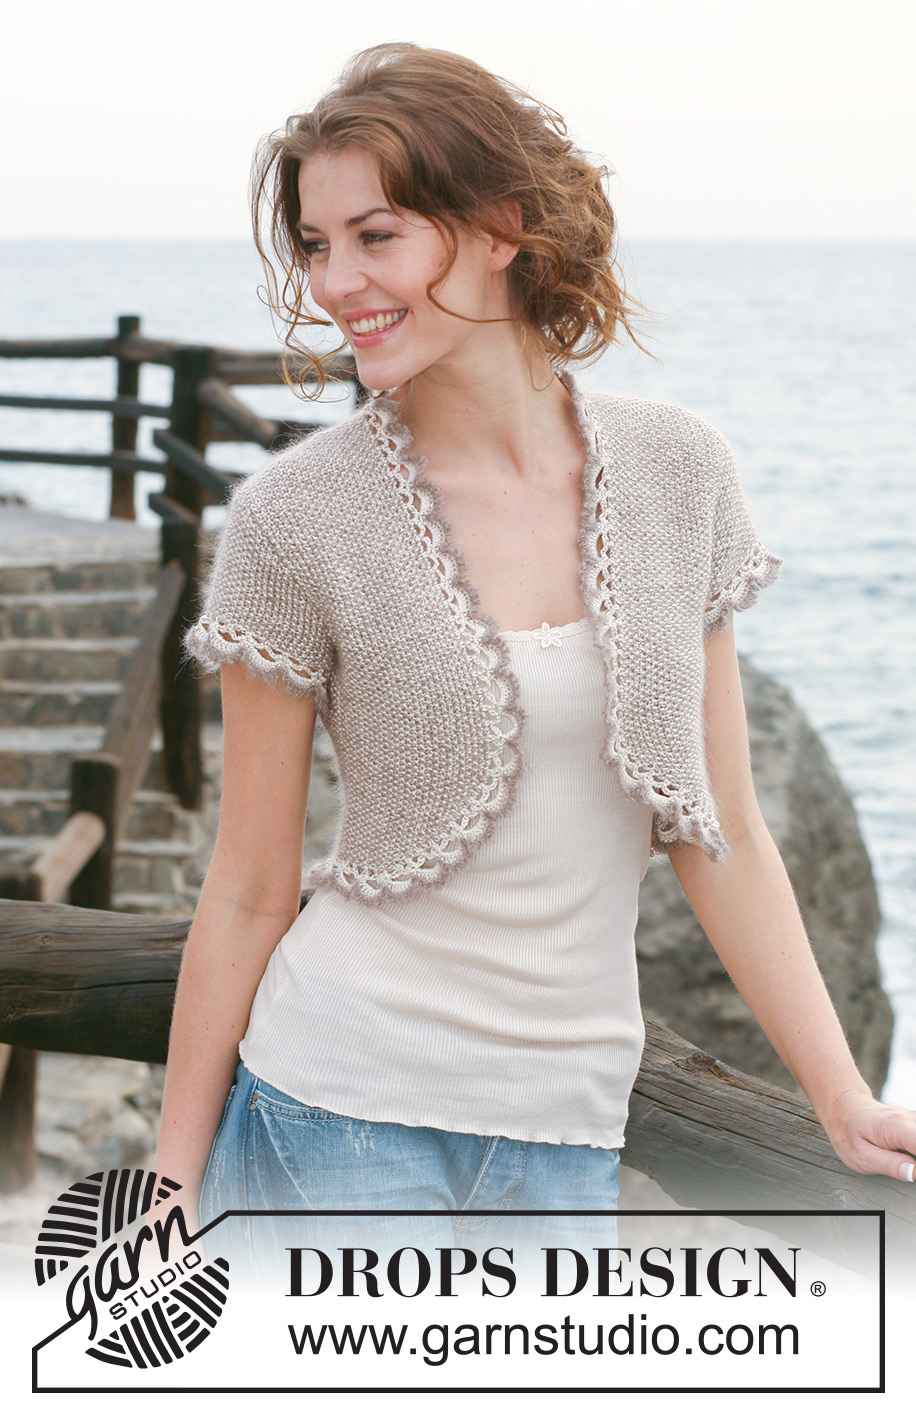
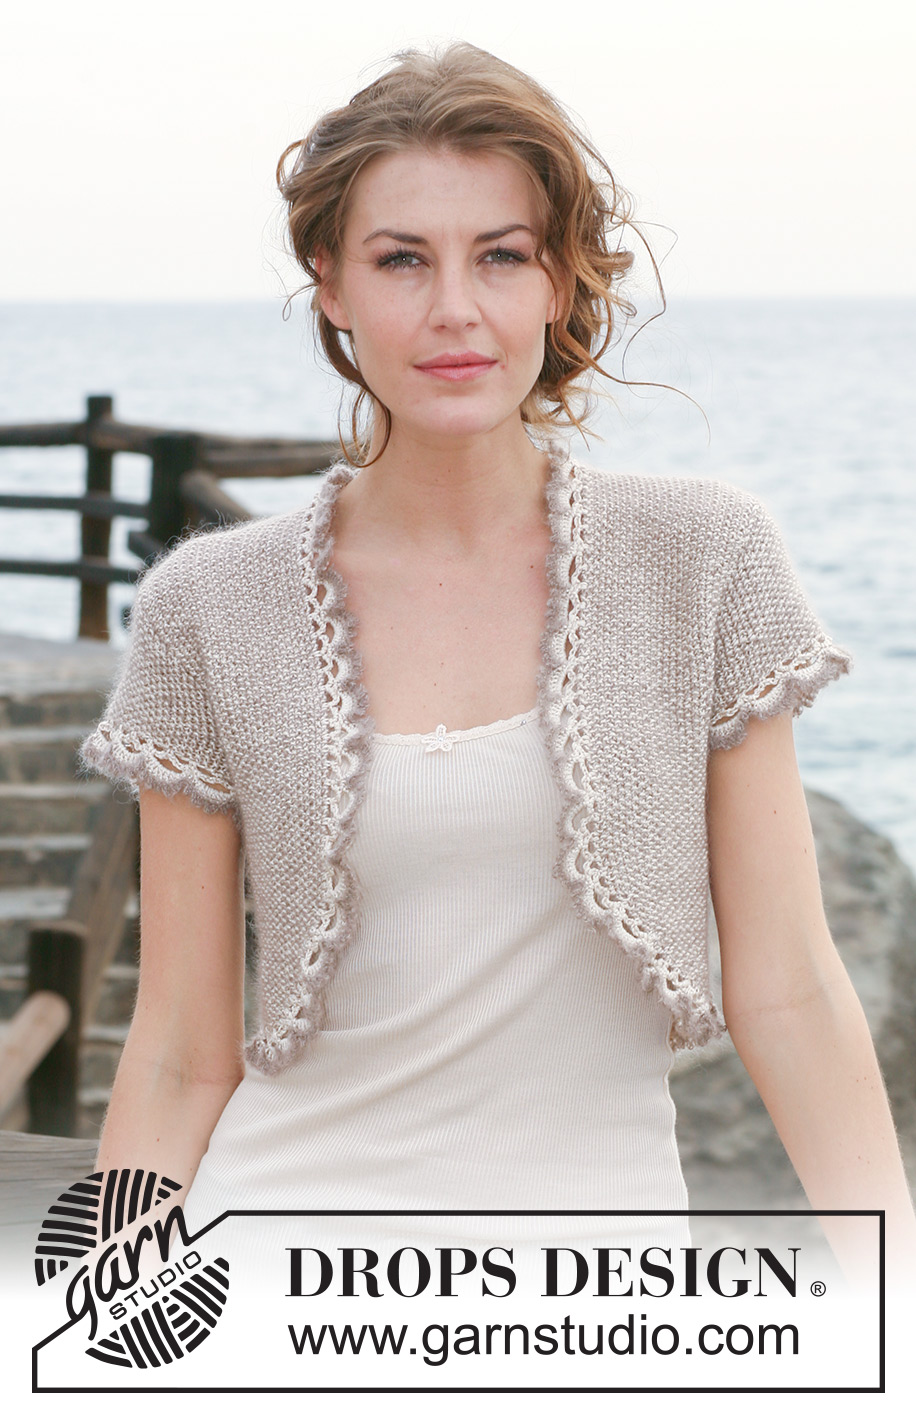
Coffee & Cream#coffeeandcreambolero |
|
 |
 |
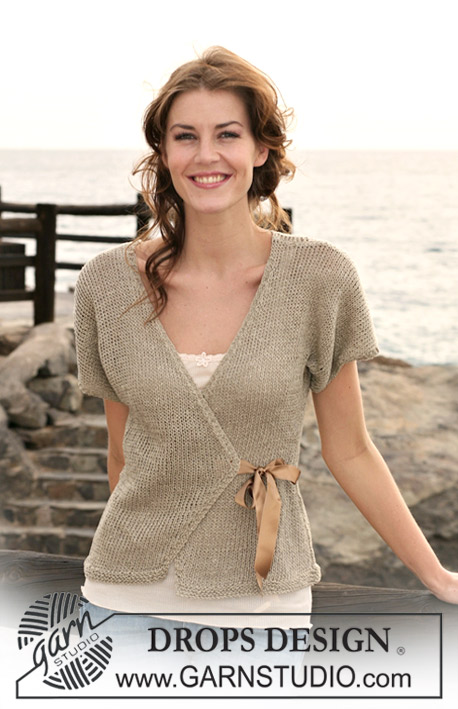
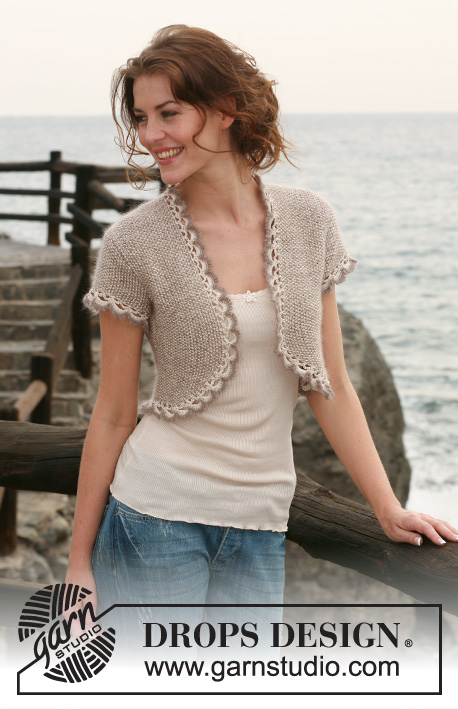
DROPS bolero in seed st in ”Cotton Viscose” and ”Kid-Silk” with short sleeves and crochet borders. Size: S to XXXL
DROPS 118-20 |
|
|
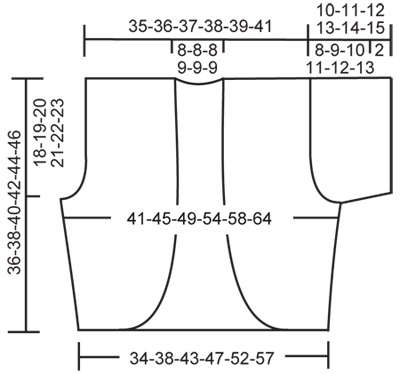
SEED ST: Row 1:* K1, P1 *, repeat from *-*, finish with K1. Row 2: P over K and K over P. Repeat row 2. INCREASING TIP: Inc 1 st by making 1 YO inside edge st. On return row P or K YO (to fit into seed st) into back of loop to avoid a hole. -------------------------------------------------------- -------------------------------------------------------- BACK PIECE: Worked back and forth on needle. Cast on 63-71-79-87-95-105 sts (includes 1 edge st each side) on needle size 4.5 mm / US 7 with 1 thread of each quality. Work SEED ST – see above! REMEMBER THE GAUGE! When piece measures 5-5-6-6-7-7 cm / 2"-2"-2⅜"-2⅜"-2¾"-2¾" inc 1 st each side – SEE INCREASING TIP! Repeat the inc on every 2 cm / ¾" a total of 6 times = 75-83-91-99-107-117 sts. When piece measures 18-19-20-21-22-23 cm / 7"-7½"-8"-8¼"-8¾"-9" bind off for armhole each side: 4 sts 1-1-1-2-2-3 times, 2 sts 0-1-2-2-3-3 times and 1 st 2-3-4-3-4-4 times = 63-65-67-69-71-73 sts. When piece measures 34-36-38-40-42-44 cm / 13⅜"-14¼"-15"-15¾"-16½"-17 ¼" bind off the middle 13-13-13-15-15-15 sts for neck and complete each shoulder separately. Bind off 1 st on neckline on next row = 24-25-26-26-27-28 sts left on shoulder. Bind off when piece measures 36-38-40-42-44-46 cm / 14¼"-15"-15¾"-16½"-17¼"-18". RIGHT FRONT PIECE: Worked back and forth on needle. Cast on 13-15-17-19-21-25 sts (includes 1 edge st at the side) on needle size 4.5 mm / US 7 with 1 thread of each quality. READ ALL OF THE FOLLOWING SECTION BEFORE CONTINUING! Work Seed st, AT THE SAME TIME on row 2 inc 1 st towards mid front – SEE INCREASING TIP – and repeat the inc on every other row a total of 7-9-11-13-15-16 times and then on every 4th row a total of 4-4-4-3-3-3 times. AT THE SAME TIME when piece measures 5-5-6-6-7-7 cm / 2"-2"-2⅜"-2⅜"-2¾"-2¾" inc 1 st 6 times at the side as described for back piece. When all inc are complete there are 30-34-38-41-45-50 sts on needle. When piece measures 18-19-20-21-22-23 cm / 7"-7½"-8"-8¼"-8¾"-9" bind off for armhole at the side as described for back piece = 24-25-26-26-27-28 sts. Continue until piece measures 36-38-40-42-44-46 cm / 14¼"-15"-15¾"-16½"-17¼"-18", bind off. LEFT FRONT PIECE: Like right front piece, but mirrored. SLEEVE: Worked back and forth on needle. Cast on 59-63-67-71-75-79 sts (includes 1 edge st each side) on needle size 4.5 mm / US 7 with 1 thread of each quality. Work seed st. When piece measures 2 cm / ¾" bind off for sleeve cap at the beg of every row each side: 4 sts 1 time, 2 sts 2 times and 1 st 5-7-8-9-11-12 times, then bind off 2 sts each side until piece measures 9-10-11-12-13-14 cm / 3½"-4"-4⅜"-4¾"-5⅛"-5½", now bind off 3 sts 1 time each side, and bind off remaining sts. Sleeve measures approx 10-11-12-13-14-15 cm / 4"-4⅜"-4¾"-5⅛"-5½-6". ASSEMBLY: Sew shoulder seams. Set in sleeves, sew sleeve and side seam inside 1 edge st. CROCHET BORDER: Crochet a border round the opening of bolero and round sleeve edges with 1 thread Cotton Viscose and hook size 3 mm / C as follows: ROUND 1: 1 sc in first st, * ch 5, skip approx 1-1.5 cm / ⅜"-½", 1 sc in next st *, repeat from *-*, and finish with ch 5 and 1 sl st in first sc from beg of round. NOTE: Adjust to have an even number of ch-loops. ROUND 2: Crochet sl sts to the middle of first ch-loop, 1 sc in ch-loop * ch 7, 1 sc in next ch-loop, ch 1, 1 sc in next ch-loop *, repeat from *-*, but replace the last sc with 1 sl st in first sc on round. ROUND 3: Crochet as follows in each of the large ch-loops: 1 sc, 7 dc, 1 sc, and crochet 1 sc in each of the small ch-loops (=1 ch), finish with 1 sl st in first sc from beg of round. ROUND 4: Change to 1 thread Kid-Silk. Crochet 1 sc in first sc and 1 sc in first dc, * [3 ch, 1 sc in first ch (= 1 picot), 1 sc in next dc], repeat from [-] a total of 6 times, 1 sc in each of the next 4 sts *, repeat from *-*, i.e. 6 picots in each of the large ch-loops, and finish with 1 sl st in first sc. |
|
 |
|
Have you finished this pattern?Tag your pictures with #dropspattern #coffeeandcreambolero or submit them to the #dropsfan gallery. Do you need help with this pattern?You'll find 14 tutorial videos, a Comments/Questions area and more by visiting the pattern on garnstudio.com. © 1982-2026 DROPS Design A/S. We reserve all rights. This document, including all its sub-sections, has copyrights. Read more about what you can do with our patterns at the bottom of each pattern on our site. |
|


With over 40 years in knitting and crochet design, DROPS Design offers one of the most extensive collections of free patterns on the internet - translated to 17 languages. As of today we count 325 catalogs and 12298 patterns - 12288 of which are translated into English (US/in).
We work hard to bring you the best knitting and crochet have to offer, inspiration and advice as well as great quality yarns at incredible prices! Would you like to use our patterns for other than personal use? You can read what you are allowed to do in the Copyright text at the bottom of all our patterns. Happy crafting!
Post a comment to pattern DROPS 118-20
We would love to hear what you have to say about this pattern!
If you want to leave a question, please make sure you select the correct category in the form below, to speed up the answering process. Required fields are marked *.